Considering how critical it is to have an extra layer of safeguard against hacking these days, most websites and apps support two-factor authentication. With 2FA enabled for your account, you must verify your identity with an additional code to sign in. What makes 2FA so essential is the ability to shield your account even if your passwords are leaked. Up until iOS 14, iPhone users had to rely on third-party authenticator apps like Google Authenticator and Authy to generate 2FA verification codes. However, with iOS 15, Apple has introduced a built-in password authenticator to make it even easier and secure for users to log into their accounts. If you want to try it out, here’s how to use the built-in password authenticator in iOS 15 on iPhone and iPad.
How to Use Built-in Password Authenticator on iPhone and iPad (2021)
To get going, let’s first take a sneak peek into how iOS 15’s new password authenticator works! After that, we will explain how to set up verification codes for apps or websites on your iPhone. You can also delete them if you want to use a third-party app. So, let’s jump right in.
How Does iOS 15’s New Built-in Password Authenticator Work?
Thanks to the deep integration, Apple’s Password Authenticator works a bit more smoothly than rivals. It lets you set up the verification code required for additional sign-in security via the setup key or by scanning the QR code. Once the setup is complete, the password authenticator automatically generates a 6-digit verification code every 30 seconds, which you can use to authenticate your password.
You can either copy and paste the verification code manually or let Apple autofill the code when you log into a website or app. In a nutshell, the verification process will feel more intuitive, secure, and faster. Apple eliminates the need to switch between apps to get the 2FA code on your iPhone and iPhone. Therefore, we suggest you set it up for all of your apps as there is no additional hassle. Instead, it will only help safeguard your data and personal information.
Set Up Built-in Password Authenticator on iPhone and iPad [Easiest Method]
As I have mentioned above, you first need to set up the verification code for the app or website you want to safeguard with two-factor authentication. To do that, just follow the steps below:
- Head over to the Settings app on your iPhone and iPad.
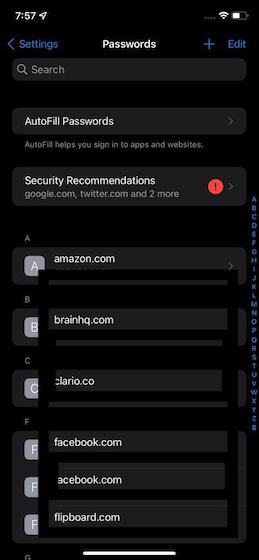
2. Now, scroll down and tap on Passwords.

3. Next, you will need to authenticate using Face ID/ Touch ID or your passcode to proceed.

4. On the next page, you will see a list of all the websites and apps whose passwords you have saved in the iCloud Keychain. Now, make sure that the website for which you want to set up the verification code is saved here.
If a website or app is not on the list, tap the “+” at the top right corner of the screen, and enter the website address, your username, and password to save it. Make sure to tap Done at the top right to finish.

5. Now, tap on the name of the app or website for which you want to use the built-in password authenticator on your iPhone or iPad. Then, tap the “Set Up Verification Code…” option.

6. Next, there are two ways to set up the verification code on your iPhone or iPad.
- Enter Setup Key: If the website supports using a verification code, head over to the website to get the setup key and either it here.
- Scan QR Code: If the website provides a QR code, you can long-press the QR code and select Set Up Verification Code to get it done automatically.

Set Up Verification Code for Facebook on iPhone and iPad
Since Apple’s password authenticator in iOS 15 works perfectly with Facebook, I have used this social media app for the tutorial. The process would be quite similar for other supported apps. Let’s check out how it works!
1. Open the Facebook app and tap on the menu button (three horizontal lines) on the bottom navigation bar. Then, move to Settings & Privacy -> Settings -> Security and Login.

2. Now, tap “Use Two-Factor Authentication” and make sure the Authentication App option is selected. After that, tap the blue “Continue” button.

3. Next up, you have three different options to choose from while setting up the 2FA verification codes. You can choose from the following:
- Set up on the same device: Choose this option to set up the verification code for Facebook using the built-in password authenticator on your iPhone or iPad.

- Scan QR Code: If you have opened Facebook in Safari, long-press the QR code and choose the Open in “Settings” option.

- Copy the code: Lastly, you also have the option to copy a unique code and enter it into the Settings.

All three methods of setting up password authentication are easy and reliable. So, you can choose any of the methods based on convenience (and availability). For the purpose of this guide, I’m going to copy the key.
4. Next, head over to Settings -> Passwords -> Facebook -> Setup Verification Code > Enter Setup Key.

5. Then, paste the key you copied in the step above and tap “OK” to confirm. Up next, the built-in password authenticator on your iPhone or iPad will automatically generate a 6-digit verification code. You can then copy and paste this code to authenticate your login or see Apple autofill the code for you.

Note: Bear in mind that a verification code remains valid only for 30 seconds.
6. Next, all you have to do is copy the verification code and paste it into Facebook to authenticate your login attempt. That’s all. You have successfully set up the built-in password authenticator in iOS 15 on iPhone and iPad.

That’s pretty much it! From now onwards, whenever you are asked to authenticate your password, take advantage of the autofill feature to fill the verification codes when you sign in to Facebook. Of course, you can also copy the verification code manually from Settings -> Passwords and then paste it.
How to Delete Password Authenticator Setting for an App in iOS 15
While the password authenticator on iPhone and iPad running the latest iOS 15 and iPadOS 15 builds is really useful, you may want to remove the verification code settings for an app in the future. If that day ever comes, you can follow the steps below to delete the two-factor authentication settings for an app in iOS 15:
1. Navigate to Settings -> Passwords. After Face ID/ Touch ID authentication, tap on the app’s name you want to delete the verification code for.
2. Next, tap on “Edit” at the top right corner.

3. Then, tap the “-” (minus) button under the verification code section to reveal the “Delete” button.

4. Finally, Tap the “Delete” button. From the pop-up message that appears, select the “Delete Verification Code” option.

And that’s it. You are no longer using Apple’s built-in password authenticator for 2FA verification codes for that particular app.
Use the Built-In Password Authenticator in iOS 15 and iPadOS 15 Like a Pro
So, that’s the way to get the most out of the built-in password authenticator in iOS 15 and iPadOS 15 to log into websites and apps securely. It’s always better to have a native and integrated alternative, especially for something as sensitive as password authentication on your device. That’s why I welcome this all-new security feature. And I’m pretty sure most of you would appreciate it as well. Anyway, give Apple’s password authenticator a try and let me know your thoughts in the comments below. And if you want to learn how to enable two-factor authentication (2FA) for Facebook, Twitter, Instagram, and other popular apps, then we have you covered.