
The ad-based revenue model has helped online services and publishers to remain functional for years. However, we can’t deny that nasty trackers have made it nearly impossible to keep an anonymous profile on the Internet today. New fingerprinting techniques and trackers integrated into app SDKs can easily identify you within a few seconds. Not to mention, ad-heavy web pages eat up crucial resources and slows down the device. So if you have bought a Raspberry Pi to remove all ads from your devices, then this article will help you install Pi-hole. We have detailed how you can set up Pi-hole on Raspberry Pi to block ads and trackers in this article.
Set Up Pi-hole on Raspberry Pi to Block Ads & Trackers
Here, we have explained the steps to set up and run Pi-hole in simple terms. We have used Raspberry Pi 4 Model B in our tutorial, but it will also work on old boards. You can expand the table below and move to the corresponding section with ease.
-
Install Pi-hole on Raspberry Pi
I am assuming you have already set up your Raspberry Pi. If not, you can follow our tutorial and learn how to use your Windows laptop as a monitor to access and set up your Raspberry Pi, in case you don’t have a separate monitor. Now having said that, let’s move to the steps.
1. First of all, connect the Raspberry Pi to your home Wi-Fi network and open the Terminal. Next, run the below command. It will start installing Pi-hole on your Raspberry Pi.
sudo curl -sSL https://install.pi-hole.net | bash


2. If you are using Putty or VNC to remotely access the Raspberry Pi, you can run the same command in the Terminal window. For example, here I am using Putty to install Pi-hole through Raspberry Pi’s console.


3. Once the initial steps are done, Pi-hole will take you through the setup screen. Press “Enter” as it displays information regarding Pi-hole. Keep in mind you can only navigate the UI through the keyboard. Use the arrow keys and “Tab” to jump between options. And press the “Spacebar” if you want to select an option.


4. After a couple of dialogs, it will alert you that Pi-hole needs a Static IP Address. Press “Enter” again.


5. Next, choose “wlan0” if the Raspberry Pi is connected through Wi-Fi. And select “eth0” if you are using a wired Ethernet connection.


6. Then, it will ask you to choose the DNS provider. I usually go with Google’s DNS server, but you are free to choose your own.


7. On the next page, it will show you that Pi-hole is using StevenBlack’s hosts to block ads. Earlier, there were multiple third-party host files, but now Pi-hole uses a unified list to reduce mismatch. Later on, you can add more host files if you want. So don’t change anything and make sure the list is marked (an asterisk sign will appear next to the list), and hit Enter.

8. After that, choose both IPv4 & IPv6 protocols. You can press the spacebar to mark both options.

9. Next, press on “Yes” to set a static IP address to your Raspberry Pi. These steps are important to ensure that the IP address does not keep changing.

10. On the “FYI: IP Conflict” page, press “OK“. We will perform a step later to deal with the IP conflict issue.


11. After that, choose “On” and press “OK”. This will allow you to access all the queries in a web interface.


12. Similarly, choose “On” and press “OK” to install the webserver (lighttpd) on your Raspberry Pi.

13. Now if you want to log queries, choose “On” and proceed.


14. On the next dialog box, select “Show everything” and press “OK”. It will let you monitor all the queries and the IP addresses to know where these requests are coming from. You don’t need to worry about the privacy aspect as everything happens locally on the Raspberry Pi.

15. Now, you are almost done. It will start the installation again and will configure Pi-hole according to your preferences on the Raspberry Pi. This step will take considerable time so keep patience.
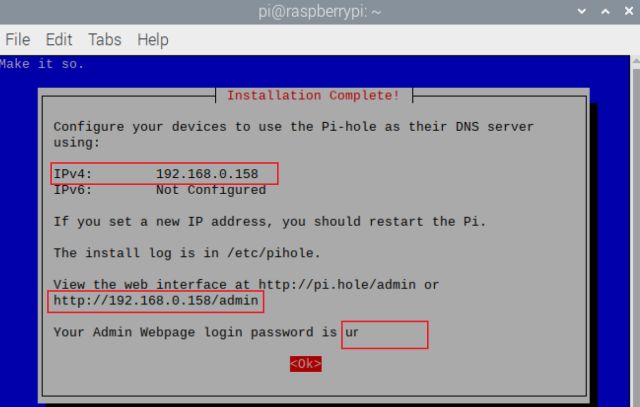
16. Once the installation is complete, it will show a final screen with all the details. Make sure to note down the “IPv4 address” (it’s your RPi’s IP address), password, & the web interface address. With these details, you will be able to monitor all the queries on your home network. Press “OK” and close the window.
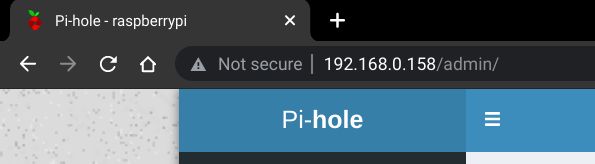
17. Now, open a web browser and enter the web interface address, and hit enter. Basically, open the [IP address]/admin page. If the dashboard opens up, you have successfully set up Pi-hole on your Raspberry Pi. Click on “Login” in the left pane and enter the password. Now, sign in, and you are almost at the finish line.

-
Configure Your Router
While everything is set up correctly, you need to change one key setting on your router. You need to redirect all the traffic to the Raspberry Pi so that it can filter out all the ads and trackers. Here is how you can do it.
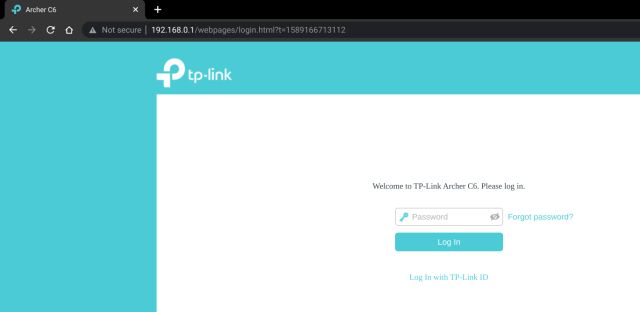
1. Enter 192.168.0.1 in a web browser on any device in your home network and hit enter. As we all know, it opens the router’s settings page. Now, enter the default credentials for your router and sign in.

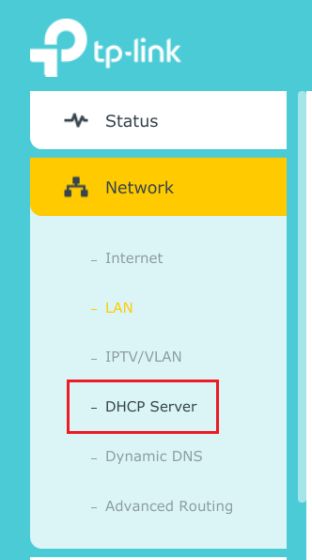
2. Next, you need to look for the “DHCP server” setting option. I am using a TP-Link Archer C6 router, and it’s available under Advanced -> Network. For other routers, it may be present under a different page, so look it up and find the settings page.

3. Once you are here, enter the IP address of your Raspberry Pi in both Primary DNS and Secondary DNS. The IPv4 address you noted above in step #16 is the IP address of your Raspberry Pi. After that, click on “Save”. Now, this will redirect all the traffic to Pi-hole on Raspberry Pi to filter out all the ads and trackers. In the future, if you want to remove Pi-hole’s configuration from your router, simply delete both the DNS, and you will have your connection like before.


4. Next, scroll down and move to the “Address Reservation” section. For other routers, you will have to look for this option under different setting pages. We need to perform this step to prevent any IP conflict issue. Basically, you can reserve the IP address of the Raspberry Pi, so it’s not assigned to any other device in your home network.
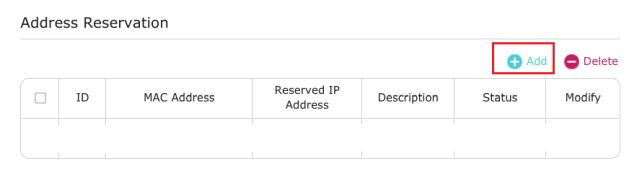

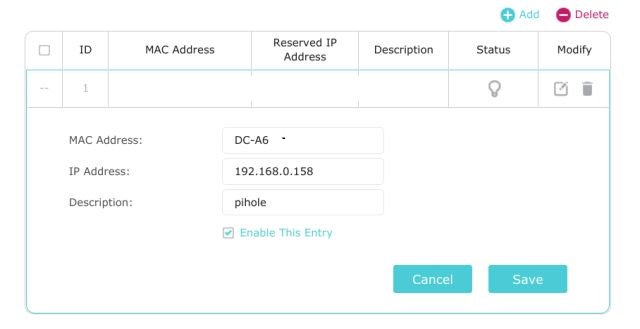
5. Click on “Add” and enter the IP address of Raspberry Pi in the “Reserved IP Address” field. You can find the MAC address of RPi from the client list mentioned below on the same page. Next, give a name in the “Description” field and turn on the “Enable This Entry” checkbox. Finally, click on “Save”. It will reserve the Raspberry Pi’s IP address.

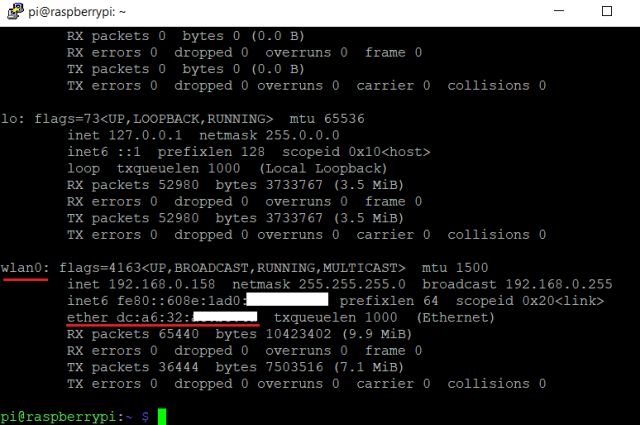
6. If you are unable to find the MAC address of your Raspberry Pi, open the Terminal on RPi and run ifconfig. Under “wlan0”, check the value of “ether”. That’s the MAC address of your RPi.

7. Finally, restart your router, and the changes will be applied.
-
Block Ads & Trackers With Pi-hole on Raspberry Pi
1. You have set up Pi-hole and made all the changes necessary. Now, it’s time to see Pi-hole in action. Open the web interface address of Pi-hole, i.e. [IP address of RPi]/admin. You can open the page on any device in the home network.


2. Now, log in and you will find the Pi-hole dashboard with all the stats and queries that are being redirected to Raspberry Pi.


3. Scroll down, and you will find the top permitted and blocked domains. Although it didn’t happen to me, but if you cannot access a website, open the Query log from the left menu and whitelist the related domain. You can also click on a suspicious domain and choose to blacklist it.


4. At the bottom, you will find all the devices with a list of total and blocked requests.

Disable System-wide Ads and Trackers With Pi-hole & Raspberry Pi on Your Home Network
So that is how you can set up Pi-hole on Raspberry Pi to block ads and trackers on your home network. The steps may seem complex, but it’s certainly doable, and you can get it working in just a few minutes. Anyway, that is all from us. If you are facing any issues, do comment down below and let us know. We will surely help you out.

