- Anvils help repair tools, enchant them, and even rename them in Minecraft.
- The anvils let players preserve enchantments while upgrading them, which is not possible with the grindstone.
- However, using the same item on an anvil will eventually show the "Too Expensive" message, which leads to making the tool unusable for further repair.
An anvil is one of the most useful utility blocks in Minecraft, used for repairing damaged equipment, combining enchantments, and even renaming items. A quick way to craft an anvil requires 3 blocks of iron and 4 iron ingots placed on the crafting table grid. Now, to get the full picture, go through this guide to learn how to craft an anvil in Minecraft and all of its uses as well.
Items Required for an Anvil Recipe in Minecraft
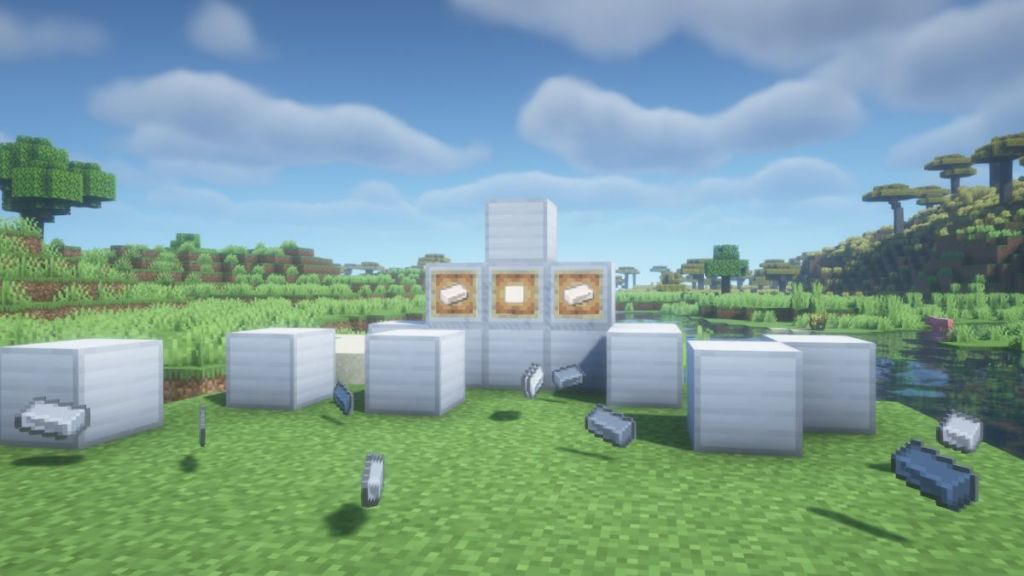
The anvil recipe in Minecraft requires only iron, but you need a lot of it. So, here’s everything you need to make an Anvil:
| Item | Quantity | How to Get |
|---|---|---|
| Iron Ingots | 31x | Make an iron farm in Minecraft, or mine iron ore in caves |
| Blocks of Iron | 3x | Make them using the 27x Iron Ingots from the main lot |
| Crafting Table | 1x | Make it using four wooden planks |
Finding Iron: Quick Tips
Since the Minecraft anvil crafting recipe requires a lot of iron, you need to mine a ton of iron ore. Our Minecraft ore distribution guide will help you find it in no time. The best places to look for iron in Minecraft are in the following areas:
- Mountain Peaks and Surfaces
- Inside Caves and Ravines (at Y=16 and below)
- Loot Chests inside Shipwrecks, Bastion Remnants, Strongholds, Mineshafts, Trial Chambers, and Woodland Mansions in Minecraft.
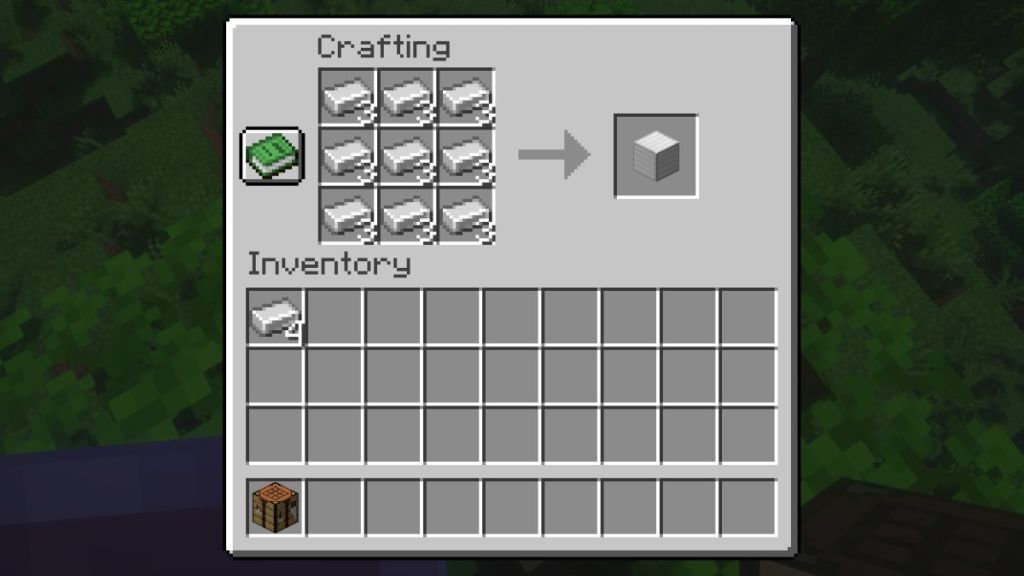
Then, you have to smelt all the raw iron in the Minecraft furnace until you have 31 iron ingots in your inventory. Moreover, when you put nine iron ingots on the crafting table, filling it up completely, you will get a block of iron. The anvil crafting recipe requires 3 blocks of iron, along with the remaining 4 iron ingots.
Step-by-Step: How to Craft an Anvil in Minecraft (Grid Layout)
Once you have collected all the items, the rest is easy. First, open up the crafting table in Minecraft and then follow the steps below to learn how to craft an anvil in Minecraft:
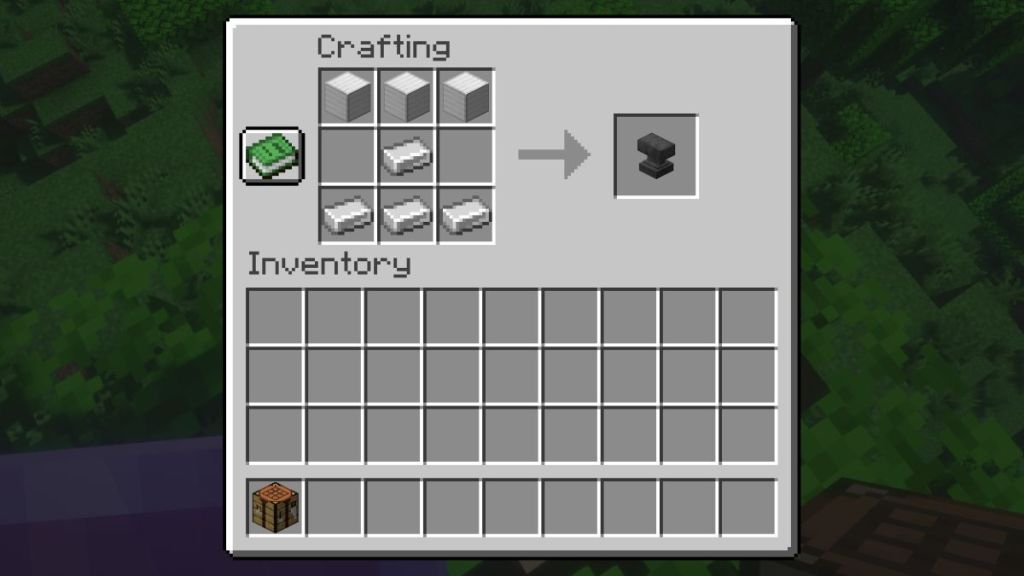
- First, place three blocks of iron in the top row of the crafting area.
- Then, place an iron ingot in the middle cell of the second row.
- Finally, fill the bottommost row of the crafting table by placing iron ingots in each cell.
- And you have successfully crafted an anvil in Minecraft.
How to Use an Anvil in Minecraft
After learning how to make an anvil in Minecraft, the next step is understanding its several distinct features. This can help you reduce XP level and resource waste. So, here’s how you can use the anvil for the following purposes in Minecraft:
Repairing Weapons, Tools & Elytra
You can add a material ingot to a damaged tool on an anvil to repair it. Alternatively, you can also combine two damaged items to restore their durability. This mechanic is similar to a grindstone, but it doesn’t remove the enchantments in Minecraft.
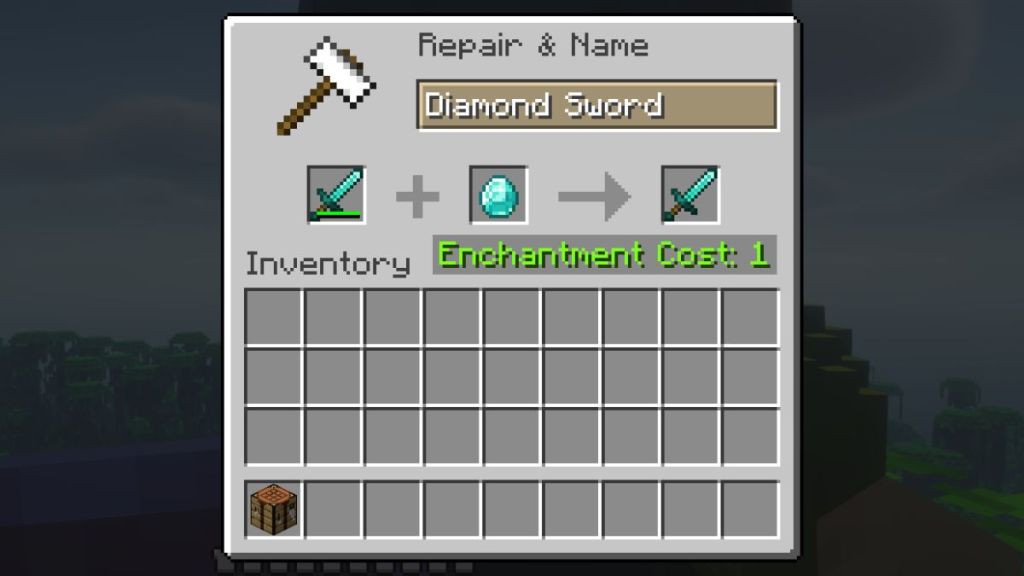
To repair a damaged tool in Minecraft, you can perform the following:
- Place the tool in the anvil on the left.
- Place a copy of the same tool in the middle cell to get the same item with increased durability on the right.
- Alternatively, you can also use an ingot of the same mineral you used to make the item that’s damaged.
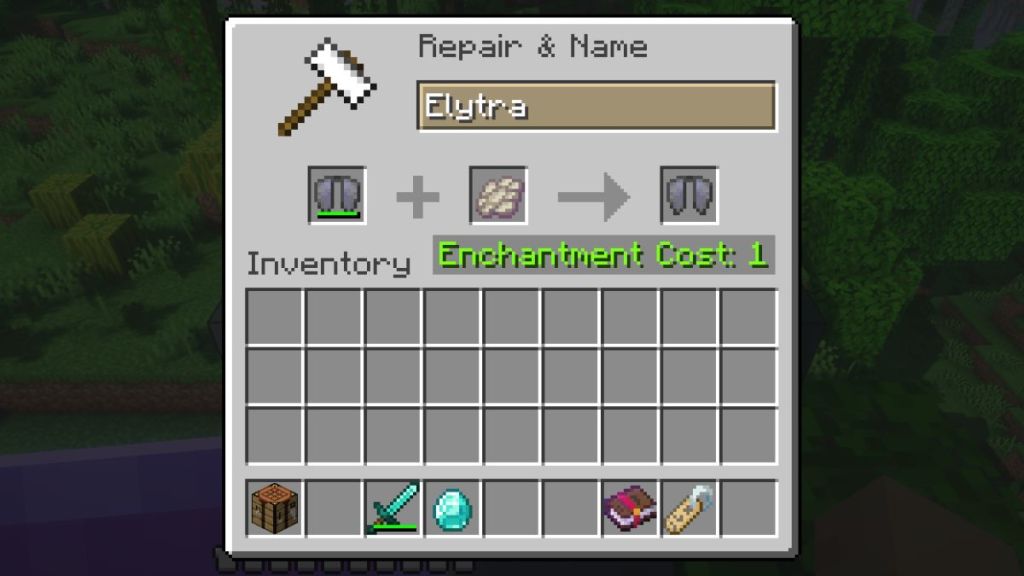
- In some special cases, you can use technically unrelated materials to repair some items. For example, the elytra in Minecraft can be repaired using a phantom membrane.
Below is a table for all the materials required to repair a tool and improve its durability:
| Item | Repair Material |
|---|---|
| Wooden tools and shield | Any wooden planks |
| Leather armor | Leather |
| Stone weapons and tools | Cobblestone, Cobbled Deepslate, Blackstone |
| Copper weapons, tools, and armor | Copper ingot |
| Iron weapons, tools, and armor | Iron ingot |
| Gold weapons, tools, and armor | Gold Ingot |
| Diamond weapons, tools, and armor | Diamond Ingot |
| Netherite weapons, tools, and armor | Netherite Ingot |
| Turtle Shell | Scute |
| Elytra | Phantom Membrane |
Combining Enchanted Books & Tools
You can combine enchanted books in Minecraft with tools to enchant them on an anvil. Do note that enchanting using books is usually cheaper than combining two enchanted tools, especially when you are dealing with high-level enchantments.
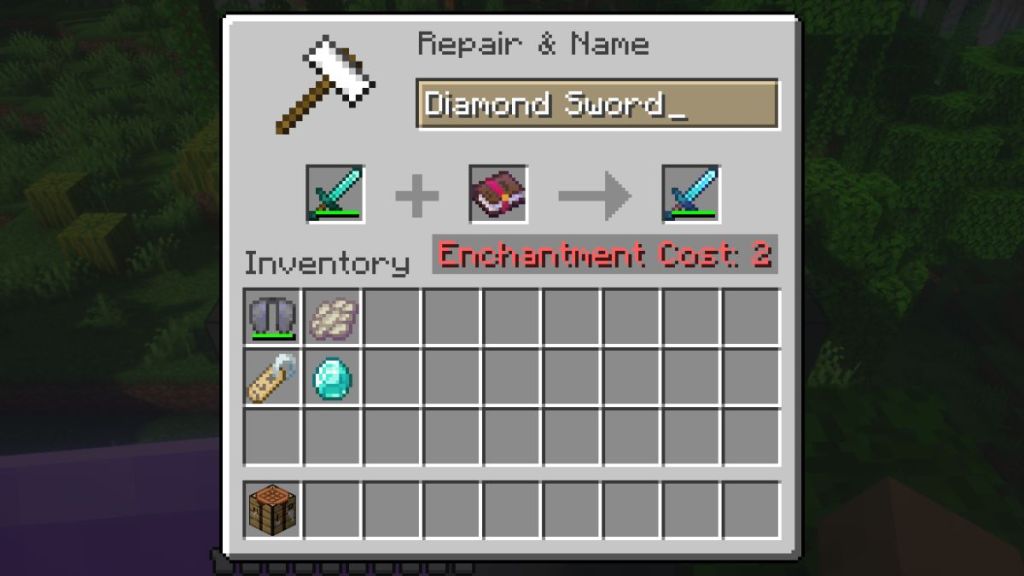
Here are some tips to keep in mind before enchanting an item after learning how to craft an anvil in Minecraft:
- If you combine a tool with an enchanted book in Minecraft, the enchantment gets applied to the tool.
- Remember that it will only work with enchantments compatible with a particular tool and destroys the enchanted book in the process.
- The enchanted book always goes in the middle cell of the anvil, and the item goes in the left cell during enchanting.
Renaming Items, Mobs & Easter Eggs (Dinnerbone, Grumm)
First up, you can put an item or a group of items in the anvil to rename them. To do so, you just have to type the name of that item in the name field at the top of the anvil’s UI. Once renamed, Minecraft assigns that item its new name. You can even use a name tag in the anvil to give new names to the mobs in Minecraft.
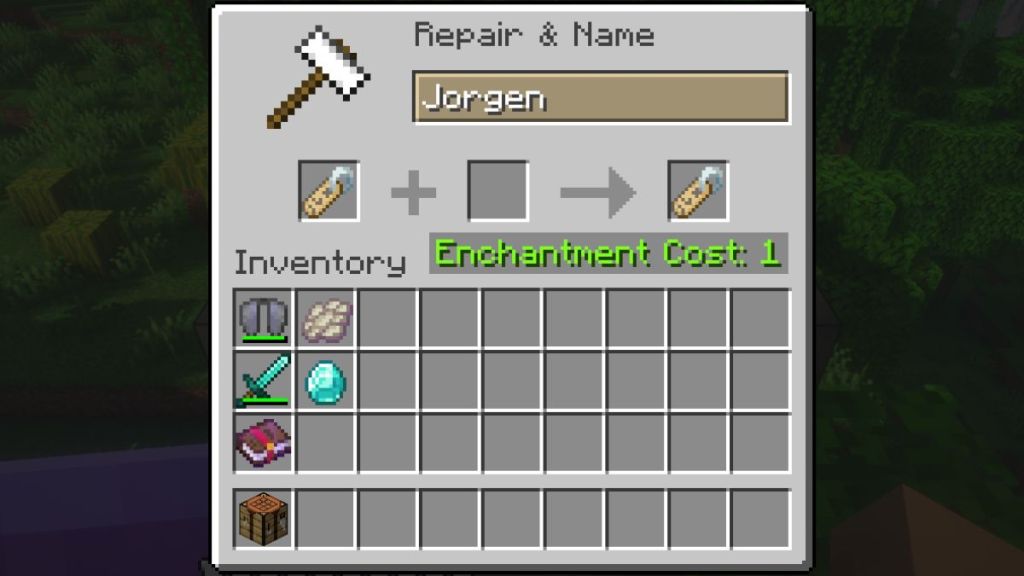
Even though the mechanics of naming items feel simple, it can have a special effect in some cases. Here are a few of them:
- In Java Edition, you can rename mobs trapped in a bucket by placing that bucket in the anvil. The mobs will carry the name even after being removed from the anvil. The same effect applies to the spawn eggs of mobs.
- Once you name an item, it can’t be stacked with other items with a different name or no name, even when they are the same type.
- Functional blocks like an enchanting table display their own name in the anvil’s UI.
- You can use the Minecraft name tag with an anvil to assign special names to mobs and unlock some amazing easter eggs. For example, the name “Dinnerbone” turns mobs upside down in Minecraft.
Among the few easter eggs in Minecraft, if you rename certain mobs to “Dinnerbone” or “Grumm“, they will appear upside down.
Using Falling Anvils as a Trap
The fun part about how to make an anvil in Minecraft is that, unlike most blocks, anvils are bound by gravity. So, if you place them floating on the side of another block, they will fall down. While doing so, they damage any entity that’s below them.
When placed in a floating position, the anvil tends to fall down due to gravity. You can use this mechanic to kill mobs by throwing anvils on top of them. Moreover, you can even use a falling anvil to smash a dropped item out of existence.
How to Avoid the “Too Expensive!” Anvil Limit in Minecraft
After learning how to craft an anvil in Minecraft, understand that there are a few unique mechanics that might confuse you at first.
- Understanding Experience: Every action inside the anvil interface costs experience levels that vary based on enchantment type, the repair method, and the number of times an item has been worked on previously.
- Cost & Penalties: Enchantment cost is the total cost of performing an action on the item, including renaming, repairing, enchanting, and more.
- The “Too Expensive” Limit: In survival and adventure modes, the anvil caps the actions at 39 experience levels. Once you reach an action that costs more than 40 levels, the item will become “Too Expensive” for the anvil. After that, you won’t be able to rename, repair, or enchant it further.
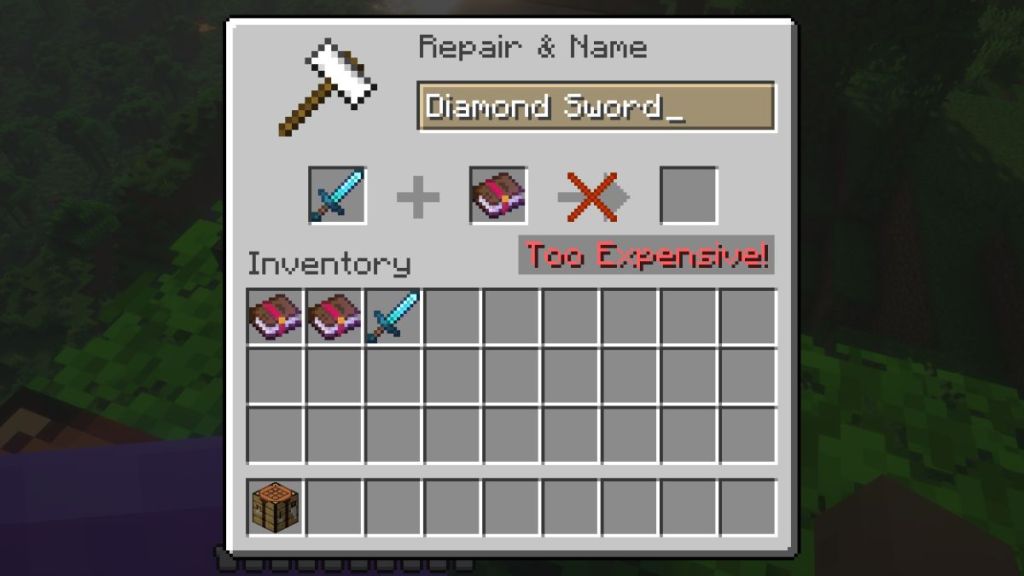
The “Too Expensive” message is shown due to a hidden mechanic that follows the prior work penalty formula: 2^n – 1, where n is the number of previous anvil uses. This is why the anvil shows the message after a few uses of the same tool.
Hitting the “Too Expensive” limit is inevitable when you’re constantly trying to repair or upgrade the same tool. However, you can delay hitting this limit if you combine the enchantment books together and then use them collectively on the tool. Moreover, if you plan on using the anvil a lot, you should learn how to make a Sculk XP farm in Minecraft.
Anvil Durability and Damage Stats
Every time you use an anvil, it has a slight chance of getting damaged. On average, it lasts for about 25 uses before getting completely annihilated. But it can also get damaged and destroyed due to falling. The higher the height, the more fall damage will be dealt to the anvil. Given below are the three visible damage stages that can act as warnings before it becomes unusable:
- Usual Anvil: At this stage, it is fully intact and has a smooth texture.
- Chipped Anvil: Slight visual cracks are visible on the surface.
- Damaged Anvil: The anvil becomes heavily cracked and is close to breaking.
Anvil vs. Grindstone: Key Differences in Minecraft
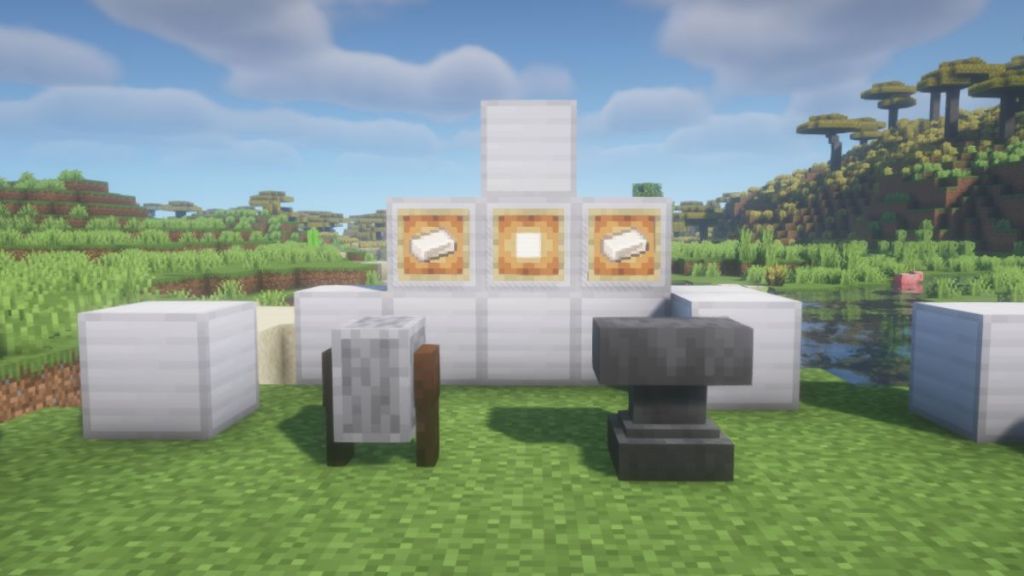
Both the Anvil and the Grindstone in Minecraft are great utility blocks to repair your armor, tools, and weapons, but their purpose varies slightly based on your requirements. So, refer to the table below, which compares the Anvil and Grindstone on the basis of their functionality:
| Features | Anvil | Grindstone |
|---|---|---|
| Repairs Item | Yes | Yes |
| Enchantments | Preserves enchantments and combines them | Doesn’t preserve enchantments; rather, removes them |
| Uses XP | Yes | No |
While the anvil is best for stacking up enchantments on a tool, the grindstone is ideal for removing those unwanted enchantments, like the Curses.
Just like that, you now know all about how to craft an anvil in Minecraft. You can use the best Minecraft seeds list to find the best biome to start your adventure and then work your way up to add enchantments to your tool on this crafty little anvil.
Having said that, do you think the anvil usage cost is an unwanted feature, or is it an essential mechanic? Share your views in the comments below!
An anvil can repair equipment while preserving Minecraft enchantments, combine and apply those enchantments, and help in renaming items. Whereas a Grindstone can repair certain items and remove non-curse enchantments, but it doesn’t preserve those enchantments while disenchanting.
An Anvil gets destroyed after 25 uses in Minecraft. However, it can perish earlier if any fall damage is dealt to the anvil.
If you want to continue using an item with an anvil after it has passed its level limits, you can switch to creative game mode to increase the limit. Doing so will also allow you to add incompatible enchantments to random items.
You need 31 iron ingots to craft an anvil in Minecraft. Three iron blocks require 27 iron ingots, while the rest of the 4 iron ingots are used in the Anvil recipe.
No, Minecraft doesn’t have a recipe or mechanic to repair the damaged anvil block. So, once it is destroyed, craft a new one instead.