
With Windows 11, Microsoft has made Cortana less intrusive than ever before. As the company detailed on its list of features removed in Windows 11, Cortana is no longer part of the first boot experience. As a result, you will no longer get the Cortana voice announcement when you first set up a new Windows 11 PC. However, Cortana is still present in Windows 11. And to help you get rid of her, we will teach you how to disable Cortana on Windows 11 in this article. We have also included the steps to uninstall Cortana to completely remove Microsoft’s voice assistant from your Windows 11 PC.
Disable/ Uninstall Cortana on Windows 11 (2021)
We have included four methods to disable Cortana on Windows 11, two of them are super easy, while the others require you to edit the Registry and Group Policy. And you will need to use Windows Powershell to uninstall Cortana from your computer. Use the table below to pick your desired method
Disable Cortana from Windows 11 Settings
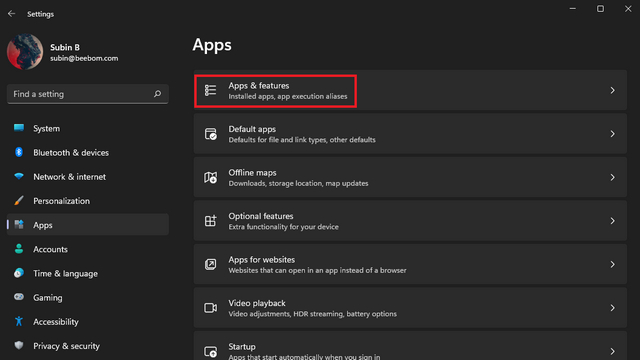
1. Open the Settings app using the Windows 11 keyboard shortcut ‘Win+I’ and switch to the Apps section from the left sidebar. Now, click on ‘Apps & features’ to manage app settings.

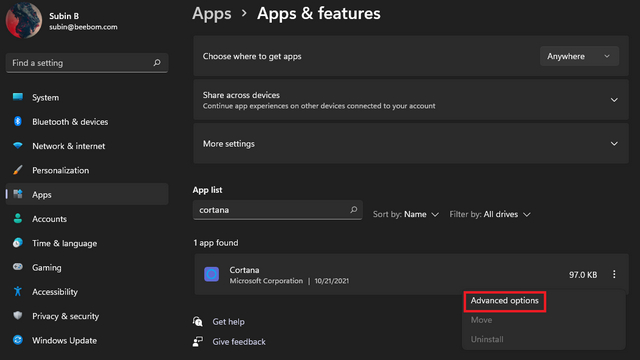
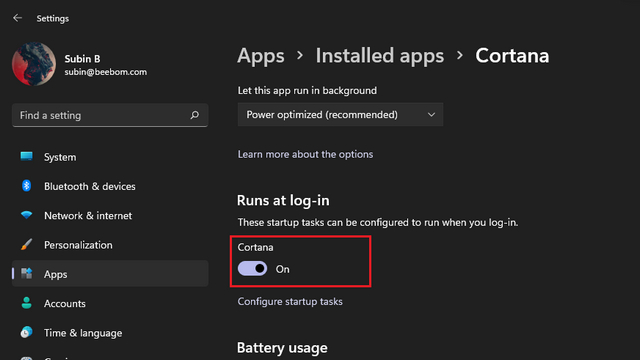
2. In the App list search box, type Cortana. Once the Cortana app listing appears, click on the vertical three dots menu next to it, and choose “Advanced options”.
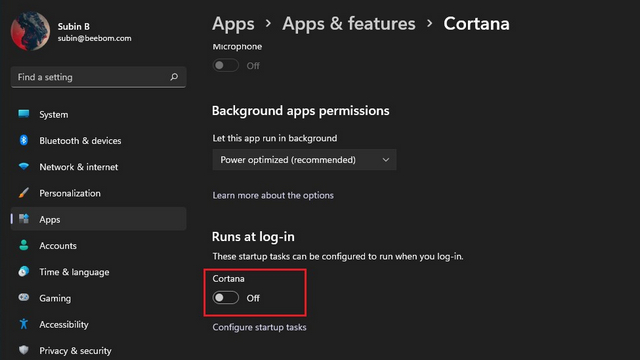
3. Under the ‘Runs at log-in’ section, disable the Cortana toggle. And you are all set. Cortana will no longer start automatically when you log in to your Windows 11 PC.
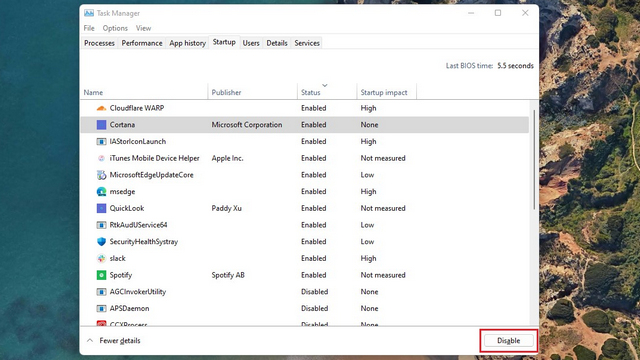
Disable Cortana from Task Manager
1. Another way of disabling Cortana is from the task manager. Use the keyboard shortcut ‘Ctrl+Shift+Esc’ to open the Task Manager in Windows 11. When Task Manager appears, switch to the ‘Startup’ tab to control tasks that power up when you boot up your PC.
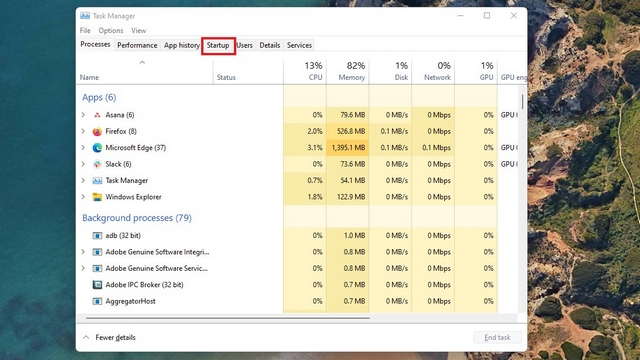
2. Locate Cortana from the list of startup items and click on the ‘Disable’ button. Cortana will no longer take up resources when you are booting your Windows 11 machine.
Disable Cortana from Registry Editor
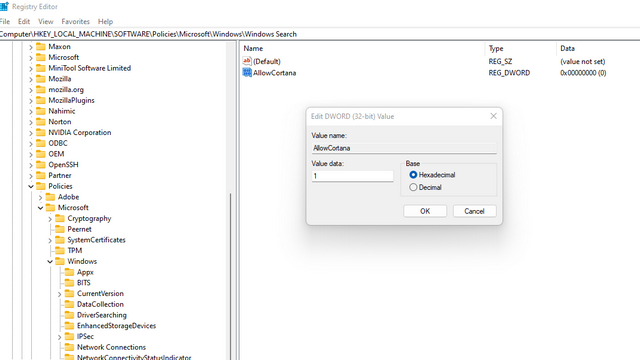
1. Use the keyboard shortcut ‘Win+R’ to open the Run window and type “regedit” to open the Registry Editor. Then, hit Enter.

2. Navigate to the following path, right-click anywhere on the right pane, and choose New->DWORD (32-bit) Value. If you are not seeing Windows Search here, right-click the Windows folder on the left pane, and create a new ‘Windows Search’ folder.
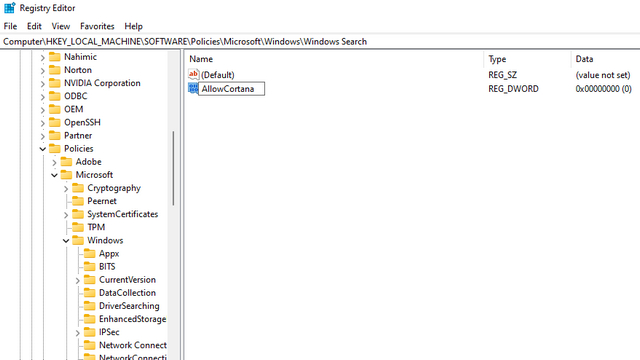
HKEY_LOCAL_MACHINE\SOFTWARE\Policies\Microsoft\Windows\Windows Search
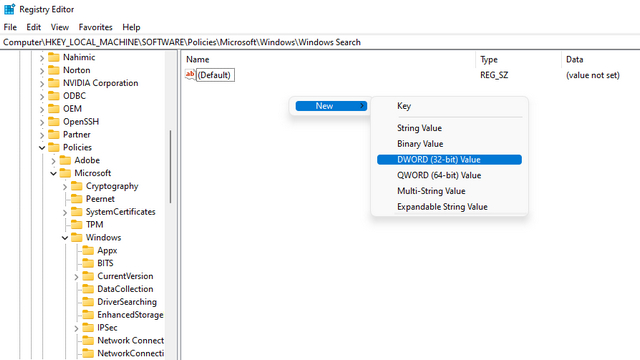
3. When the new value appears, name it ‘AllowCortana’.
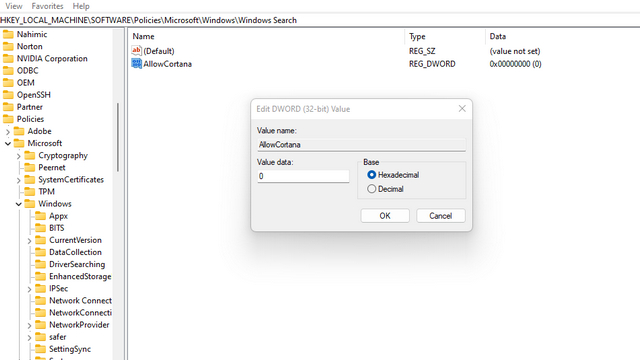
4. Double-click ‘AllowCortana’ and set its value data as ‘0’. Click OK to save the changes. Once done, restart your Windows 11 PC, and you will find that Cortana has been disabled.
Disable Cortana from Group Policy Editor
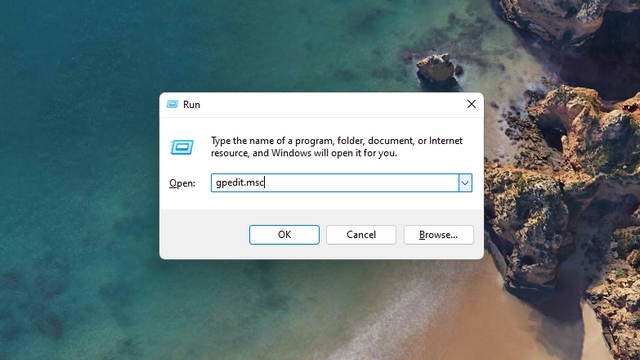
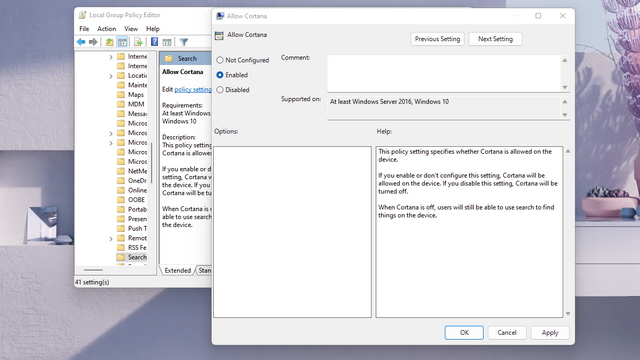
1. Open a Run window using the keyboard shortcut ‘Win+R’, type ‘gpedit.msc’, and hit OK.
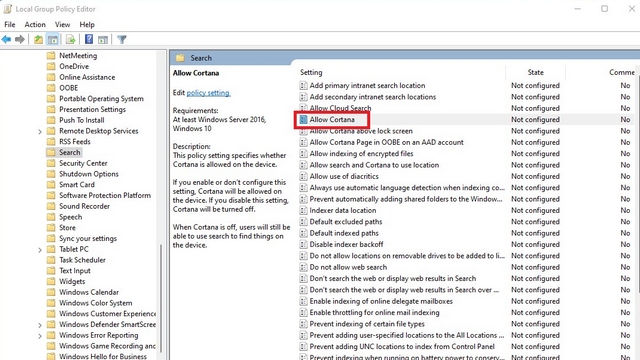
2. Visit the following path and double-click on ‘Allow Cortana’.
Computer Configuration -> Administrative Templates -> Windows Components -> Search
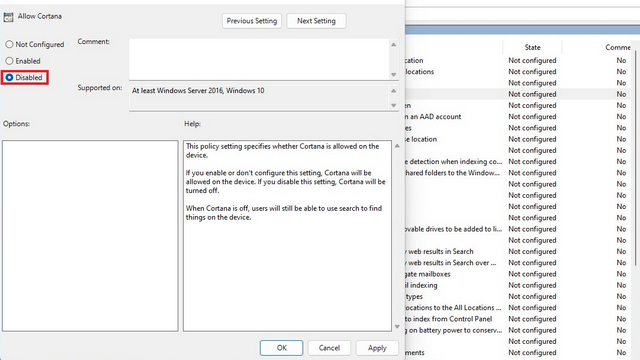
3. From the dialog box that appears, click on ‘Disabled’ and choose ‘OK’. After that, restart your PC, and Cortana will no longer work on Windows 11.
Re-enable Cortana on Windows 11
Now, if you have used any of the four methods above to disable Cortana on your Windows 11 PC, find the steps to re-enable Microsoft’s voice assistant right here:
1. If you have disabled Cortana from Settings, you can enable Cortana toggle from Settings -> Apps & features -> Cortana Advanced options. You simply need to enable the Cortana toggle under the ‘Runs at log-in’ section.
2. In case you used the registry method to disable Cortana, navigate to the path given below and set the value of AllowCortana as 1.
HKEY_LOCAL_MACHINE\SOFTWARE\Policies\Microsoft\Windows\Windows Search
2. If you chose to use the Group Policy Editor method, navigate to the path below, and select the ‘Enabled’ radio button for ‘AllowCortana’.
Computer Configuration -> Administrative Templates -> Windows Components -> Search
How to Uninstall Cortana from Windows 11
Now, instead of choosing to disable Microsoft’s voice assistant, you can completely uninstall Cortana from your Windows 11 PC as well. It requires a couple more steps and knowledge of Windows Powershell. With that said, let’s look at the steps:
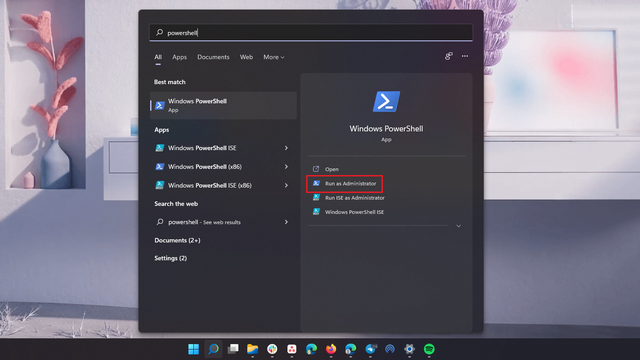
1. Open a PowerShell window as an administrator. To do that, press the Windows key, type ‘PowerShell’ in the search bar, and choose the ‘Open as administrator’ option.
2. Paste the following command in the PowerShell window and hit the Enter key.
Get-AppxPackage -allusers Microsoft.549981C3F5F10 | Remove-AppxPackage
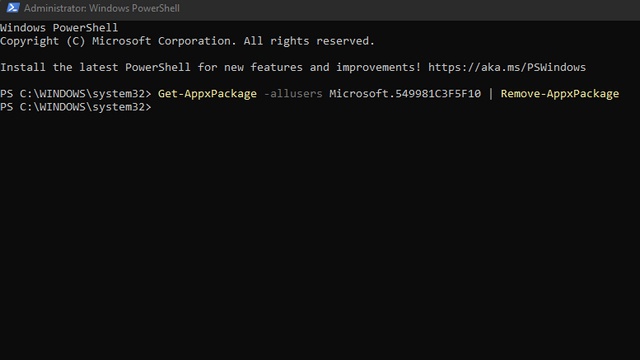
That’s pretty much it. You will no longer see the Cortana app on your Windows 11 computer. In case you change your mind later, check the next section to reinstate Cortana on Windows 11.
How to Re-install Cortana on Windows 11
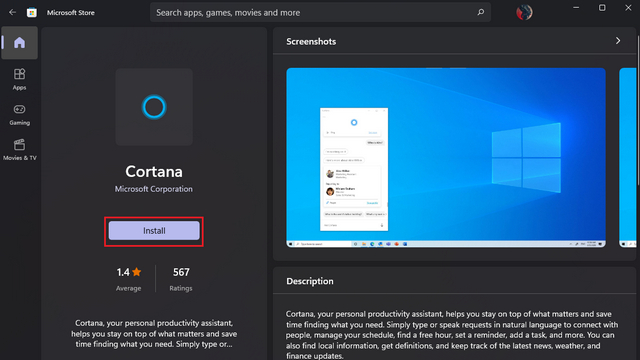
1. Open the Cortana app listing on the Microsoft Store using this link and click on the ‘Get’ button.

2. Windows 11 will automatically redirect you to the Microsoft Store. Here, click the ‘Install’ button to get back the Cortana app on your Windows 11 PC.
Uninstall Cortana on Windows 11 PC Permanently
So that’s how you can disable or uninstall Cortana on Windows 11 in a few easy steps. Although Cortana is no longer part of the first boot experience, we hope this guide helped you enable, disable, or uninstall Cortana on your Windows 11 machine. If you would like to further enhance your PC’s performance, go through our guides on debloating Windows 11 and speeding up Windows 11. If you have queries about any of the methods to remove Cortana from Windows 11, feel free to comment them down below.

