
Considering the scale of Windows in the desktop operating system market, Microsoft offers a variety of languages in the OS so that users across the globe can use Windows in the language they’re comfortable with. So like previous Windows releases, Windows 11 also lets you change your system language, and in this article, we will walk you through the steps involved in changing the Windows 11 default system language.
Change the Language in Windows 11 (2022)
Change Windows 11 Language from Settings
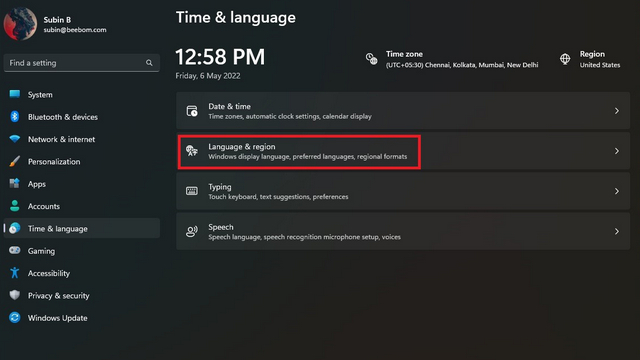
1. Open the Settings app and switch to the “Time & language” tab from the left sidebar. When you are here, select “Language & region” to change your system’s language.

2. Up next, click “Add a language” to add a new language.

3. You will now see a list of all supported languages. Pick your preferred language and click “Next”.

4. From the language preferences screen, enable the “Set as my Windows display language” checkbox and click on the “Install” button. And that’s it! You have successfully modified the system language on your Windows 11 PC.

Disable Language Sync to Microsoft Account
When you change the system language on your PC, the preference gets synced across all the devices associated with your Microsoft account. However, you can disable this sync so that you can use your preferred language on different PCs. Follow the steps below to disable language sync to your Microsoft account.
1. Open the Settings app and choose “Windows backup” from the “Accounts” section.

2. Expand the “Remember my preferences” section, uncheck the “Language preferences” option, and you’re all set. You can now use different languages across your Windows 11 devices.

Change Keyboard Language in Windows 11
1. Open the Settings app, switch to the “Time & language” section from the left sidebar, and choose “Typing” in the right pane.

2. Up next, click on “Advanced keyboard settings” to pick a new keyboard language in Windows 11.

3. Pick your preferred language from the list of available languages, and that’s it. You can now start typing in the language you selected. As a side note, you can check the first method to add new languages to your PC.

4. If you often find yourself switching between keyboard languages, you can enable the taskbar language switcher. Just enable the “Use the desktop language bar when it’s available” checkbox under “Advanced keyboard settings” on your Windows 11 PC. And well, if you find the language switcher in Windows 11 annoying, you can turn it off using the linked guide.

Switch to Your Preferred Language in Windows 11
Well, there you have it! That’s how you can change your system language in Windows 11. The option to change languages is convenient for bilingual people or just anyone who doesn’t want to use English to navigate around their PC. While you’re at it, do not forget to take a look at our other Windows 11 guides to customize touchpad gestures and disable search highlights.

