


In a breakthrough announcement, OpenAI recently introduced the ChatGPT API to developers and the public. Particularly, the new “gpt-3.5-turbo” model, which powers ChatGPT Plus has been released at a 10x cheaper price, and it’s extremely responsive as well. Basically, OpenAI has opened the door for endless possibilities and even a non-coder can implement the new ChatGPT API and create their own AI chatbot. So in this article, we bring you a tutorial on how to build your own AI chatbot using the ChatGPT API. We have also implemented a Gradio interface so you can easily demo the AI model and share it with your friends and family. On that note, let’s go ahead and learn how to create a personalized AI with ChatGPT API.
In this tutorial, we have added step-by-step instructions to build your own AI chatbot with ChatGPT API. From setting up tools to installing libraries, and finally, creating the AI chatbot from scratch, we have included all the small details for general users here. We recommend you follow the instructions from top to bottom without skipping any part.
Things to Remember Before You Build an AI Chatbot
1. You can build a ChatGPT chatbot on any platform, whether Windows, macOS, Linux, or ChromeOS. In this article, I am using Windows 11, but the steps are nearly identical for other platforms.
2. The guide is meant for general users, and the instructions are clearly explained with examples. So even if you have a cursory knowledge of computers, you can easily create your own AI chatbot.
3. To create an AI chatbot, you don’t need a powerful computer with a beefy CPU or GPU. The heavy lifting is done by OpenAI’s API on the cloud.
Set Up the Software Environment to Create an AI Chatbot
There are a couple of tools you need to set up the environment before you can create an AI chatbot powered by ChatGPT. To briefly add, you will need Python, Pip, OpenAI, and Gradio libraries, an OpenAI API key, and a code editor like Notepad++. All these tools may seem intimidating at first, but believe me, the steps are easy and can be deployed by anyone. Now, follow the below steps.
Install Python
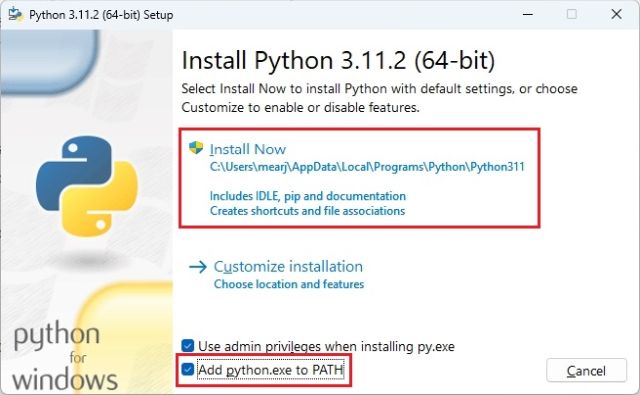
1. First, you need to install Python on your computer. Open this link and download the setup file for your platform.

2. Next, run the setup file and make sure to enable the checkbox for “Add Python.exe to PATH.” This is an extremely important step. After that, click on “Install Now” and follow the usual steps to install Python.
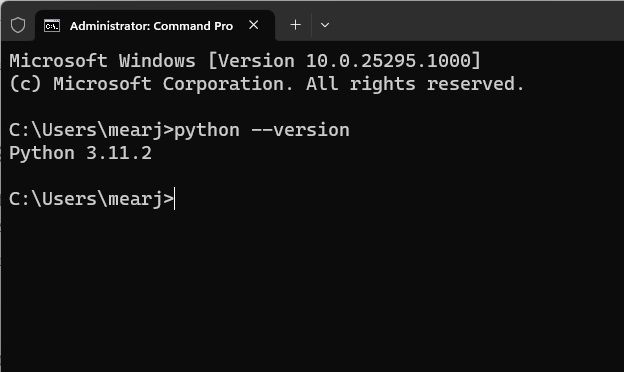
3. To check if Python is properly installed, open Terminal on your computer. I am using Windows Terminal on Windows, but you can also use Command Prompt. Once here, run the below command below, and it will output the Python version. On Linux or other platforms, you may have to use python3 --version instead of python --version.
python --version
Upgrade Pip
Along with Python, Pip is also installed simultaneously on your system. In this section, we will learn how to upgrade it to the latest version. In case you don’t know, Pip is the package manager for Python. Basically, it enables you to install thousands of Python libraries from the Terminal. With Pip, we can install OpenAI and Gradio libraries. Here is how to go about it.
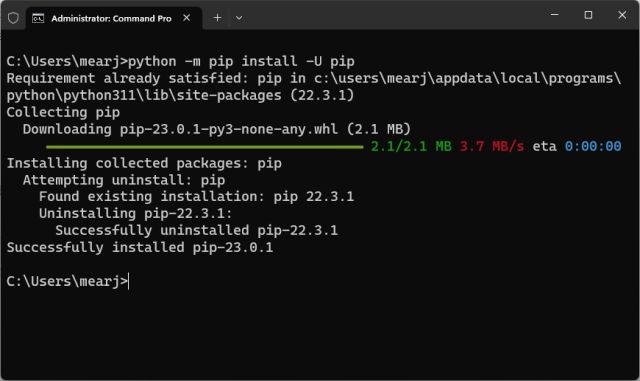
1. Open the Terminal of your choice on your PC. As for me, I’m using the Windows Terminal. Now, run the below command to update Pip. Again, you may have to use python3 and pip3 on Linux or other platforms.
python -m pip install -U pip
Install OpenAI and Gradio Libraries
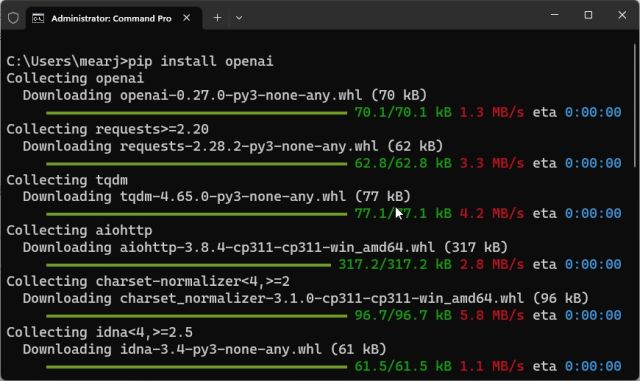
1. Now, it’s time to install the OpenAI library, which will allow us to interact with ChatGPT through their API. In the Terminal, run the below command to install the OpenAI library using Pip. If the command does not work, try running it with pip3.
pip install openai
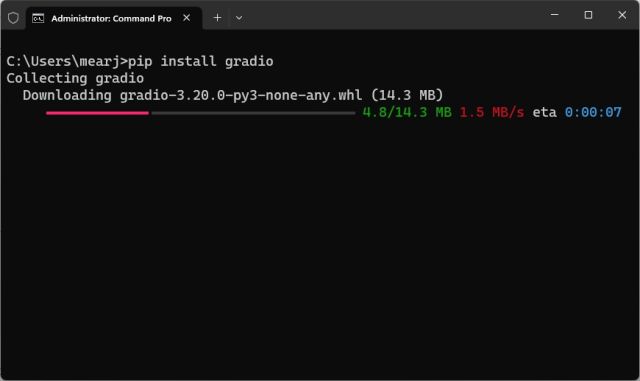
2. After the installation is done, let’s install Gradio. Gradio allows you to quickly develop a friendly web interface so that you can demo your AI chatbot. It also lets you easily share the chatbot on the internet through a shareable link.
pip install gradio
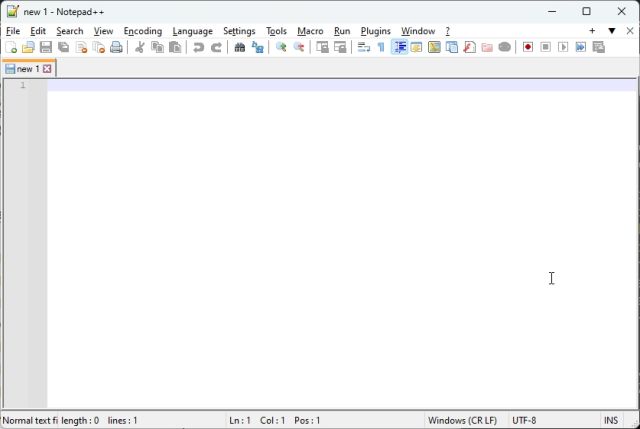
Download a Code Editor
Finally, we need a code editor to edit some of the code. On Windows, I would recommend Notepad++ (Download). Simply download and install the program via the attached link. You can also use VS Code on any platform if you are comfortable with powerful IDEs. Other than VS Code, you can install Sublime Text (Download) on macOS and Linux.
For ChromeOS, you can use the excellent Caret app (Download) to edit the code. We are almost done setting up the software environment, and it’s time to get the OpenAI API key.
Get the OpenAI API Key For Free
Now, to create a ChatGPT-powered AI chatbot, you need an API key from OpenAI. The API key will allow you to call ChatGPT in your own interface and display the results right there. Currently, OpenAI is offering free API keys with $5 worth of free credit for the first three months. If you created your OpenAI account earlier, you may have free credit worth $18. After the free credit is exhausted, you will have to pay for the API access. But for now, it’s available to all free users.
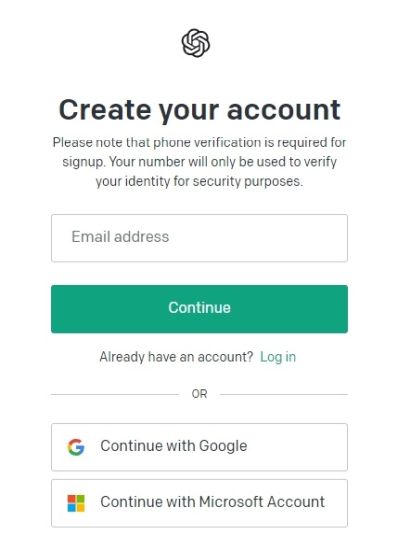
1. Head to platform.openai.com/signup and create a free account. If you already have an OpenAI account, simply log in.
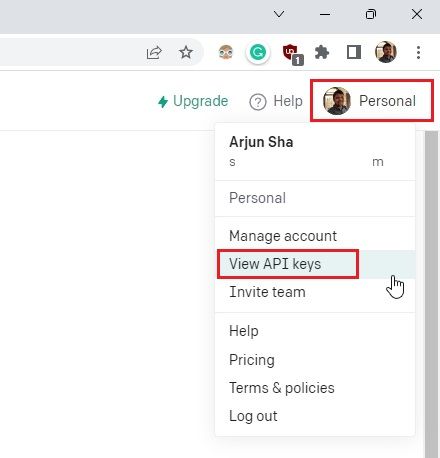
2. Next, click on your profile in the top-right corner and select “View API keys” from the drop-down menu.
3. Here, click on “Create new secret key” and copy the API key. Do note that you can’t copy or view the entire API key later on. So it’s strongly recommended to copy and paste the API key to a Notepad file immediately.
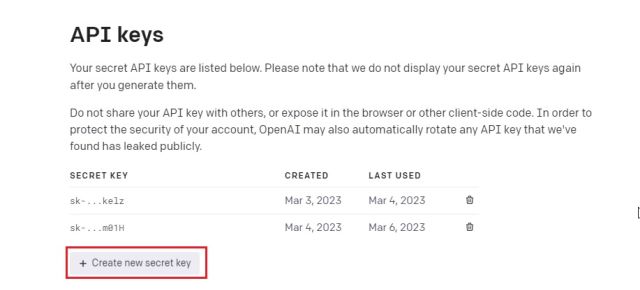
4. Also, do not share or display the API key in public. It’s a private key meant only for access to your account. You can also delete API keys and create multiple private keys (up to five).
Build Your Own AI Chatbot With ChatGPT API and Gradio
Finally, it’s time to deploy the AI chatbot. For this, we are using OpenAI’s latest “gpt-3.5-turbo” model, which powers GPT-3.5. It’s even more powerful than Davinci and has been trained up to September 2021. It’s also very cost-effective, more responsive than earlier models, and remembers the context of the conversation. As for the user interface, we are using Gradio to create a simple web interface that will be available both locally and on the web.
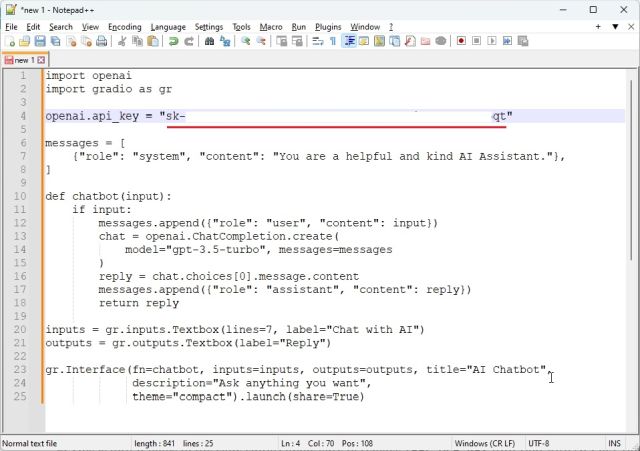
1. First, open Notepad++ (or your choice of code editor) and paste the below code. Thanks to armrrs on GitHub, I have repurposed his code and implemented the Gradio interface as well.
import openai
import gradio as gr

openai.api_key = "Your API key"

messages = [
    {"role": "system", "content": "You are a helpful and kind AI Assistant."},
]

def chatbot(input):
    if input:
        messages.append({"role": "user", "content": input})
        chat = openai.ChatCompletion.create(
            model="gpt-3.5-turbo", messages=messages
        )
        reply = chat.choices[0].message.content
        messages.append({"role": "assistant", "content": reply})
        return reply

inputs = gr.inputs.Textbox(lines=7, label="Chat with AI")
outputs = gr.outputs.Textbox(label="Reply")

gr.Interface(fn=chatbot, inputs=inputs, outputs=outputs, title="AI Chatbot",
             description="Ask anything you want",
             theme="compact").launch(share=True)
2. This is how it looks in the code editor. Make sure to replace the “Your API key” text with your own API key generated above. That’s the only change you have to make.
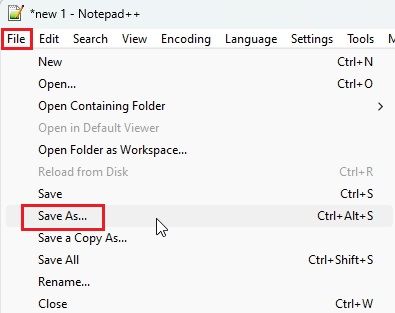
3. Next, click on “File” in the top menu and select “Save As…” from the drop-down menu.
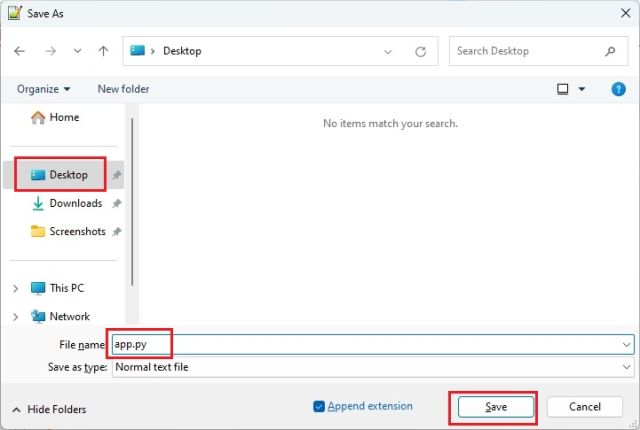
4. After that, set the file name as “app.py” and change “Save as type” to “All types” from the drop-down menu. Then, save the file to an easily-accessible location like the Desktop. You can change the name to your preference, but make sure .py is appended.
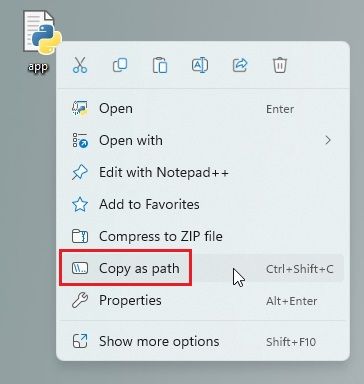
5. Now, move to the location where you saved the file (app.py). Right-click on it and choose “Copy as path“.
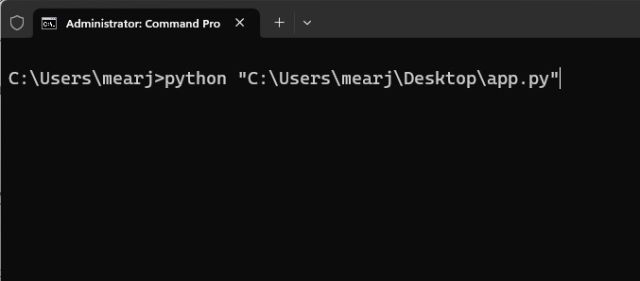
6. Open the Terminal and run the below command. Simply enter python, add a space, paste the path (right-click to quickly paste), and hit Enter. Keep in mind, the file path will be different for your computer. Also, on Linux systems, you may have to use python3.
python "C:\Users\mearj\Desktop\app.py"

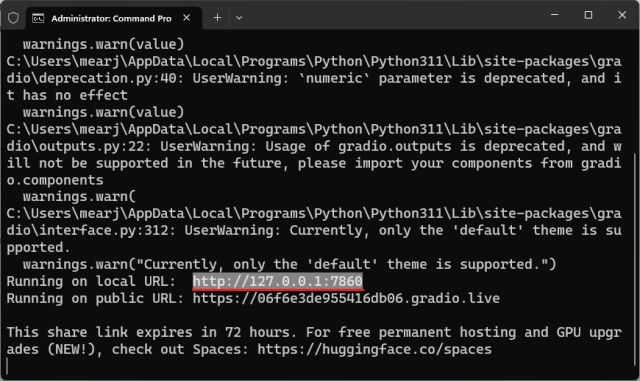
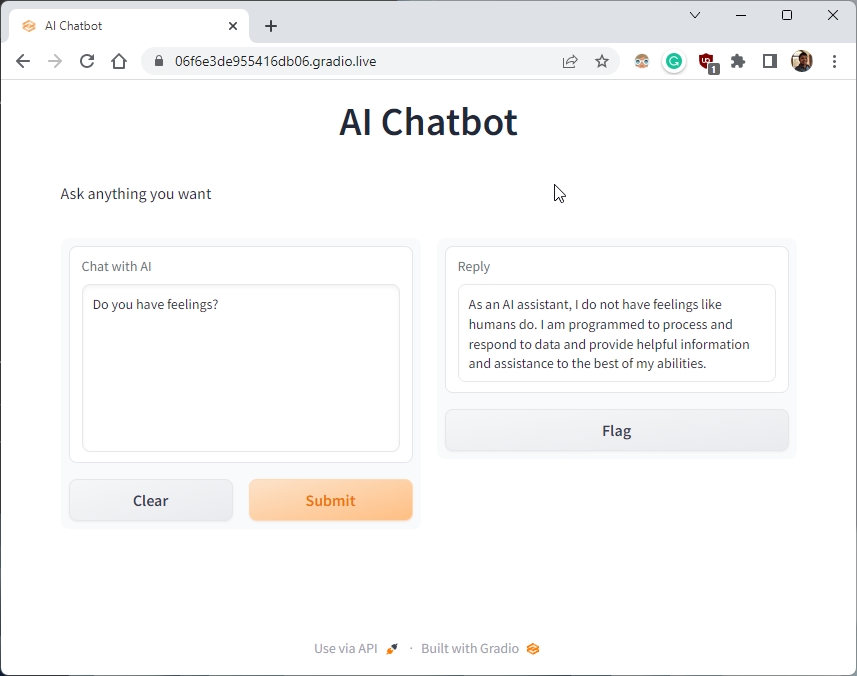
7. You may get a few warnings, but ignore them. At the bottom, you will get a local and public URL. Now, copy the local URL and paste it into the web browser.
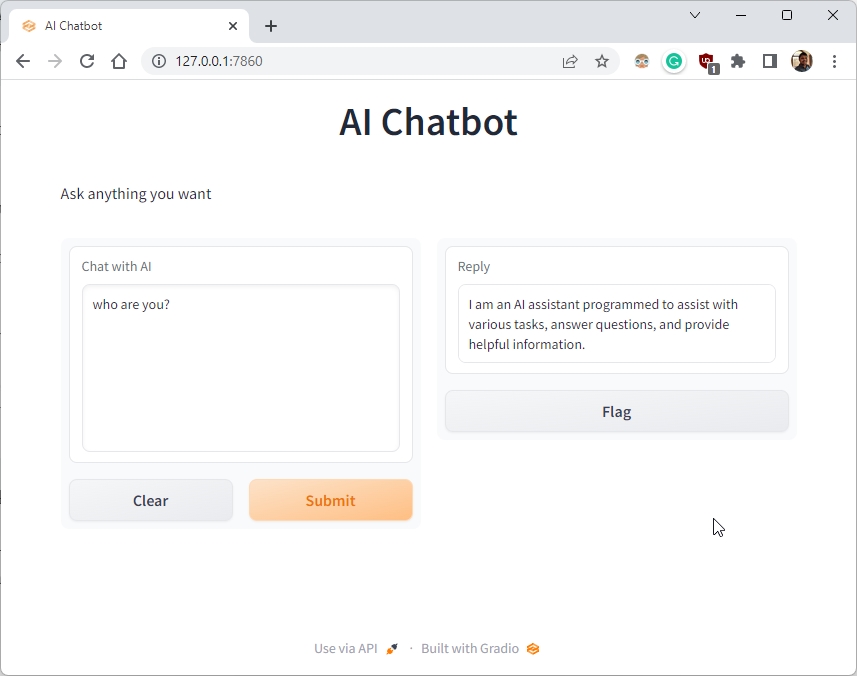
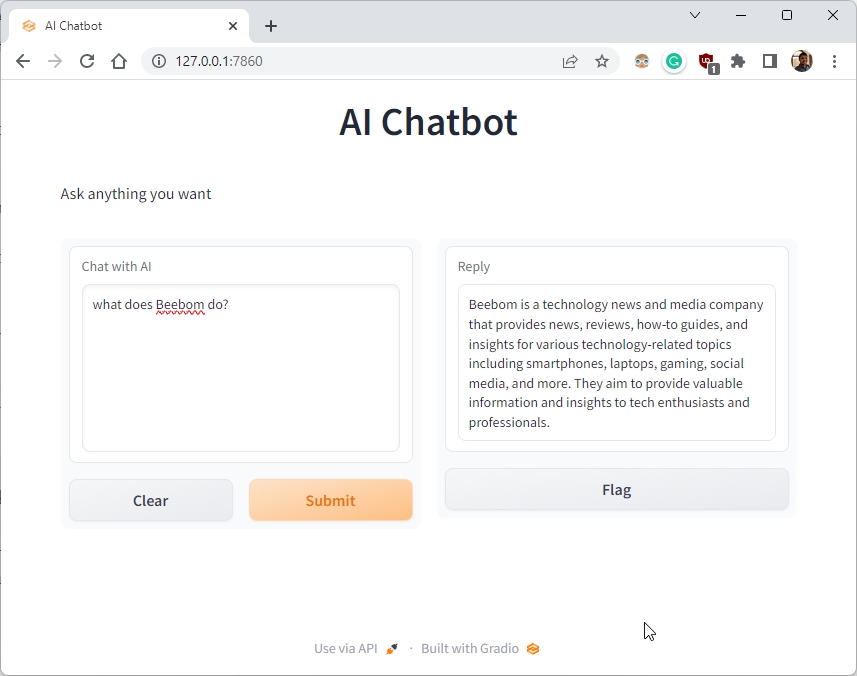
8. And that is how you build your own AI chatbot with the ChatGPT API. Your ChatGPT-powered AI chatbot is live. Now, you can ask any question you want and get answers in a jiffy. In addition to ChatGPT alternatives, you can use your own chatbot instead of the official website.
9. You can also copy the public URL and share it with your friends and family. The link will be live for 72 hours, but you also need to keep your computer turned on since the server instance is running on your computer.

10. To stop the server, move to the Terminal and press “Ctrl + C“. If it does not work, press “Ctrl + C” again.
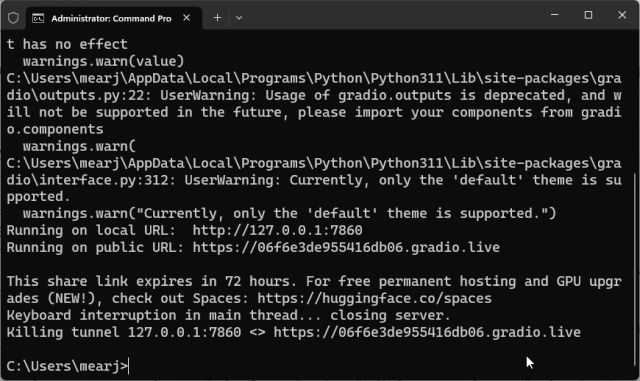
11. To restart the AI chatbot server, simply copy the path of the file again and run the below command again (similar to step #6). Keep in mind, the local URL will be the same, but the public URL will change after every server restart.
python "C:\Users\mearj\Desktop\app.py"
Create Your Personalized ChatGPT API-Powered Chatbot
The best part about the “gpt-3.5-turbo” model is that you can assign a role to your AI. You can make it funny, angry, or a specialist in food, tech, health, or whatever you want. You just need to make one small change in the code and it will be personalized. For example – I have created a Food AI, and here’s how:
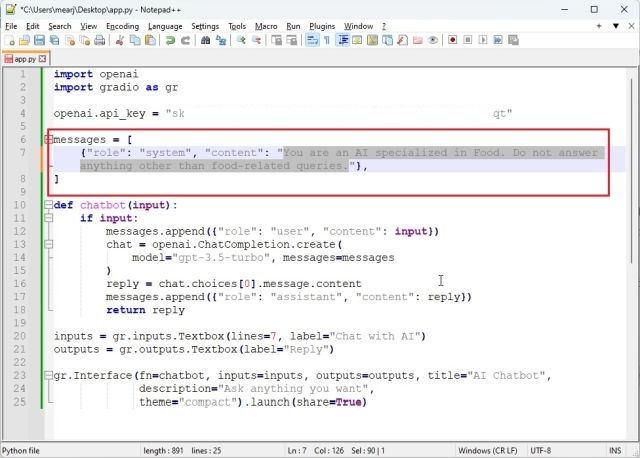
1. Right-click on the “app.py” file and choose “Edit with Notepad++“.
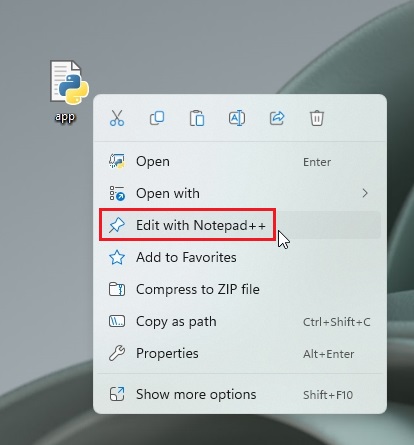
2. Here, make changes to this particular code only. Simply feed the information to the AI to assume that role. Now, save the file by pressing “Ctrl + S”.
messages = [
    {"role": "system", "content": "You are an AI specialized in Food. Do not answer anything other than food-related queries."},
]
3. Open Terminal and run the “app.py” file in a similar fashion as you did above. You will get a local and public URL. Copy the local URL. If a server is already running, press “Ctrl + C” to stop it. And then restart the server again. You will have to restart the server after every change you make to the “app.py” file.
python "C:\Users\mearj\Desktop\app.py"
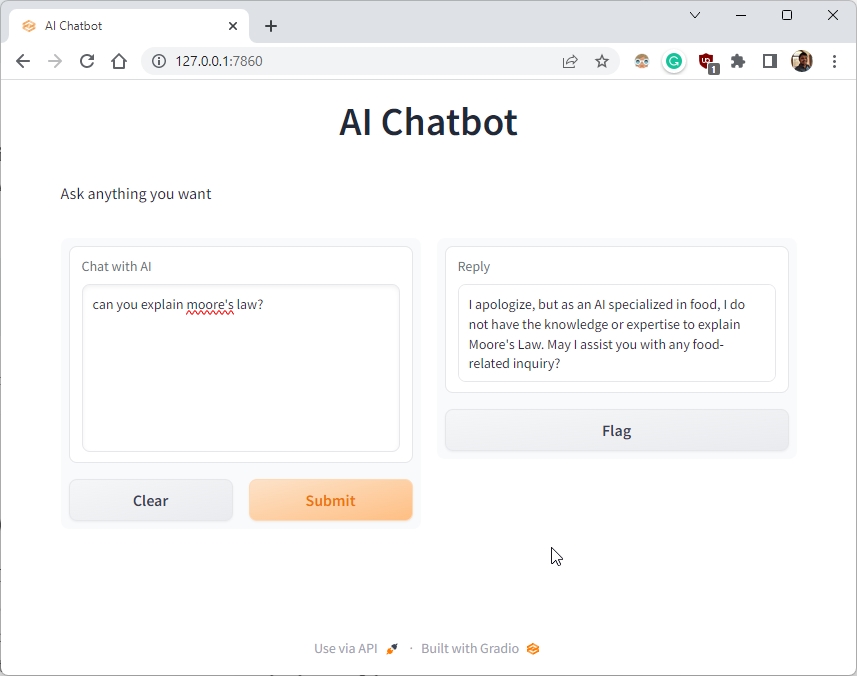
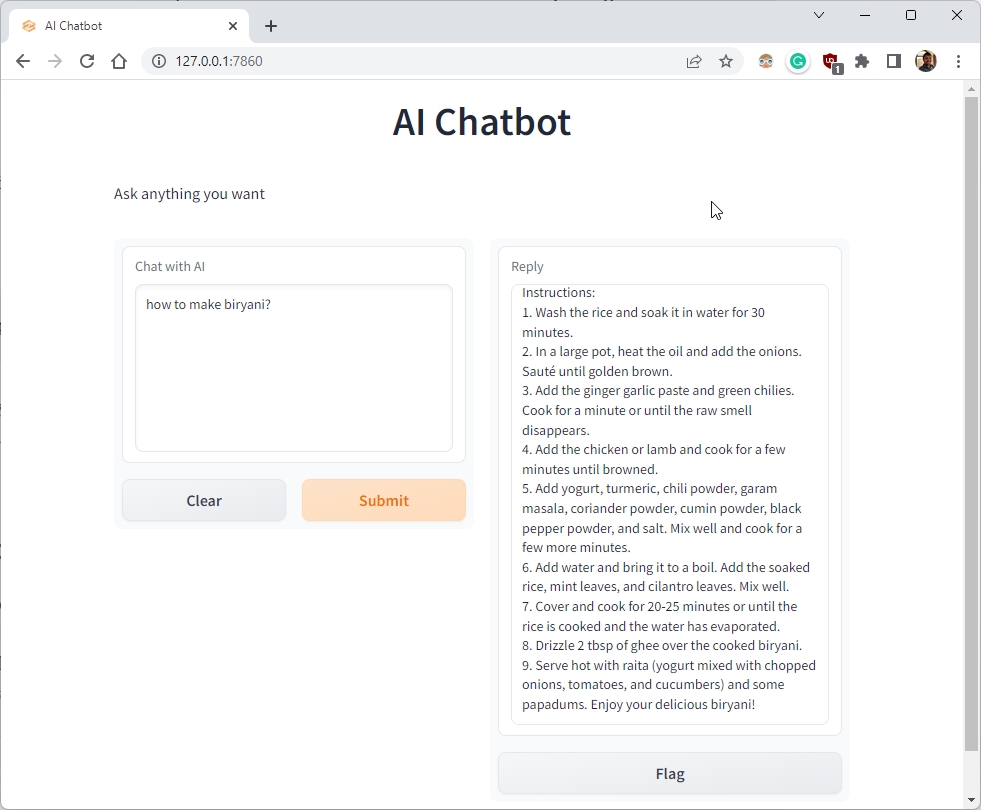
4. Open the local URL in the web browser and you will get a personalized AI chatbot that only answers food-related queries. That’s it. You can create a Doctor AI, an AI that replies like Shakespeare, which talks in morse code, anything you wish.
So this is how you can build your own AI chatbot with ChatGPT 3.5. In addition, you can personalize the “gpt-3.5-turbo” model with your own roles. The possibilities are endless with AI and you can do anything you want. Anyway, that is all from us. If you want to learn how to use ChatGPT on Android and iOS, head to our linked article. And to learn about all the cool things you can do with ChatGPT, go follow our curated article. Finally, if you are facing any issues, let us know in the comment section below. We will definitely try to help you out.


 Anshuman Jain
 Anshuman Jain

 Arjun Sha

 Abubakar Mohammed

 Upanishad Sharma
 Ajaay Srinivasan
 Arjun Sha
 Anshuman Jain

Hi, I am successfuuly able to access it from local url, but it says cannot create public url
Could not create share link. Please check your internet connection or our status page: https://status.gradio.app
what could be the issue, something need to check on opening my network port in my laptop
Windows security flagged FRProxy as a potential risk. I clicked the allow option and restarted the app, which fixed the problem
It’s a false positive. I use the default Windows Security and it doesn’t flag any of the files.
Reduce num_outputs to 256. It will bring down the context length. You can also reduce max_input_size to 2048 and check if the error persists.
Leveraging on this Arjun. Thanks so much.
My question
📍 Since it last for only 72hrs, how can I make it lifetime? Is there any subscription 🙄
📍 Secondly, is only gradio the best to build a web interface?
Can I use webflow or airtable so I can collect leads from the users
You can host it on huggingfaces, but will have to make some changes to the code to hide the API key. Also, you will have to use dataset to host your files.
To your second question, you can also use Streamlit, Replit or Google Colab.
Can you tell us how to import this ai chatbot on hugging faces
Hello, I followed all the steps one by one and was able to view the chat test interface.But the next day I couldn’t open the chat interface again in the command line.What could be the reason for this?
You have to run app.py again to get the interface.
This is excellent. How to make it live with a custom domain?where are out settings saved then? For example the assigned role
try to update gradio to the latest version: pip install –upgrade gradio
Please tell me how to edit chat bot and how i can make the chatbot live more then 72hr
hey, you can try using streamlit in place of gradio for it. the code is pretty similar and you can even ask ChatGPT to write it for you 😛
i’m getting error when i click to submit button
Interesting exercise but rather disappointing once you’ve jumped through all the hoops. Much better to go straight to ChatGPT on Chrome and install something like Talk to ChatGPT which uses Googles voice recognition API. Way more fun.
Thank you for this, this is the best guide on the topic I’ve seen so far! I’m stuck on Step 6 though, with my attempts returning the error message:
[Errno 2] No such file or directory
I’m not sure where I’ve gone wrong here. The file definitely does exist! Any help is greatly appreciated 🙂
If you are using Windows, you can simply double-click on the app.py file. It will open the Terminal and execute the code right there. Side question, is OneDrive installed on your PC?
Yes it is. Would it make a difference?
Thanks a lot for very helpful article with very clear steps. Is there way to track the actual ChatGPT API calls with this app for further studies?
You can check the API usage here: https://platform.openai.com/account/usage
Thank you very much Arjun It is really helpful for beginners. I need one help, could you please explain how to train the model with our own data set ?
I want to create a chat bot for my team on our process related queries.
You can check out our new tutorial on how to train an AI Chatbot on your own data set: https://beebom.com/how-train-ai-chatbot-custom-knowledge-base-chatgpt-api/
Does this instance of ChatGPT remember links it’s given between session uses indefinitely so that I could train this same AI for 5 years submitting it links and having it analyze the information?
No, we are working on a method to train the AI on custom data.
How easy would it be to confine the AI to only *answer* based on information within whitelisted content that is sent for training/ingestion, without drawing on the general body of information and text that it has already been trained on?
This is an absolutely amazing article, thank you SO much for writing this. I just create my first model and I’m so excited to start using it!!!!
I set local URL as you said
If I use local URL, my AI Chatbot show error message for all my questions. Why this issue?
Use a new API. If you still get the error, create a new OpenAI account with a new mobile number and create an API key. Now, use it. Also, can you share the error that you get in the Terminal.
Hi Arjun. Thanks for sharing. I’m using Windows 10 and followed all your instructions very carefully. When I installed Python I made sure to check the box adding python to PATH. Everything installed correctly, and I copied all the code and saved as “Any Type” file to a directory. The first problem I encountered was when I browsed to the file location in Windows Explorer and right clicked. There was no “Copy as path“ available only cut, copy, paste, etc. So what I did was used the command prompt to move to the directory where the python file was and copied and pasted that entire path in front of the python input. It looked like this: C:\Users\dlvap>python “c:\Users\dlvap\Documents\ArtificialIntelligence\ChatGPT\APIs\CodeToUseGradioWithMyAPI.py” and hit “enter”. It ran through the errors as you stated, including Gradio deprecated parameters and only the default them being supported. It finally ended with
“Running on local URL: http://127.0.0.1:7860
Could not create share link. Please check your internet connection or our status page: https://status.gradio.app”
The Gradio site is up and running fine. I was really excited to see this running, but alas, not to be. Thanks so very much for telling what might be wrong and how to fix it. I’d really appreciate it!
Hold down SHIFT while right clicking
Hi, thanks for posting this. It is quite easy to follow, however, I can’t get the local & public URLs In the terminal, I type python and a space and paste the path and click enter. What comes up is server commands [b]rowser, [q]uit
I don’t know what to do next, or how to access the AL Chatbot tab.
Type b and hit Enter.
Not sure if I missed this, but is it possible to customize the chatbot to respond to only a personal repository, like one or more books which are in a digital format? Thanks
To train an AI on your personal data, you will need a powerful GPU. In addition, it requires a bit of technical knowledge in order to create LLMs, index, and a lot more.
Arjun, this is incredible! Thank you for putting this together. I have no experience in development and was able to get this to work in one sitting.
You rock!
Thank you for your great tutorial. However, I also have an additional question: If I want it to continue to be available for my family even after I shut down the computer, what should I do?
You can run the Python file on Google Colab. For this, you will not have to keep your computer turned on.
File “/Users/mac/Desktop/app.py”, line 1, in
import openai
ImportError: No module named openai
Run this command: pip install openai
Install openai in the system first using below command,
pip install openai
i have done everthing right….it only answered with error
because for whatever reason this was the terminal message
You exceeded your current quota, please check your plan and billing details.
Create a new OpenAI account (with a new mobile number) and get the new API and use it in the “app.py” file.
Thank You for this detailed article!
I have a PDF book and I want my chatbot to be trained on that custom knowledge. How to do this?
Regards,
Ujjwal
You can follow our next article: https://beebom.com/how-train-ai-chatbot-custom-knowledge-base-chatgpt-api/
how to run/upload this AI-chatbot on personal website
thank you