A good number of Adobe Creative Cloud users are reportedly facing issues with fonts after updating to macOS Monterey. Whenever users try to manage fonts, Adobe CC freezes on the “Loading Adobe Fonts” screen. And the only way to fix the unresponsive apps is to force kill the app. Though there is no official word yet, we have compiled some handy solutions to fix the frustrating “Loading Adobe Fonts” bug on macOS Monterey. So, check them out if you have also run into the freezing issue on your Mac.
8 Tips to Fix Adobe Creative Cloud ‘Loading Fonts’ Bug on Mac (December 2021)
While the “Loading Adobe Fonts” issue appears to be the result of a bug, you should first try out basic troubleshooting tips. That includes fixing the poor Wi-Fi connection, updating the app, or using the nifty Adobe repair tool. If they fail to fix the problem, you should proceed with radical measures like uninstalling the Creative Cloud app or using the official Adobe Cleaner tool. With that in mind, let’s get down to the business!
Turn Off/ On Wi-Fi on Your Mac
The Adobe Creative Cloud “Loading Fonts” bug could be the result of a sluggish or ill-functioning Wi-Fi connection. So first, we suggest you make sure that your Internet connection is strong and working normally.
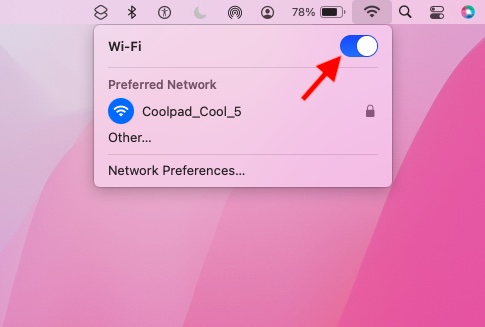
- Click the Wi-Fi icon at the top right corner of the screen and turn off the Wi-Fi toggle. Then, wait for some time and turn on the Wi-Fi toggle once again. Now, launch Adobe CC to check if the fonts issue has been resolved.
Restart Your Mac or MacBook
If Adobe CC is still freezing when trying to manage the fonts, reboot your Mac. I can’t remember how many times rebooting has helped me troubleshoot miscellaneous problems in macOS Monterey. Hence, it would be smart to not miss this effective solution.
- Click the Apple menu icon at the top left corner of the screen and choose Restart in the drop-down menu. After your Mac has rebooted, open Adobe CC and check if you still get the “Loading Adobe fonts” error or not. If not, you have successfully resolved the issue.

Update Adobe Creative Cloud Apps
If you haven’t updated Adobe Creative Cloud for a long time, there is a good chance that the problem could be due to the outdated version. Hence, the next tip would be to update the apps, and here’s how to do that:
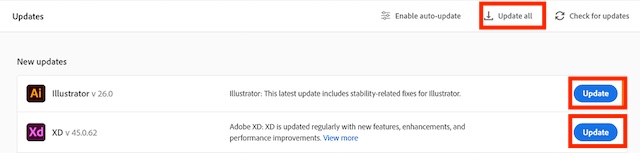
- Open the Creative Cloud desktop app on your Mac. Then, click the menu icon at the upper right corner of the screen -> move to Apps tab -> Updates -> Check for Updates. Now, update apps individually or all at once using the “Update all” button.
Sign Out and Sign Back into Adobe CC
At times, you can fix certain app-related issues by logging out and then logging back in. So, make sure to give this ever-reliable solution a try if none of the above-mentioned tips worked for you.
- Launch the Adobe CC app on your Mac -> Gear icon at the top right -> Preferences -> General -> Account tab -> Sign Out.
- Now, right-click on the app icon in the Dock and choose Quit. Next, open the app and sign back in.
Repair Adobe Creative Cloud on Your Mac
Now, if you continue to see the “Loading Adobe fonts” error on your Mac, take advantage of the official repair tool to fix all the app-related issue.
- First, make sure to close all of your Creative Cloud apps. Then, download the Creative Cloud desktop app uninstaller for your Mac device. After that, double-click the .zip file and then double-click the Creative Cloud Uninstaller.
- If asked to open the file, click the Open option and enter your administrator password.
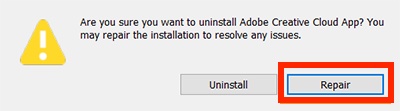
- Finally, click the “Repair” button in the pop-up that appears. After the Adobe CC desktop app is repaired, open it to find out if you have resolved the “loading fonts” issue on your macOS Monterey device.
Uninstall/ Reinstall Adobe Creative Cloud Desktop
If the issue persists, uninstall the Adobe Creative Cloud desktop app and reinstall it. But before you do that, make sure all of your files have already been synced with the cloud. Do note that the files that haven’t been synced could be potentially lost in the process.
1. To get going, download the Adobe CC uninstaller app for your macOS version using the links below:
- Download Adobe CC uninstaller for macOS 10.11 or earlier
- Download Adobe CC uninstaller for macOS 10.12 or later
- Download Adobe CC uninstaller for Macs with Apple silicon
2. Next, extract the zipped file. Simply double-click the “Creative Cloud Uninstaller.app” installer file. Now, you may get a warning to open the uninstaller from the mounted DMG file. Choose “Open” in the pop-up to continue.
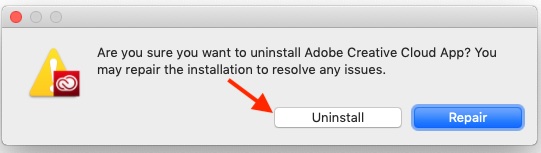
3. Now, you will see a pop-up saying, “Are you sure you want to uninstall the Adobe Creative Cloud app? You may repair the installation to resolve any issues.” Click “Uninstall“. The uninstaller will remove the Adobe CC app from your Mac and show a confirmation message.
4. You can then reinstall Adobe Creative Cloud from scratch to see if the fonts bug has been fixed on your macOS Monterey machine or not.
Run the Adobe Creative Cloud Cleaner Tool (Most Trusted Method)
The Adobe Creative Cloud Cleaner tool is highly effective for removing or fixing corrupted files. That’s why it would be worth trying out this efficient tool to fix the “Loading Adobe fonts” bug on your Mac device. It is also said to be the most reliable solution shared by users on the official Adobe community forum earlier this year.
- Before running the Adobe CC Cleaner tool, make sure to close all Adobe Creative Cloud apps and complete/ terminate all Creative Cloud background processes.
- Also, make sure to back up all your files and folders.
- Make sure your files have already synced to the cloud. Bear in mind that files not synced to the Creative Cloud account could potentially be lost in the process.
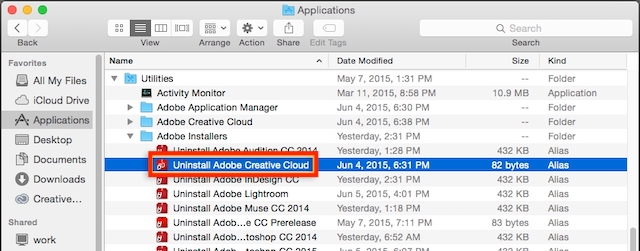
- Once you have backed up all your files stored in Adobe product directories, head to Finder -> Applications -> Utilities -> Adobe Installers. Now, double-click Adobe Creative Cloud’s uninstaller and follow the prompts to complete uninstallation.
- Next, restart your Mac. After that, download the Adobe Creative Cloud Cleaner tool for your Mac.
- Once downloaded, double-click the AdobeCreativeCloudCleanerTool.dmg file. Up next, open the Terminal app and type out the following commands:
To get rid of all products above CS6, input the following command –
sudo [Path to Adobe Creative Cloud Cleaner Tool.app]/Contents/MacOS/Adobe Creative Cloud Cleaner Tool --removeAll=CREATIVECLOUDCS6PRODUCTS
To wipe out all products below CS6 along with Adobe ID credentials, input the following command –
sudo [Path to Adobe Creative Cloud Cleaner Tool.app]/Contents/MacOS/Adobe Creative Cloud Cleaner Tool --removeAll=ALL
Now, make sure to verify that the Adobe Creative Cloud Cleaner tool has completed the task at hand without any issues and review the log file entries. Next up, it’s time to reinstall your Creative Suite of applications.
Update Your Mac
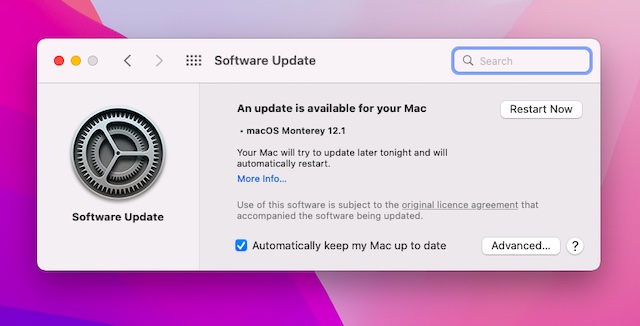
Is Adobe Creative Cloud still freezing due to the fonts loading bug on your Mac? If yes, it could very well be a stubborn macOS 12 Monterey bug causing the issue. Considering how buggy macOS 12 has been recently, you should not rule out this possibility. The good thing is that most macOS updates come with a ton of bug fixes and performance improvements. Hence, simply updating the software could help you fix Adobe CC on your device.
- Head to System Preferences on your Mac -> Software Update and download and install the latest macOS version.
Fixed ‘Loading Adobe Fonts’ Bug in macOS Monterey
So yeah, that’s pretty much it! Hopefully, Adobe Creative Cloud has started to function normally on your macOS Monterey device, and it no longer throws the annoying “Loading fonts” error. Tell us which of these hacks has helped you fix Adobe CC on your macOS device. Was it one of the basic tips at the start or the Cleaner tool that did the trick for you? Share your feedback and let us know if any other effective tips work in troubleshooting this bug.