An extra layer of safeguard for personal information has become the order of the day in the backdrop of ever-looming hacking and pervasive spamming. Therefore, not adding a shield to sensitive info is like inviting trouble with both hands. Speaking of reliable protection from hacking, two-factor authentication, and iCloud email address aliases, which allow you to send and receive emails without revealing your email address, can go a long way in safeguarding an account. What’s more, you can also use iCloud email address aliases on your iPhone, iPad, and Mac to log in to websites and online services to shield your true email address against spamming. If this well-thought-out privacy and security feature seems in line with your needs, follow along to set up iCloud email address aliases on your iDevice.
Use iCloud Email Address Aliases on iPhone, iPad, and Mac
Beyond protection, email aliases can also let you filter messages thanks to their ability to sort incoming emails into separate mailboxes automatically. Not just that, you can even use them to name email addresses so that they can ideally represent their professional or personal purposes. It’s worth reiterating that mail aliases can’t be changed, converted or transferred into primary accounts. Now that you know what they are meant for and how handy they can prove to be, it’s time to get started with steps!
Set Up iCloud Email Aliases
First off, we are going to add an iCloud email alias using the iCloud.com website.
1. Open a web browser on your desktop and head over to icloud.com. After that, sign in with your Apple ID credentials and click Mail.

Note:
- To use this feature, you will need to have an iCloud email. If you don’t have iCloud email, head over to the iCloud settings on your iOS or macOS device to create one right now.
- On iOS, head over to Settings -> Apple ID banner -> iCloud -> Mail. Now, tap on Create in the popup and then follow the instructions to create an email address.
- On macOS, navigate to System Preferences -> Apple ID -> Mail. Then, go through the quick instructions to create an iCloud email.
2. Now, click on the gear cog icon located at the bottom-left corner of the window.
![]()
3. Next, click on Preferences.

3. Ensure that the Accounts tab is selected. Then, click on Add an alias. After that, enter an alias for your iCloud email address.
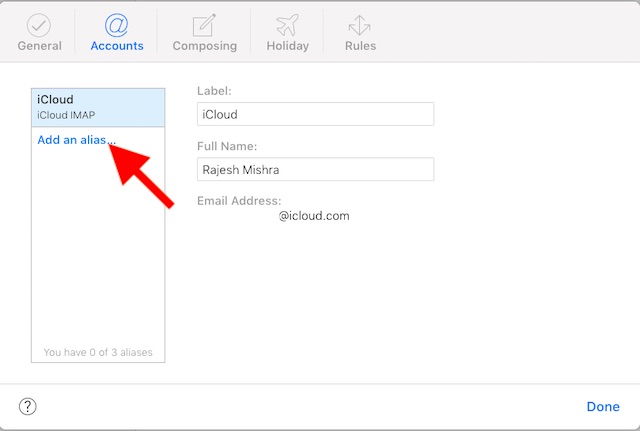
Do note that you also have an option to label the address to specify how you wish to use it. Then, click on OK.

Now, you will get a confirmation that a new email alias has been created. After that, click on Close and hit Done.

Note: If you ever wish to delete your iCloud alias, return to this same setting -> select the email alias in the Accounts tab. In the end, hit Delete and confirm.
Manage iCloud Aliases on iOS
Once you have created a mail alias, you can manage it right from your iOS device.
1. On your iPhone or iPad, launch the Settings app -> Apple ID banner.

2. Now, tap on iCloud. Then, scroll down and tap on Mail.

3. Next, you should see your email alias/es. If you want to customize everything in line with your needs, tap on Advanced and then personalize mailbox behaviors, deleted messages, S/MIME, and other features.

Manage iCloud Email Aliases on macOS
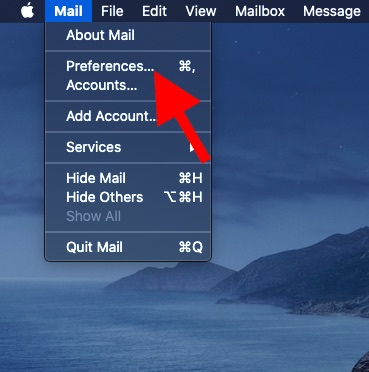
- On your Mac, open the Mail app. After that, click on the Mail menu at the top left corner of the screen and choose Preferences.
2. Make sure the Accounts tab is selected. After that, click on your iCloud account in the sidebar.
3. Next, click on the Email address dropdown and choose Edit Email Addresses option. Now, you will be taken to iCloud.com where you can manage your email aliases as desired.

Moreover, you can also check out the account information and customize the mailbox behaviors as per your needs. For instance, you can choose to download all attachments, recent or none. Besides, there is also an option to disable the option to send large attachments with the Mail Drop.

Set Up iCloud Email Aliases to Protect Your True Email Address
So, that’s the way you can use iCloud email aliases on your iDevice to shield your email address. Aside from offering the much-needed defense to your personal information, they can also let you manage messages with ease – for various purposes. Have you found this tip helpful? Sound off your two cents in the comments below.