
iCloud is a great tool for iPhone and iPad users to back their most important data without the fear of losing anything. However, if you’re part of the users who have the free 5GB iCloud plan, you already know how quickly that finite storage can run out. In order to manage that limited space, we need to cut corners from time to time. Part of the data iCloud stores is app data to make sure you have a steady backup. However, that also takes up undue space on your plan. So if you’re part of the iCloud users who are looking to free some space, let us help you out by showing you how to selectively backup data to iCloud.
Selectively Backup iCloud Data
While you can choose to only back up specific app data to your iCloud and be done with it, this guide goes into more detail to give you some tips and tricks for more space. Feel free to see them at a glance using the table below.
What Data Does iCloud Store
Before you learn how to clear up iCloud selective app data, here’s a quick information guide to let you know what exactly the cloud service stores. iCloud backs up a plethora of data of your iPhone, iPad, and other connected devices. The scope of backed-up data ranges from something as simple as your app data to device settings and even your visual voicemail password. The full list of what an iCloud backup includes is given below:
- App data
- Apple Watch backups
- Device settings
- Home screen and app organization
- iMessage, text (SMS), and MMS messages
- Photos and videos on your iPhone, iPad, and iPod touch2
- Purchase history from Apple services, such as your music, films, TV programs, apps, and books3
- Ringtones
- Visual Voicemail password (requires the SIM card that was in use during backup)
Depending on your settings, the list of iCloud data could be more or less.
How to Selectively Backup Apps to iCloud
Now that you know more about what data iCloud stores, here’s how you can choose what app data gets backed up to it for your iPhone and iPad. The steps remain the same for both the iPhone and the iPad so just follow them below and get to it:
1. Open the Settings app on your iPhone or iPad.

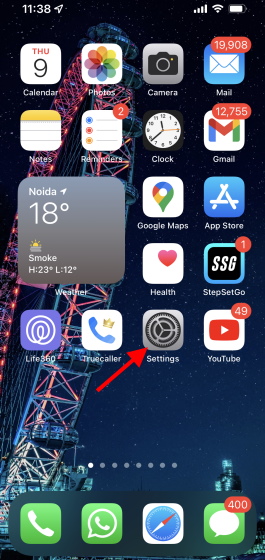
2. Tap your Name/Apple ID Banner.


3. Find and tap iCloud.


4. Here you can see your current iCloud storage allocation. Tap Manage Storage below it and you’ll be led to another menu.

5. Tap Backups from the list that appears.


6. Under the Backups menu, find and tap your iPhone or iPad.


Here you can see an entire list of apps that have their data backed up to your iPhone or iPad’s iCloud and are taking up valuable space. You can tap Show All Apps from the list to see the entire list.
7. Identify the app that is taking up the most iCloud data and tap the green slider that appears next to it.


8. You will be hit by a confirmation message. Tap the Turn off and Delete button to delete the specific app and free up some of your iCloud storage.


And that’s how easy it is. You can repeat the above steps to selectively turn off app data for any app on the iCloud. However, it is important to note that turning this app data off doesn’t mean that the app won’t return once you restore it from your iPad. However, its data won’t thereby saving your iCloud space.
Other Tips to Free up iCloud Storage
While app data is one of the ways your iCloud storage can be consumed unnecessarily, there are some other factors that go into the mix. If you want to manage your iCloud storage quota even further, follow these tips and tricks below to do so:
1. Completely Delete iPhone/iPad Backup
Your iCloud account also has device backups of your iPhone or iPad to ensure in case of device loss you can easily restore your data. However, if you are of the opinion that you don’t need regular backups, for now, you can easily clear them from your iCloud account and get some space back.
To delete your iCloud backup from an iPhone or iPad, all you have to do is head back to your iCloud backup settings and tap Delete Backup below the list of apps we adjusted up above. Deleting this iCloud backup will free up a wide amount of space on your account. However, do be aware that you will lose this backup forever and future backup will also be disabled.
2. Disable and Delete iCloud Photos
Apple iCloud is also responsible for storing your precious memories in the form of photos and videos. This is mostly done to optimize storage on your iPhone and iPad so that the heavy media files are safe in the cloud and your phone runs faster. However, that takes up a fair bit of space on the iCloud account. If you’re looking to clear up precious cloud storage, you can disable and delete the photos or either one to manage it.
Disable iCloud Photos
Disabling iCloud Photos will ensure your future photos are not automatically uploaded to your cloud account thereby saving space. However, that will mean your iPhone or iPad will slowly start to fill up with your media. If you just want to stop future iCloud photo uploads, follow these steps:
1. Open the Settings app on your iPhone or iPad.
2. Tap your Name/Apple ID Banner.
3. Find and tap iCloud.
4. Tap Photos from the list.

5. Simply toggle off the green slider next to iCloud Photos and you’re all done!


This will stop all future uploads to your cloud account from the iPhone or iPad. However, photos and videos that have been optimized for your device will also be removed. You will still be able to view the full version of your media on your iCloud account since they are already there. However, if you want you can download that media on the device itself if you want to delete the iCloud data entirely. For that just tap Download Photos and Videos.
Delete iCloud Photos
Deleting photos from your cloud account is the quickest way to get back the space your media has been taken up. However, remember that once you delete them you will have just 30 days to download your media before they are gone forever. With that in mind, let’s delete the iCloud photos.
1. Open the Settings app on your iPhone or iPad.
2. Tap your Name/Apple ID Banner.
3. Find and tap iCloud.
4. Tap Manage Storage.
5. Tap Photos and you’ll be led to another menu.

6. Tap Disable and Delete to get the confirmation message. Once you’ve read it, tap Continue Anyway and you’re done.


Deleting all these media will help clear up space for your iCloud account.
3. Clear your iCloud Drive
The iCloud drive is where all your other data is stored which includes your documents, PDF files, and other application files. You might have stored this data on your iCloud account at one time or another. Depending on how big the data is, it can span over GBS. If you like storing your Drive data but want to start fresh, you can delete the already uploaded files and folders easily. However do be aware that if you do, this will delete all your files and folders and cannot be undone.


To delete your Drive data, all you need to do is head over to Settings>Apple ID> iCloud>Manage Storage and choose iCloud Drive. From here you can tap Delete Documents and Data and confirm the action. This will do the trick and get you more space on your iCloud account.
4. Clear Other App Data from iCloud
Besides the app data that we cleared up above, iCloud also hosts some other app data you can find on the initial screen. This app data is dependent on what type of apps you have and may range from MB to GBs. Deleting this other app data will clear up more space on your iPhone and iPad easily. However, as always your app data will be lost and cannot be recovered. You can delete the other app data by going through to Manage Storage from your iCloud settings on the device and you’ll see the entire list.
5. Backup Your iPhone and iPad Using a Computer
If you’re an Apple device user who insists that there should be a careful backup of your data, you can have it without using iCloud at all. Apple allows iPhone and iPad users to backup their data to a Mac or a Windows PC easily. As part of the process, you will need to establish a physical connection with a cable.
While macOS 10.15 and onwards users can use Finder to back up their device data, Windows and older macOS users will require iTunes to keep their iPhone and iPad’s data safe. If you want a detailed process, you can visit Apple’s official website (visit) to safely backup your iPhone and iPad.
6. Be Mindful of Whatever You Upload
It is very easy to simply set everything to be backed up online and forget about it. However, that habit is also the quickest way to fill up your cloud storage quota. As a thumb rule, always try to make sure that whatever you upload to your iCloud account is actually useful and not just a waste of space. You can easily assess a file’s importance by weighing it against the finite 5GB of quota you have for a clear answer.
7. If All Else Fails, Upgrade
At the end of the day, if all the above methods worked but you still need more space, we recommend getting a paid cloud plan for more quota. No matter where you live, Apply offers a host of paid plans for its storage service with many added benefits. In fact, it is the perfect time to opt for the iCloud+ which hosts a plethora of new features including Mail Privacy Protection and Private Relay that you can use. Give it a try and you just might love it.
Selectively Backup iPhone and iPad Data to iCloud
We hope you now know how to back up selective app data to your iCloud and have also learned more things about how to keep it neater in general. If you’re a new iCloud user coming from Google, you can easily transfer Google Photos to iCloud without worries. Alternatively, if you’re actually looking to move away from the Apple service, here’s how to transfer iCloud Photos to Google Photos with ease. Have any questions? Leave them in the comments below!

