- Creating a Minecraft server is simple with Java and a proper setup.
- All you need is an updated JDK file and the server.jar file from Minecraft to get started with the server.
- If you want to invite your friends, you can simply port forward and get the server running.
With over 200 million active monthly players, Minecraft continues to be one of the most creative and community-driven games of all time. The game opens up limitless possibilities of unique multiplayer experiences. From an intense survival world to custom RPG-based adventures. But if you want to enjoy this experience with your friends or build a community inside as well, you are required to build a server. With the right steps, almost any PC can run a server once set up. So, check out this step-by-step guide as we explain how to make a Minecraft server easily.
What is a Minecraft Server?
A Minecraft server is a customised Minecraft world where other players can join to compete, play, and spend time with each other. These servers can be owned by individuals, businesses, or communities. If you plan on setting up an online server limited to a dozen-odd players, your PC has more than enough potential to handle it.
As for the server’s in-game world, it can have any type of personal customisations, ranging from texture packs to the best Minecraft skins. You can even use the best Minecraft seeds and the most amazing mods to craft an unforgettable experience for players. The online server also provides you, the host, with some admin abilities. You can control almost every in-game aspect, from weather to mob spawn frequencies. But before you get overwhelmed with power, let’s see the system requirements for hosting a server.
Requirements to Host a Minecraft Server
If you are already running Minecraft on your PC, the requirements might not seem too demanding. Based on the latest edition of the game, we recommend the following specifications for hosting a server with 4-6 players:
- Windows 10 or 11
- 2 GBs of RAM or more
- A reliable internet connection with a 5 MB/sec or faster internet speed
- Enough power supply to keep the PC running as long as the server is online
Please note that, usually, Minecraft only transfers around 100-150 MB of data on a non-modded server per hour. This makes setting up a server on Minecraft possible on all kinds of systems. But that’s only the case for vanilla Minecraft worlds with low server activity. Alternatively, you can also ask your friends to host a server if they have better specs. But if you want to do it all by yourself, read on to learn how to make a Minecraft server.
How to Make a Minecraft Server in Java Edition
Before you get started, make sure you are running the latest version of Minecraft Java Edition. Usually, the game launcher automatically keeps updating the game if you have a reliable internet connection. With that said, let’s get started:
1. Update your Java Version
For a server to run smoothly, it has to run on the latest version of Java. To update Java on your PC, follow these simple steps:
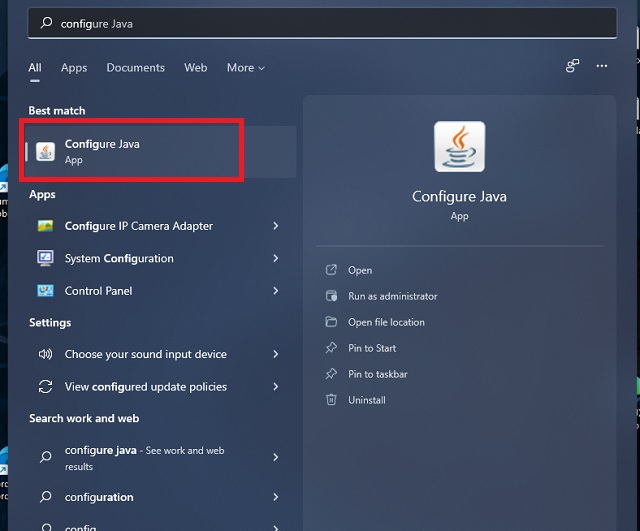
- Open the Start menu by pressing the Windows key and typing “Configure Java“. Once the search completes, click on the top search result and open the “Configure Java” app.
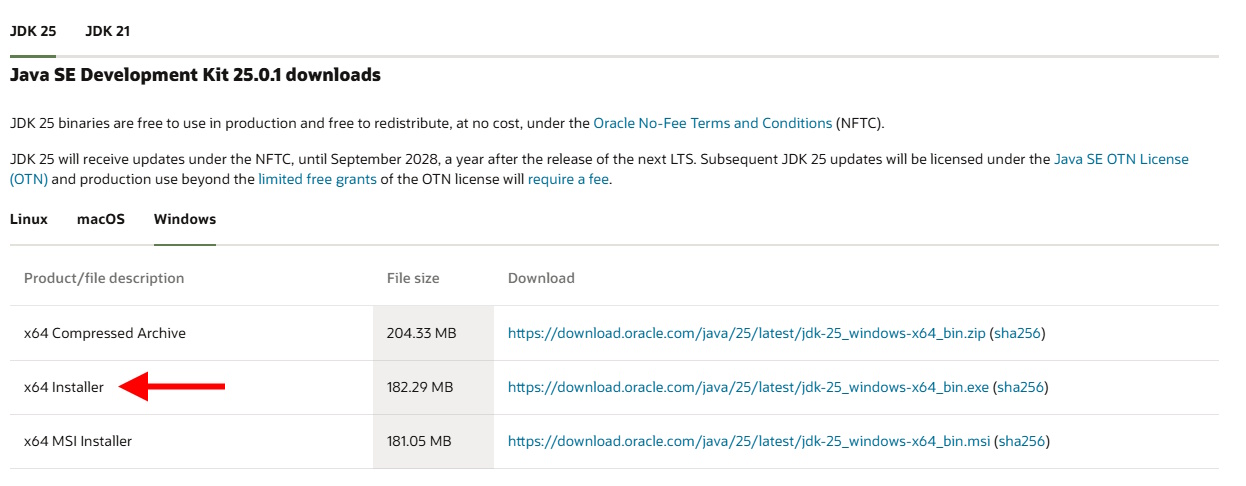
- If you don’t see the “Configure Java” in the search, which is unlikely, you can install the latest version from Oracle’s website using this link right here.

- Within the Java control panel, move to the second tab called “Update“. Then, click on the “Update Now” button at the bottom right corner.
- On the new pop-up window, click on the “Update” button.

- The app will then ask you to remove any existing versions of Java. If you are not sure what other software uses Java on your PC, you can leave it as it is.
- Now, click on “Update” and then the “Install” button. The app will automatically download and install the new version of Java.
2. Download Minecraft Server File
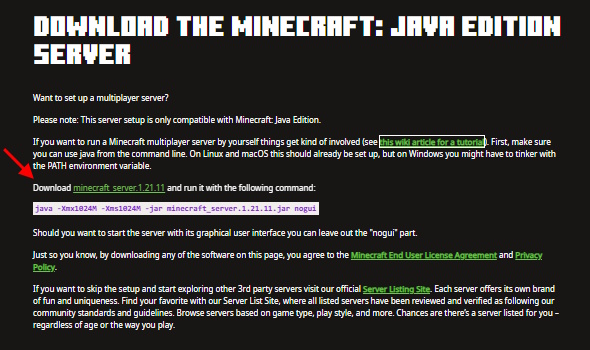
Fortunately, every single version of Minecraft, including the beta updates, has its own server file. So, it’s time to visit the official Minecraft server website and download the server file by clicking on “minecraft_server.X.X.X.jar” where “X.X.X” is the latest Minecraft version number.
The file name may vary depending on the version of the server. Your browser might warn you about the nature of the file. If it does, click on the “Keep” button when prompted to save your file. Once downloaded, store the file in a dedicated folder for easy server set up of Minecraft.

3. Agree to the EULA to Run the Server
Once you have downloaded the server file, here’s how to run a Minecraft server:
- To get started, double-click the server.jar file, and a bunch of new files will pop up if you have the latest Java version.
- Now, find and open the eula.txt file in your server folder. Here, you will notice “false” written next to EULA. Replace it with “true” and save the file.


4. Host Minecraft Server on Your Windows PC
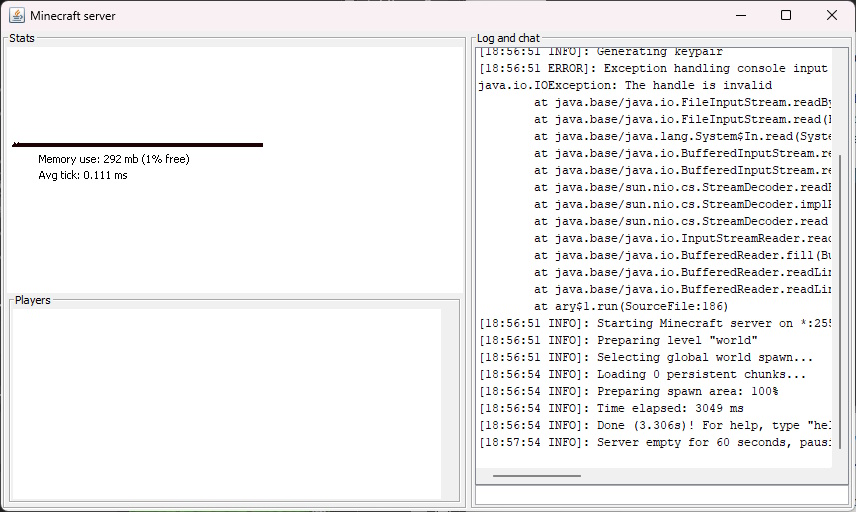
After saving the EULA file, you need to click on the server.jar file that you had downloaded from the Minecraft server page. It usually takes 2-4 minutes to complete, depending on your internet speed and system specs.

5. Join Your Minecraft Server
At this point, ideally, your Minecraft Java server is up and running. Now, to test your newly created Minecraft server, follow these steps:
- Open up your Minecraft game using the launcher. It will update the game if it’s not already on the latest version. As soon as the game opens, you will find a “Multiplayer” option on the home page. Click on it.


- Next, the game automatically starts searching for local servers running on your PC. Now, even after several minutes, if you don’t see your server on the list, click the “Add Server” button at the bottom right to connect it manually.
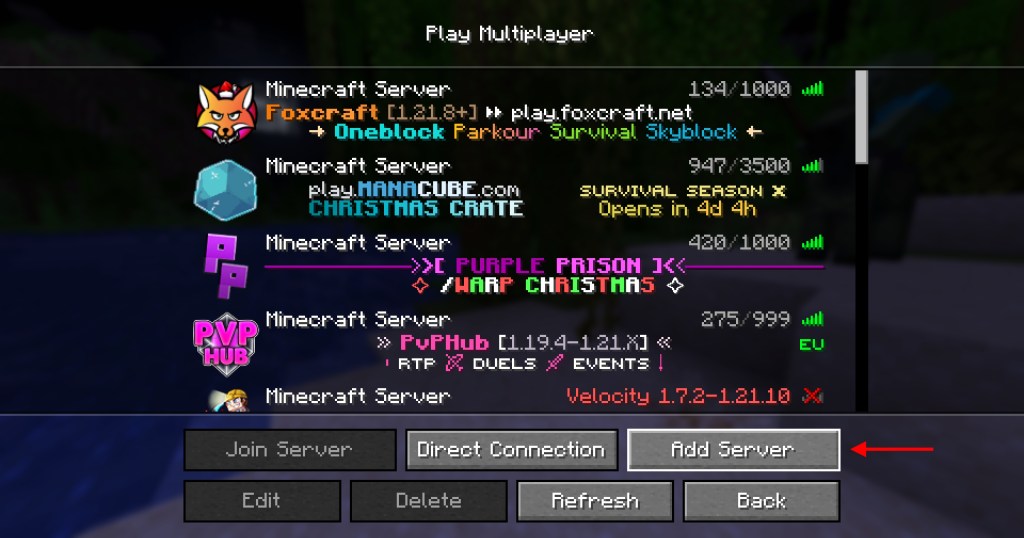
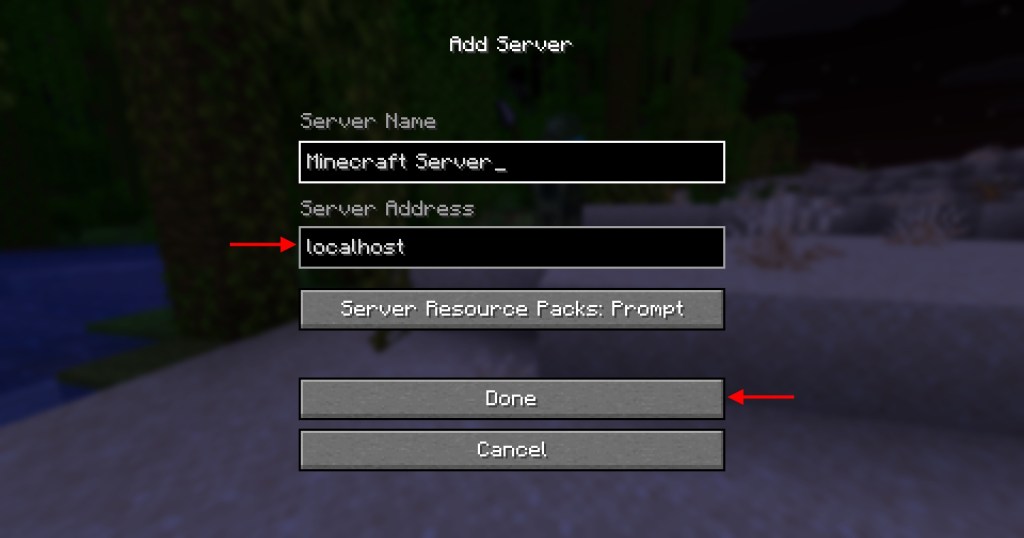
- Here, type in any server name you want, or let it be as it is. Then, in the server address, type “localhost” or “0” without the quotation marks and click on “Done” to save the server details.
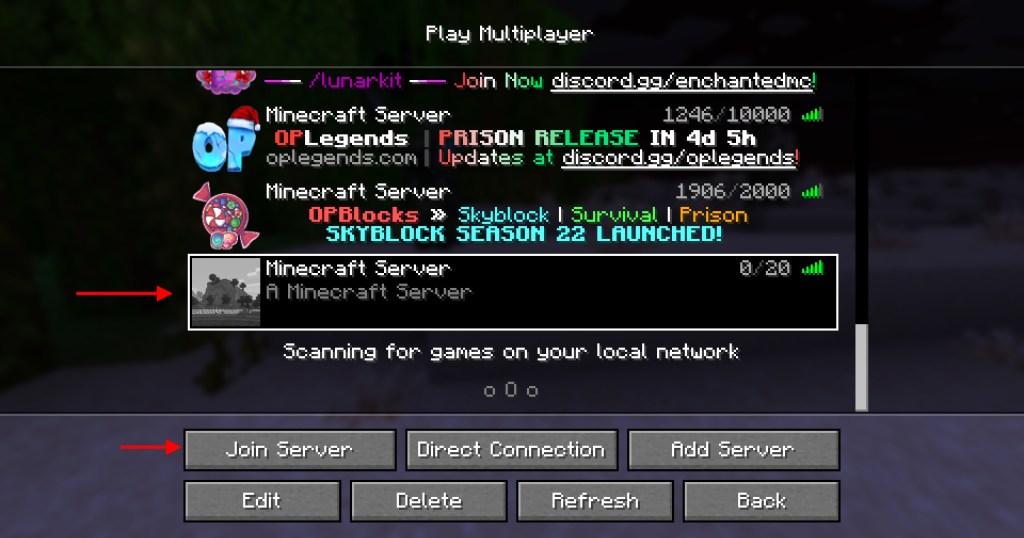
- Now, the Minecraft server you’ve created will appear in the list of available servers. You can create multiple servers and add them in the same way.
- Click on your server’s name and click on the “Join Server” button to launch it. You have now successfully learned how to make a Minecraft server on Java and Bedrock.
6. Make Yourself a Server Operator
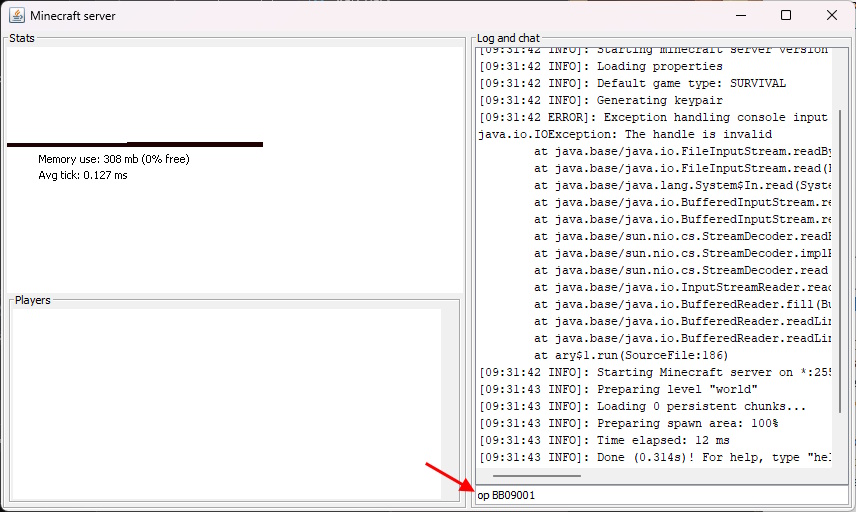
Before you start playing on your new server, let’s give you full control over the game. To do that, simply go back to the server’s command prompt window and type “op username“. where the username is your Minecraft username.
Then, press Enter to execute the command. Once it finishes processing, you will become the server operator. The position gives you control over all the Minecraft commands you can use to change the game mode, in-game settings, and a lot more.
How to Invite Friends to Join Your Minecraft Java Server
If your friends are playing on the same local network as you, they can join the game in the same manner as you did. They simply need to go to the multiplayer section and join the localhost server. Being on the same local network means using the same WiFi or LAN network to connect to the Internet. This method also gives you the lowest latency online Minecraft experience.
However, things get a little complicated when we try bringing distant online friends to the Minecraft server. But worry not, we have broken down this complicated part into easy-to-follow steps. Let’s get started.
1. Get your System Port Settings Ready
Starting with the basics, a System Port is the route other players take to reach your online server from Minecraft. The default port ID is “25565”, but you can change it within your server properties. So, you need to add this port ID to your router to allow players to join your Minecraft server.


But even though it sounds easy, every router manufacturer has a unique method with a different option name to open up the system port. We won’t be able to cover all of them here. Fortunately, you can use setuprouter.com to find your way around the QoP or Port Forwarding settings. They have covered almost every major WiFi router in the market.
2. Enter Basic Server Details
On your router’s port settings page, all you need to do is click on “add service“, “create new”, or a similarly named button. Then, you have to enter the details for different network-related information.

The format and the positioning might change, but the field names should be more or less the same. You may leave the optional ones as they are if you’re not sure. For the rest of the fields, use the following information.
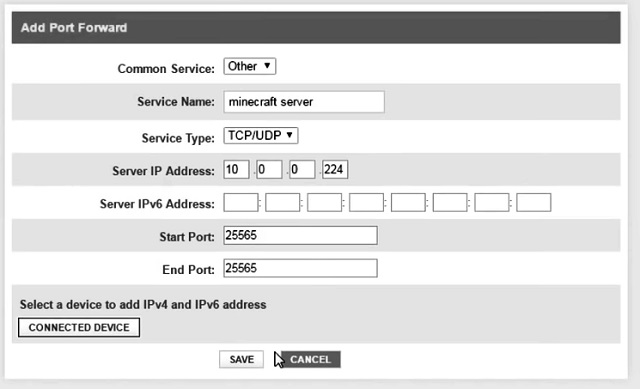
- Server/Service/Port Name: Minecraft Server
- Start Port: 25565
- End Port: 25565
- Service Type: TCP/UDP
The start and end ports might also have maximum or minimum ranges. You can enter the same value: 25565 in all those fields.
3. Enter your Server IP Address & IPv6 Addresses
Your server IP address is the same as the IPv4 address of your PC. Note that this step is crucial for anyone learning how to make a Minecraft server for Java and Bedrock. So, to find that and the IPv6 address, follow these steps.
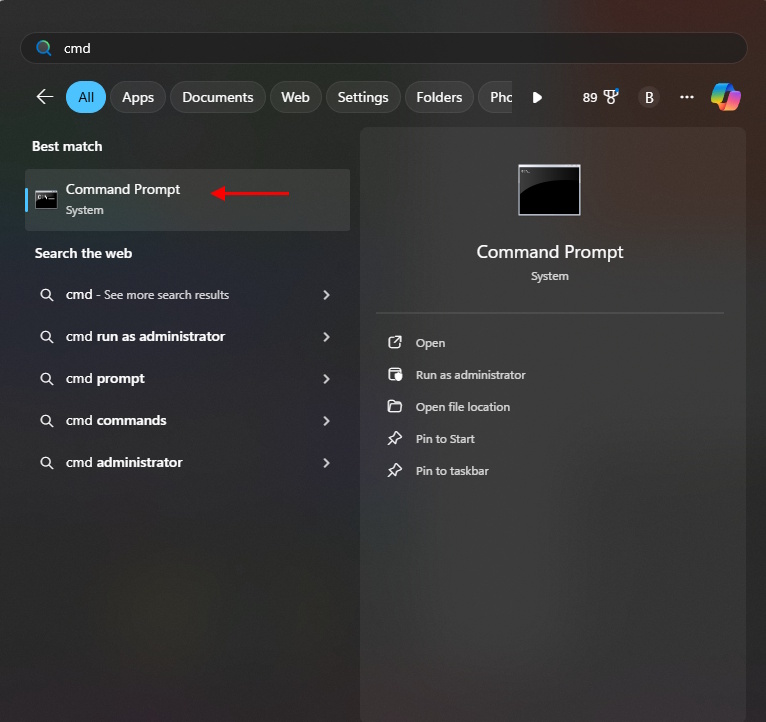
- Open Command Prompt by searching for “cmd” in the Start menu and clicking to open it.

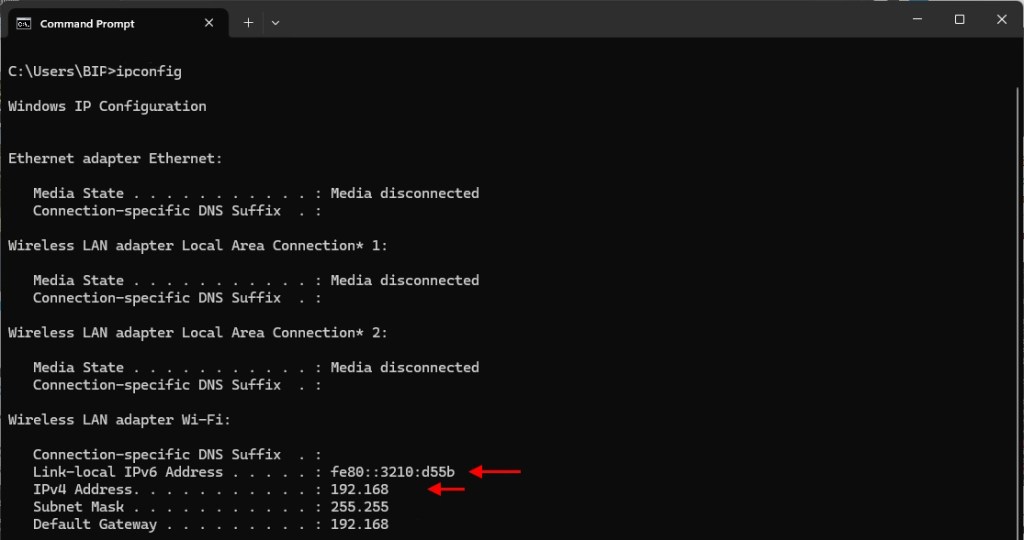
- Then, type “ipconfig /all” in the Command Prompt and press Enter.
- The command will list your IPv4 address and IPv6 address on the screen.
- Enter the same in the Server IP Address segment of the Port Forwarding settings.
- What we just did will create a new public IP address for your system, and your friends can use it to join your server without exposing any confidential details.

4. Find and Share Your Public IP Address
You can relax now. The hard part of the tutorial is over. Now, you need to load Google and search for “what is my IP“. The search results will display your public IP address, and it is the IP address you need to share with your friends to enable them to join your server.


Now, you need to copy (select and Ctrl+C) the public IP address and send it to your friends. They need to write it in the place of localhost when adding a new multiplayer server, as we did earlier in this tutorial. With that, you and your friends can finally play Minecraft together on your own server.
What are the Errors While Making a Minecraft Server
Understanding how to make a Minecraft server is a monumental task in itself. It gets even more complex if there are some random errors in the process. Fortunately, I also experienced the majority of those errors and have found some quick solutions for all of them. Hopefully, your server-making journey will be smoother than mine.
1. JNI Errors
The first error that you may encounter is when opening the server.jar file that we downloaded from the official website. Another version of this error can meet you when the command prompt fails to start the server. Luckily, the solution to most JNI errors is updating Java. If the automatic update isn’t working for you, you can manually update Java by downloading it from this link.

2. EULA Error
Technically, the EULA error is not an error, but this step is mandatory for every server set up in Minecraft. But still, you’re bound to face it while opening the server.jar file for the first time. The fix is quite straightforward. You need to open the eula.txt file in your Server folder and accept the EULA agreement by replacing “false” with “true” just like we did earlier.

3. Stuck at Scanning for Games in Minecraft
Due to either your Internet or some other reasons, you can get stuck at finding Minecraft Servers while in the multiplayer window. The scanning goes on for a long time with no results.

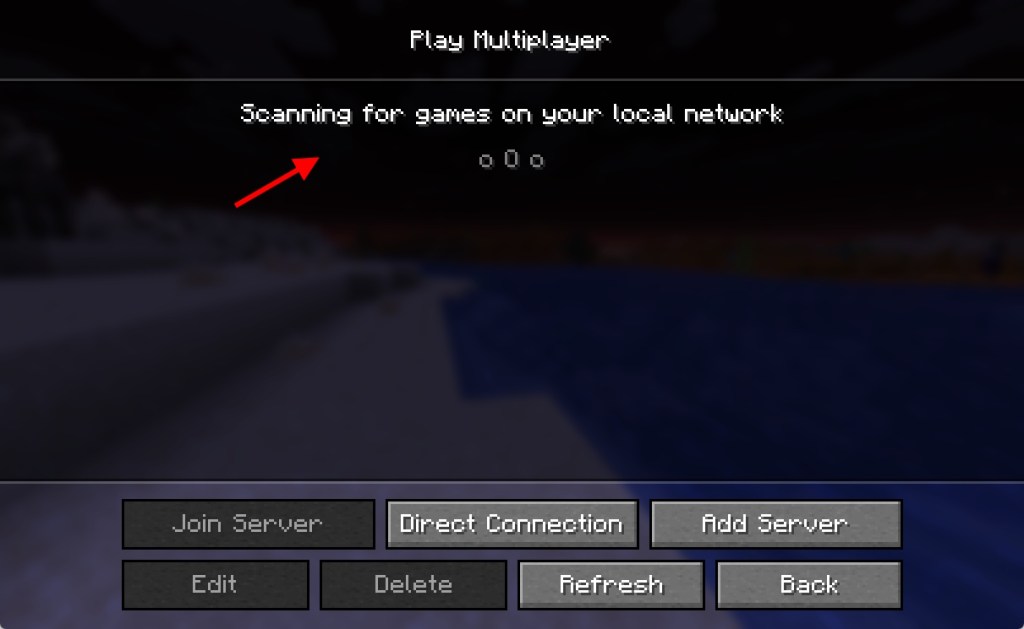
For most people, waiting it out works fine. But if you are sick of waiting, you can use the “add server” button to manually load the server using its server address. Restarting the game is another quick fix for this situation.
4. Failed to Login: Invalid Session

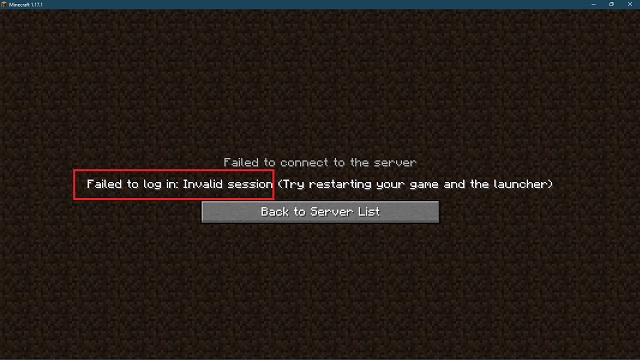
It is a common Minecraft error that can appear for you and even your friends. It indicates that Minecraft is unable to recognise your username and register it in the server you are trying to enter. The devs suggest restarting the game to fix the error. That can work for a few people, but a better fix is logging out of Minecraft. When you log back into the game, it is sure to register the username while your server is running. Therefore, the invalid session will turn valid.
5. Firewall or Connectivity Errors
Finally, the king of all Minecraft server errors is the basic connection error. All of them stem from firewall and antivirus settings, as the firewall automatically blocks people from joining the Minecraft server sometimes. To avoid such an error, you need to make an exception for your Minecraft server in your firewall. Here’s how:
- First, open your “Windows Defender Firewall” by searching for it in the Start menu. Click to open it.

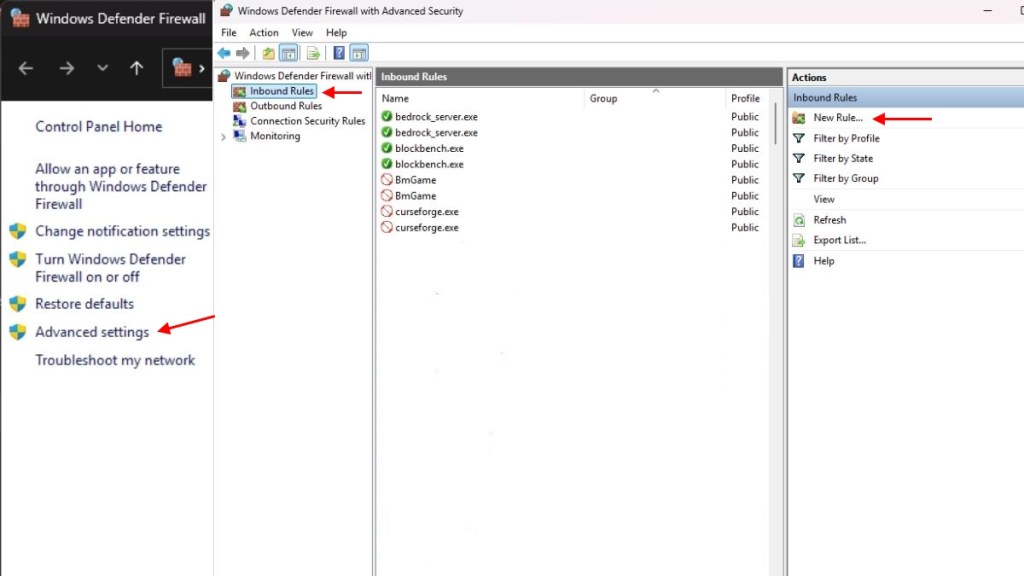
- Then, click on the Inbound Rules section in the left panel and select the “New rule” option on the right. Please note that you will have to repeat the same steps with Outbound Rules as well to complete the process from this point onwards.
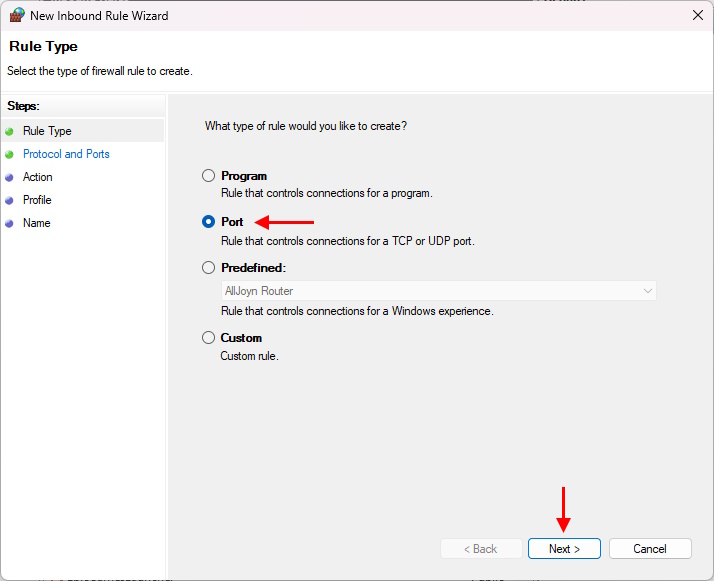
- On the new rule window, select the Port option and click “Next“.

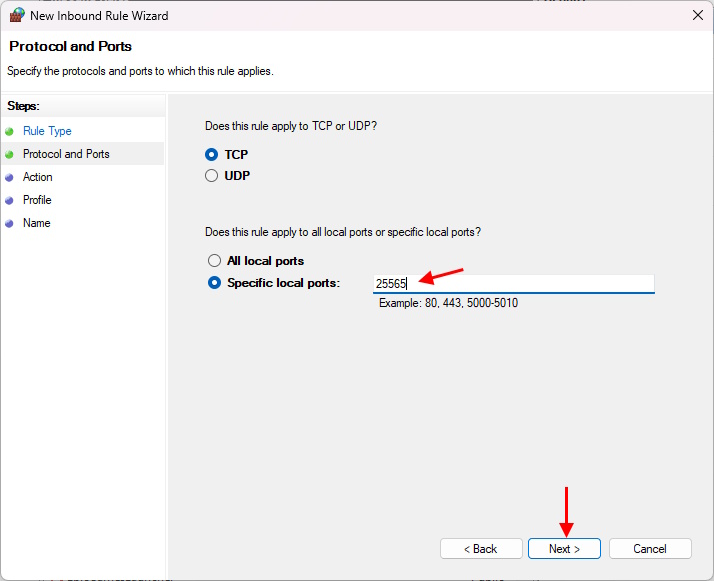
- Now, you can select either TCP or UDP because you will have to repeat this rule creation process with the other option too. Then, in the specific port column, enter your server port ID, which by default will be 25565. Continue the process by clicking next.
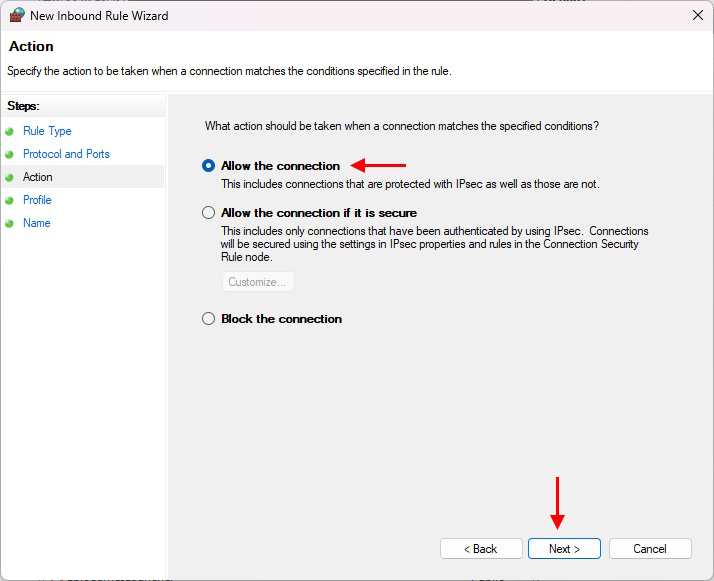
- Then, the app will ask the conditions under which it should allow a connection. Here, you need to select the option that says “Allow the Connection” and continue.
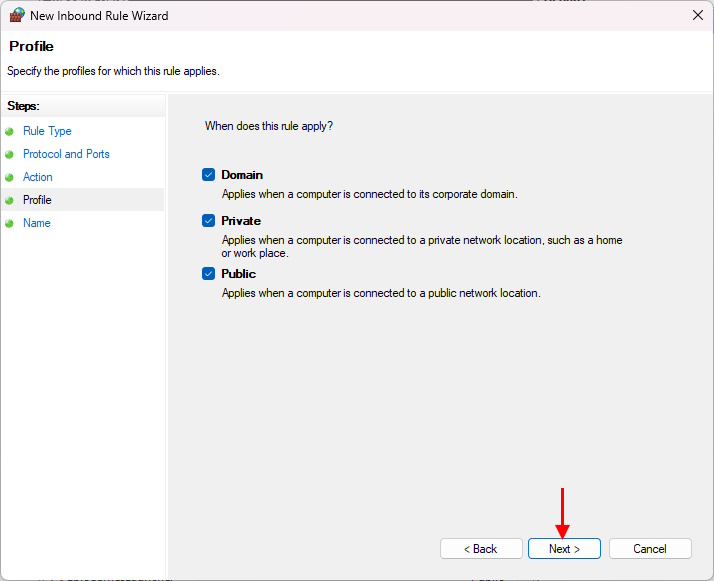
- Finally, you have to choose when the connections are allowed. So, simply select all the given options and click “Next”. You can then give the firewall rule a name and save it.
Saving the rule creates an exception for people connecting to your Minecraft server port through your firewall.
With that, your long and tiring journey of creating a Minecraft server has come to a close. Did you face any errors while making your own Minecraft server? If yes, then reach out to us in the comments below.
Yes, it is completely free to make your own Minecraft server, but you can always pay the hosting services to do so on your behalf.
Yes, even small servers with at least 6 players can run smoothly on a PC with 2-4 GB RAM.
Yes, if your PC stays powered on for that long, the Minecraft server will be online. But you can use a paid hosting service to do so if you don’t want to keep your PC turned on for that amount of time.