
After Windows Subsystem for Android (WSA) and the new Paint app, Microsoft has released another update replacing Groove Music with a brand new Media Player in Windows 11. It looks beautiful, has a UI consistent with the rest of the Windows 11 aesthetics, and brings a ton of features that were largely missing earlier. That said, the new Media Player is currently rolling out only to users in the Dev channel. But if you want to try out the new Media Player, we have found a nifty way to get it running on stable and beta builds of Windows 11. So without any delay, let’s go ahead and learn how to install the new Media Player on Windows 11 stable and beta builds.
Install the New Media Player on Windows 11 Stable Build (2021)
In this article, we have discussed the steps to install the new Media Player on Windows 11. Even if you are a beginner, you can get it running in no time, granted you know a bit of how Windows works.
Download the Required Windows 11 Media Player Files
1. First, open this website to download the MSIXBUNDLE of the new Media Player in Windows 11. After opening the website, set the drop-down menu to the left of the textbox to “PackageFamilyName“. After that, paste the below content into the text field. Next, choose “Fast” from the drop-down menu to the right of the textbox, and hit the “OK” (checkmark) button.
Microsoft.ZuneMusic_8wekyb3d8bbwe

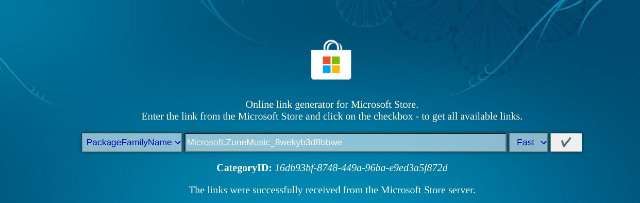
2. Now, you will find a long list of results. You only need to download the MSIXBUNDLE file. Search for the file name written below and download it. On Chrome, you need to right-click on the link and choose “Save link as…”. The file size is roughly around 34MB.
Microsoft.ZuneMusic_11.2110.34.0_neutral_~_8wekyb3d8bbwe.msixbundle


Modify the Windows 11 Media Player File
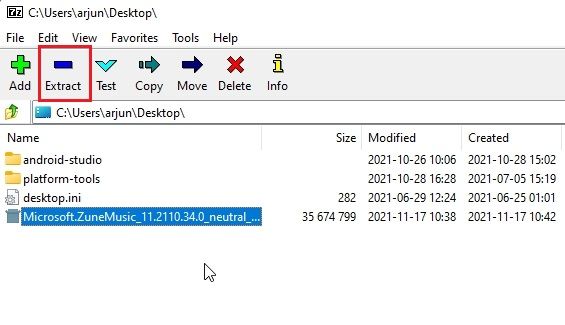
1. Once you have downloaded the MSIX package of the Windows 11 Media Player, go ahead and download 7-Zip (Free). It will enable you to access and extract the MSIXBUNDLE file.
2. After installation, open 7-Zip and locate the MSIXBUNDLE you downloaded in the section above. Select the file and click on “Extract” at the top. The files will be instantly extracted in the same folder/ drive. Click “OK” on the pop-up window that appears.

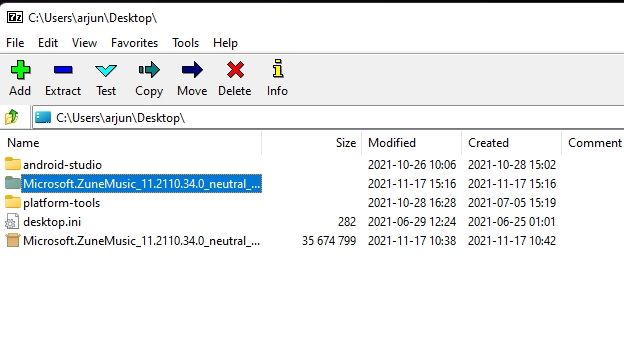
3. Next, open the extracted folder.

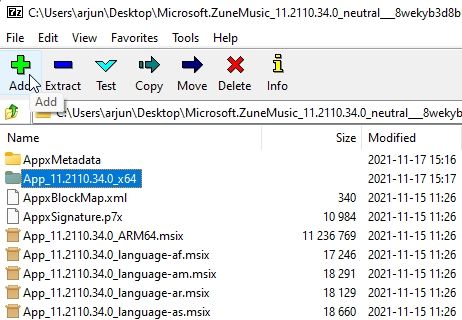
4. After that, scroll to the bottom and look for the x64 MSIX package, as highlighted in the screenshot below. Select it and click “Extract” on the top once again. These files will be extracted in the same folder.


5. Scroll to the top and open the extracted x64 folder.

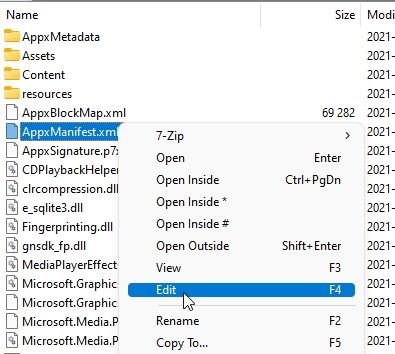
6. Here, right-click on the “AppxManifest.xml” file and choose “Edit”.

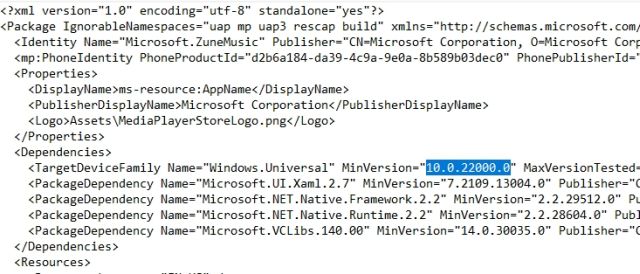
7. Open the file in Notepad and move to the 11th line. Here, under MinVersion, change the OS build to 10.0.22000.0. That’s it. Now, save the Notepad file and close it.

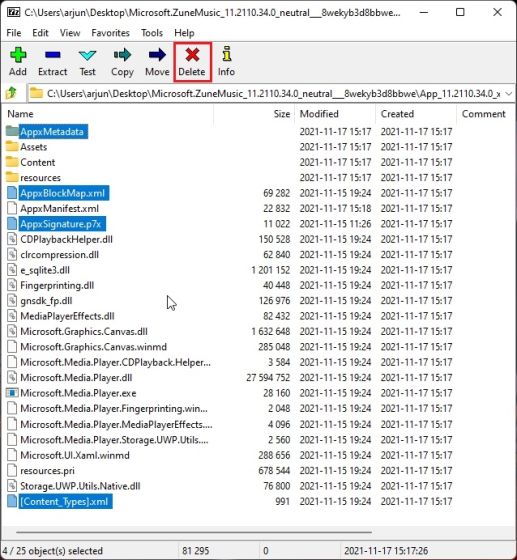
8. In the same x64 folder, delete the following files and folder (create a backup before deleting if you want). You can click “Delete” on top. Now, you can close 7-Zip.
AppxBlockMap.xml
AppxSignature.p7x
[Content_Types].xml
AppxMetadata folder

Install the New Media Player on Windows 11 Stable Build
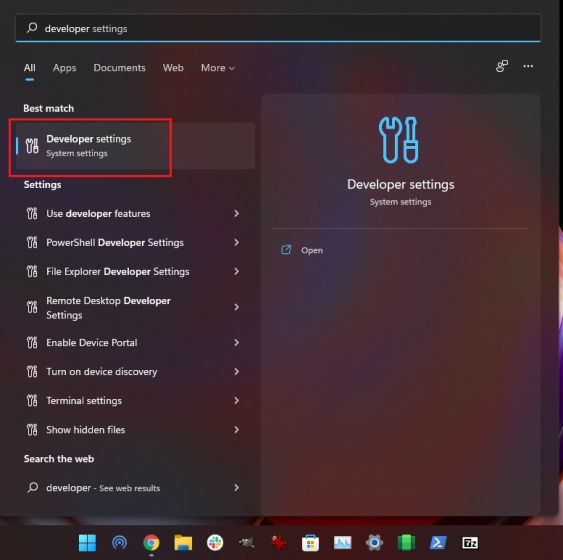
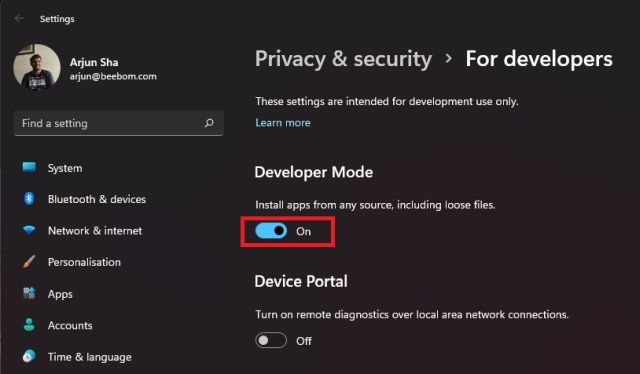
1. Now that you have modified the MSIXBUNDLE, let’s install the new Media Player on Windows 11 stable build. First, press the Windows key once and search for “developer” without quotes. Then, select “Developer settings” from the search results.

2. Here, turn on Developer Mode using the “Install apps from any source, including loose files” toggle. On the next prompt, choose “Yes”.

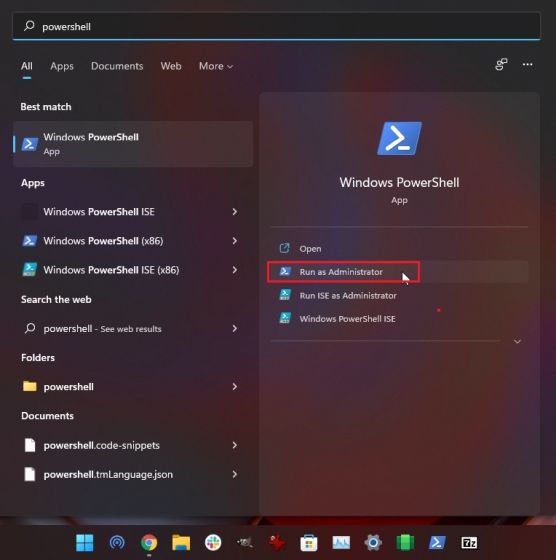
3. After that, press the Windows key again and search for PowerShell. On the search results screen, click “Run as administrator” on the right pane.

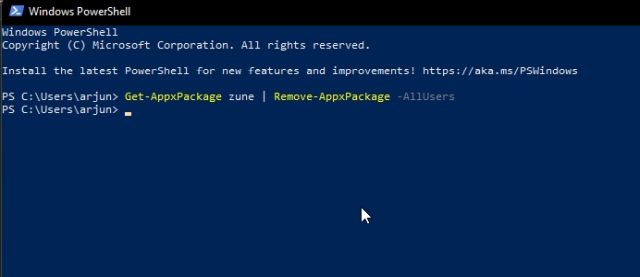
4. In the PowerShell window, paste the below command to remove the existing Groove Music package.
Get-AppxPackage *zune* | Remove-AppxPackage -AllUsers

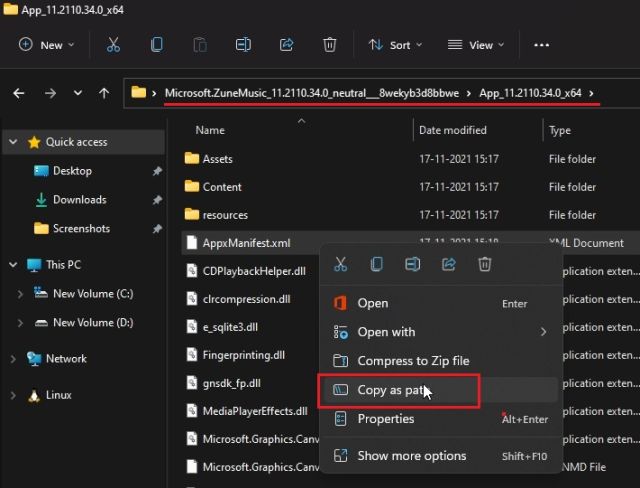
5. After that, navigate to the extracted MSIXBUNDLE folder and open the x64 folder. Here, look for the “AppxManifest.xml” file that we modified in the section above. Right-click on it and choose “Copy as Path“.

6. Move back to the PowerShell window and enter the below command. Make sure to replace filepath with the path you copied in the step above. Right-click on the PowerShell window and the path will be included at the end. Finally, hit Enter.
Add-AppxPackage -Register filepath


7. Now, open the Start Menu, and you will find the new Windows 11 Media Player installed on your PC. Click to open it, and you can use it without any issue. You can also search for “Media Player” in the Start Menu, and it will show up. Here are a few screenshots to showcase the UI of the new Media Player:


Don’t Wait! Install the New Media Player on Windows 11 Right Now
So that is how you can install the new Media Player on Windows 11 without having to wait for the release on the stable build. The steps may seem lengthy, but once you understand the basics, it gets pretty easy. Not to mention, this method may also come in handy for sideloading other Windows apps on Windows 10 and 11. Anyway, that is all from us. If you want to learn how to install Google Play Store on Windows 11, go through our linked guide. And yeah, you can also install the new Microsoft Store on Windows 10 with ease. Finally, if you have any questions, let us know in the comments section below.

