
There may be times when you are working in the Linux terminal and suddenly see the “can’t set the locale” error and see some mysterious characters like “��”. This error occurs due to misconfigured or missing UTF-8 encoding support in Linux. UTF-8 locale support becomes necessary when you are using a language other than English or using emojis. So in this article, we will first explain what is UTF-8, and then show how to enable UTF-8 support in Linux in case it’s missing.
What Does UTF-8 Mean?
UTF-8 stands for “UCS Transformation Format 8,” and it is the most common form of character encoding for Unicode. Here, each unique character is mapped to one-byte units. And since one byte consists of 8 bits, thus, UTF includes “-8” in its name. These bytes are finally interpreted by the language processor into binary for the processor to understand our human language.
The environment variable locale provides support for UTF-8 in Linux and can be modified in easy steps via the terminal. It enables your Linux system to show characters correctly from different languages in a text file or website.
How to Enable UTF-8 Locale in Linux
Installing locale Package
The locale package is usually installed during the installation of your Linux distro, but sometimes, it can get corrupted and show some errors to use. If you are facing issues, we first suggest pasting the below command in the Linux Terminal to check if the locale package is installed on your computer:
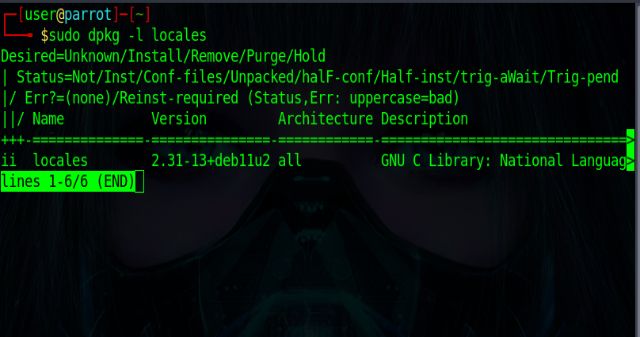
sudo dpkg -l locales
If the local package is installed on your system, you will get a similar output as below:

If you get any errors or missing values in the output, then you need to install the locales package using the command below. Then, you can manually enable support for UTF-8 in Linux.
sudo apt-get install locales
Setting the Correct Locale (UTF-8)
1. Once you have installed the package, you need to regenerate the locales to enable UTF-8 support via the below command in the Linux terminal:
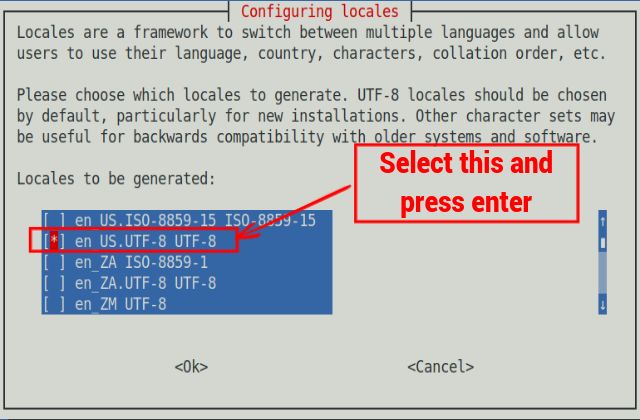
sudo dpkg-reconfigure locales
2. The above command is used to regenerate the locales for all the languages available. Move down the list using the arrow keys and select your preferred UTF – 8 locales to enable. We have selected “en_US.UTF-8” (English UTF-8) in this tutorial.

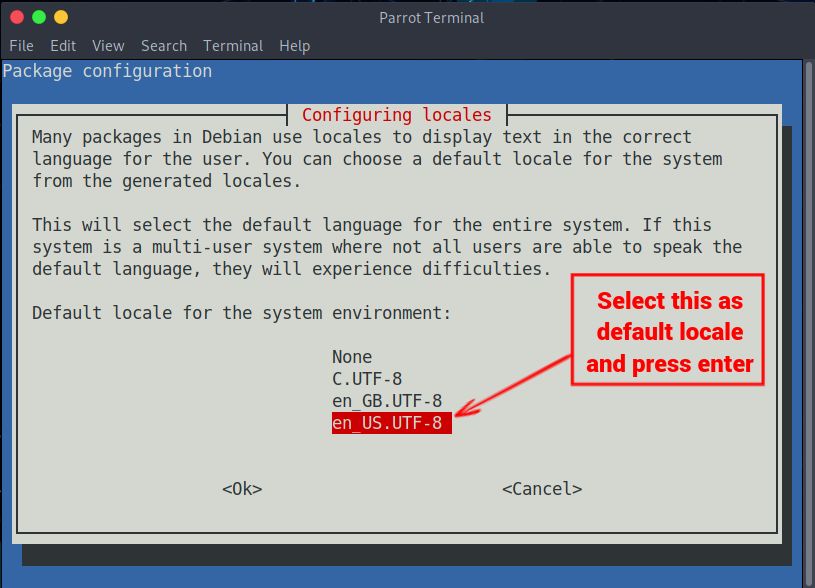
3. Next, set the default locale as “en_US.UTF-8” and hit Enter. This will regenerate the selected UTF-8 locale in your Linux Terminal.

Make locale Changes Permanent
1. After the above command has finished regenerating the locale, open the .bashrc file using this command in the Terminal:
sudo vim .bashrc
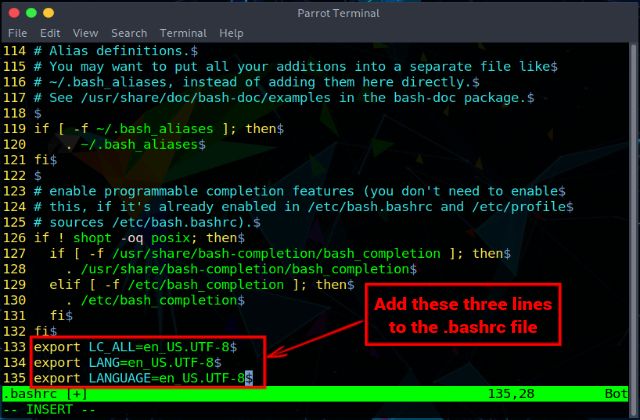
2. Once the file opens in the Vim editor in the Terminal, copy and paste the following lines at the end of the .bashrc file.
export LC_ALL=en_US.UTF-8
export LANG=<chosen_utf8_locale>
export LANGUAGE=<default_utf8_locale>
3. After adding these, you need to exit the vim editor. For that, you first need to press the “Esc” key and then type “:w” to save and exit the file.
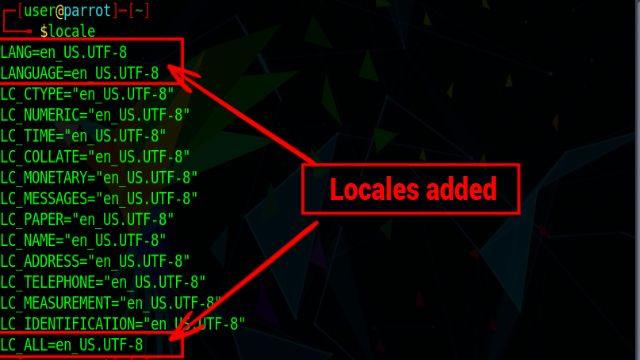
Verify the Changes Made
After going through so many steps, you must be skeptical about whether UTF – 8 support for the Linux terminal has been enabled or not. To verify the changes, run the locale command in the Terminal. You will now see the changes you made to the .bashrc configuration file. Finally, reboot the system to have the UTF-8 locale support come into effect.

[SOLVED] Missing UTF-8 Support in Linux Terminal
With UTF – 8 support disabled in the Linux Terminal, it can lead to a pretty frustrating experience for most users as the text comes out as gibberish and is unreadable. However, with the steps we have shown above, we hope you were able to enable support for the UTF-8 locale on your Linux computer. If you face any issues in fixing this problem, let us know in the comments below. Also, while you are here, check out the essential Linux Terminal commands that everyone should know.


