
The new Procreate 5.2 update is finally here, and it has a lot to offer. One of the major features in this Procreate update is the 3D lighting and environment settings. It helps you define the environment that your 3D models are virtually placed in, but you can also choose to view 3D objects in AR using Procreate. The app includes a handful of default environments, and each of them interacts with the object differently. You can get effects not as good but similar to Unreal Engine. So let’s learn how to edit the 3D lighting and environment settings in Procreate.
3D Lighting and Environment in Procreate (2021)
While covering the feature, we will focus on all the built-in options available in the Procreate app. But before we proceed, make sure you know how to import a 3D model in Procreate. You can skip to specific features using the table below. With that out of the way, let’s dive in.
How Lighting and Environment Settings Works in Procreate?
3D lighting and environment are visualization techniques you can use to create a realistic rendition of 3D objects. The function of these settings is to create a virtual light-based environment that can not only recreate sunlight but other artificial lighting conditions as well. They interact with 3D objects and their textures by reflecting and absorbing light.
Usually, these environments in Procreate function with a combination of light sources to create a natural-looking interaction with your 3D object. Filmmakers and artists use these techniques to add realistic visual global lighting properties to 3D objects and to set an overall mood of the world around them.
How to Open 3D Lighting and Environment Settings in Procreate
To begin, grab your Apple Pencil or its alternative and open up the Procreate app on your iPad. Then, follow the steps below:
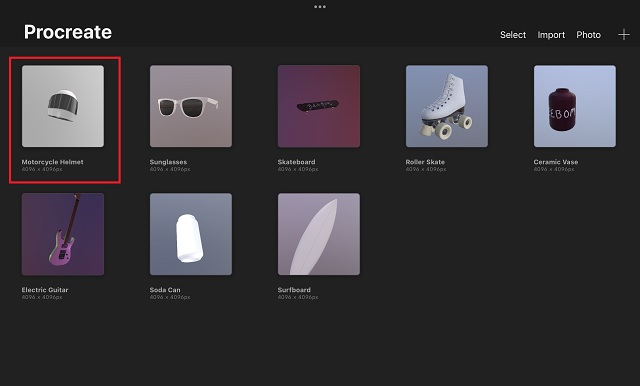
1. First, from the Procreate homescreen, choose the 3D model you want to work upon. For this tutorial, we will be using a 3D helmet, which is a part of Procreate’s sample models.

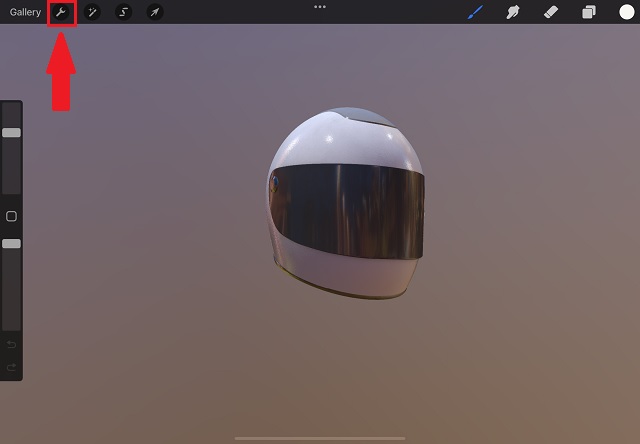
2. Once the 3D model loads up, tap the Actions icon. It is the round button with a wrench symbol next to the “Gallery” option at the top left corner of the screen.

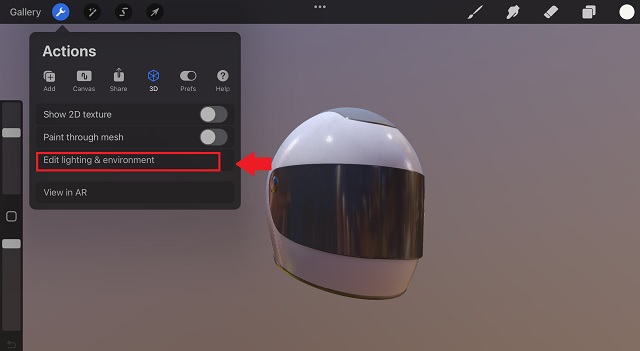
3. From the Actions menu, tap the 3D option. It is marked by a hollow cube icon and located to the right of the Share button. Under the 3D settings, tap on the second last option that reads “Edit lighting & environment“.

How to Use 3D Lighting in Procreate on iPad
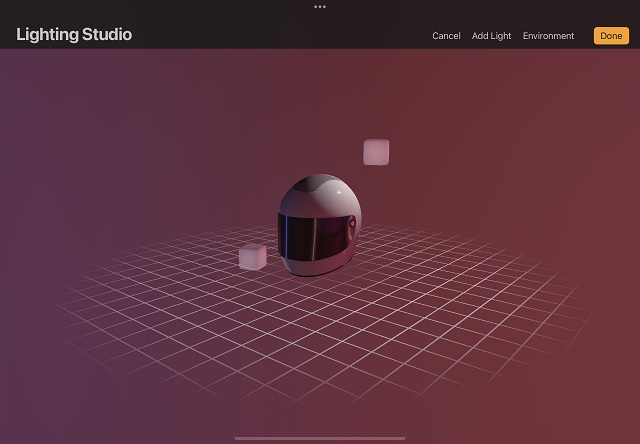
Tapping the “Edit Lighting & environment” button takes you to the Lighting Studio in Procreate. It is where the magic happens if you are looking to represent your 3D model in life-like lighting conditions.
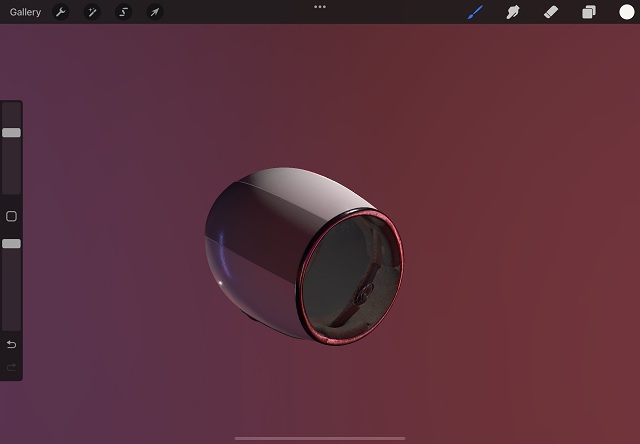
Feel free to use your fingers by pressing, holding, and moving the 3D model in the empty area to change the perspective until you find an angle that suits your needs. You can even look at objects from the bottom, and if it’s hollow, even from the inside. Pinching with two fingers on the object helps you to zoom in and out. But now, let’s go over all the light-based options, starting by adding light sources.
Add and Place Lights in Procreate
As soon as you enter the lighting studio in Procreate, you will notice two light cubes present there by default. These are the light sources around your 3D object. Similar to real life, your object will absorb and reflect light coming from this source, depending upon the texture. Even if they aren’t already present there for some reason, it’s easy to add more light sources.
1. To begin, tap the “Add Light” button at the top-right corner to add more light cubes. It sits between the “Cancel” and “Environment” options. You can place a maximum of four light cubes at once in Procreate.
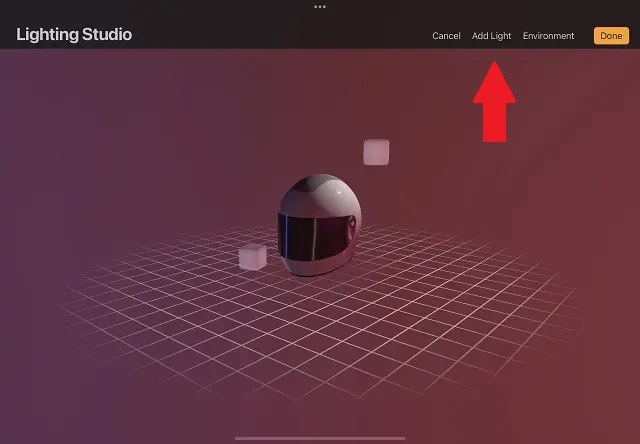
2. As soon as you tap the “Add Light” button, it will place a new light cube in the lighting studio. These cubes are movable by dragging and dropping them into place anywhere in this space. You need to place and hold your finger on a light cube to drag and move it. To make it easier, you can adjust the perspective by pressing, holding, and then dragging your finger in the empty area.

Edit Light Settings in Procreate Lighting Studio
Once you place the light cubes, it’s time to edit the settings to change how the object looks in 3D space. Fortunately, Procreate gives you just enough options to edit lights without making it too complex. You can tap on a light cube to edit its properties.
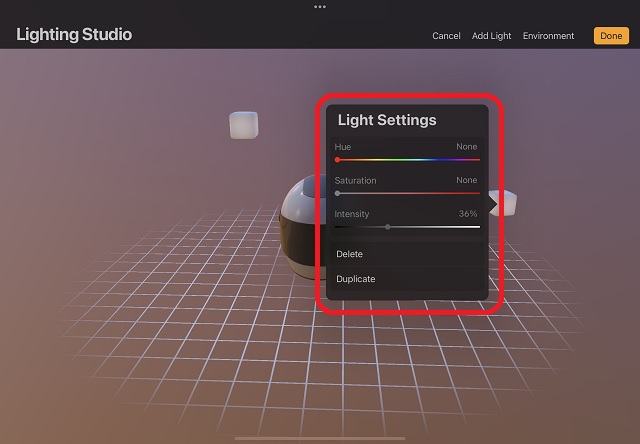
The Light Settings pop-up lets you edit the following properties in Procreate:
- Hue: It is the color that the light source is emitting. In a rainbow-like format, you can easily select the color of the light.
- Saturation: This option describes how colorful the light from that source should be. It works by changing the presence of white light mixed with your chosen hue or color. You can use it, in a way, to increase the brightness of a color.
- Intensity: The final option determines how bright or powerful the light source should be. Pulling the slider to zero will turn off the light, whereas moving the slider to the right will make the light source as powerful as it can get.
How to Edit the Environment in Procreate on iPad
Once our custom light sources are in place, it’s time to change the environment (or fundamental) lighting. At the moment, Procreate only offers a set of default environments that you can choose from. Here’s how it works.
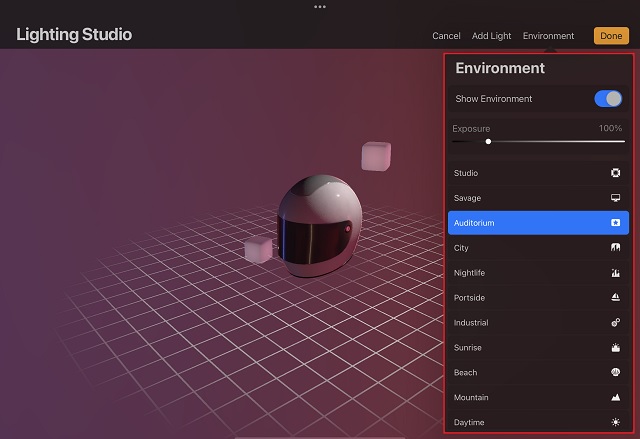
1. In the lighting studio, tap the “Environment” button at the top right corner of the screen. Here, you can show or hide the environment with a tap. Hiding the environment will remove all lights and reflection-based effects applied to your 3D model.

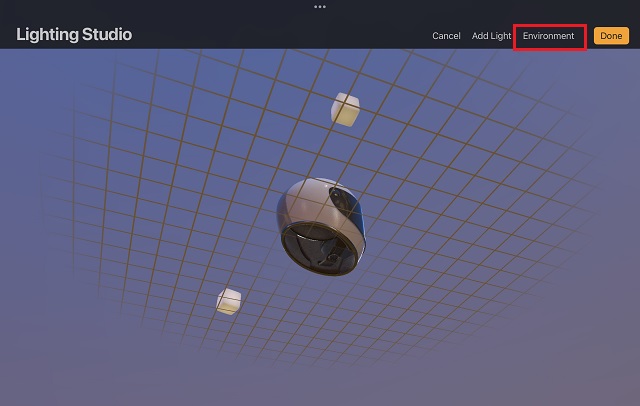
2. In the Environment drop-down menu, Procreate gives you plenty of options to choose from. As the names might suggest, the available environments are based around certain real-life locations. Tap on their names to select and apply them. When selected, the virtual environments will recreate the lighting conditions of these locations. You can even change the environment’s exposure settings as per your preferences. Doing so will change the intensity of the environmental lights.

3. Now, you can click the “Done” button at the top right corner to save the changes and exit these settings.
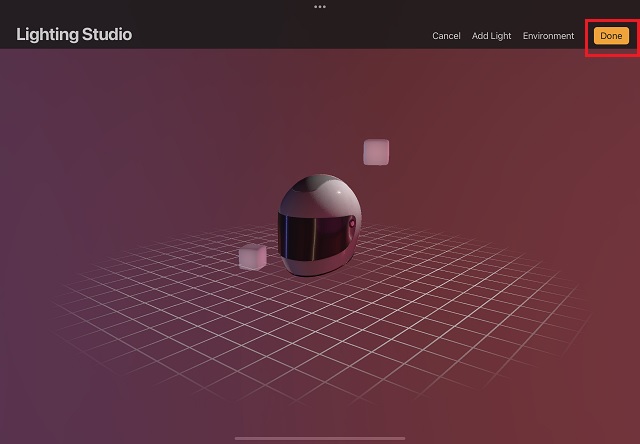
6. Pressing the “Done” button will take you back to the drawing board, but the lighting and environmental effects will still be visible.
Default Environments in Procreate 5.2
Here’s a list of all the default environments you can use in the Procreate 5.2 update to add lighting effects to your 3D models. All of them are designed to recreate life-like lighting environments.
- Studio
- Savage
- Auditorium
- City
- Nightlife
- Portside
- Industrial
- Sunrise
- Beach
- Mountain
- Daytime
We can expect Procreate to add more environments in the future, along with in-depth light editing features. Though, there have been no official announcements around the same as of November 2021.
Start using 3D Lighting and Environment in Procreate
With that, you are ready to professionally present your 3D objects with like-like lighting effects in the Procreate app. If you can’t find these options in your Procreate app, head to the App Store and update the app on your iPad. As the Procreate 5.2 update is now widely available, you can start using 3D lighting and environment settings in Procreate, as explained above. The functionality will remain the same on every iPad model, including the new M1 iPad Pro. We will make sure to update you with more important features in the Procreate 5.2 update as they roll out. Meanwhile, if you feel stuck while using Procreate, drop your queries in the comments below. Our team will help resolve it at the earliest. If you have the new Procreate 5.2 update, what is your favorite new feature? Let us know in the comments below.


