As it’s always the case, with a new Windows update come new bugs. Just recently, Microsoft released a cumulative update on August 30 named KB4512941 which has started causing major CPU spikes with abnormally high usage. Many Windows users are facing this issue particularly after installing the KB4512941 update. So, if you are one of those affected users and looking for a solution, you have come to the right place. Here, we have provided two simple ways to fix the high CPU usage that is occurring after the Windows 10 KB4512941 update. Both the methods are easy and straightforward so no worries there. Now without further ado, let’s go through the steps.
Fix High CPU Usage After KB4512941 Update
Before we fix the issue, let’s first understand what is causing the CPU to spike abnormally. With the KB4512941 update, Windows integrated Cortana with SearchUI.exe system-wide. As a result, Cortana keeps running in the background, eating too much system resources and causing the CPU spike. Now that we have run through the cause, let’s fix the problem. There are two easy ways to resolve the high CPU Usage on the latest Windows 10. Either, we can uninstall the KB4512941 update altogether or replace Cortana search with Bing Search. At first, we will go through the first method and then will move to the second method. Now having said that, here is how to do it.
Note: With either method, you won’t lose any data so there is nothing to worry.
-
Uninstall KB4512941 Update
1. Open Windows Settings or simply press Windows + I shortcut to open it. After that, open Update and Security.

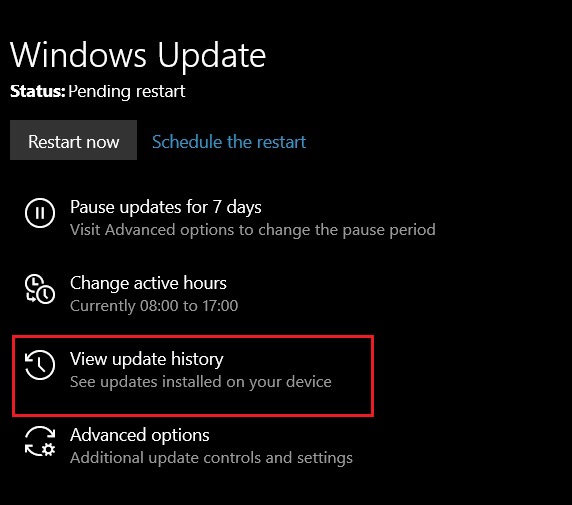
2. Here, click on “View Update History”.

3. Now, click on “Uninstall Updates” on the top.

4. Here, you will find the KB4512941 update. Right-click on it and select “Uninstall”.

5. It will ask for your confirmation. Click on “Yes”.

6. Now restart your PC and your computer will be back to the stable 18362.295 build. Following that, you won’t face any high CPU usage on Windows 10.
-
Disable Cortana Search
Here, we will use Windows Registry to disable Cortana Search and replace it with Bing Search. The good part is that you will still be on the latest Windows 10 build, but without any performance issues. Here are the simple steps to follow.
1. Press the Windows key once and type Regedit. It will show up on the top. Open it.

2. Now, navigate to this path manually or you can paste the Registry address on the address bar to quickly open the said menu.
HKEY_CURRENT_USER\Software\Microsoft\Windows\CurrentVersion\Search
3. Here, look for “BingSearchEnabled” keyword. Generally, it should be on top. Double-click on it and change “Value Data” to 1 and click the “OK” button.

4. Once you have done that, close the Registry and restart your computer. Voila, now Bing Search should be back and you should not face any unusual CPU spikes.
SEE ALSO: How to Speed up Windows 10 in 2019 [Effective Methods]
Resolve High CPU Usage on Windows 10 with Simple Steps
So that was our quick guide on how to fix high CPU usage after installing KB4512941 update on Windows 10. As I have already mentioned, the problem is simple and so is the solution. I have mentioned two easy ways to deal with the issue so that you can choose accordingly. You can altogether uninstall the update or remain on the latest build after tweaking Registry. Anyway, that is all from our side. If you are facing some other issues on Windows 10, do comment down below and let us know. We will be happy to take a look.


