- Chromebooks are great devices but they're not invulnerable.
- One of the lesser-known issues when dealing with a Chromebook is when it keeps turning off abruptly without your input.
- To overcome this issue, you can try restarting your device, adjusting its power settings, disabling Chrome extensions and flags, and powerwashing your Chromebook.
Chromebooks have become a dominant force in the laptop market, especially within education. Their affordability and user-friendly design make them a compelling choice. That said, Chromebooks are not invincible and you could run into issues with them, or in rare cases they might die on you and turn on after some time. If you’re wondering why your Chromebook keeps turning off, here are the nine potential causes and solutions to get your device back on track.
1. Restart Your Chromebook
It’s important sometimes to stick to the basics and stop thinking out of the box. Unlike typical laptops, Chromebooks don’t require a shutdown. When your work is complete, you can simply close the lid and open it to get back to work. However, after prolonged use, this could lead to Chromebooks slowing or even shutting down due to the buildup of temporary data and cache.
A quick restart should flush your RAM, clear any bugs or glitches that appeared due to prolonged usage, and help you start from a clean slate. “Have you tried turning it off and on again?” might be one of the most overused and funny statements, but it’s surprising how it is still true and holds a lot of weight.
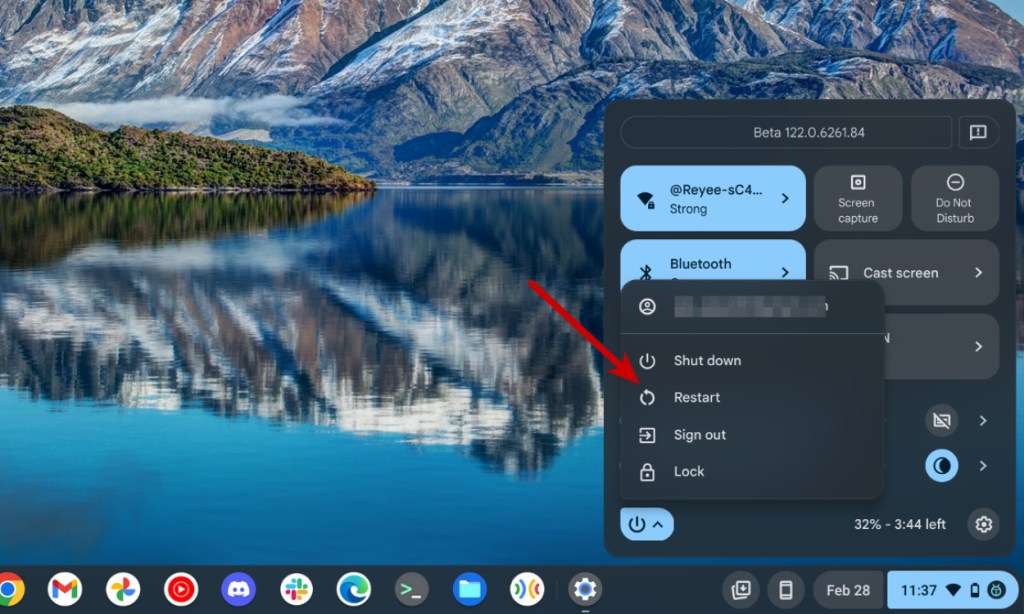
To restart your Chromebook, press and hold the Power button for the power menu to appear and click on Restart. Or you can click the notification tray from the bottom right corner and go to the Power icon > Restart.
2. Change Power Settings
Perhaps your Chromebook isn’t turning off automatically due to an underlying issue but because of the default standby settings. If your Chromebook’s standby settings are set to “Turn off display,” the display is automatically turned off to save power. All you need to do is change the option to “Keep display on” and you should be good to do. Here’s how to do it.
- Go to your Chromebook’s settings by searching and clicking the Settings app from the app menu.
- Inside the Settings screen, go to System Preferences > Power.
- Click on the When inactive and on battery dropdown menu and select Keep display on.
And voila! Your Chromebook screen will not automatically turn off. Keep in mind that this may increase power consumption when the laptop is idle and you’re not using it.
3. Check Your Apps and Extensions
Apps and extensions can sometimes break a device, regardless of the operating system it is running on. If you’ve recently installed an app after which your Chromebook keeps turning off, you may want to uninstall the app first. The same goes for Chrome extensions.
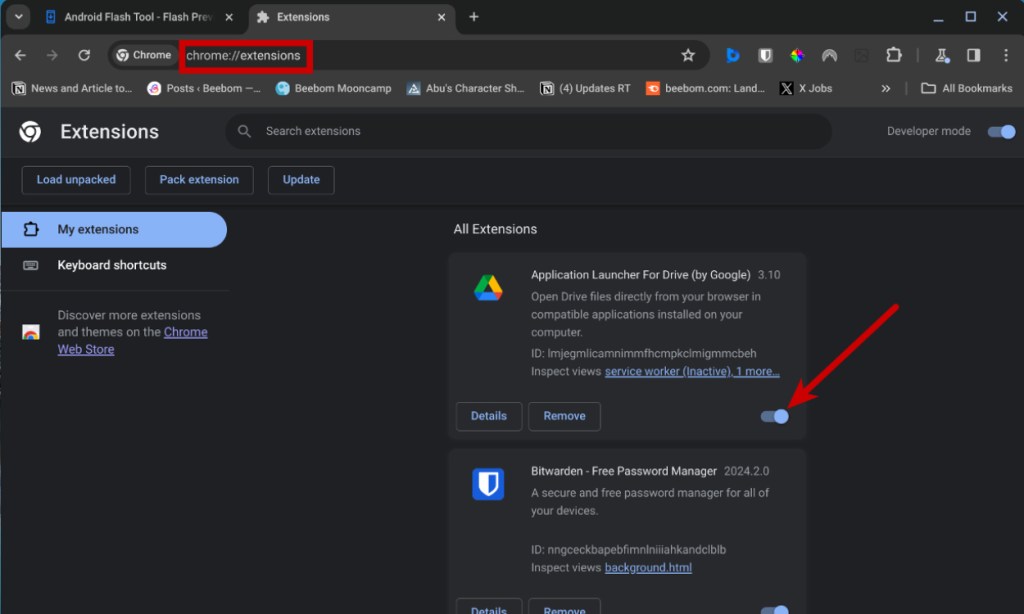
You don’t need to remove the extensions but turn them off to check if the issue persists. If you find that the issue was with an extension, you can keep it turned off until a new update for the same lands, then see if it fixed the issue. Here’s how you can disable Chrome extensions on a Chromebook.
- Launch Google Chrome and go to
chrome://extensionsusing the address bar at the top. - Now, disable the extensions you recently installed by turning OFF the adjacent toggles.
- If you find the issue was with a particular extension, you can click Remove to uninstall the same.
4. Check Chrome Flags
Chrome Flags are one of the easiest ways to enable new features on Chromebooks before they’re released for everyone. However, most Chrome Flags are usually in testing, and enabling them could cause problems on your Chromebook.
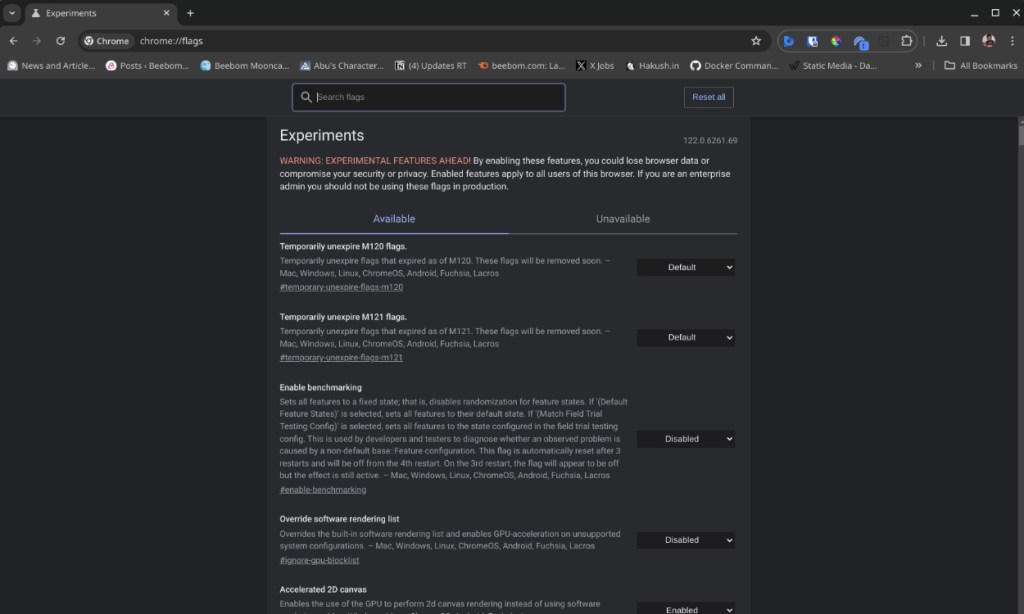
If you remember switching on a flag on your Chromebook, you can disable it by launching Google Chrome, going to chrome://flags and turning off the flags that you recently enabled.
5. Check the Charger and Connector
Your Chromebook may have turned off and is unable to turn on because of a faulty charger or charging connector. The device could have run out of juice and now refuses to charge due to a bad charger. You may want to try a different charger and see if it does the trick. Plug it in and wait for about five minutes until the battery charges a bit. Press the Power button to see if the Chromebook boots up.

If it doesn’t boot up, something might be stuck inside the charging connector. Try using the other charging connecter (if your Chromebook has two) or take a peek into the port and check if something is hindering your Chromebook from charging. If you see dust, use a pair of tweezers or a needle to gently remove the debris, and then try plugging in your Chromebook.
6. Replace Your Chromebook’s Battery
If you’ve tried everything we’ve mentioned above and nothing worked, there might be a bigger underlying issue. One of the reasons why devices shut down and don’t boot up is when they don’t get enough power from the battery. If your Chromebook is considerably old and has shut down abruptly in the past, it needs a battery replacement.
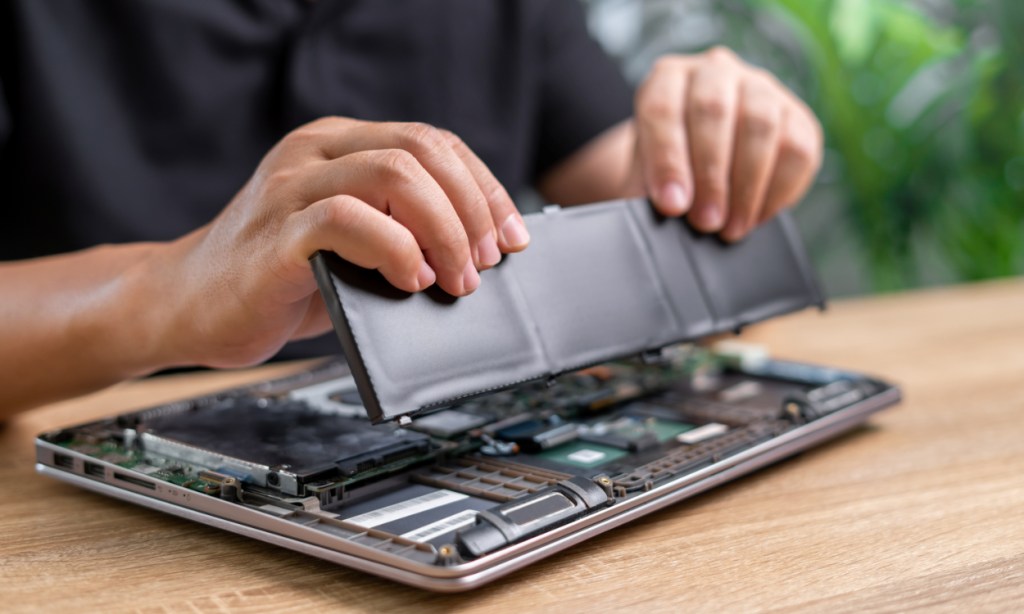
Now, given the poor state of the right to repair and the availability of spare parts, the act of replacing the Chromebook’s battery could be tough to pull all by yourself. Your best option is to contact a local computer manufacturer and ask for battery availability, or find and order batteries from websites like AliExpress, and iFixit, and replace them yourself or via a trained technician.
That said, batteries could explode when poked or not handled correctly, so proceed with caution. If your model of Chromebook is popular enough, you could find a battery replacement guide you can follow on iFixit.
7. Check Thermals
The next common culprit could be the thermals. A sign of bad thermal performance is when your Chromebook starts to lag during even moderate usage. This is called thermal throttling where to manage excess heat, the PC slows down or sometimes even shuts down to protect itself.
ChromeOS has a built-in option to check CPU temperature. You can go to Settings > About ChromeOS > Diagnostics > CPU. An ideal idle temperature at room temperature for any mobile CPU is 40°C. The maximum temperature a CPU can reach is 90°C.
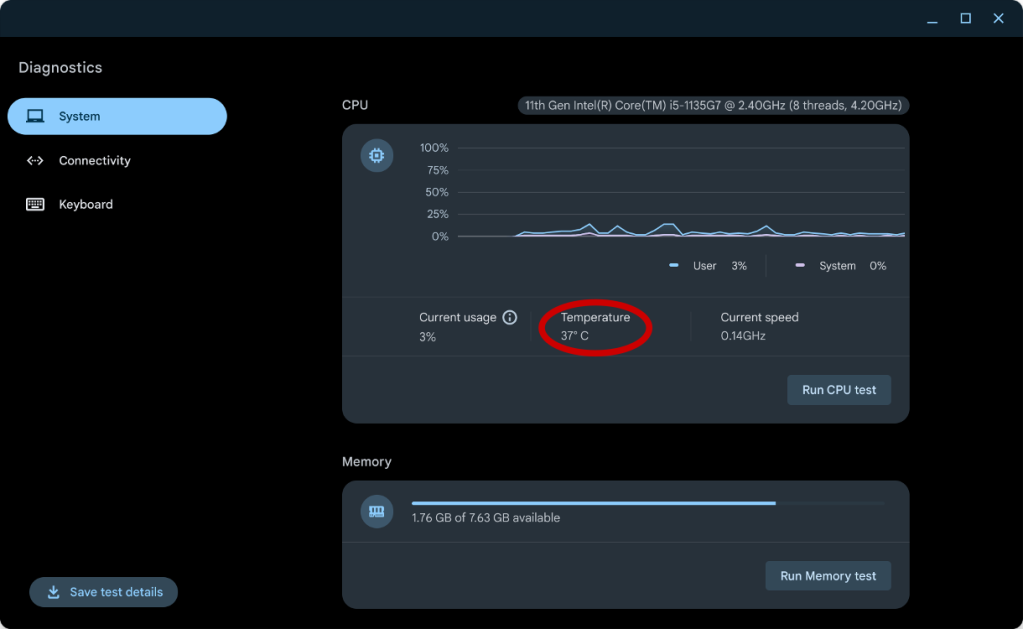
Try running the CPU test or multiple-tasking with different applications. If the temperature rises drastically and the Chromebook starts to lag and turns itself off, you know it’s bad thermals. Bad thermals can be caused by old thermal paste or lint/gunk buildup in fans.
There are two ways to go about this; The safest option is to take your Chromebook to a trusted PC repair shop and ask them to clean the fan intake and repaste the CPU. Or you can do it yourself but if you aren’t seasoned in opening up electronics, it could be challenging.
8. Powerwash Your Chromebook
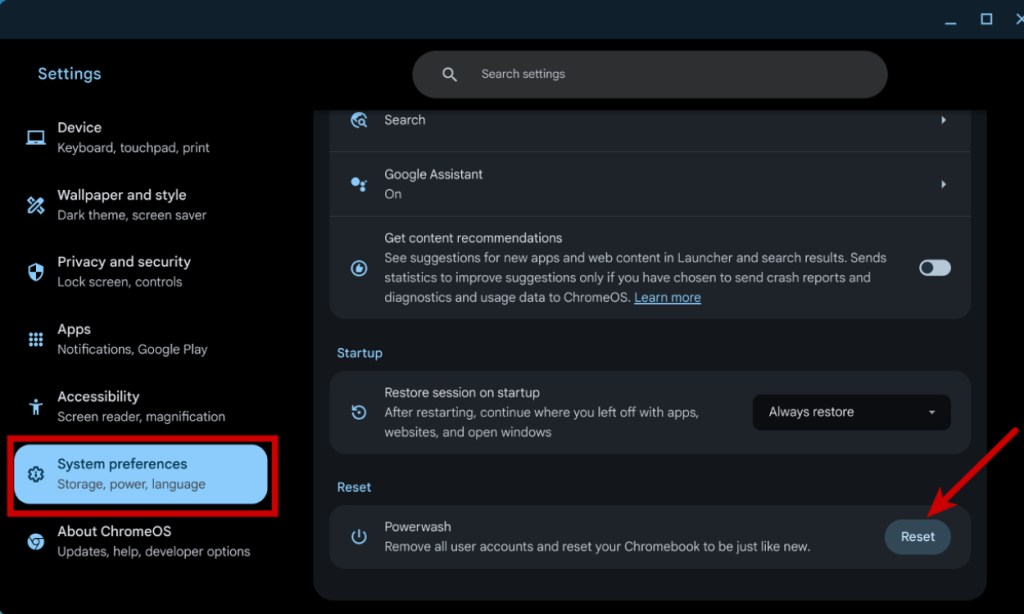
Powerwashing resets a Chromebook to factory settings. If none of the above methods worked, this is your last resort. If your Chromebook is still turning on, make sure to back up all files to an external drive and proceed to powerwashing. To perform a Powerwash:
- Go to Settings > System preferences.
- Scroll down and locate the Powerwash section. Here, click on the Reset button.
- Click on OK for subsequent prompts that appear and the Powerwashing process should begin.
9. Get Professional Help
Some problems can only be solved by a professional’s touch. If nothing has worked till this point, you might want to take your device to a well-known expert. If you bought your Chromebook recently, the chances are that it’s still under warranty.
Hence, you can reach out to the manufacturer using their helpline numbers and describe your issue. If your Chromebook is under warranty, the OEM is entitled to offer you a free repair or replacement for the Chromebook.
The aforementioned methods are some of the most common problems that play a role in Chromebook turning off. As mentioned earlier, some of the fixes require prior experience in opening up electronics and if you don’t have that or feel confident about it, we suggest taking your Chromebook to a technician to get it fixed.
Did we help you with the “Chromebook keeps turning off” issue? What was causing it? Let us know your thoughts in the comment section below.


