
There are dozens of reasons why your WiFi may be slow. It might be due to external factors, your ISP, your PC’s hardware or software, or due to someone sharing your WiFi. Dealing with slow Wi-Fi speeds can be a cumbersome process, especially when there are lots of factors that may be causing the issue. Detecting these issues and fixing them as soon as possible will get your WiFi speeds to normal. However, the question is what do you need to look for? Here are some of the things you can try to fix slow Wi-Fi speed issues. We’ll start with some of the most popular basic troubleshooting techniques followed by tricky ones placed in the end.
1. Check your Wi-Fi Speed
“But why do I need to check my Wi-Fi speed when I already know how fast it used to work?” Good question, but it is possible your ISP may have revised their speeds in your plan, or it could be a different reason altogether. Hence, to check your Wi-Fi speed, you can go to websites like Speedtest.net or Fast.com, or just type Internet speed test on Google and run the speed test.

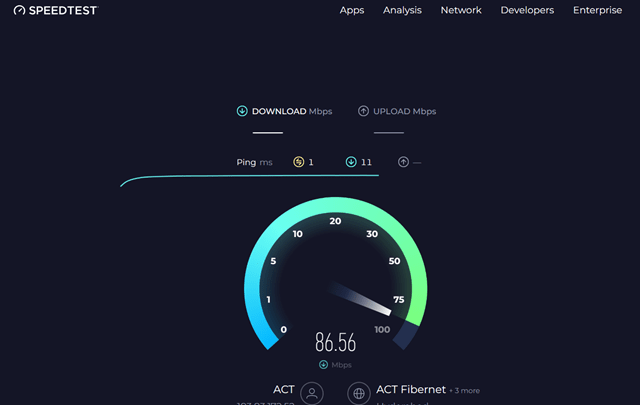
Additionally, you can check in your ISP’s app if the speed and plan are still the same. If the speed you’re getting is nowhere close to the speed mentioned in the app, you may contact customer service. If they say there’s nothing wrong with your network from their end, you may proceed and follow the methods mentioned below.
2. Connect to a 5GHz SSID
If you have a dual-band router, to get the best Wi-Fi speeds, you must connect to the 5GHz SSID rather than 2.4GHz. The former transmits data at a faster rate (almost 50% faster) than the latter but doesn’t go as far as 2.4GHz waves. To check if your router is a dual-band unit, you could refer to its user manual or box, or simply turn it on and check if you see two SSIDs with the same name but different numbers 2.4 or 5 followed by GHz.


Additionally, if your router is a tri-band unit with support for Wi-Fi 6E and your PC has a Wi-Fi 6E card, you should connect to the 6GHz SSID for maximum speed.
3. Restart the Router
“Tech support: Have you tried turning it off and on again?” is a line you’ve probably heard many times by now, but did you know that restarting the device you’re facing issues with might be the easiest way to solve the issue? Switch off the router and wait for at least a minute or two before you turn it back on. Once your router restarts wait for at least a minute and try connecting to the internet. If this solved your issue, hurray! Now you know what to do whenever your electronics trouble you.


While you are at it, it is possible that the issue could be with the device you’re using rather than the router. So go ahead and restart your device (mobile, laptop, desktop, etc) as well.
4. Check Other Devices on the same Network


A Wi-Fi network’s bandwidth is shared between devices that are currently connected to it and any user on the network that’s consuming more bandwidth could impact other users. If a user on your network is using the internet for tasks like browsing the web, it shouldn’t majorly impact the speed, but if someone is streaming games on the cloud, streaming videos in 4K, or downloading huge files, it could drastically affect the network bandwidth of the other devices.
To ensure everyone gets an equal or required share of bandwidth, most routers allow you to set bandwidth limits on users. Furthermore, you can disconnect inactive devices like smartphones that are not in use as background apps may still be using the bandwidth even when the screen is turned off.
5. Switch to a Different Channel
Different Wi-Fi channels have different frequencies through which they send information to your device. It is possible that your device may have connected to the channel that has the worst transmittance or more interfering routers, and you can find the same from your ISP’s app. Hence, if you’re facing issues with Wi-Fi, switching to a different channel should fix the issue.


Switching channels should be fairly easy; just go to the default router management software (usually, it’s located at the address 192.168.1.1), go to your network settings, and change the channel. If you’re unsure, you could also refer to your router’s manual. If you want to do it from Windows, Nirsoft’s WifiInfoView is a great little tool that is simple and free. When you launch the program, it lists all the Wi-Fi channels and shows how crowded they are. Select the one that is the least crowded and you are good to go.


6. Stop Background Programs Using Bandwidth
There is a chance that a background program may be using up the bandwidth without your knowledge. For instance, Windows update is notorious for downloading updates in the background and there are other programs as well that are connected to the internet and take up bandwidth in the background.


If you’re on Windows, you can check the programs and their bandwidth consumption using the Windows Task Manager. Press the Ctrl+Shift+Esc key combo to open Task Manager and click the “Processes” tab. Look for any third-party application that you think is consuming an abnormal amount of data and click “End Process” after selecting it. Be mindful of programs such as explorer.exe as they don’t consume bandwidth and you shouldn’t accidentally delete them or else your PC will be rendered useless and will need a forced restart.
7. Check for Unauthorized Access
If no program or device is using the bandwidth then there could be a chance someone has hacked into your network and is consuming the bandwidth. This can happen if your router uses an old security standard or certificates, or if you have WPS enabled. WPA2 is currently the most advanced protocol to secure your WiFi, but ensuring that your password has at least 12 characters is also important. You will have to change the password from your router’s main interface which can be accessed by entering the router’s IP address in your browser’s address bar. A common IP address of most routers is 192.168.1.1, but if that doesn’t work, here’s how to find the default IP address.


1. Press the key combination Windows + R and enter “cmd” in the “Run” to launch the command prompt.


2. Once in cmd, type “ipconfig” and hit enter. You should see the IP address next to “Default Gateway”. Just enter this address in your browser address bar and press enter.
If prompted for a password, enter “Admin” or “12345” (refer to a manual if didn’t set a password or contact your ISP if the router was bundled with your plan).


Each router has a different interface hence there’s no common way of changing your network’s password. It should be pretty straightforward, though, if you search under Security or Wi-Fi options. Just choose WPA2 security and AES encryption, and use a strong password.
8. Change your Router’s Location
Your router’s location and the lack of a strong Wi-Fi signal are interconnected and play a huge role in determining the speed of your network. If you have a router that’s too old, its hardware and signal throw may not be strong enough to penetrate walls, therefore resulting in a weaker Wi-Fi signal. Although Wi-Fi signals can easily penetrate through most objects with little to no drops in speed, it may vary depending on the material it needs to pierce.

For example, Wi-Fi signals have a hard time penetrating metals, cement, or concrete so if you are behind a wall with such material in it, the Wi-Fi signals will be affected. Depending on the SSID you’re connected to (5GHz or 2.4Ghz) and the room you’re in, if you’re much away from the router, it makes more sense to connect to 2.4Ghz since it travels farther at lower speeds. The ideal scenario would still be moving the router to a central location where most devices reside and connecting to a 5GHz SSID to get faster speeds.
9. Reinstall Network Drivers
Windows has this thing where USB, Sound, Network, and other drivers may sometimes break after an update for no reason. To find and fix network drivers, search for “Device Manager” in Windows search and open the first search result. A Wi-Fi adapter will be under network adapters and will have the word Wi-Fi in it; right-click and uninstall the driver. Restart your PC and Wi-Fi should be back again.


If that doesn’t work, look for an update for your driver on the manufacturer’s official Drivers and Utilities page. Nearly all manufacturers have drivers published on their websites. All you need to do is download the drive and double-click on the executable to install them and restart your computer.
10. Check if you’re using a VPN


A Virtual Proxy Network, also known as VPN is used to browse anonymously, but it is possible that you left the VPN connection on when you were browsing. VPNs establish tunnels to different countries and as a result, both the ping and network speed of a VPN network may not be nearly as fast as your stock connection speed. Hence, you need to disable your VPN connection.
11. Reset Your Router


If everything fails, you can also completely reset your router to factory settings which should revert any wrong changes that may be affecting the Wi-Fi. Most routers come with a tiny reset button recessed inside a hole (mostly at the back). You can use a paper clip to press this button. Press and hold this button for 10-15 seconds and your router should restart confirming it has been reset. Once done, you will have to go through the setup process again, but the chances that your Wi-Fi will be restored to its original speed are high.
12. Contact Your Internet Service Provider
If none of the above solutions worked, you should consider contacting your ISP and raising a ticket. It could be a problem on their end and they may be able to provide the right means to solve your issue. They will send a service agent over to your place as soon as possible and get the problem fixed.

