
Though I had always loved using iMessage on Mac, never before did I find it so fun-loving. With the introduction of Memoji in macOS Big Sur, the Messages app for Mac seems to have become a go-to tool for kickstarting bone-tickling banters with friends and loved ones, especially when you are tied to your macOS device. Well, if you are willing to put your hands on it as well, follow along to learn how to use Memoji in iMessage on macOS Big Sur on Mac.
Use Memoji in iMessage on macOS Big Sur Like a Pro
Before getting started, let’s get the basics out of the way as they can help you understand how Memoji works on macOS Big Sur! You can directly jump to the steps if you are already familiar with these basics.
- A Little Brush with History
- Does iMessage for macOS Offer the Same Level of Experience as iOS?
- Create, Edit, Duplicate, and Delete Memoji
- Set Up Name and Photo Sharing with Memoji
- Set Memoji for Group Conversations
A Little Brush with History
First introduced in iOS 12 at WWDC 2018, Memoji (fully supports iPhone X or later, iPad Pro 11-inch 1st generation and later, or iPad Pro 12.9-inch 3rd generation and later) has become very popular among folks who enjoy hilarious messaging. It uses the facial sensors of the iPhone or iPad to mimic real-time facial expressions and head movements. Not to mention, it even supports wink and tongue detection.
Does iMessage for macOS Offer the Same Level of Experience as iOS/iPadOS?
The straightforward answer to this question is No. Memoji has a very basic functionality on macOS. It doesn’t offer real-time mimicking of facial expression nor does it support wink and tongue detection. However, I expect Memoji to get better with time or at least come very close to its iOS/iPadOS counterpart in the future.
Create, Edit, Duplicate and Delete Memoji on macOS Big Sur
1. To get started, open Messages app -> a conversation thread on your Mac.


2. Now, click on the App Store icon to the left of the text field.


3. Next, choose Memoji Stickers.


4. Next up, click on the three horizontal dots at the top left.


Create a Custom Memoji
- Select the New Memoji option on the menu.

Now, you have a ton of customization options to give a personal touch to your Memoji. For instance, you can set a nice hairstyle, select a more suitable nose, mouth, head, facial hair, and more. Once you have customized the Memoji, click on Done to confirm.


Edit, Duplicate or Delete Memoji
In the same menu, you have the option to edit your custom Memoji, duplicate, or even delete it. Each process is quite straightforward, so you won’t have any problem in getting these things done.


Set Up Name and Photo Sharing with Memoji in macOS Big Sur
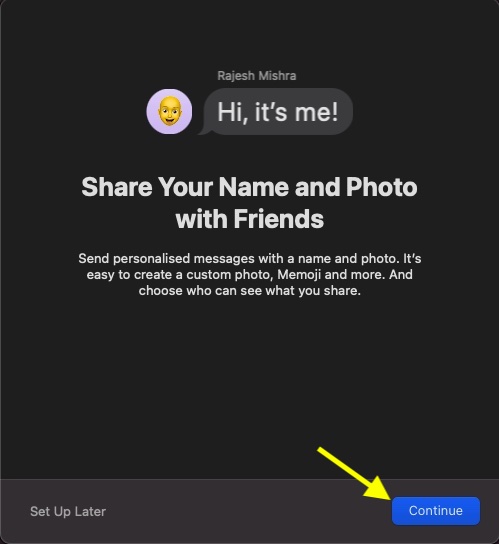
If you want to make the most of Memoji, you can also set up the name and photo sharing with Memoji. It will help help you send personalized messages with a name and photo. Moreover, macOS also offers you the desired control to choose who can see what you share.
- Launch Messages app on your Mac.


2. Now, click on the Messages menu at the top left of the screen and choose Preferences.


3. Next, click on Set up Name and Photo Sharing.


4. Next up, click on Continue.

5. Up next, click on Customize.

6. Now, choose a Memoji from the available options. (click on See More to see all the available Memojis.) (Note: if you have already created Memoji, you should see your custom Memoji. Select it and you are ready to go.)


7. Next, select the desired skin tone for your Memoji and click on Done.

8. Next up, a popup will appear saying your Apple ID and My Card in Contacts will be updated with this photo. Click on Use to confirm.


9. Up next, you have the option to always share your name and photo with your Contacts Only. But if you want the iMessage to ask you before sharing your name and photo, select Always Ask.


10. Finally, click on Done to confirm.

That’s it! You’ve perfectly set up name and photo sharing in iMessage on your Mac.

Set Memoji for Your Group Conversations in iMessage on Mac
Not just that, you can also set Memoji for your group conversations. The process is just as straightforward.
1. Launch Messages app on your Mac.
2. Now, open the group conversation which image you want to set.


3. Next, click on the “i” button at the top right corner of the group conversation.


4. Next up, click on the change group name and photo option.


5. Scroll down and click on the Memoji icon from the available options. (click on See More to view more available Memojis).

6. Next up, choose a preferred skin tone for the Memoji and click on Done.


Use Memoji Like a Pro in macOS Big Sur
So, that’s how you can create a custom Memoji and use it in macOS Big Sur. Now that you know how it works, make the most of it to spice up your iMessaging. I’m sure it will light up the mood of your conversation. Boasting a ton of cool features like the ability to customize the Safari start page, the latest iteration of macOS is a huge upgrade from the macOS Catalina. What’s your take on this new macOS version? Share your thoughts in the comments below.

