- If you haven't updated PowerShell in a while, there are many ways to do it easily.
- The most elementary ways are by using the Windows Store or downloading the latest PowerShell installer.
- Some of the other ways are using Winget or updating Windows.
If you’re a developer or power user, you probably use Windows PowerShell a lot. For those unaware, PowerShell and Command Prompt are used to execute and use advanced Windows features and development, with PowerShell being a superior command-line software compared to CMD. Microsoft keeps adding new features to PowerShell, so if you haven’t updated the same for a while, here’s how to upgrade Windows PowerShell.
It’s worth noting that PowerShell, until version 5.1, was automatically updated by Windows updates. However, the new version 7.x is no longer handled by Windows updates and needs manual updating. Regardless of the version, you can follow the steps below to update/install the latest version of PowerShell. To check your PowerShell’s version, enter the command $PSVersionTable in your existing PowerShell app.
Method 1: Upgrade PowerShell Using the Microsoft Store
We often sideline Microsoft Store because we’re so used to installing EXE files from the internet. Microsoft Store can help you update the PowerShell swiftly, and here’s how:
- Launch Microsoft Store from the Start menu.
- Click on the Downloads tab at the bottom left.
- This will show you all the available updates. Here, check if an update to PowerShell is available and if yes, click on Update.
- You can also click Update all to update all apps at once.


Method 2: Update Using the PowerShell Installer
Did you know that the new PowerShell 7.x is open source? Regardless, its installer is available on both the official PowerShell website and GitHub. Here’s how to update to the latest Windows PowerShell using the installer.
- Head over to the official PowerShell GitHub repository.
- Go to the Releases page and click on the latest win-x64.msi file to download the installer.
- Once downloaded, double-click the installer to launch it and click on Next.
- Click on Next for the subsequent prompts to proceed.
- Now, click on Install.


Method 3: Upgrade PowerShell Using Winget
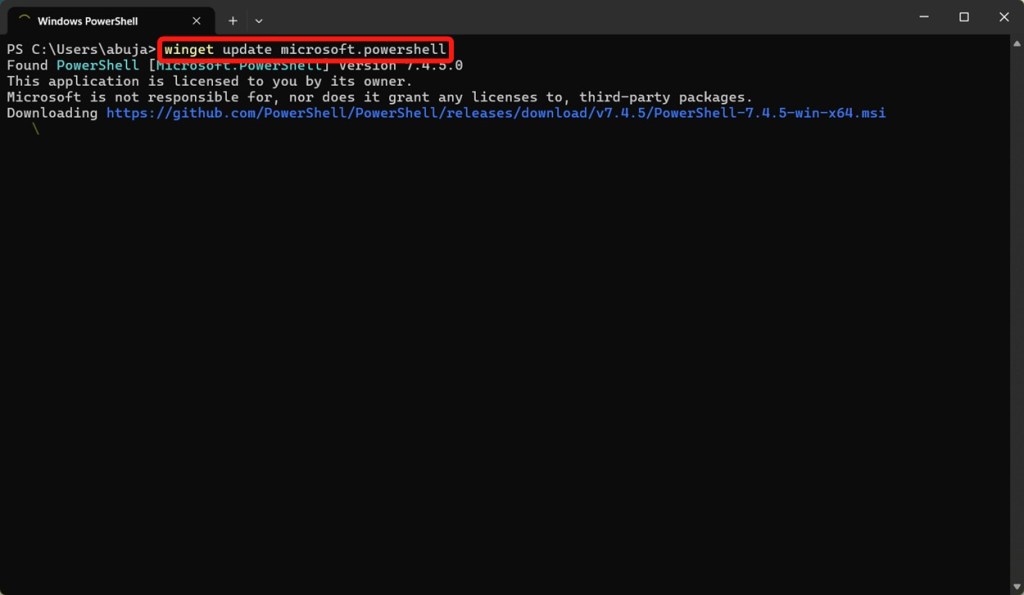
Winget is a package manager and the APT or DNF equivalent on Windows. It works pretty well and can be used to download new packages/apps or update the existing ones. Here’s how to use it to update Windows PowerShell.
- Launch Windows PowerShell and type the following command.
winget update microsoft.powershell
- If you don’t have PowerShell installed, you can use the following command to install it.
winget install --id Microsoft.Powershell --source winget- Once done, you should have the updated version or a new version of PowerShell installed.
Method 4: Update PowerShell Using Windows Update
This only applies to older versions of Windows and PowerShell. If you’re using an old Windows, your PowerShell version will also be old, and you’ll need to upgrade to the latest Windows version to have the latest PowerShell version.
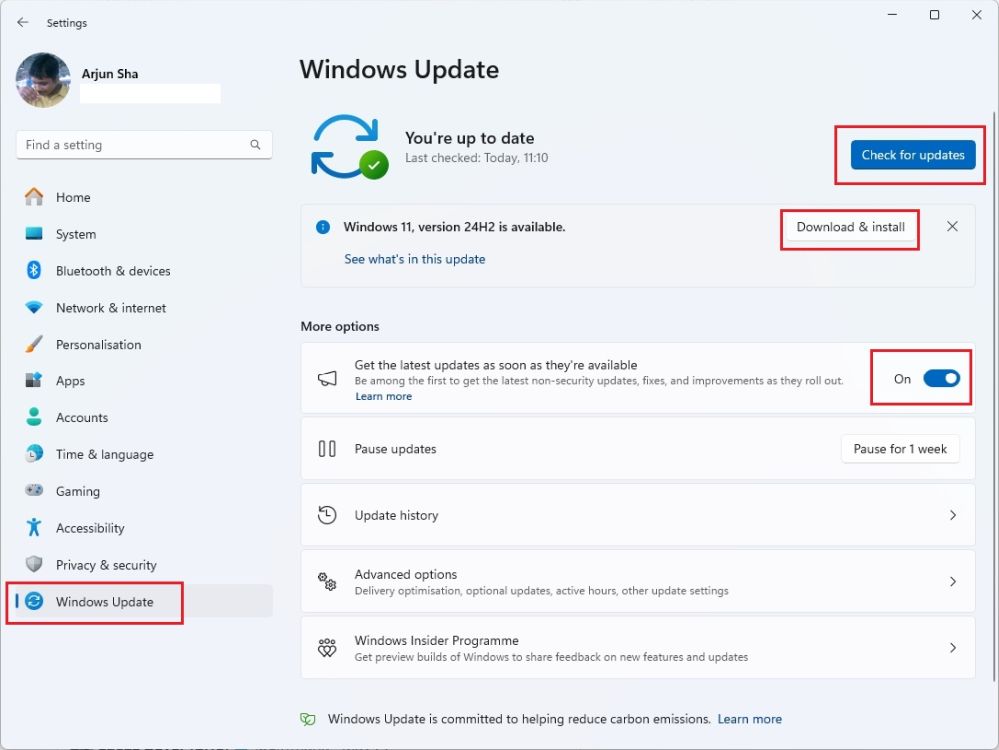
- Go to Settings > Windows updates.
- Click Check for updates and Windows should find and install them automatically.
- Once done, restart your Windows PC and you should have the latest PowerShell version for your Windows version.

And those are the methods you can use to upgrade PowerShell on Windows. The first two are by far the easiest ways to update it quickly. Were you able to upgrade PowerShell by following the steps? Let us know in the comments.