ZIP files are great to compress and easily move around large groups of files. However, if you’ve ever downloaded something and received a ZIP file, you might be confused about how to open it. Though most operating systems these days come with a ZIP program in tow, if you’re still confused about unzipping files, don’t worry. In the same vein as our guides on extracting ZIP files in Chrome OS and unzipping files in iPhones, here is how to unzip files in Windows 11.
Extract ZIP Files in Windows 11 Easily (2022)
Here, we have mentioned four different ways to unzip files in Windows 11. You can either use the native File Explorer or a third-party tool to extract content from a ZIP file. You can also use CMD to unzip files in Windows 11. For detailed instructions, expand the table below and move to your desired section.
1. Unzip Files in Windows 11 Using File Explorer
You can easily unzip files and folders in Windows 11 using the native File Explorer. There is no need to download a third-party file compression tool like Winzip or WinRAR. Here is how to unzip and extract contents from folders in Windows 11.
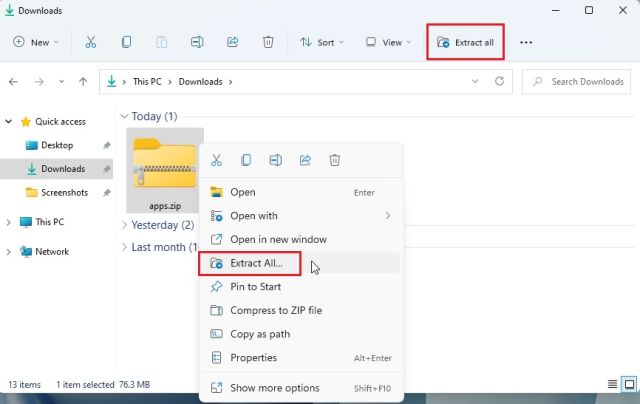
1. First off, right-click on the ZIP file and choose “Extract all“. You can also click on “Extract all” at the top menu.
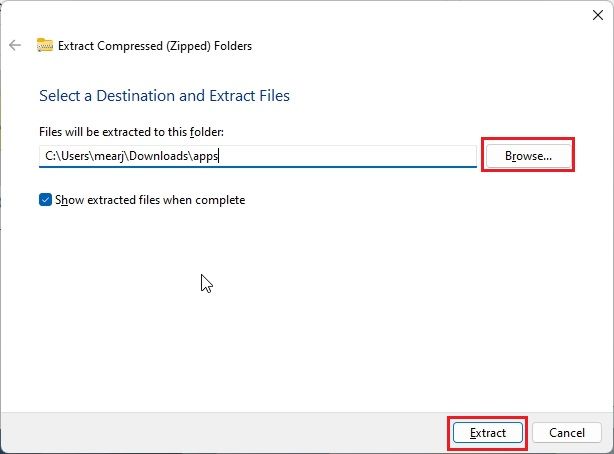
2. A mini-window will appear where you can choose the destination folder. I generally keep it as it is and click on “Extract“. This will unzip the file to the same destination where the zipped folder is located.
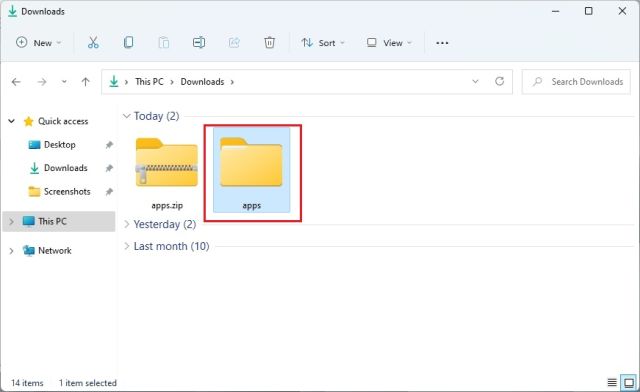
3. And there you have it! The unzipped content is available in a standard folder right there.
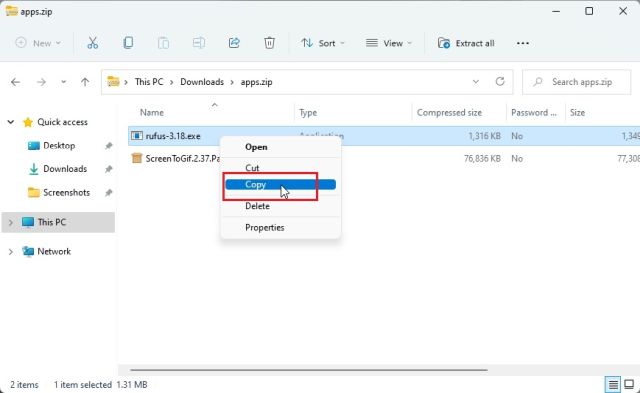
4. Alternatively, if you want to unzip specific files, you can open the ZIP file by double-clicking on it. And now you can select the files you need and copy them just like regular files.
5. Now, move back and create a new folder in the same destination and paste the files. This way, you can unzip particular files from a compressed ZIP file.
Create a ZIP file in Windows 11 using File Explorer
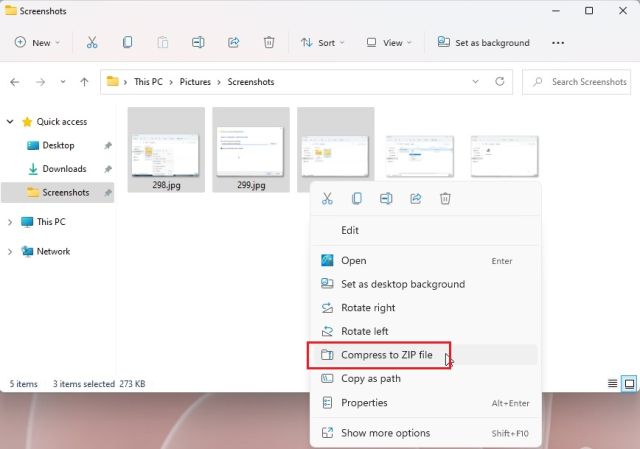
If you want to create a ZIP file in Windows 11 using File Explorer, simply select a file or folder and right-click on it. You can also select a bunch of different files. Now, choose “Compress to ZIP file”.
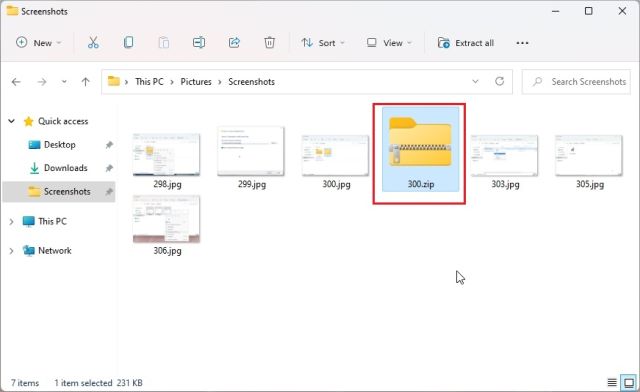
A compressed ZIP file will be created in the same folder. You can set a name to the ZIP file and you are done.
2. Unzip Files in Windows 11 Using 7-Zip
If you want to use a third-party program, I would recommend 7-Zip to unzip files in Windows 11 against other popular solutions like WinRAR and WinZip. It’s free, open-source, does not annoy you with pop-ups, and offers an excellent compression algorithm. That’s why we have chosen 7-Zip as one of the best Windows 11 apps. So if you want to unzip files in Windows 11, follow our guide below.
1. Go ahead and download 7-Zip from here. After that, install the app on your Windows 11 PC.
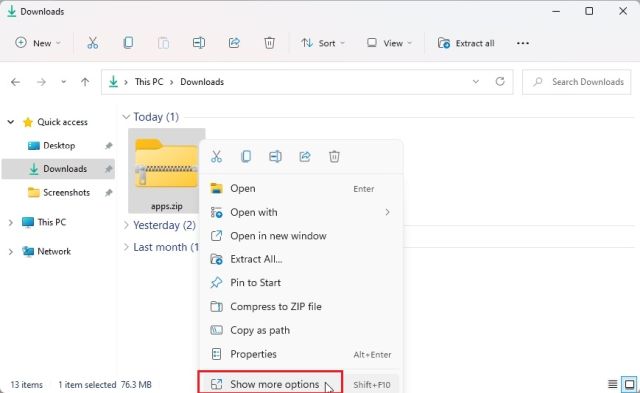
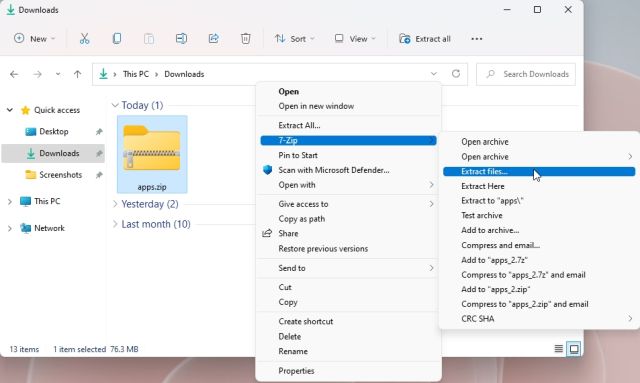
2. Now, right-click on the ZIP file and open “Show more options“.
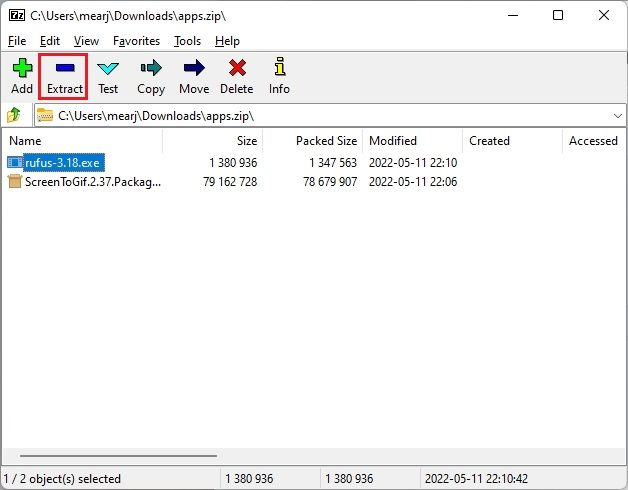
3. Here, select “7-Zip” and open “Extract files…“.
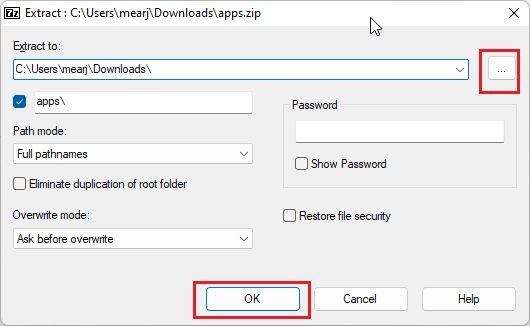
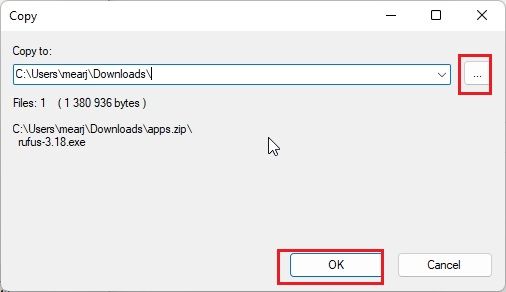
4. Now, choose the destination by clicking on the 3-dot menu and then click on “OK“.
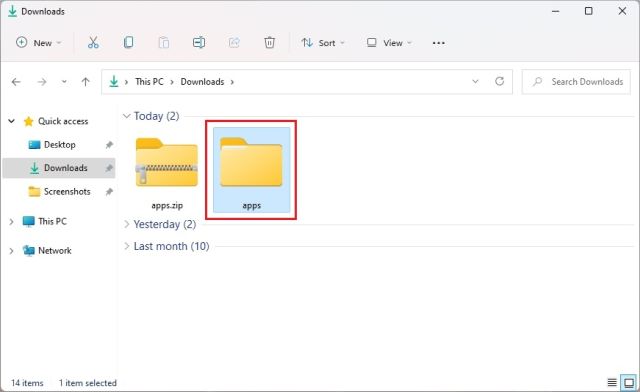
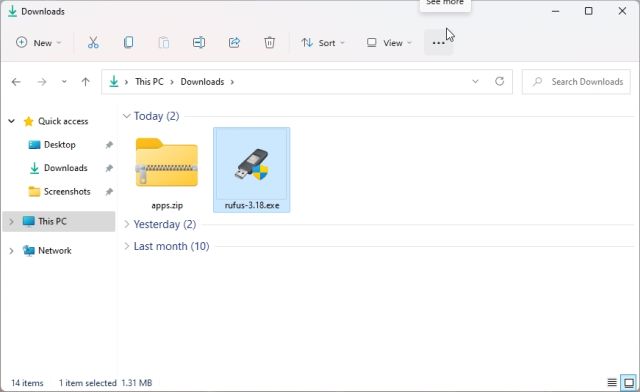
5. And that’s all. All the contents within the ZIP file will be extracted into the chosen folder.
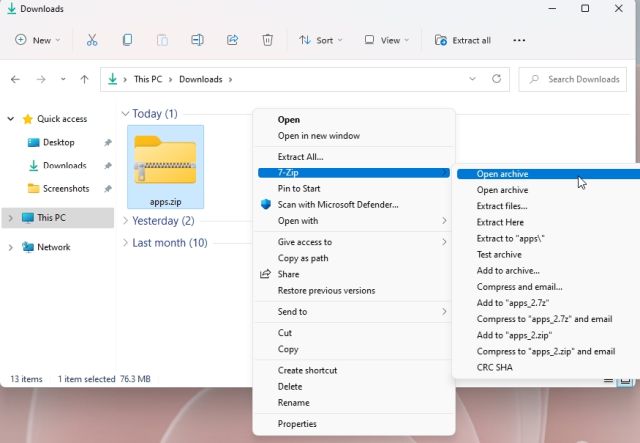
6. In case, you want to extract specific content from a ZIP file, right-click on it and choose “Show more options”. Now, open 7-Zip -> Open archive.
7. Once 7-Zip opens up, select the files that you want to extract and then click on “Extract” at the top.
8. In the next window, choose the destination folder and click on “OK“.
9. The files will be unzipped in a folder. And that is how you can use 7-Zip to unzip files in Windows 11.
3. Unzip Files in Windows 11 Using PowerShell
Other than File Explorer and 7-Zip, you can also use PowerShell to unzip files in Windows 11. With just a command, you can unpack a ZIP and extract content from them. Here is how to go about it.
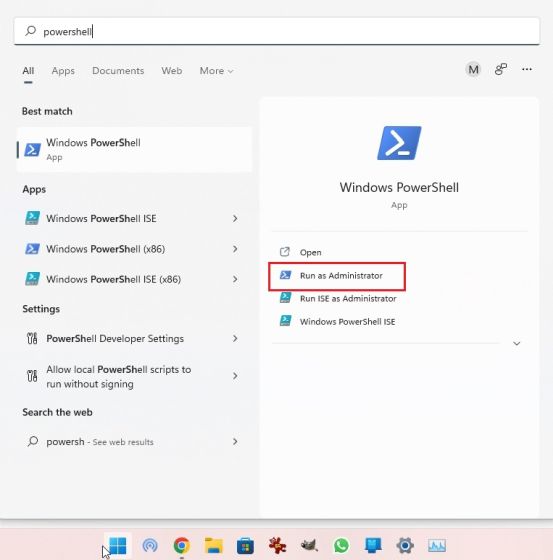
1. Press the Windows key once and type “powershell”. Now, click on “Run as Administrator” in the right pane. In case, you want to always run PowerShell with Administrator privilege, follow our guide for more information.
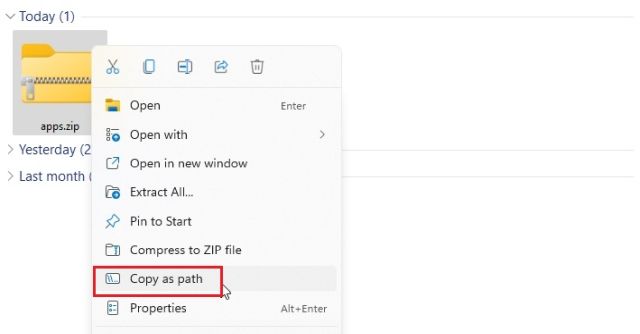
2. Next, right-click on the ZIP file and choose “Copy as path“. This will copy the complete address of the ZIP file to the clipboard.
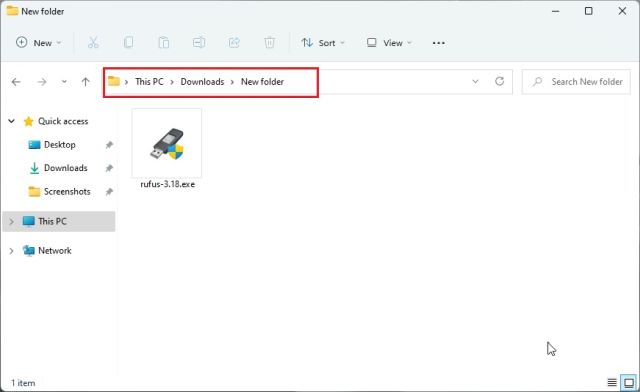
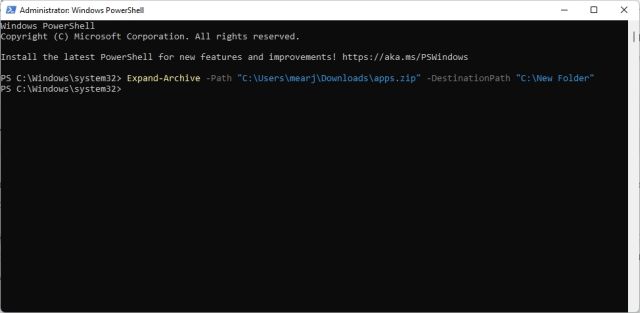
3. Now, to unzip files in Windows 11 using PowerShell, run the below command. Here, replace path of ZIP file with the actual path you copied above. This will unzip the contents of the ZIP file in the “C” drive under “New Folder”. I have chosen “C” drive as the destination address, but you can choose your own.
Expand-Archive -Path "path of ZIP file" -DestinationPath "C:\New Folder"
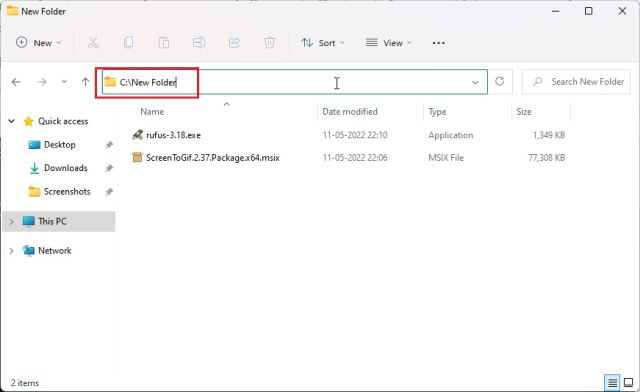
4. Finally, open “C” drive and move to “New Folder”. Here, you will find the extracted content of the ZIP file. So that is how you can unzip files in Windows 11 using PowerShell.
5. In case, you want to compress a folder and create a ZIP file using PowerShell in Windows 11, simply run the below command. The syntax is similar to the above one. Here, replace path of the file or folder with the address of the file/folder that you want to compress.
Compress-Archive -Path "path of the file or folder" -DestinationPath "C:\compressed.zip"
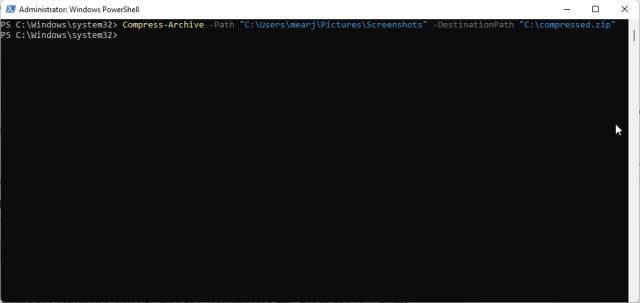
6. After running the command, you will find the “compressed.zip” file in the “C” drive.

4. Unzip Files in Windows 11 Using Command Prompt (CMD)
Finally, you can use Command Prompt to extract ZIP files in Windows 11. Just like PowerShell, Command Prompt has some neat tricks up its sleeves to compress and decompress ZIP files. In case, you are not aware, in 2018, Command Prompt got the powerful TAR command-line tool that allows you to quickly unzip files in Windows 11, just like on Linux systems. So here is how to use TAR and extract ZIP files in Windows 11 using CMD.
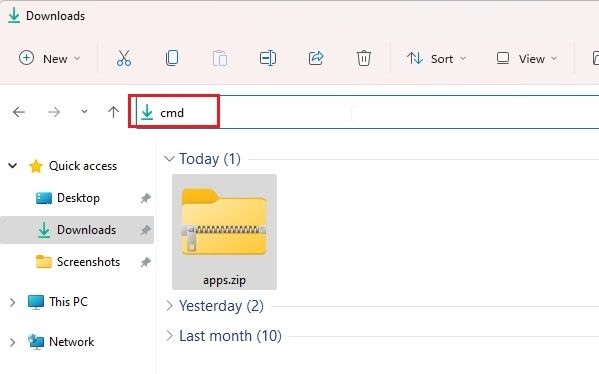
1. Move to the folder where the ZIP file is located. Click on the address bar and type cmd and hit Enter. This will open Command Prompt in the same window.
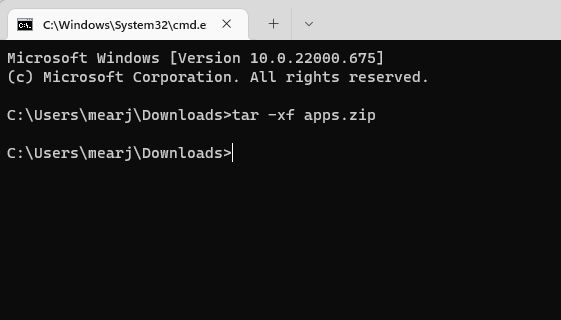
2. Next, run the below command. Make sure to rename filename with the actual name of the file. Now, hit Enter and the ZIP file will be extracted in the same folder.
tar -xf filename.zip
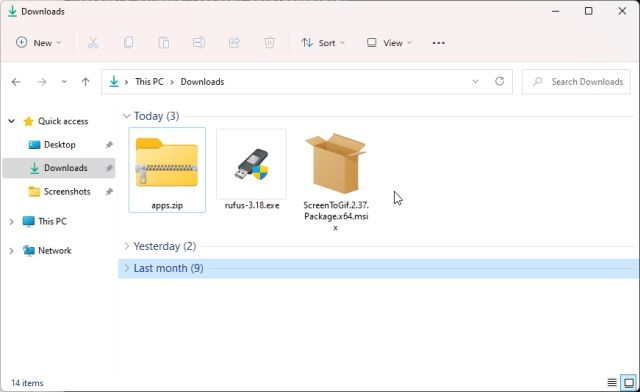
3. As you can see here, CMD has successfully unzipped the ZIP file in the same location.
Extract ZIP Files in Windows 11 With CMD, 7-Zip, File Explorer and PowerShell
So these four methods can extract ZIP files for you. Not only that, with 7-Zip, you can extract RAR, 7Z, TAR, TGZ and many more compressed file formats. And if you are a command-line nerd, you can have TAR at your disposal on Command Prompt. Anyway, that is all from us. If you want to see Wi-Fi passwords in Windows 11, you can head over to our linked guide. And if you are looking for the Windows 11 Startup folder location to add your favorite programs to launch during startup, we have a handy guide for you as well. Finally, if you have any questions, let us know in the comment section below.