In an earlier tutorial, we demonstrated how you can train a custom AI chatbot using ChatGPT API. While it works quite well, we know that once your free OpenAI credit is exhausted, you need to pay for the API, which is not affordable for everyone. In addition, several users are not comfortable sharing confidential data with OpenAI. So if you want to create a private AI chatbot without connecting to the internet or paying any money for API access, this guide is for you. PrivateGPT is a new open-source project that lets you interact with your documents privately in an AI chatbot interface. To find out more, let’s learn how to train a custom AI chatbot using PrivateGPT locally.
Requirements to Set up PrivateGPT on Your PC
1. To run PrivateGPT locally on your machine, you need a moderate to high-end machine. You can’t run it on older laptops/ desktops. To give you a brief idea, I tested PrivateGPT on an entry-level desktop PC with an Intel 10th-gen i3 processor, and it took close to 2 minutes to respond to queries. Keep in mind, PrivateGPT does not use the GPU. Currently, it only relies on the CPU, which makes the performance even worse. Nevertheless, if you want to test the project, you can surely go ahead and check it out.
2. PrivateGPT can be used offline without connecting to any online servers or adding any API keys from OpenAI or Pinecone. To facilitate this, it runs an LLM model locally on your computer. So, you will have to download a GPT4All-J-compatible LLM model on your computer. I have added detailed steps below for you to follow.
Set Up the Environment to Train a Private AI Chatbot
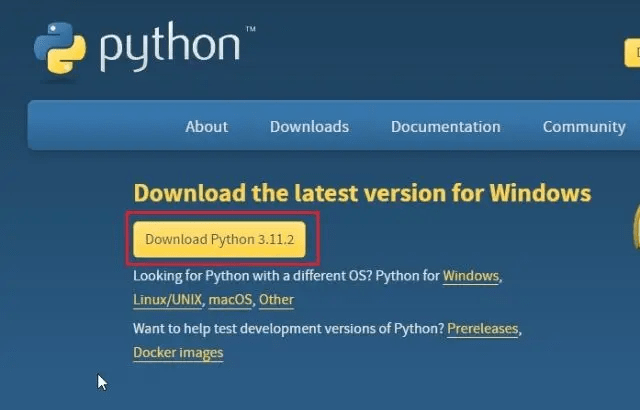
1. First, you need to install Python 3.10 or later on your Windows, macOS, or Linux computer. You can click on this link to download Python right away.
2. Next, run the setup file and make sure to enable the checkbox for “Add Python.exe to PATH.” After that, click on “Install Now” and follow the usual steps to install Python.

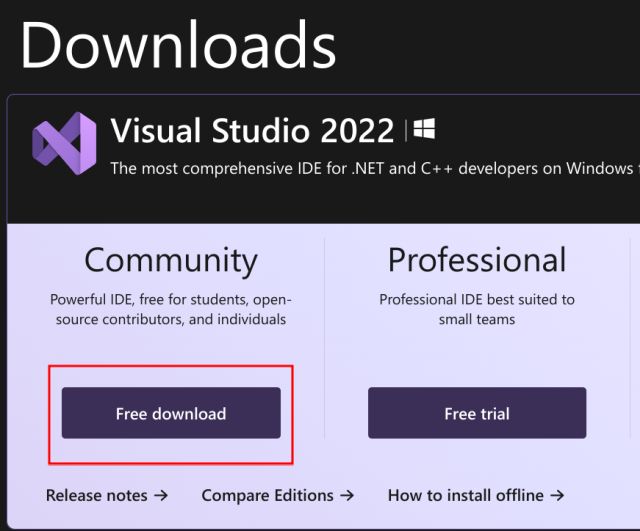
3. Next, you will need to install Visual Studio 2022 if you are using Windows. This is done to get the C++ CMake tool and UWP components. Click on this link and download the “Community” version for free.
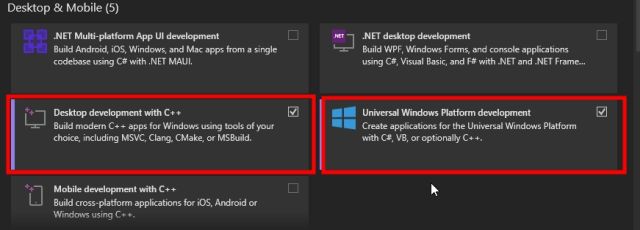
4. Now, run the setup, and it will download another installer. A window will appear where you can choose the components. Scroll down and select “Desktop Development with C++” and “Universal Windows Platform development.”
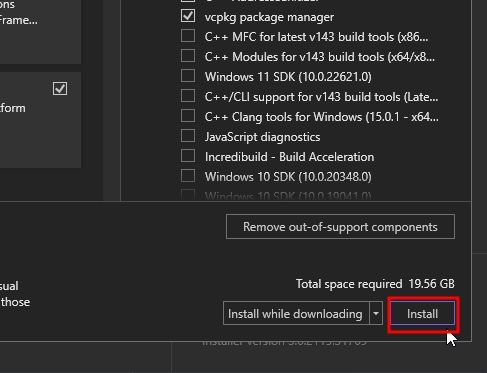
5. Next, click on the “Install” button at the bottom right corner. After the installation, restart your computer. You don’t need to use Visual Studio thereafter, but keep it installed.
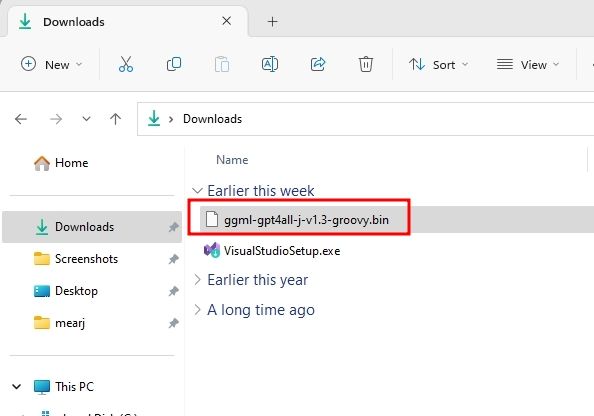
6. Finally, go ahead and download the default model (“groovy”) from here. The size is around 3.5GB. You can download other models from this link if you have a more powerful computer.
How to Set Up PrivateGPT on Your PC Locally
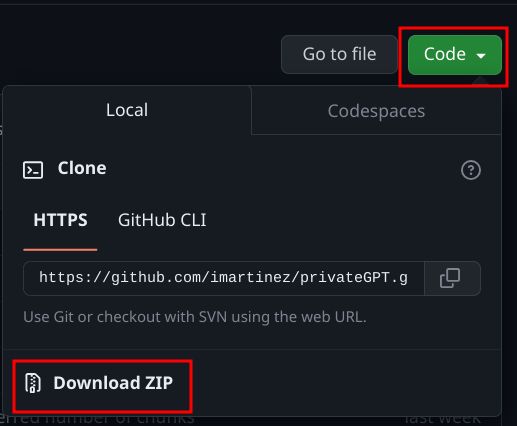
1. First, open the GitHub link of the privateGPT repository and click on “Code” on the right. Here, click on “Download ZIP.”
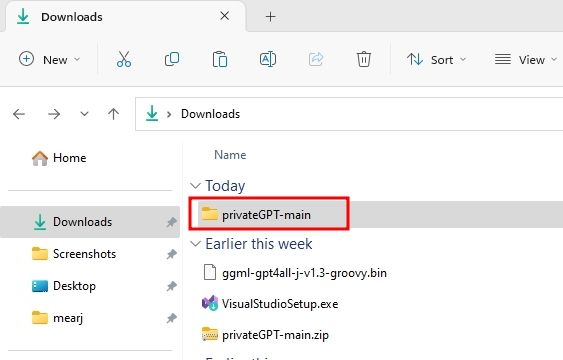
2. Now, open the ZIP file and extract the folder named “privateGPT-main”.
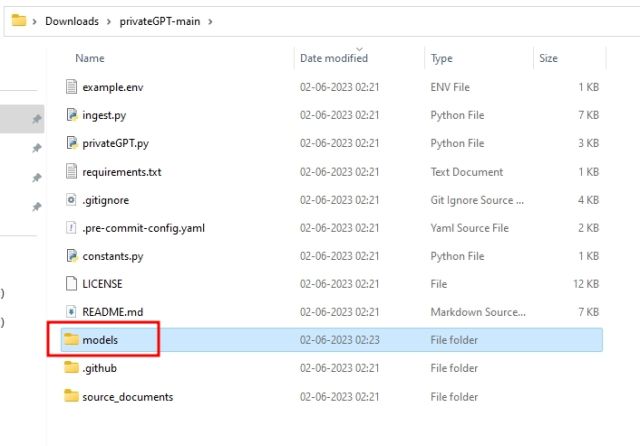
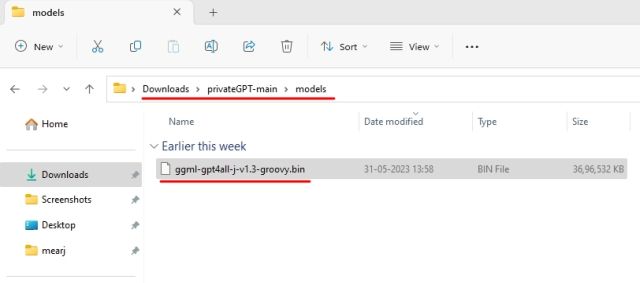
3. Next, open the “privateGPT-main” folder and create a new folder named “models“.
4. Under the “models” folder, paste the “groovy” model you downloaded above.
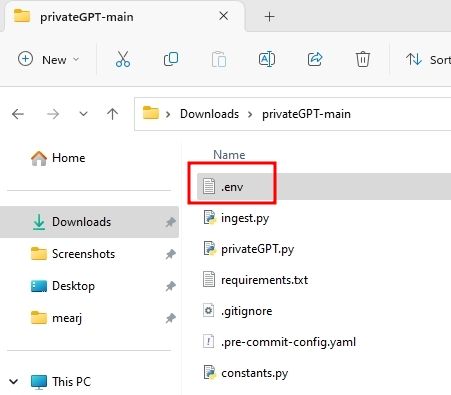
5. Now, go back to the main folder, and you will find an “example.env” file. Rename it as just the “.env” file.
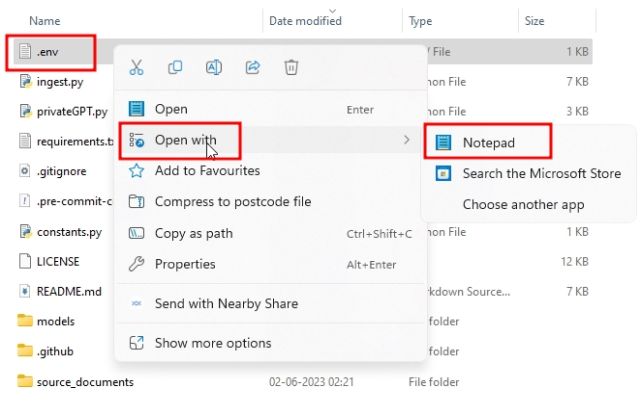
6. Now, right-click on the “.env” file and open it with Notepad.
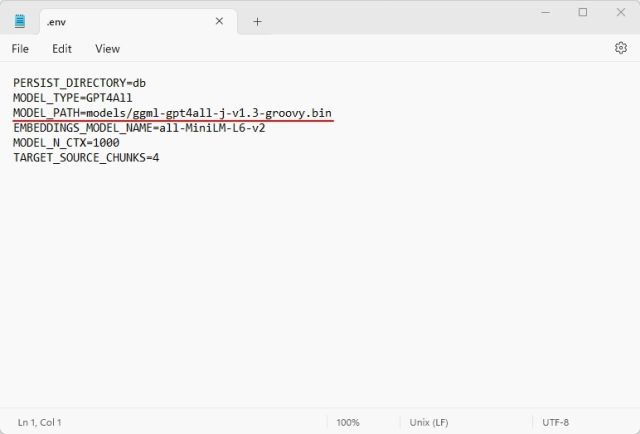
7. If you have downloaded a different model, you can define it under “MODEL_PATH”. Since we are using the default model, no change is needed. You can close Notepad now.
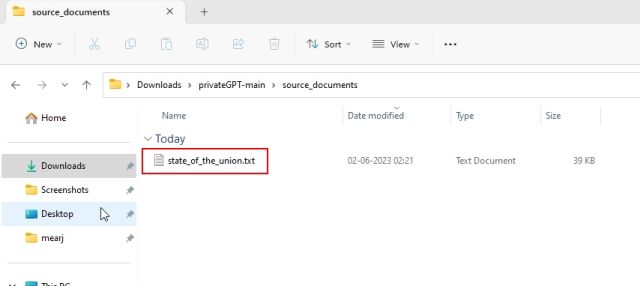
8. Next, open the “source_documents” folder. Here, you can add all kinds of documents to train the custom AI chatbot. As an example, the developer has added a transcript of the State of the Union address in TXT format. However, you can also add PDF, DOC, DOCX, CSV, EPUB, TXT, PPT, PPTX, ODT, MSG, MD, HTML, EML, and ENEX files here.
Train a Custom AI Chatbot Using PrivateGPT
1. Finally, it’s time to train a custom AI chatbot using PrivateGPT. Open Terminal on your computer. If you are using Windows, open Windows Terminal or Command Prompt.
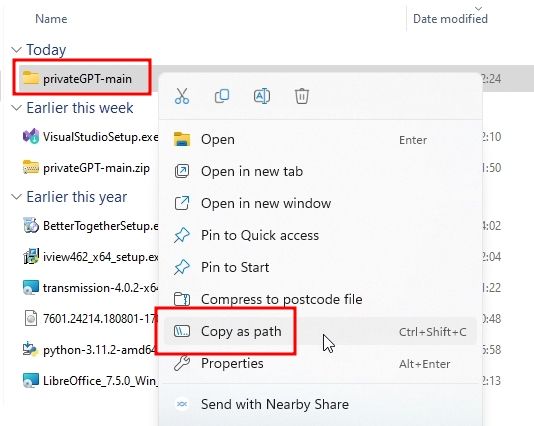
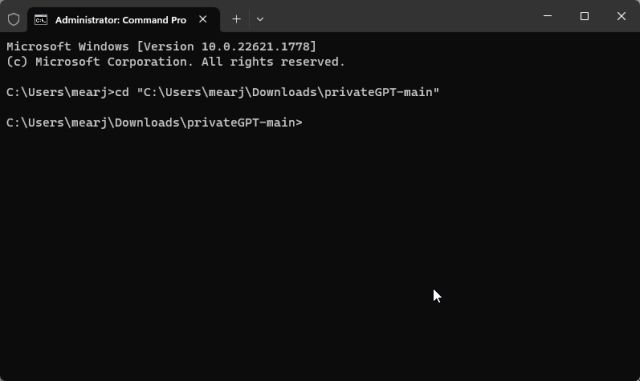
2. Now, right-click on the “privateGPT-main” folder and choose “Copy as path“. This will copy the path of the folder.
3. Now, move back to the Terminal and type cd, add a space, and paste the path by right-clicking in the Terminal window. It will look something like below.
cd "C:\Users\mearj\Downloads\privateGPT-main"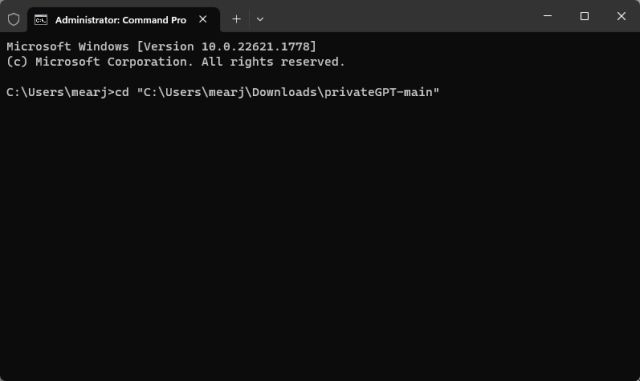
4. Next, hit Enter, and you will move to the privateGPT-main folder.
5. Once you are in the folder, run the below command, and it will start installing all the packages and dependencies. It might take 10 to 15 minutes to complete the process, so please keep patience. If you get any error, run the below command again and make sure Visual Studio is correctly installed along with the two components mentioned above.
pip3 install -r requirements.txt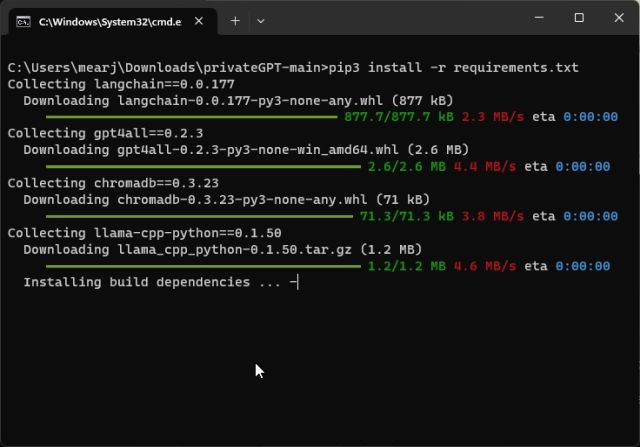
6. Once all the dependencies are installed, run the below command to create local embeddings and vectorstore. This process will take a few seconds depending on the corpus of data added to “source_documents.” macOS and Linux users may have to use python3 instead of python in the command below.
python ingest.py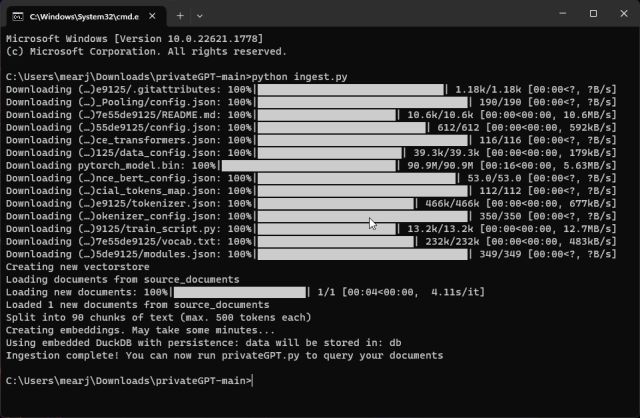
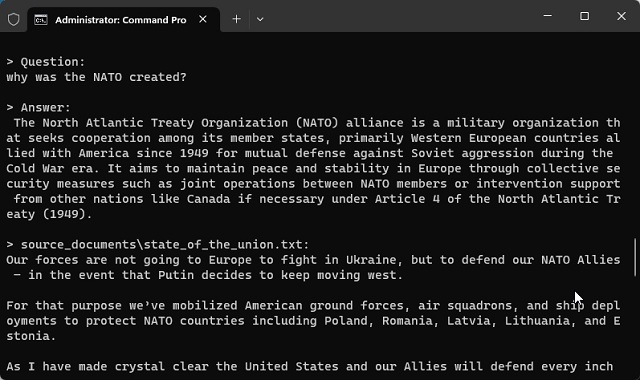
7. Finally, run PrivateGPT by executing the below command. You will be asked to enter your query. Enter your question and hit Enter.
python privateGPT.py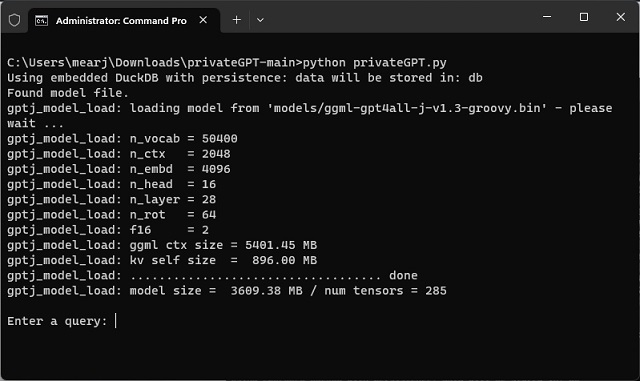
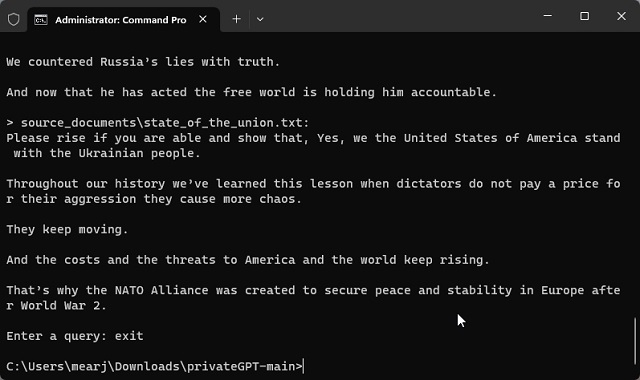
8. On my Intel 10th-gen i3-powered desktop PC, it took close to 2 minutes to answer a query. After every answer, it will also display four sources from where it has got the context.
9. To stop the conversation, type exit and hit Enter.
You can also turn off the internet, but the private AI chatbot will still work since everything is being done locally. PrivateGPT does not have a web interface yet, so you will have to use it in the command-line interface for now. Also, it currently does not take advantage of the GPU, which is a bummer. Once GPU support is introduced, the performance will get much better. Finally, to load up the PrivateGPT AI chatbot, simply run python privateGPT.py if you have not added new documents to the source folder.


