
In our earlier article, we demonstrated how to build an AI chatbot with the ChatGPT API and assign a role to personalize it. But what if you want to train the AI on your own data? For example, you may have a book, financial data, or a large set of databases, and you wish to search them with ease. In this article, we bring you an easy-to-follow tutorial on how to train an AI chatbot with your custom knowledge base with LangChain and ChatGPT API. We are deploying LangChain, GPT Index, and other powerful libraries to train the AI chatbot using OpenAI’s Large Language Model (LLM). So on that note, let’s check out how to train and create an AI Chatbot using your own dataset.
Notable Points Before You Train AI with Your Own Data
1. You can train the AI chatbot on any platform, whether Windows, macOS, Linux, or ChromeOS. In this article, I’m using Windows 11, but the steps are nearly identical for other platforms.
2. The guide is meant for general users, and the instructions are explained in simple language. So even if you have a cursory knowledge of computers and don’t know how to code, you can easily train and create a Q&A AI chatbot in a few minutes. If you followed our previous ChatGPT bot article, it would be even easier to understand the process.
3. Since we are going to train an AI Chatbot based on our own data, it’s recommended to use a capable computer with a good CPU and GPU. However, you can use any low-end computer for testing purposes, and it will work without any issues. I used a Chromebook to train the AI model using a book with 100 pages (~100MB). However, if you want to train a large set of data running into thousands of pages, it’s strongly recommended to use a powerful computer.
4. Finally, the data set should be in English to get the best results, but according to OpenAI, it will also work with popular international languages like French, Spanish, German, etc. So go ahead and give it a try in your own language.
Set Up the Software Environment to Train an AI Chatbot
Install Python and Pip
1. First off, you need to install Python along with Pip on your computer by following our linked guide. Make sure to enable the checkbox for “Add Python.exe to PATH” during installation.


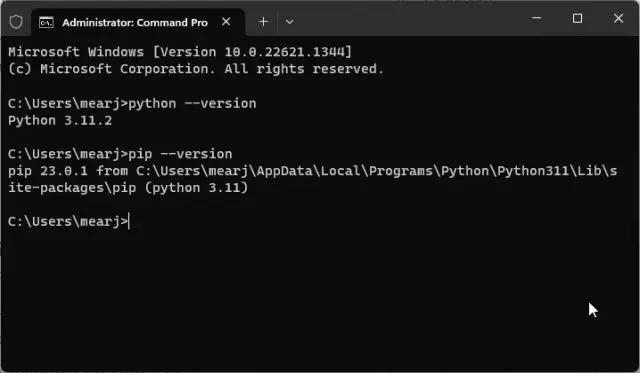
2. To check if Python is properly installed, open the Terminal on your computer. Once here, run the below commands one by one, and it will output their version number. On Linux and macOS, you will have to use python3 instead of python from now onwards.
python --version
pip --version

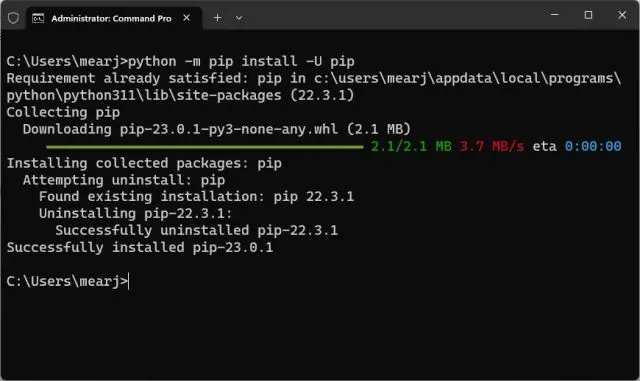
3. Run the below command to update Pip to the latest version.
python -m pip install -U pip

Install OpenAI, GPT Index, PyPDF2, and Gradio Libraries
1. Open the Terminal and run the below command to install the OpenAI library.
pip install openai

2. Next, let’s install GPT Index.
pip install gpt_index==0.4.24


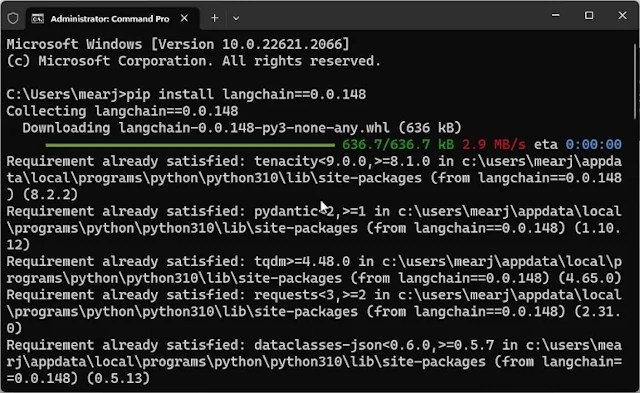
3. Now, install Langchain by running the below command.
pip install langchain==0.0.148

4. After that, install PyPDF2 and PyCryptodome to parse PDF files.
pip install PyPDF2
pip install PyCryptodome


5. Finally, install the Gradio library. This is meant for creating a simple UI to interact with the trained AI chatbot.
pip install gradio

Download a Code Editor
Finally, we need a code editor to edit some of the code. On Windows, I would recommend Notepad++ (Download). Simply download and install the program via the attached link. You can also use VS Code on any platform if you are comfortable with powerful IDEs. Other than VS Code, you can install Sublime Text (Download) on macOS and Linux.


For ChromeOS, you can use the excellent Caret app (Download) to edit the code. We are almost done setting up the software environment, and it’s time to get the OpenAI API key.
Get the OpenAI API Key For Free
1. Head to OpenAI’s website (visit) and log in. Next, click on “Create new secret key” and copy the API key. Do note that you can’t copy or view the entire API key later on. So it’s recommended to copy and paste the API key to a Notepad file for later use.


2. Next, go to platform.openai.com/account/usage and check if you have enough credit left. If you have exhausted all your free credit, you need to add a payment method to your OpenAI account.


Train and Create an AI Chatbot With Custom Knowledge Base
Add Your Documents to Train the AI Chatbot
1. First, create a new folder called docs in an accessible location like the Desktop. You can choose another location as well according to your preference. However, keep the folder name docs.


2. Next, move the documents for training inside the “docs” folder. You can add multiple text or PDF files (even scanned ones). If you have a large table in Excel, you can import it as a CSV or PDF file and then add it to the “docs” folder. You can also add SQL database files, as explained in this Langchain AI tweet. I haven’t tried many file formats besides the mentioned ones, but you can add and check on your own. For this article, I am adding one of my articles on NFT in PDF format.
Note: If you have a large document, it will take a longer time to process the data, depending on your CPU and GPU. In addition, it will quickly use your free OpenAI tokens. So in the beginning, start with a small document (30-50 pages or < 100MB files) to understand the process.


Make the Code Ready
1. Now, open a code editor like Sublime Text or launch Notepad++ and paste the below code. Once again, I have taken great help from armrrs on Google Colab and tweaked the code to make it compatible with PDF files and create a Gradio interface on top.
from gpt_index import SimpleDirectoryReader, GPTListIndex, GPTSimpleVectorIndex, LLMPredictor, PromptHelper
from langchain.chat_models import ChatOpenAI
import gradio as gr
import sys
import os

os.environ["OPENAI_API_KEY"] = 'Your API Key'

def construct_index(directory_path):
    max_input_size = 4096
    num_outputs = 512
    max_chunk_overlap = 20
    chunk_size_limit = 600

    prompt_helper = PromptHelper(max_input_size, num_outputs, max_chunk_overlap, chunk_size_limit=chunk_size_limit)

    llm_predictor = LLMPredictor(llm=ChatOpenAI(temperature=0.7, model_name="gpt-3.5-turbo", max_tokens=num_outputs))

    documents = SimpleDirectoryReader(directory_path).load_data()

    index = GPTSimpleVectorIndex(documents, llm_predictor=llm_predictor, prompt_helper=prompt_helper)

    index.save_to_disk('index.json')

    return index

def chatbot(input_text):
    index = GPTSimpleVectorIndex.load_from_disk('index.json')
    response = index.query(input_text, response_mode="compact")
    return response.response

iface = gr.Interface(fn=chatbot,
                     inputs=gr.components.Textbox(lines=7, label="Enter your text"),
                     outputs="text",
                     title="Custom-trained AI Chatbot")

index = construct_index("docs")
iface.launch(share=True)
2. Next, click on “File” in the top menu and select “Save As…” . After that, set the file name app.py and change the “Save as type” to “All types”. Then, save the file to the location where you created the “docs” folder (in my case, it’s the Desktop).


3. Make sure the “docs” folder and “app.py” are in the same location, as shown in the screenshot below. The “app.py” file will be outside the “docs” folder and not inside.


4. Come back to the code again in Notepad++. Here, replace Your API Key with the one that you generated above on OpenAI’s website.


5. Finally, press “Ctrl + S” to save the code. You are now ready to run the code.


Create ChatGPT AI Bot with Custom Knowledge Base
1. First, open the Terminal and run the below command to move to the Desktop. It’s where I saved the “docs” folder and “app.py” file.
cd Desktop


2. Now, run the below command.
python app.py


3. It will start indexing the document using the OpenAI LLM model. Depending on the file size, it will take some time to process the document. Once it’s done, an “index.json” file will be created on the Desktop. If the Terminal is not showing any output, do not worry, it might still be processing the data. For your information, it takes around 10 seconds to process a 30MB document.


4. Once the LLM has processed the data, you will find a local URL. Copy it.

5. Now, paste the copied URL into the web browser, and there you have it. Your custom-trained ChatGPT-powered AI chatbot is ready. To start, you can ask the AI chatbot what the document is about.


6. You can ask further questions, and the ChatGPT bot will answer from the data you provided to the AI. So this is how you can build a custom-trained AI chatbot with your own dataset. You can now train and create an AI chatbot based on any kind of information you want.


Manage the Custom AI Chatbot
1. You can copy the public URL and share it with your friends and family. The link will be live for 72 hours, but you also need to keep your computer turned on since the server instance is running on your computer.


2. To stop the custom-trained AI chatbot, press “Ctrl + C” in the Terminal window. If it does not work, press “Ctrl + C” again.

3. To restart the AI chatbot server, simply move to the Desktop location again and run the below command. Keep in mind, the local URL will be the same, but the public URL will change after every server restart.
python app.py


4. If you want to train the AI chatbot with new data, delete the files inside the “docs” folder and add new ones. You can also add multiple files, but make sure to add clean data to get a coherent response.

5. Now, run the code again in the Terminal, and it will create a new “index.json” file. Here, the old “index.json” file will be replaced automatically.
python app.py

6. To keep track of your tokens, head over to OpenAI’s online dashboard and check how much free credit is left.


7. Lastly, you don’t need to touch the code unless you want to change the API key or the OpenAI model for further customization.


