If there is one thing that Android does better than any other mobile operating system, it’s customization. If you’re running a rooted device, you can do pretty much anything on it. However, even without root access, Android allows users to customize their phone endlessly. With the Google Pixel, and now the Galaxy S8, we’ve seen some really cool navigation bar icons, and while those icons are not available on other devices, it doesn’t mean we can’t customize the navigation bar to get icons like that. So, if you want to customize your Android phone to have a navigation bar that looks like the Pixel, or the S8, here is how to set custom navigation bar icons in Android:
Installing and Setting Up Custom Navigation Bar
Getting custom navigation bar icons on Android is very easy, you just need an app called “Custom Navigation Bar” (Free). Once you have it installed, just follow the steps below:
- Launch the app, and tap on “Get Started”. This will take you to a screen with instructions on how to give the app permissions to change the navigation bar icons on your phone. You’ll need ADB for this, so connect your phone to your laptop, and allow USB Debugging.
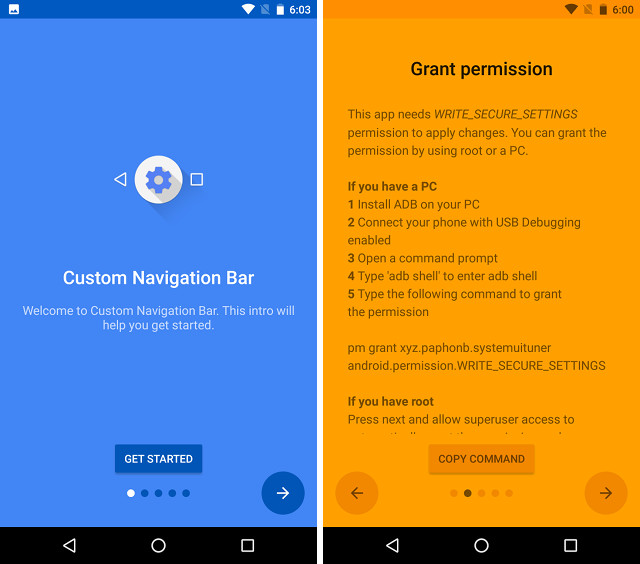
- Launch Terminal (or CMD on Windows), and type the following commands:
adb shell
pm grant xyz.paphonb.systemuituner android.permission.WRITE_SECURE_SETTINGS

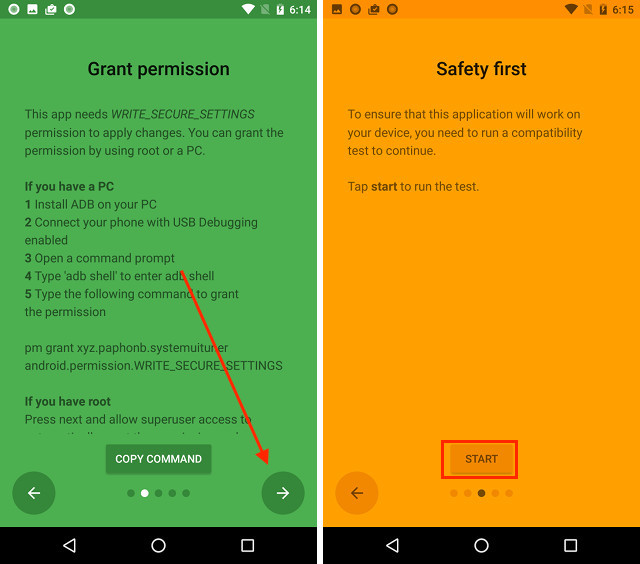
- Once you’ve done that, the yellow screen in the app will turn green, signifying that the app has the required permissions. Tap on the right arrow. You’ll be required to run a compatibility test for your phone. Just tap on “Start“.
Set Custom Navigation Bar Icons
Now that you’ve set up the Custom Navigation Bar app, you can play around with the settings and change the navigation bar icons on your phone. For demonstration, I’ll change the icons on my Nexus 5X to those of Galaxy S8. You’ll have to download the image files for the icons, that you can find readily available on the internet. Once you have that, just follow the steps below:
- Launch the app and tap on “Navigation Bar“. Here, tap on “Experimental Tweaks“.
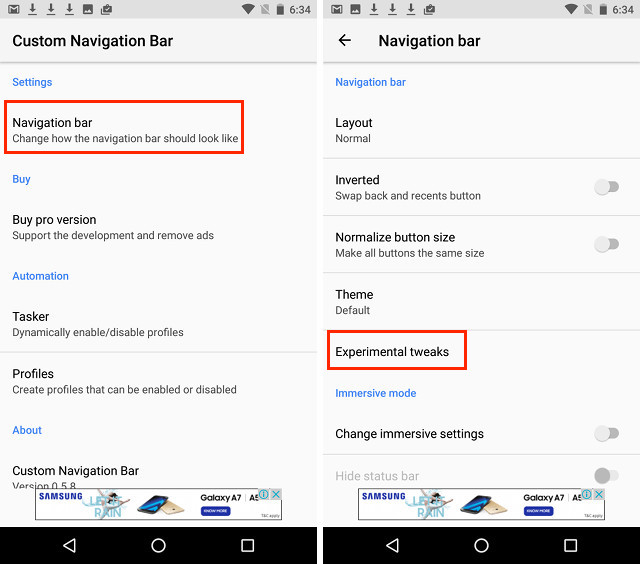
- Under “Back“, tap on “Type“, and select “Keycode“.
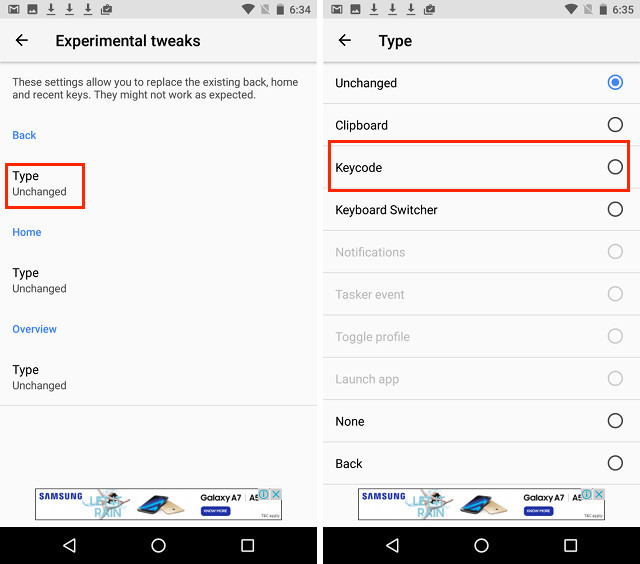
- Then, under “Back“, tap on “Keycode“, and select “Back“.
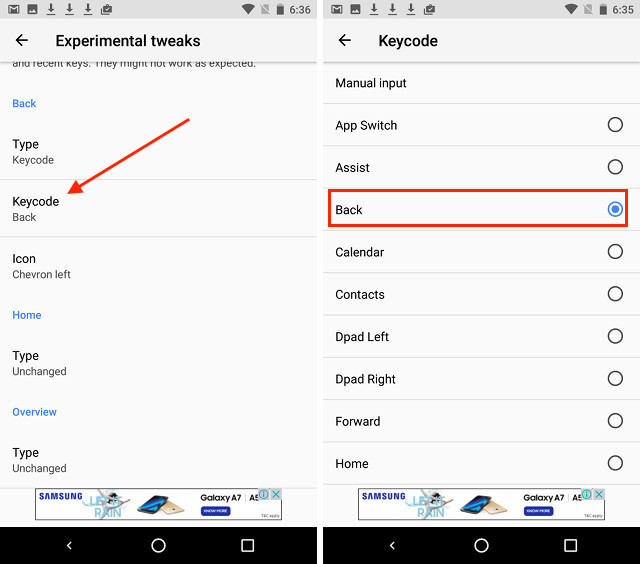
- Then, tap on “Icon“, scroll down and tap on “Browse File…“.
![]()
- Select the downloaded image for the back key, and tap on “Ok“.
- Repeat the process for each of the Navigation Bar keys, and select the appropriate images. The keycode for the “Home” key is “Home”, and for the “Recent Apps” key is “App Switch”.
Once you’ve done that, your navigation bar should have the icons that you want. Check out this Nexus 5X with a navigation bar that looks like the Galaxy S8’s or whatever else you wanted it to look like.
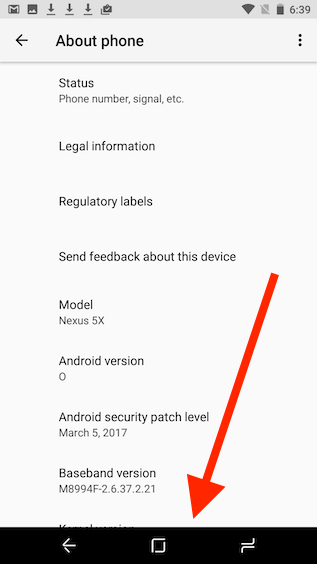
The Custom Navigation Bar app has a number of preset themes available as well. However, they are only available in the Pro version of the app, which will cost you ~$1.99.
SEE ALSO: How to Customize Navigation Bar on Android
Customize Navigation Bar with Custom Navigation Bar
Custom Navigation Bar is a very powerful app that you can use to completely customize your navigation bar. You change the icons to custom icons that you want, or you can use on the preset themes in the app to apply a different look to your navigation bar with one tap. There are a lot of other features in the app as well, and it’s definitely worth a try. As always, if you know of some other, easier way to change the look of the navigation bar on your Android device, do let us know about it in the comments section below.


