Technology as a whole is always advancing onto newer frontiers. But, this also means older hardware slowly gets less performant when it comes to running newer operating systems. However, there are a lot of ways one can make their computers perform much faster. While Chrome OS Flex was one such example, another one is the recently released Bliss OS, an open-source OS based on Android. Fortunately, Bliss OS has now released the alpha version of Bliss OS 15 that brings Android 12L to PC users. So if you’re part of the users looking to power up your PC and enjoy Android 12L at the same time, keep reading.
Run Android 12L on Windows PC (2022)
While this guide will cover the process to install Android 12L on a PC, I will also be quickly comparing it to ChromeOS Flex briefly. If you would rather read that, then use the table below to do so:
Requirements and Considerations to Run Android 12L
While the process itself is easy enough, there are some things you will need to properly install Android 12L. Make sure you have the following items checked before you begin:
1. Bliss OS 15 Build
You will need to download the early test OS 15 build from Bliss’ website in order to use it on your PC. Since the process itself is not as easy as just double-clicking on it, Bliss has put up a little test you need to pass. However, in the interest of saving you time, you can simply download the latest BlissOS 15 (Get) from this link and keep it aside for now.
2. Rufus
The build we have downloaded will be in an ISO format and hence will need to be burned onto a USB drive. Rufus is a good utility software that helps you quickly create bootable USB drives. Make sure to download Rufus (Get) and install it on your PC before we begin.
3. A USB Pen Drive
You will also require a USB pen drive since it will be used to install or even view Android 12L on the target computer. Make sure to have that covered before you begin.
4. Be Prepared for Bugs and Glitches
Since this Bliss OS Alpha build is in very early stages, it’s no surprise there might be lots of bugs there. If you’re thinking of using this build as your daily driver, I would advise against that and instead suggest previewing it first. Don’t worry as I will show you how to do that too. However, if you do decide to proceed with the installation, keep the build’s early nature in mind.
How to Install Android 12L on Your PC
Ready to begin? The process of installing 12L on your PC is easy enough. Follow along as I show you to proceed:
Burning ISO Image onto the USB Drive
Let’s begin by making our USB drive bootable with the Bliss OS 15 build. You will need to do this regardless of whether you want to preview the OS or are installing it. Insert your pen drive onto your PC and follow the steps below to do so:
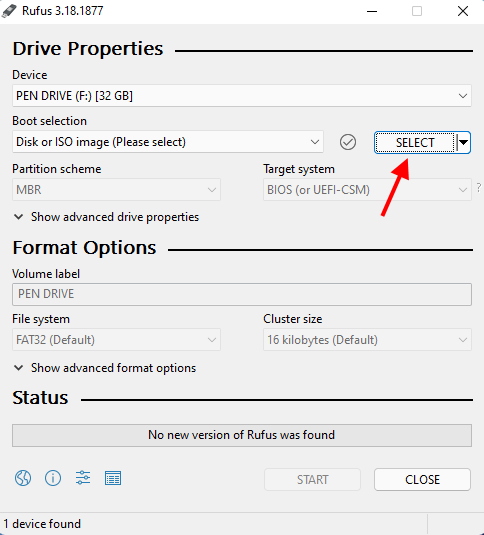
1. Open up Rufus on your computer to begin. Make sure you select your USB drive by clicking the drop-down button next to ‘Device‘.
2. Besides boot selection, click on the ‘Select‘ button to choose your ISO file.
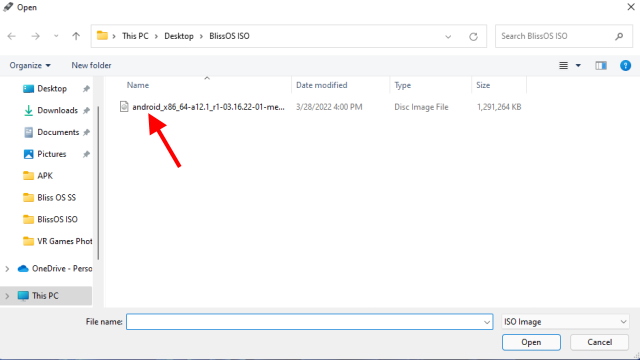
3. Navigate to the directory where you have stored your build. In my case, I have done so on the desktop.
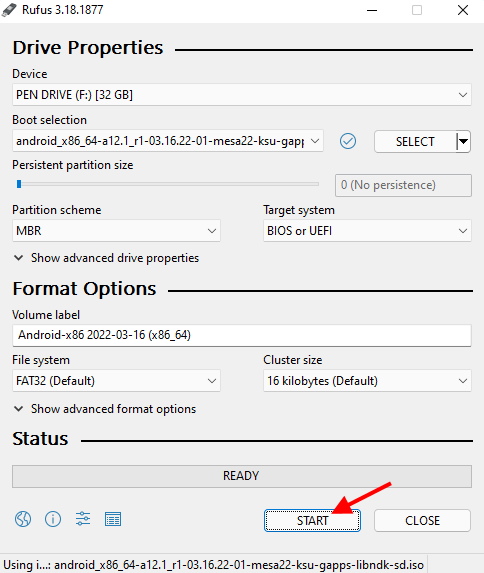
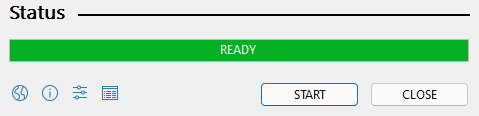
4. Simply press the ‘Start‘ button. You do not need to change any other setting.
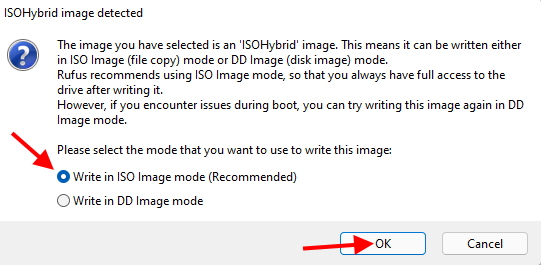
5. A pop-up box will appear and will ask you the mode in which you want the image to be written. Choose ‘Write in ISO image mode‘ and then OK to proceed.
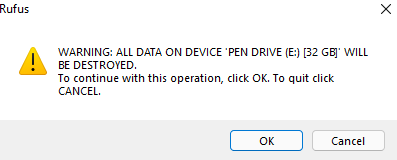
6. Press ‘OK‘ to give Rufus consent to format your pen drive.
7. Depending on your PC, the process may take anywhere from 2 to 10 minutes. Once done, you will see the following message and can then press Close and eject your Pen Drive.
Install Android 12L onto Your PC – Preparation
If you loved navigating through the portable version of Android 12L, then you can go ahead and install it onto your PC. However, as mentioned above do remember that the early builds might and do contain some bugs. For instance – Bluetooth does not seem to work at this point. If you dabble in sensitive work, then I recommend sticking with your stock OS. However, if you still want to proceed, then we will first need to create a separate partition on our system before installation. I will be using my Windows 10 laptop for this. Those with a similar setup, follow the steps below:
1. Press Win+R and type “diskmgmt.msc” in the Run window and press Enter. The Disk Management window will now open up.
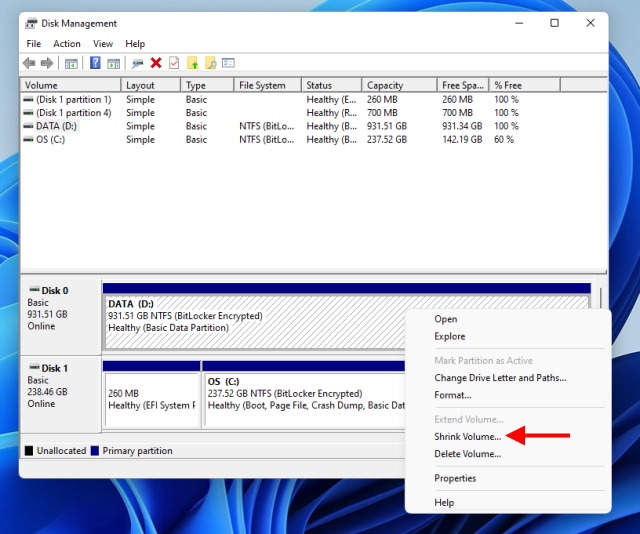
2. You will now need to either find unallocated space in your drive and create a volume or shrink an existing one to do so. Make sure the space comes out to at least 50GB.
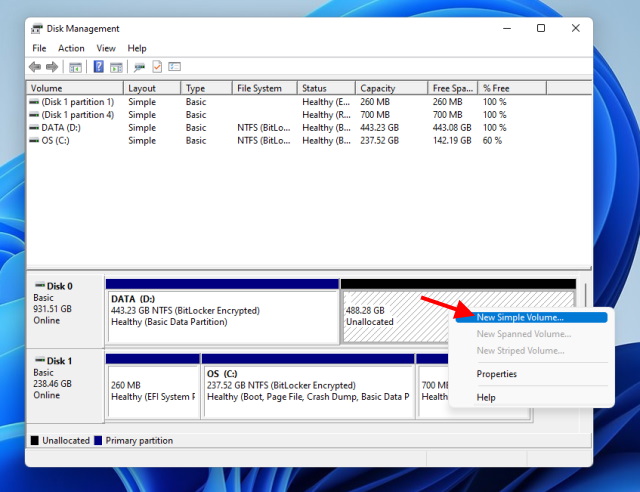
3. Once you see unallocated space, right-click on it and press ‘New Simple Volume‘.
4. Follow through the set-up wizard and assign your drive a letter and a name. You can leave the rest of the settings untouched.
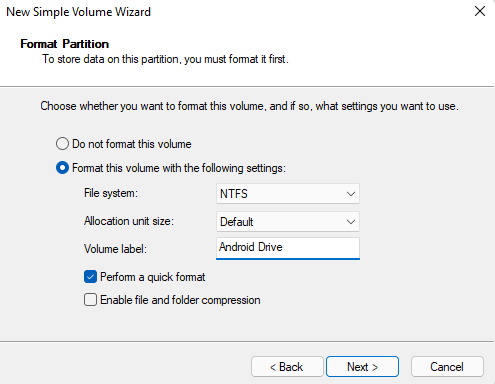
5. Click Finish and the new partition will be created.
You are now ready to install Android 12L on our PC. Follow the section below for that.
Installing Android 12L
With everything set let’s begin by installing Android onto our system. Follow the steps below to do so:
1. Like before in the preview section, insert the USB drive onto your PC and shut it down.
2. Boot up the pen drive again by going into your PC’s BIOS and the boot menu. You’ll find yourself in the Android’s main menu once again.
3. However, this time scroll all the way down using your keyboard and select ‘Android-x86 2022-03-16 Installation‘, and press Enter.
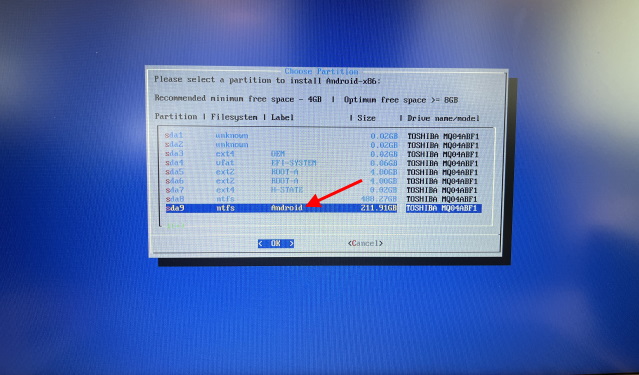
4. From the menu that appears, choose the partition that we created earlier and then press Enter to select it.
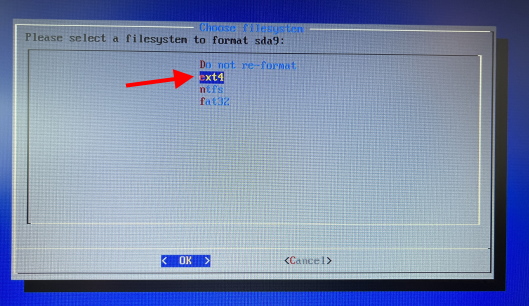
5. On the next screen, choose ‘ext4‘ and press Enter. This will begin the reformatting of the partition and might take a few minutes.
6. A couple of pop-up boxes will now come up. Simply say Yes to all of them to proceed with the installation.
The process itself will take 15-20 minutes and once done you will see the option to boot into Android or return to the BIOS. And that’s how easy it is! However, do remember that you will need to boot into your BIOS every time to make the selection between Windows/Android partitions. Now go on and enjoy Android 12L on your PC!
Preview Android 12L Instead
This section is for the users who want to experience Android 12L on their PC but aren’t ready to fully install it. Fortunately, Bliss OS’ ISO build has a preview function that will make it run from the USB drive itself. Make sure you have burned the ISO image on to your pen drive before you proceed. Once done, follow the steps below.
1. Shut down your PC and insert the USB drive into the computer you want to try this one.
2. Press the Power On button and soon as you do, repeatedly tap the key that will lead you into the PC’s BIOS. Depending on the manufacturer, the key might vary but mostly is between F2, F8, and F12.
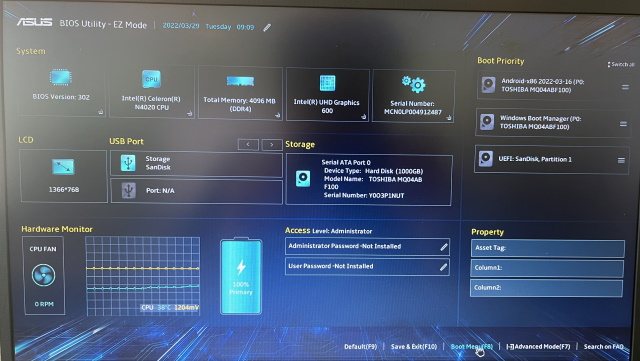
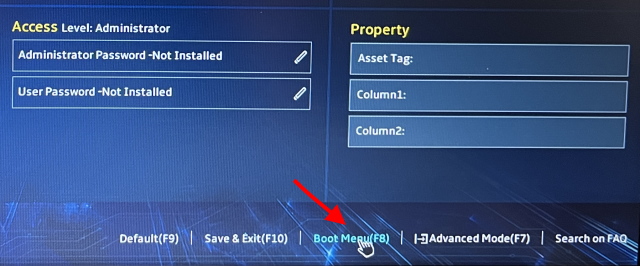
3. You will land into the PC’s BIOS interface. From here, find the Boot Menu option that will let you choose your Pen Drive. As you can see, in my ASUS PC’s case, it’s simply pressing F8.
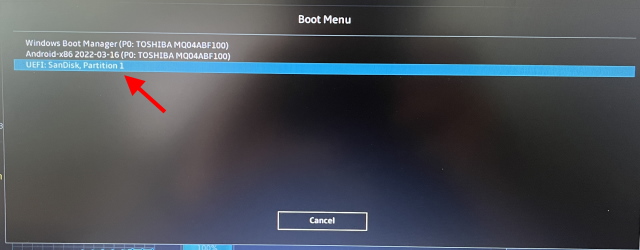
4. Once in the boot menu, you will see your main hard drive and the Pen Drive below it. Simply highlight the pen drive by using the arrow keys and then press Enter to boot from it.
5. Your PC will now begin reading from this USB drive and will show up in a menu in a while. You’re now in the USB drive’s menu list.
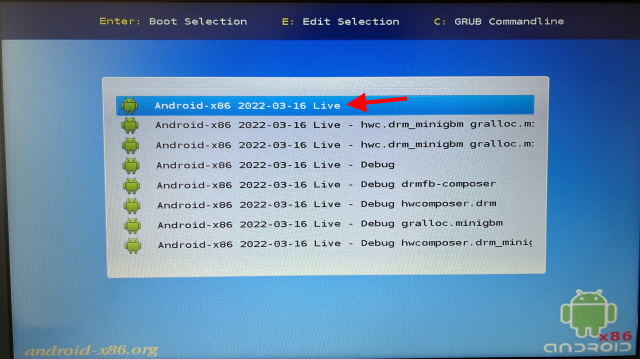
6. From the list of options that appear, select ‘Android-x86 2022-03-16 Live‘ and press Enter to boot it up.
7. Your PC will now start to boot up into the Android 12L build. Depending on your USB Drive and PC, this might take a while. It is also important to note that you should not remove the USB drive at any stage. Furthermore, if you see any warnings, don’t worry and let the start-up process continue as is.
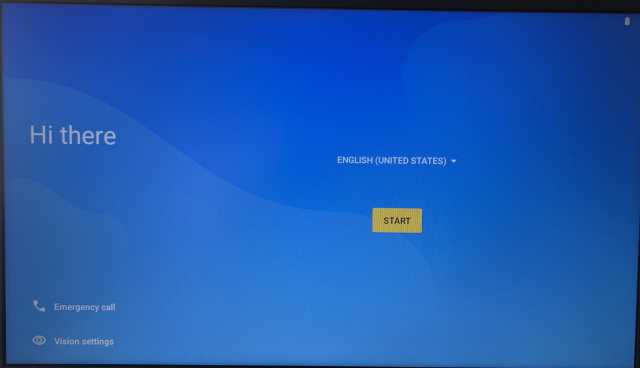
Congratulations! You’re now on the Android set-up screen. Feel free to set the OS up and connect to Wi-Fi and experience Android on your PC! However, do remember that once you shut your PC down, you will have to start over with the setup once again. If you feel the preview version is stable enough, then follow the section below to learn how to install it.
Initial Impressions of 12L
From my initial use of Android 12L on the PC, I can say that Bliss OS devs have done a fine job of implementing their code on top of Android. Running Android 12L on my pc even while previewing definitely feels faster and smoother compared to Windows. One of the biggest advantages of the Bliss OS 15 Android build is that you get pre-installed Google apps. When it comes to the overall design, this build of 12L shares aspects and elements from traditional Android combined with Material Elements. I had lots of fun setting Google Clock Android 12 Widgets on my home screen while jazzing my experience up with different launchers all the while on my PC.
Comparing the Android 12L build against ChromeOS Flex, I feel little to no difference when it comes to overall smoothness. However, the perfect replication of Android elements and gestures combined with various keyboard shortcuts make 12L feel more of an Android and fun experience. If you’re someone in love with Android and want to have it on your PC without slowing it down, surely check it out. Users who want more of a PC experience while still keeping their computer fast learn how to install ChromeOS Flex here.
Make Your PC Faster with Android 12L
I hope you enjoy making your PC faster and enjoying Android with this newest BlissOS build. Once you’re all set up, try these best Android multiplayer games out and see if you can play any of them on this build. Are you running into problems? Ask your questions in the comments below!