Since there isn’t a native option to record video calls in the FaceTime app, Apple device users often wonder, ‘Can you record FaceTime calls on iPhone or Mac?’ If that question has ever been on your mind as well, let me show you a handy workaround to recording a FaceTime call on your iPhone, iPad, and Mac device in a few easy steps. And that too without having to install any third-party screen recording software. With that in mind, let’s check out the steps to record a FaceTime call!
Record FaceTime Calls on iPhone, iPad, and Mac (September 2021)
Talking about the requirements to record FaceTime calls, all you need is a Mac and QuickTime Player. Yes, you read that right! Whether you want to save a FaceTime call on your Mac or iPhone, QuickTime is a must. Since QuickTime comes preinstalled in macOS, you don’t have to worry about installing the software or spending any money. Now that you know the requirements, it’s time to go through the steps to record a FaceTime call.
How to Record a FaceTime Call on Your Mac

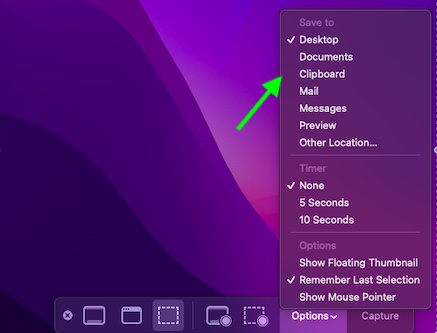
2. Next, select the preferred location where you want to save your FaceTime call recordings under “Save to“. All screen recordings are saved to the Mac Desktop by default.
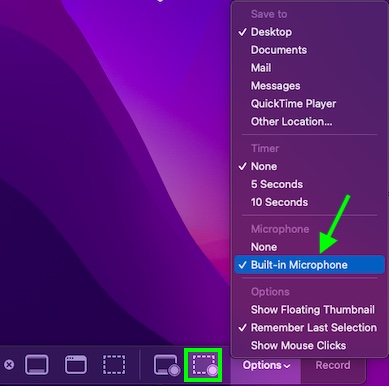
3. Then, under the Options menu, choose the Built-in Microphone option under the “Microphone” section to record FaceTime calls with audio on your Mac.
4. Next up, you need to click the “Record Entire Screen“ or “Record Selected Portion” buttons to select your recording area.


5. And now, click on the Record button to start recording the screen on your Mac.

6. Now, start a FaceTime call, knowing that the call is being recorded in the background. Once you end the call, click on the “Stop Recording” button from the Menu bar at the top.

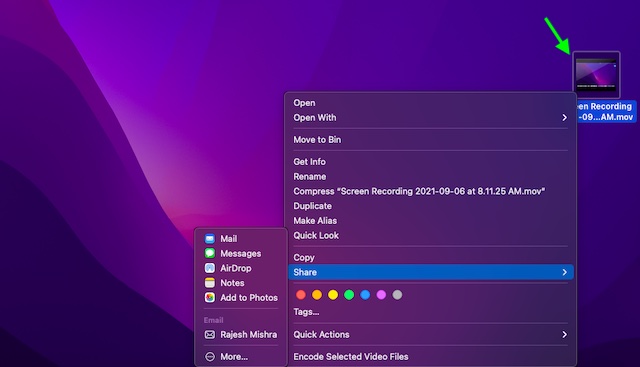
That’s it! Your FaceTime call recording will be saved to your desired location. Now, you can watch your recorded call, save it to the Photos app, and even share it via AirDrop, iMessage, messaging apps like WhatsApp, or other mediums.
How to Record a FaceTime Call on iPhone or iPad
While you can choose to record Facetime calls on your iPhone, Apple doesn’t allow you to record audio on your device for privacy reasons. But there’s a workaround that has existed for the longest time. You can simply use your Mac to record a FaceTime call with audio on your iPhone. And well, we will show you how to do it right here:
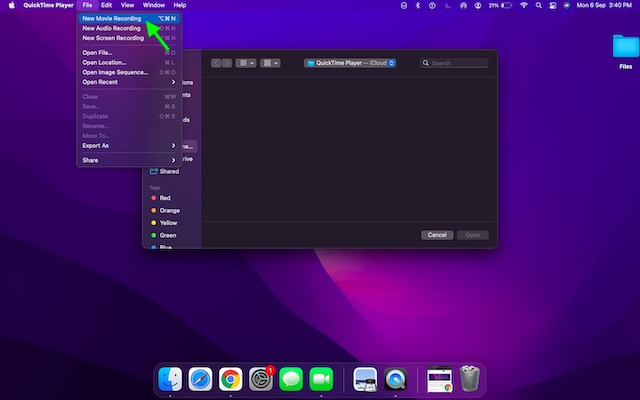
2. Now, click on the arrow located next to the record button in the QuickTime window.

3. Next, select your iPhone or iPad from the list of available cameras.

4. Then, unlock your iOS device. And boom! You can now see your iPhone or iPad’s display in the QuickTime Player on your Mac.
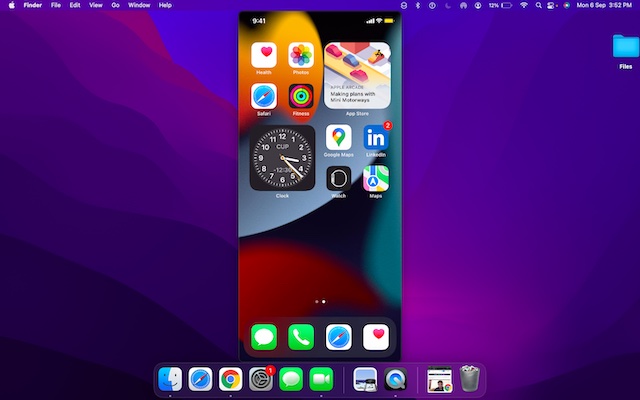
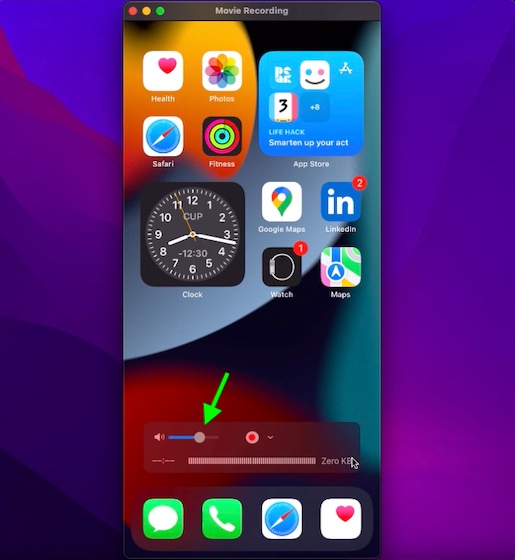
5. Now, ensure that the volume bar is turned up in QuickTime Player. You can drag the slider to increase/ decrease the volume of the audio being recorded from the device.
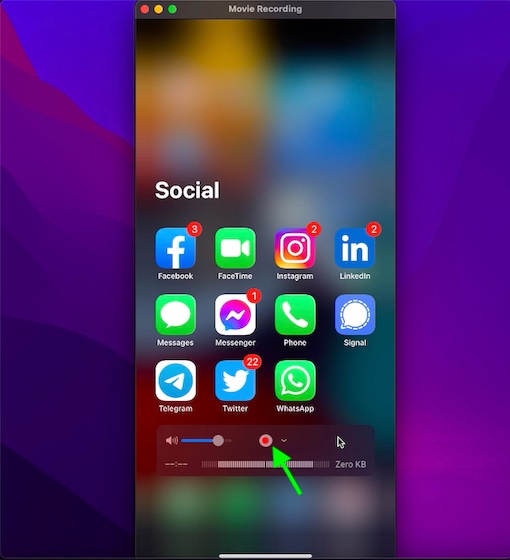
6. Up next, launch the FaceTime app on your iPhone or iPad, and click the Record button in QuickTime Player on your Mac.
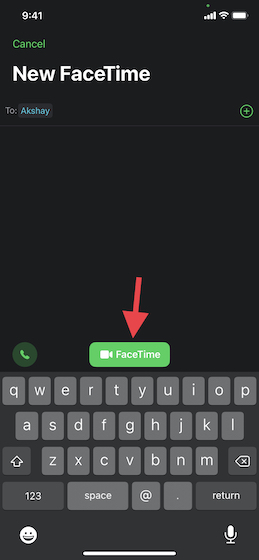
7. After that, start a FaceTime call on your iPhone to record it with audio using your Mac.
8. Once you have ended the FaceTime call, click on the Stop button in QuickTime to end the recording.
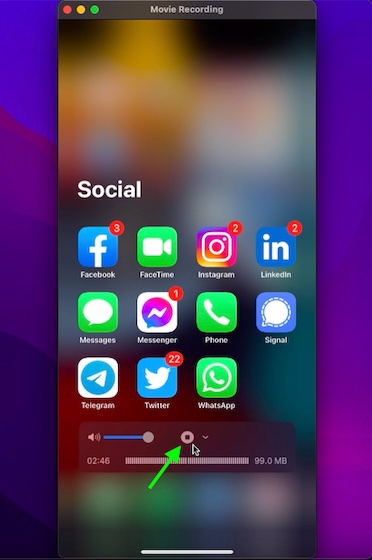
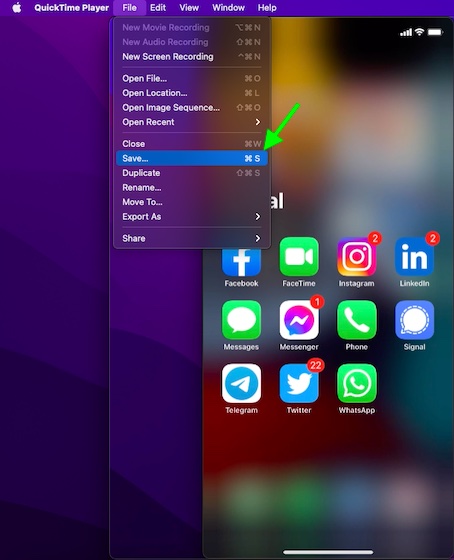
9. Next, click on the File menu and choose Save.
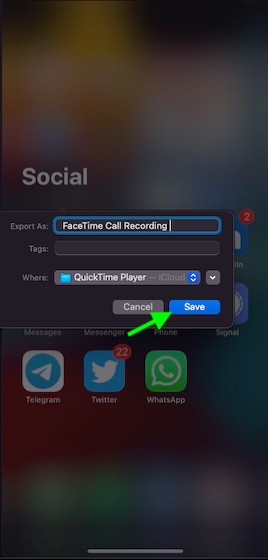
9. Finally, select the location where you want to save the recording and hit “Save” to finish.
Record FaceTime Video Calls on iPhone, iPad, and Mac With Ease
That’s pretty much all you have to do to record FaceTime calls with audio on your iPhone, iPad, or Mac device. Thanks to the QuickTime Player app, the process is a lot easier than most people think. While a native FaceTime call recording option would be of great convenience, this nifty workaround does not disappoint in any way. So, until Apple finally listens to our wish, make the most of this hack to record your FaceTime calls for a keepsake.
It’s worth pointing out that Apple has revamped FaceTime in iOS 15 and macOS Monterey. The ability to watch movies and TV shows with friends on FaceTime, the ability to screen share, and use FaceTime on Android and Windows 11 have further enriched Apple’s video-calling app. Let us your thoughts on the redesigned FaceTime app and its amazing new features in the comments section below.


