- The first step to make a server in Minecraft Bedrock is to download and extract all files from the Bedrock server file.
- Next, run the server.exe file, and complete the port forwarding in order to share the IP with friends.
- Lastly, players can customize the server using the properties, packs, and commands.
Minecraft servers grant you some of the most fun ways to enjoy the game. And only if the topic is Minecraft Realms, the Java players get the majority of the good stuff. But we are here to guide you through all the easy steps on how to make a server in Minecraft Bedrock Edition. We have also stated some of the best features that you can implement to take it to the next level. So if you want to explore the multiplayer options with your friend and try speedrunning seeds, or spend some quality time together, this guide is just the one for you. With that said, let’s dive in!
What are the Requirements To Make a Minecraft Server?
To make a dedicated server on Minecraft Bedrock, your system needs to fulfill the following official requirements:
- Windows 10 version 1703 or later OR Ubuntu 18 or later
- 64-bit Intel or AMD processor with 2 cores
- 1 GB RAM
As Bedrock edition can’t run Minecraft shaders, its server doesn’t require much graphical power. So, as long as your GPU can handle the regular game, it can handle some extra players too. Additionally, focusing on the platforms, Minecraft only allows users on Ubuntu and Windows to host dedicated servers. However, players on any device running Bedrock can join these servers.
How to Make a Server in Minecraft Bedrock
The process of making a Minecraft server involves some unique steps. That’s why we have divided our guide into sections for your ease.
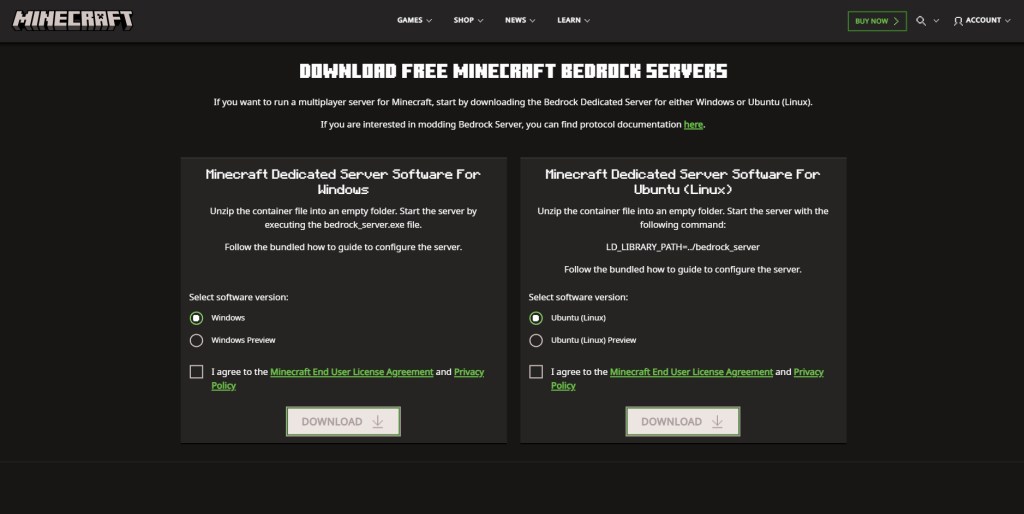
1. Download Bedrock Server Software
To run a Minecraft server, you need to download its zip file from Minecraft’s official website. It provides you with server files for both Windows and Ubuntu. You can unzip it using your default file explorer or use software like WinZip or WinRAR.
2. Run the Minecraft Bedrock Server
Unlike a Java server, you don’t have to install the Minecraft server before hosting it. So, once you have unzipped the server files, let’s get started.
On Ubuntu
Each Linux OS has its own “terminal” app to run custom commands. Just make sure that your system is running at least Ubuntu 18 or equivalent. Then, use the following command to launch the server.
LD_LIBRARY_PATH=. ./bedrock_server
If the command fails, try replacing the “bedrock_server” part of it with the unzipped folder’s name and then run it again. After successfully running the command, you can jump onto the server and start playing.
On Windows
To make a Minecraft Bedrock server on Windows, you need to follow these steps:
- First, we need to exempt Minecraft from UWP loopback restrictions. It prevents the UWP apps (like Minecraft Bedrock) from connecting to the local server.
- To do this, open the command prompt as an admin by right-clicking on it in the Start menu or choosing the option directly from the sub-menu.
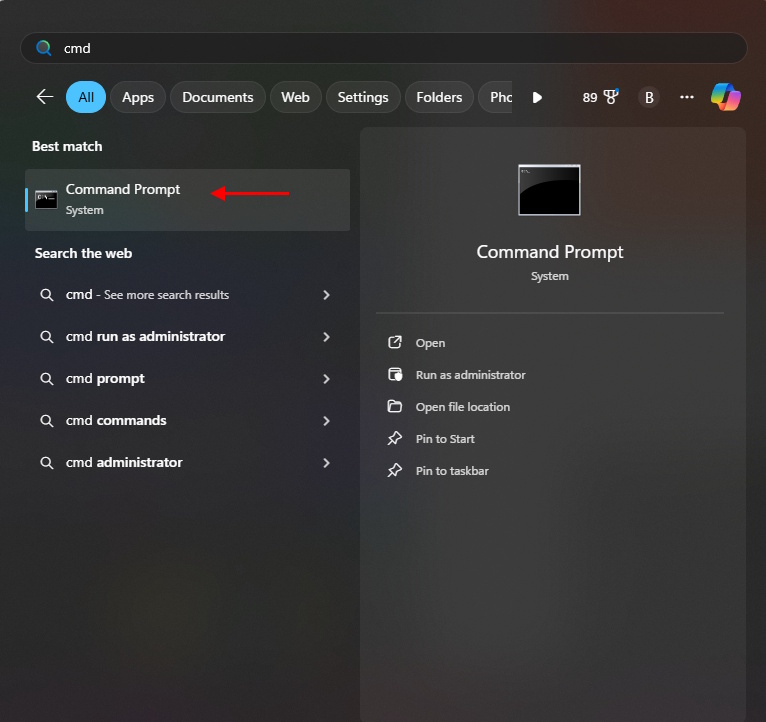
- Then, within the command prompt, paste the following command and hit enter.
CheckNetIsolation.exe LoopbackExempt –a –p=S-1-15-2-1958404141-86561845-1752920682-3514627264-368642714-62675701-733520436
- You can close the command prompt after executing the command.
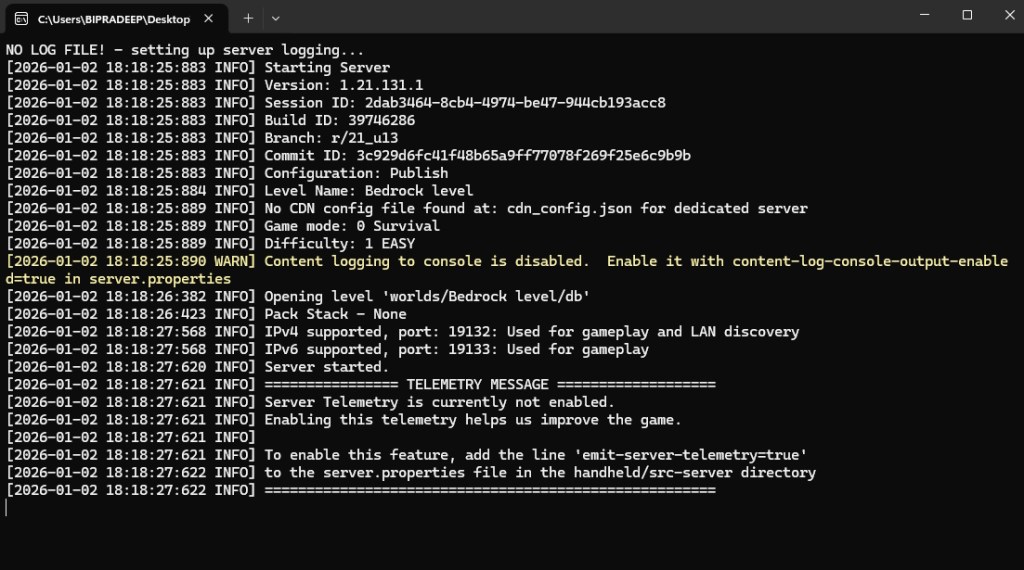
- Next, open the unzipped server folder and double-click or right-click and open the “bedrock_server.exe” file.

- As soon as you open the server file, Windows will launch its firewall. Here, make sure that both the “private” and “public” network options are selected. Then click on the “allow access” button.
- Once the Firewall accepts the exception you made, the server will start running in the command prompt.
3. Open System Port
Now that both your OS and firewall are ready to invite other Minecraft players, it’s time to get the router ready. Yes, we will be going a little more into the technical stuff than in the earlier part. But our easy-to-follow steps are all you need to get your Minecraft Bedrock server up and running.
Find Server IP Address & IPv6 Addresses
Before anything else, we need to figure out the details about the platform that is hosting the Minecraft Bedrock server. To do this, open Command Prompt once again and execute the following command in it:
ipconfig /all

It will list your IPv4 address and IPv6 address within the prompt. You can either leave the window open or write down both of them for later use. Some routers require the default gateway address instead of IPv6, so you can note that down too.
System Port Settings
A system port is the entry point through which players on other networks can communicate with and join your online server. We need to change your router’s system port settings to open it for other players.

Unfortunately, each router manufacturer has its unique UI and settings dashboard. Since we can’t cover them all, you have to head to SetupRouter.com and find the way to open your Port Forwarding settings.
Enter Server Details
Finally, assuming that you have reached the system port settings of your router, you need to look for and click on “add service” or “create new” or a similarly named button. Then, the router will require you to enter the following information:
- Server/Service/Port Name: Minecraft Server
- Start Port: 19132
- End Port: 19132
- Service Type: TCP/UDP
Minecraft Bedrock’s default port ID is “19132“. So, if there are other columns with “port” in their name, enter the same ID there as well. Moreover, the router might also require you to enter an IP Address, IPv6 Address, or default gateway address. Your IP address is the same as the IPv4 address that you noted earlier via the command prompt alongside the other two addresses.
4. Invite Friends: Find Your Public IP Address
To join any dedicated Minecraft Bedrock server, you only need the host’s public IP address. Fortunately, because of port forwarding, the public IP address won’t reveal any of your private information. You can find the same by opening Google and searching for “what is my IP“.
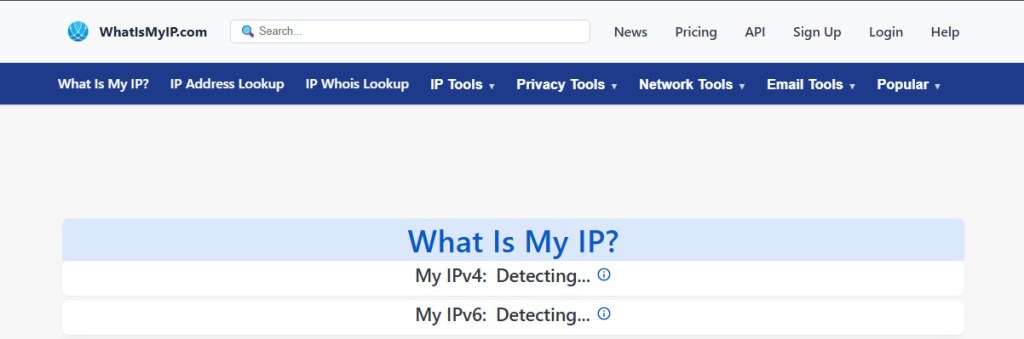
The search results will display your public IP address. You need to copy it and share it with your friends who want to join the server. As you will see in the next section, you also need the same to join your new Minecraft Bedrock server.
How to Join the Minecraft Bedrock Server
With your server up and running, it’s time to test it. The steps below are the same for you and your friends who want to join the server. So, open your Minecraft Bedrock, and let’s get started.
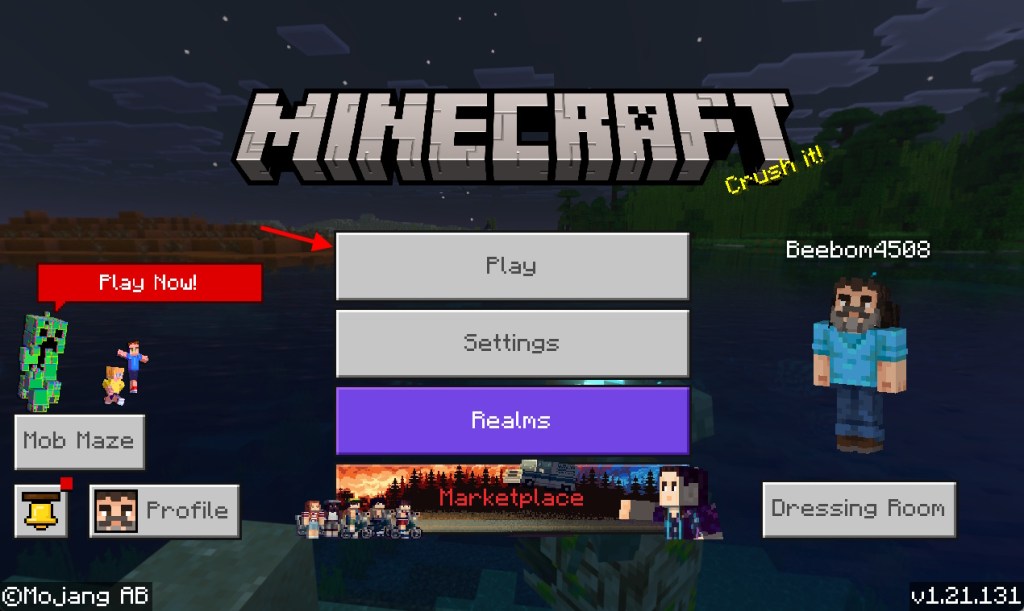
- From the homepage, click on the “Play” button.
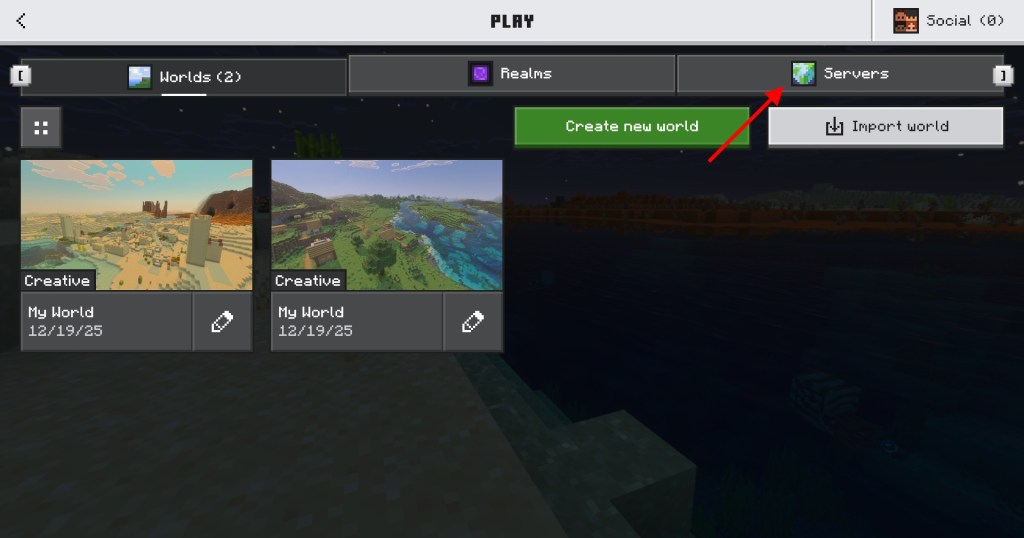
- Then click on the servers section from the top column to load all the active servers.
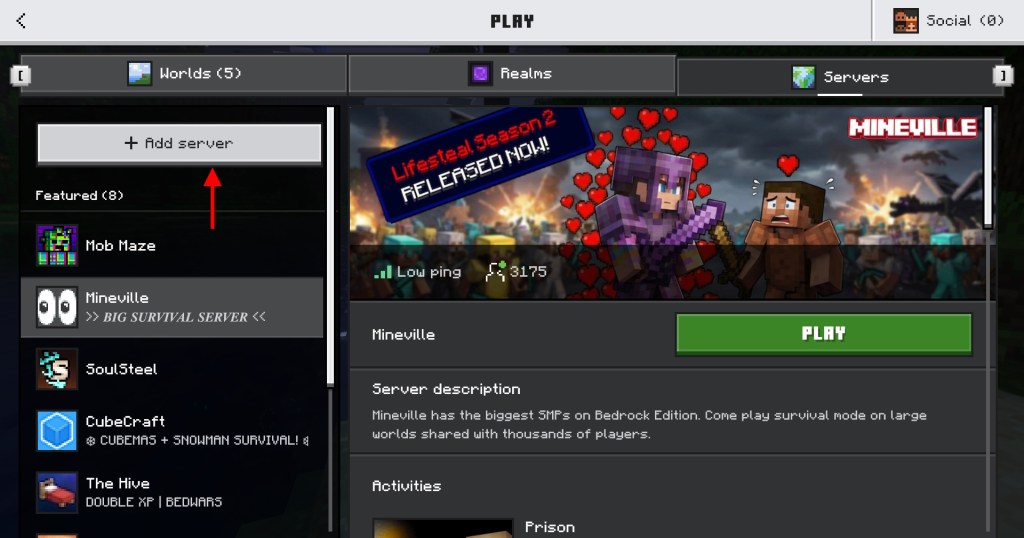
- Within the servers section, scroll down to the bottom of the server list and click on the “add server” button.
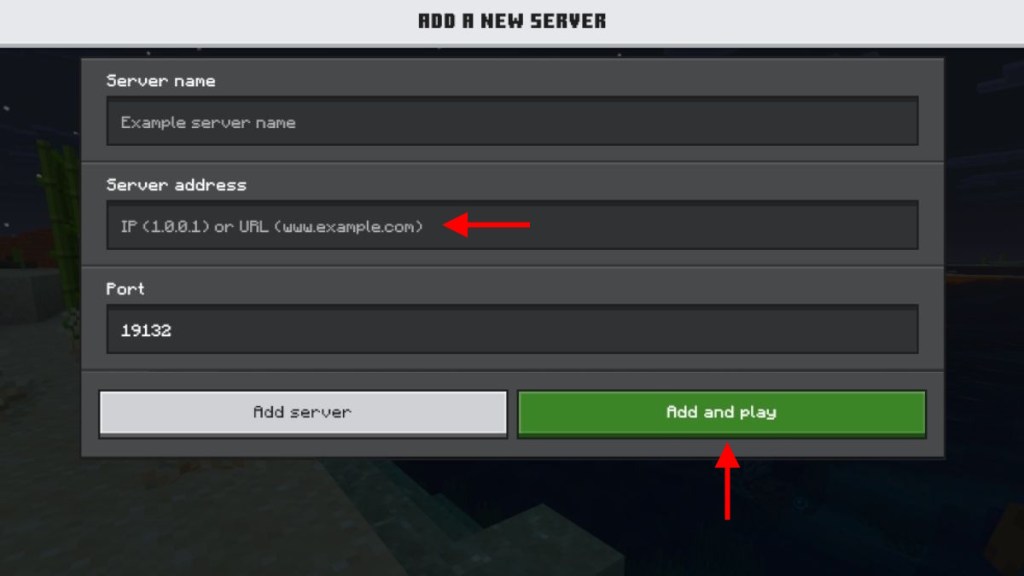
- Finally, you need to enter the details of your server to join it. The name of the server can be anything you want. As for the port, unless you changed it in server properties, it is 19132.
- Lastly, the server address is the same as your public IP address.
How to Customize Your Server in Minecraft Bedrock
Now that your server is up and running, it’s time to customize it. By default, a server loads a basic Vanilla survival world, which is great for enjoying some of the best Minecraft seeds. But it’s not enough to make your server popular. So, let’s understand our customization options.
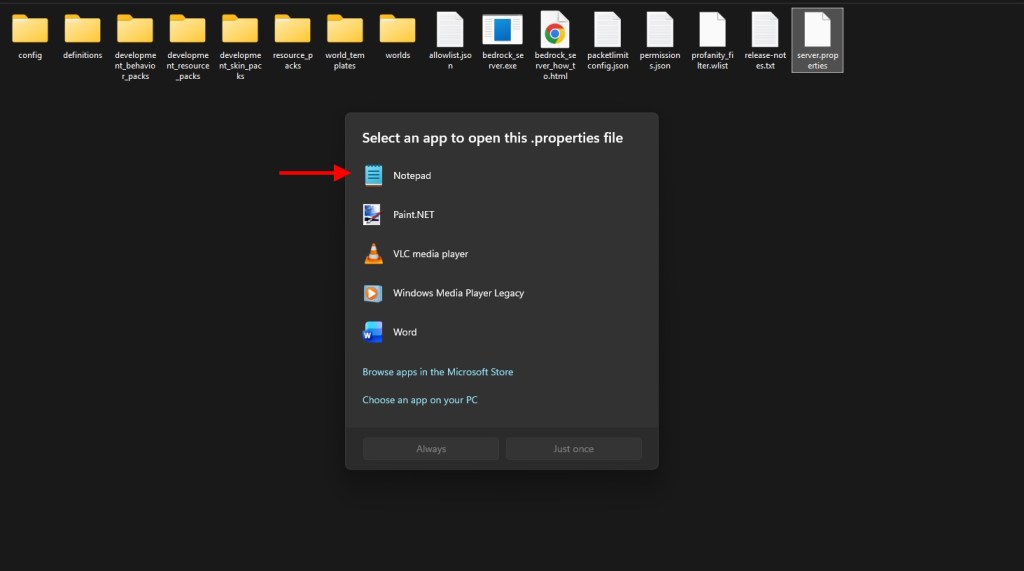
1. Server Properties
The most basic way to customize a server is by changing the properties of its world. You can open the “server.properties” file in Notepad to do so. It is present in the unzipped folder from where you run the world.
Within properties, you can edit the following features of your world:
- Game mode (Survival, Creative, or Adventure) & related settings
- Difficulty and cheats
- The maximum number of players, along with the conditions of joining
- Server settings
- World properties
- Abilities of players
2. Resource Packs and Worlds
One of the easiest ways to make a server unique is by changing how it looks. To do so, you can download and apply one of the best texture or resource packs by placing it in the “resource pack” folder of the server.
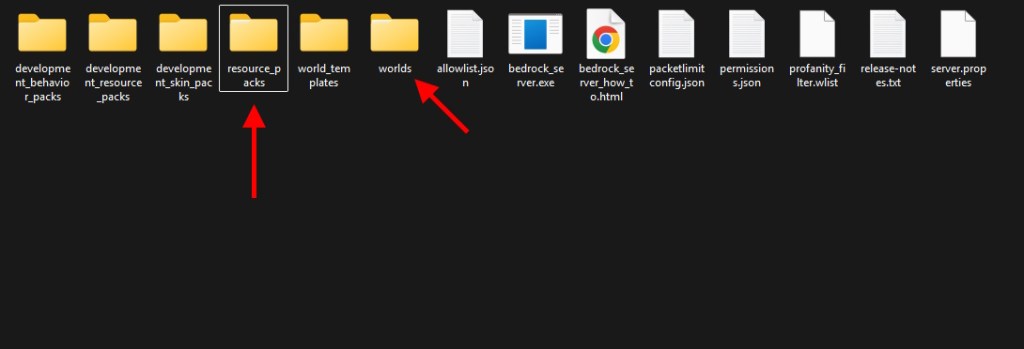
Similarly, you can also use custom Minecraft maps by placing them in the “worlds” folder to get pre-built worlds that you can explore with your friends.
3. Server Commands
In Minecraft, commands work like cheats in other games. They basically give you almost developer-like power to change everything about your world without leaving the game. You can even edit server properties using these commands. We have a dedicated guide for Minecraft Bedrock commands that you can refer to for making the most out of this feature.
How to Close Your Minecraft Bedrock Server
Once they are done playing, you and your friends can simply leave the server by closing the game. But that doesn’t automatically save the progress. Instead, you have to open the command prompt window in which your server is running. Then, within it, type “stop” and hit enter.
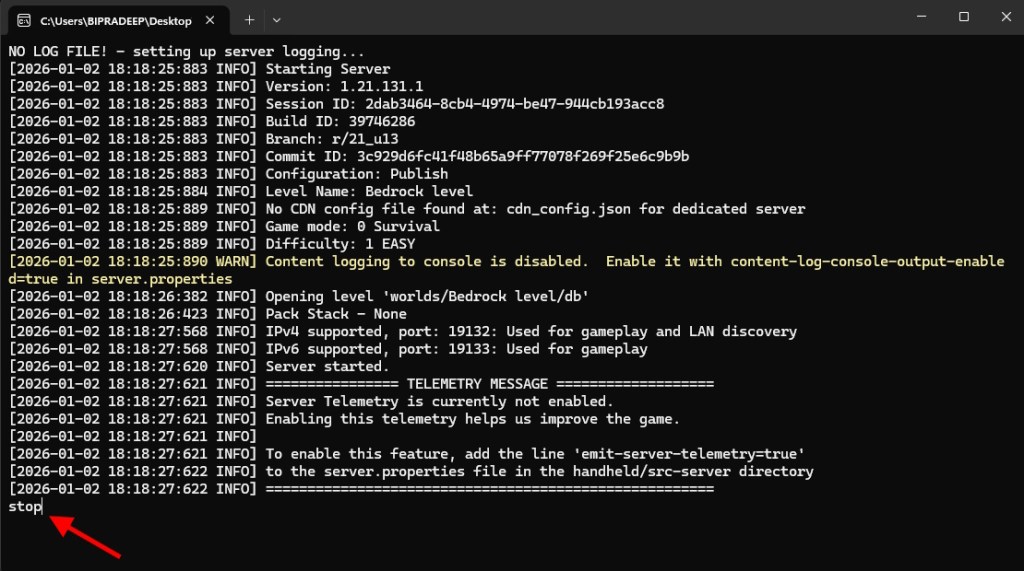
The server will immediately close and save all the progress and changes you have made to its world. You have to do this each time you want to close your server and save your progress.
With that, you now hold the power to jump into the ever-increasing Minecraft community with a Bedrock server that’s truly your own. So, are you facing any problems while hosting or running your server? Feel free to tell us in the comments below.
Unless you are using premium Minecraft hosting services, a dedicated Minecraft Bedrock server is completely free.
As long as they are on the same game version, any of your friends can join your Minecraft server from any platform that runs Bedrock. But Java players can not join the Bedrock servers.
A dedicated version works with the Xbox Game Pass version of the game, just like regular Minecraft. It even works on Minecraft Betas and Minecraft Preview as long as players are on the same version of the game.
Dedicated servers are usually the most reliable way to run Minecraft servers for free. But you can check our guide to make free online Minecraft servers for an even easier server method than dedicated servers.