
- If the Desktop Window Manager is causing high GPU usage on Windows 11 or 10, there can be several reasons behind the issue.
- You can try updating the GPU driver or manually set DWM.exe to use the integrated graphics card.
- Apart from that, you can plug the video cable into the dedicated GPU port or disable HAGS altogether.
Are you facing issues with DWM.exe on your Windows PC? Does the Desktop Window Manager show high GPU usage on your Windows 11 or 10 PC? That’s quite a common issue, and it forces apps and games to stutter. Not to worry, as we are here to help you with various fixes for this issue. With that said, let’s look at the various causes and fixes for it.
What Causes Desktop Window Manager (DWM.exe) High GPU Usage?
Before everything, it’s important to know what is Desktop Window Manager (DWM) in Windows PCs. Desktop Window Manager (DWM) is an important system process responsible for rendering the user interface on your Windows 10/ 11 computer.
The operating system uses DWM.exe to generate all the nifty visual effects, including the ability to control themes, transparency effects, animations, menus, taskbar thumbnails, and more.
As you can tell from its function, the Desktop Window Manager uses your system’s graphics card (GPU) to render these UI elements. And recently, many Windows 11 users have been facing high usage issues with this system process, causing a ton of stress and confusion. Thus, let’s look at the factors that can cause the high GPU usage issue with the Desktop Window Manager:
- Outdated or corrupted graphics drivers
- GPU Power Management settings in Control Panel
- Certain background programs
- Windows appearance or auto-scaling settings
- Presence of malware on your PC
- GPU features such as HDR or HAGS (Hardware Accelerated GPU Scheduling) being turned on
In most cases, users shouldn’t have to disable GPU features such as HDR or HAGS, but they can cause more GPU resources to be used at times. That said, let’s look at the best fixes to resolve the Desktop Window Manager high GPU usage issue on Windows 10 and 11.
1. Get the Latest Windows Update
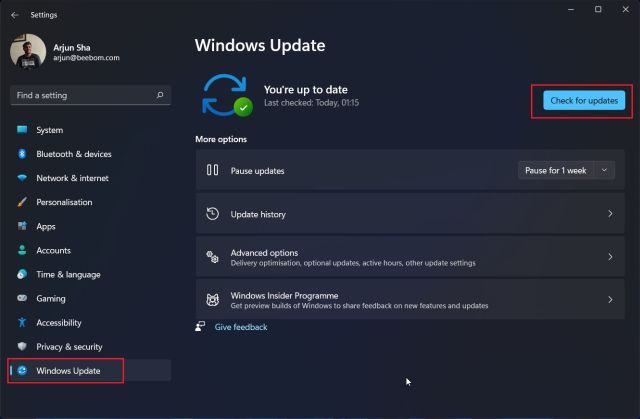
The most convenient fix is performing a Windows update, which ensures you are running the latest build that includes bug fixes, brand new features, and compatible drivers for your hardware components.
For this, press the Windows 11 keyboard shortcut “Windows + I” to open the Settings app. Then, go to “Windows Update“ from the left sidebar and click on “Check for Updates” in the right pane. Windows will automatically download updates and ask you to restart your PC to complete the installation process.

2. Update Your GPU Drivers
Since Windows update doesn’t always fetch the latest drivers for your GPU, the next course of action should be to update your GPU drivers manually. Perhaps, your graphics card has been stuck at an older version, and you haven’t enabled the option to automatically update your GPU drivers.
Follow this guide to learn how to update Windows 11 drivers. We have also explained how to enable automatic driver updates in GeForce Experience or AMD Adrenalin Software.


3. Use Intel DSA or Third-Party Apps to Update Drivers
To update the drivers of other hardware components on your PC manually, you can use Intel Driver & Support Assistant (DSA) to scan and update your Intel-based hardware. Further, you can use a third-party software called IOBit Driver Booster to manually update your drivers to the latest versions.
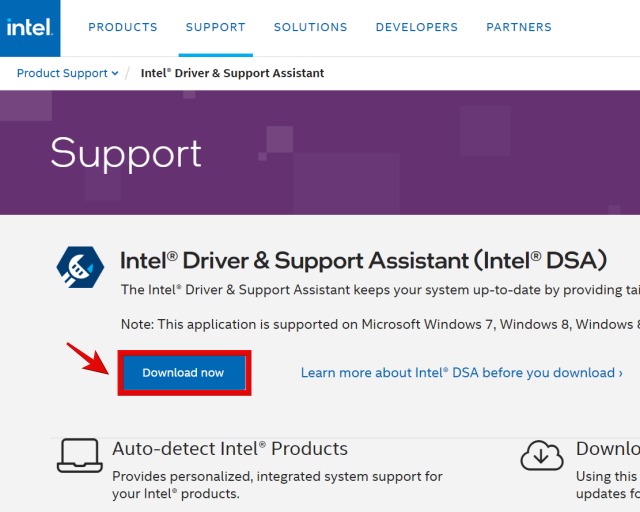
1. First, you need to download Intel DSA from this link.
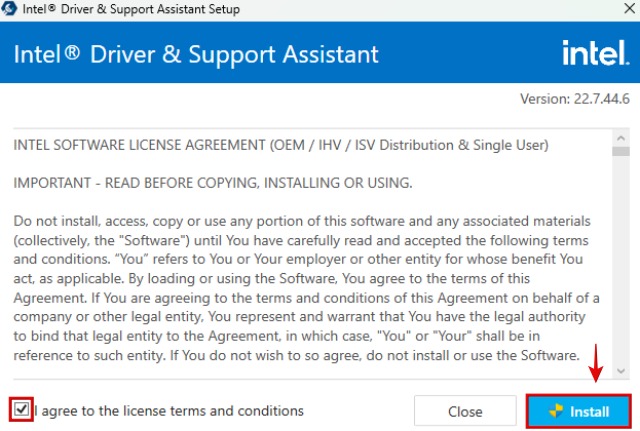
2. Open the “Intel-Driver-and-Support-Assistant-Installer.exe” file that you downloaded in the last step. Now, check the tickmark to agree to license terms and conditions. Then, click on “Install” to proceed.

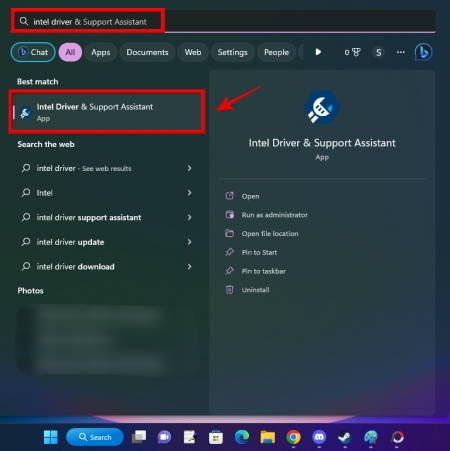
3. Once done, the setup will ask you to restart your PC. Proceed to do so, and after the system reboots, launch Intel DSA by searching for “Intel Driver & Support Assistant” after pressing the Windows key. Click on the result when it shows up to launch the software.

4. Intel DSA will then let you know the various driver updates available for components in your PC. Download and install all of these, and your Intel-based hardware will be updated.


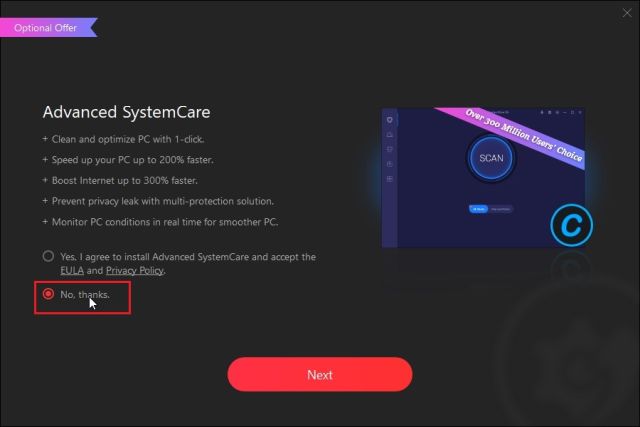
5. Now, let’s manually scan for driver updates using IOBit Driver Booster. Download it from this link, and launch the setup once the file has finished downloading. At the start, it might ask you to install another software but this is not necessary, so skip it.

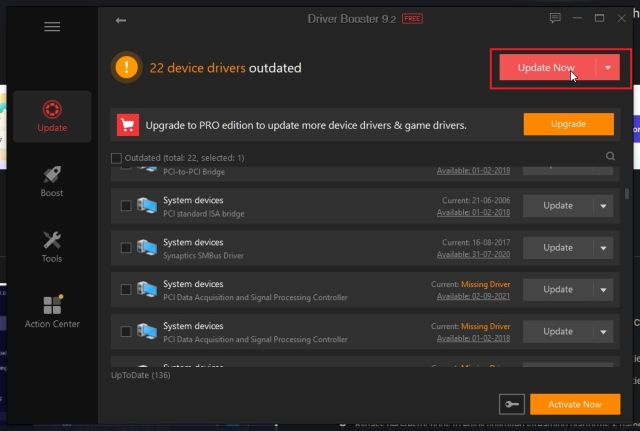
6. Once the installation is complete, launch the program and scan for driver updates. Select all the drivers you wish to update, and click on “Update Now” in the top right corner. Once installed, simply restart your PC and the new drivers will be present.
4. Manually Set DWM.exe to Use Integrated Graphics Card
Certain programs, especially if they tie in with the Windows Explorer process, can cause the Desktop Window Manager high GPU usage issue. The programs themselves can cause spikes in GPU usage, and it is also possible that multiple apps are hogging GPU resources on your PC.
In this fix, we will show you how to set the graphics preference for individual programs installed on your PC. The programs that heavily rely on the GPU, like your games and content creation software should be set to “High Performance Mode,” or manually specified to use the dedicated graphics card.
Everything else on the PC can be set to Power Saving Mode, thereby, utilizing the integrated GPU instead of eating up the resources of your high-performance discrete graphics. Here’s how it works:
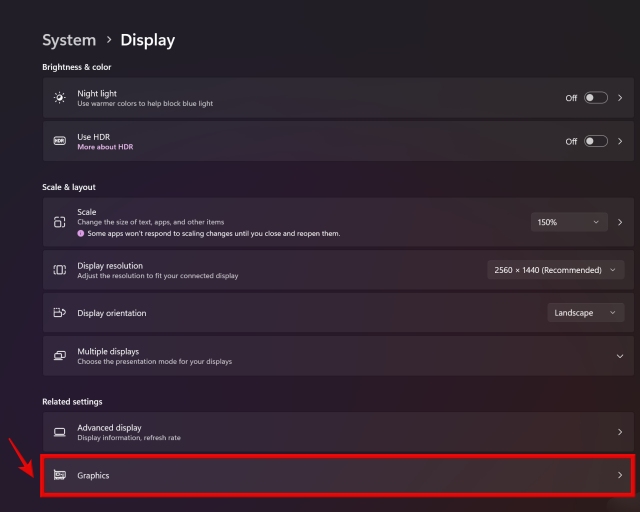
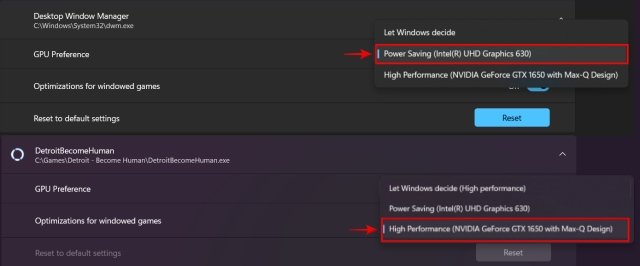
1. First, right-click on your desktop and click on “Display settings” in the context menu.


2. Then, under Display settings, click on “Graphics” at the bottom.
3. On the next screen, you can now assign which GPU should be used for various programs on your PC. Click on “Browse“, navigate to C:/Windows/System32, and select DWM.exe. Then, click on “Options” to specify the type of GPU it should use.

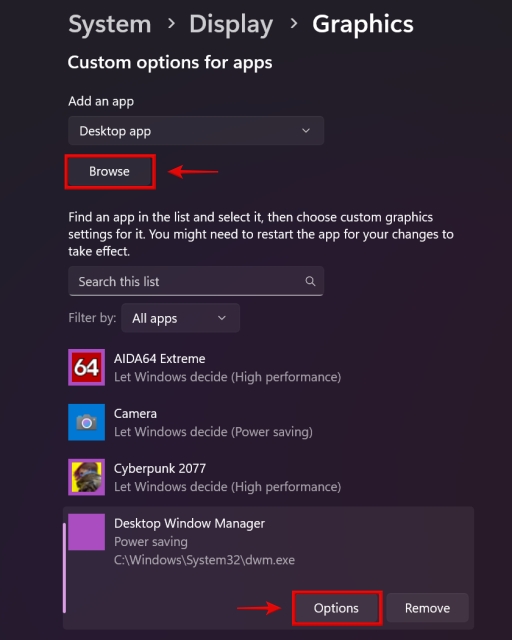
4. As you can see here, we have specified DWM.EXE to Power Saving. For games, we have specified “High Performance,” so that they use the dedicated graphics card. To complete this fix and further reduce the high GPU usage issue, perform this step for all other programs on your computer.

5. Prevent Using Integrated GPU, Keep Only One GPU Active
Wallpaper Engine has debunked in this support article that systems with two GPUs: integrated and dedicated graphics could have issues with high GPU usage. For PCs with NVIDIA Optimus or a MUX switch feature, this is supposed to work correctly, but it doesn’t hurt to try this fix. If you are facing high GPU usage issue on your laptop or desktop and the previous fixes did not help, let’s try out this solution.
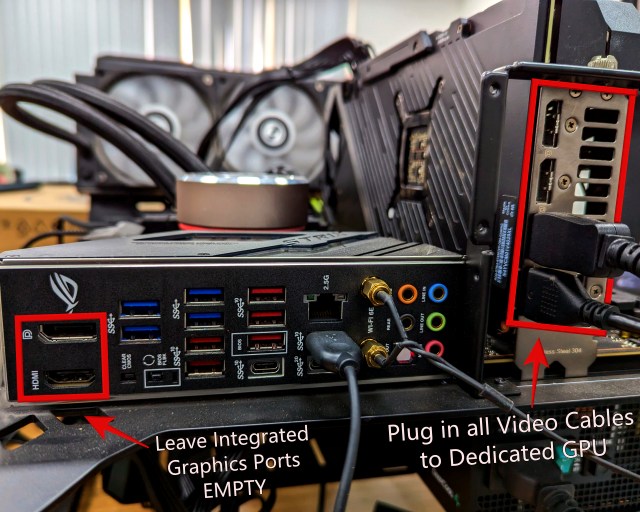
For desktop users, you simply need to look at your PC from the back and ensure that your monitor’s display cables (HDMI, DisplayPort, etc.) are NOT connected to the motherboard, but to the dedicated graphics card instead.
Essentially, all you need to do to apply this fix is avoid using display cables in both places. When you do that, the system enables the integrated and dedicated GPU at the same time, causing the Desktop windows Manager high GPU usage issue for some users.
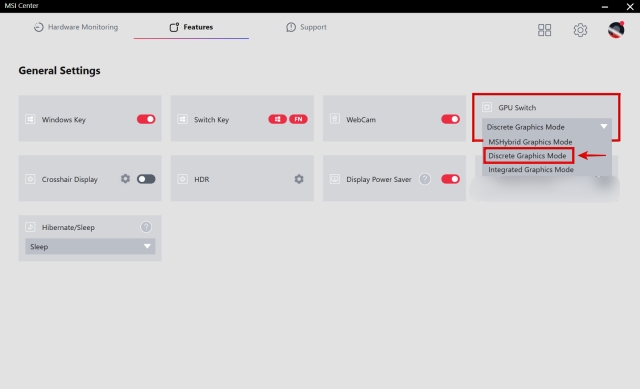
For laptop users, go to the control center software provided by the manufacturer. In our case, this is MSI Center. You have to navigate to the settings where you can specify what GPU the laptop is using.
Here, make sure you select the discrete/ dedicated graphics option instead of the hybrid option. If you want to save on battery, you can select the integrated graphics mode as well, but avoid using the hybrid settings if it gives you a high GPU usage issue.
Note: If your laptop does not have a MUX switch or the option to turn off NVIDIA Optimus, you cannot apply this fix. You can skip to the next solution in that case.

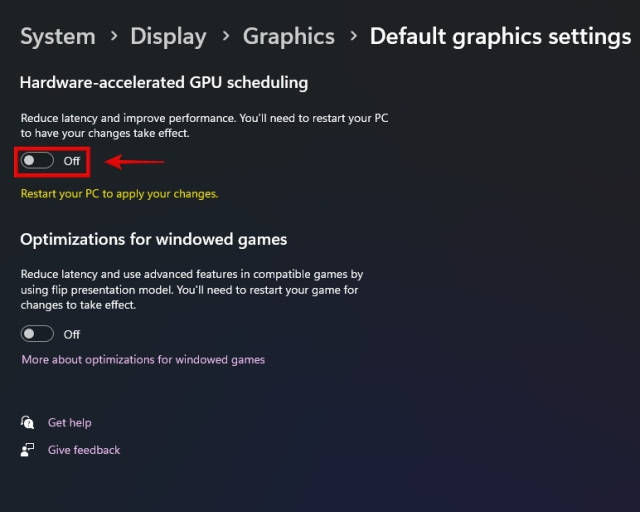
6. Turn Off Hardware Accelerated GPU Scheduling (HAGS)
This is one of the most popular solutions that has worked for users trying to fix the Desktop Window Manager high GPU usage problem on their PCs. Hardware Accelerated GPU Scheduling is a feature for improving your graphics card performance & reducing latency. However, it might not work well for everyone. So let’s look at how to turn this feature off.
1. First, right-click on the desktop and select “Display settings” from the context menu.
2. Next, under Related settings, you have to click on “Graphics” at the bottom.
3. Now, click on the “Change default graphics settings” option at the top.
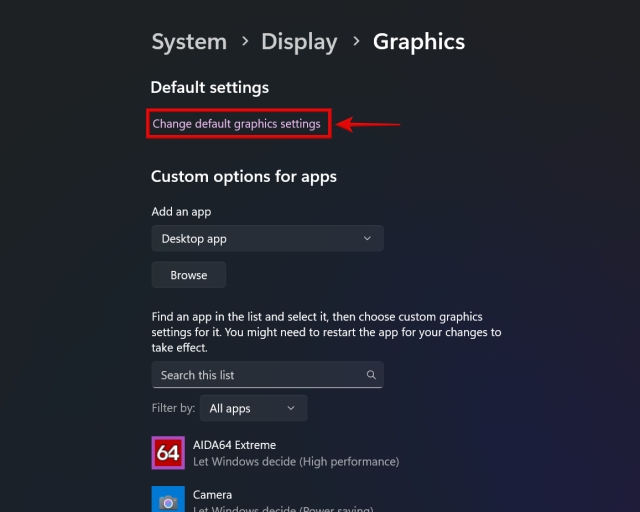
4. Here, you will find the hardware-accelerated GPU scheduling setting. Turn off the toggle for HAGS and restart your PC to apply the changes. This should potentially fix the high GPU usage issue.
7. Change Power Mode in Nvidia Control Panel
Power management settings in the Nvidia Control Panel or your laptop’s power plan itself can apparently determine how Windows will utilize the GPU resources. So, setting it to the right mode could solve the high GPU usage issue. Let’s look at how to do this.
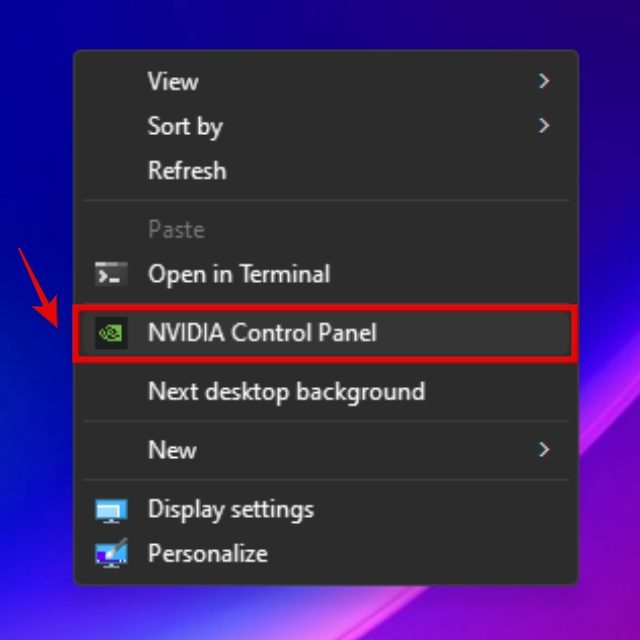
1. Right-click on your desktop and click on “Show more options“. Then, click on Nvidia Control Panel.

2. Next, navigate to “Manage 3D Settings” from the left sidebar. Then, under Global Settings in the right pane, scroll down and find the “Power management mode” setting. Set this to “Prefer Maximum Performance” using the drop-down menu and click on “Apply” in the bottom right.

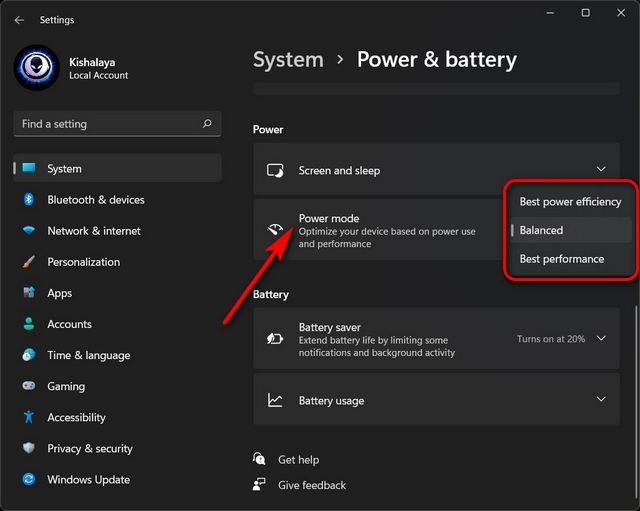
3. Also, we recommend using this guide to change the power mode settings in Windows 11. Under “Power & Battery”, set the “Power mode” setting to Best Performance. The other modes might limit your GPU, causing Windows to report GPU usage to be high, even though it’s using very few resources from your graphics card.

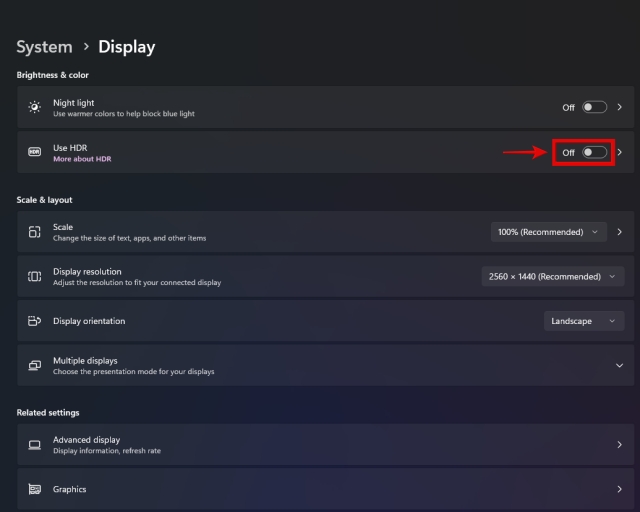
8. Turn Off HDR in Windows Display Settings
Some people have been able to fix the DWM.exe high GPU usage issue by disabling HDR in the Windows Display Settings. Here’s how you can do that.
1. First, right-click on your Desktop and click on “Display Settings” in the context menu.
2. Here, click on the toggle next to “Use HDR” and turn it off. Turning off HDR also disables Wide Color Gamut (WCG) if enabled, fixing the issue at hand.
9. Use Recommended Resolution & Scaling Settings
Windows has an auto-scaling feature that tries to scale your apps to the right sizing, according to your display scaling setting. It can cause high GPU usage issues for some users. So, let’s ensure that your scaling and resolution settings are set correctly.
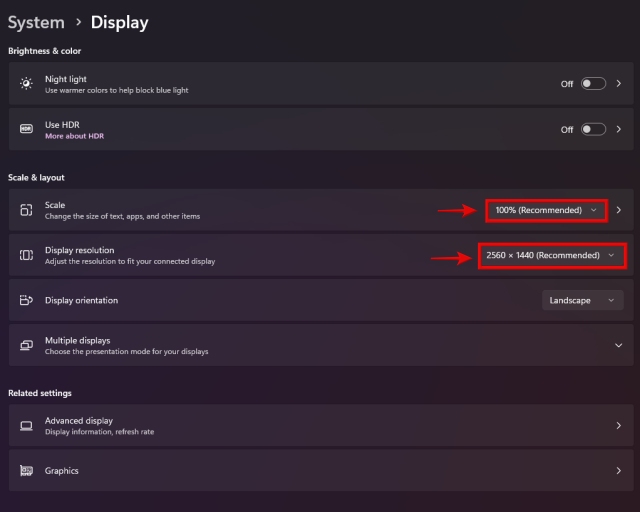
1. Go to “Display Settings” by right-clicking on your Desktop.
2. Next, under Scale & layout, ensure that the “Scale” is set to the “Recommended” setting. For us, 100% was recommended. Moreover, use the drop-down to adjust the “Display resolution” and set it to the recommended setting as well.
10. Disable Startup Apps in Windows 11/10
Unnecessary startup apps and non-Microsoft related services can slow down your PC, and even cause the high GPU usage problem with Desktop Windows Manager to occur. This is how you can disable them.
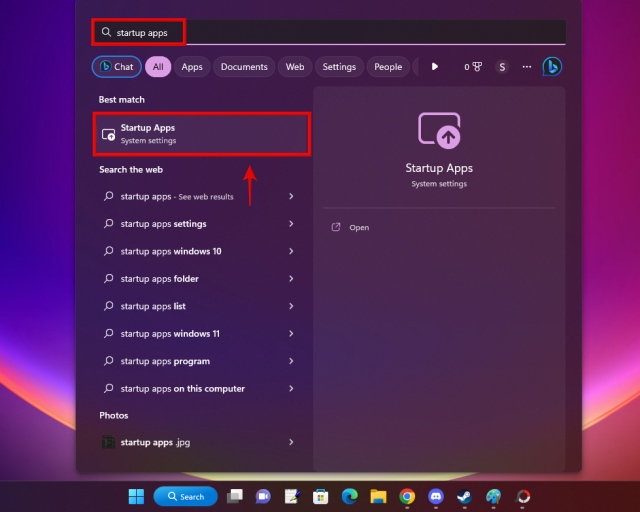
1. Let’s start by disabling startup apps first. To do this, press the Windows button and search for “Startup Apps.” Then, click on the result that shows up.
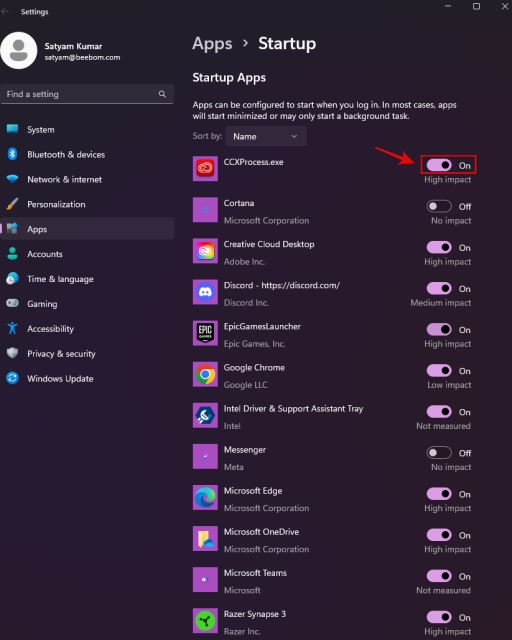
2. You will see a list of apps that open up automatically and take up resources when you boot up your Windows PC. So, look for “High Impact” startup apps and toggle them off right away. You can then pick and choose what Windows 11 apps or software you wish to load up in the background when you switch on your laptop or desktop.
3. To disable non-Microsoft services that aren’t needed for your PC to function, use the “Windows +R” keyboard shortcut to open the Run window. Here, type “msconfig” in the text field and click on OK to launch the system configuration utility.


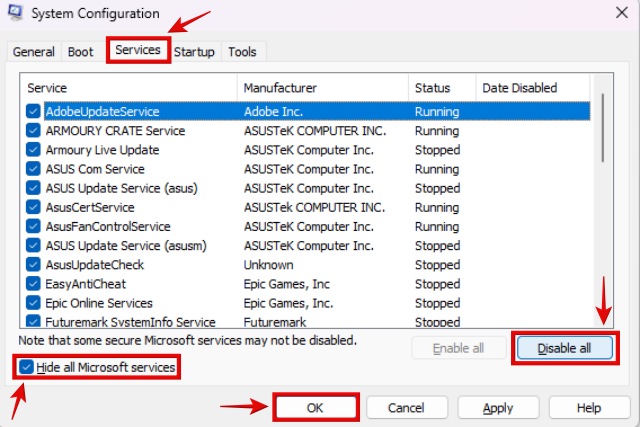
4. Here, navigate to the “Services” tab. Then, at the bottom left, ensure that the “Hide all Microsoft services” is unticked. Then, click on “Disable all,” and the unnecessary services will be stopped. Click “OK” to apply and save the changes. Then, restart your PC if asked, and the issue should be fixed.
11. Adjust Visual Effects Setting in Windows 11/10
Certain low-end PCs can have the Desktop Window Manager high GPU usage issue because of their appearance settings. So, to reduce the load on your GPU and hopefully resolve the issue, follow the steps below:
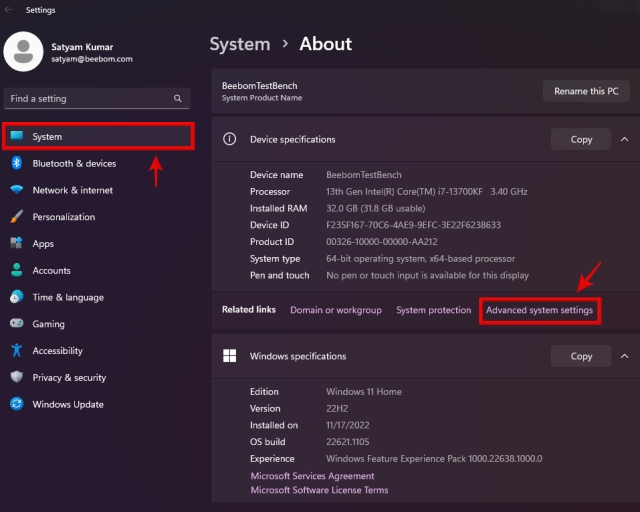
1. Open the Settings app using the keyboard shortcut “Windows + I“. Here, navigate to “System -> About,” and then click on “Advanced System Settings.”
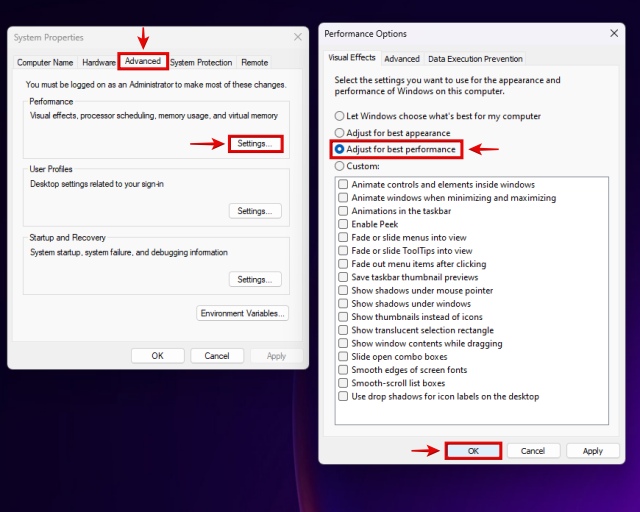
2. Now, navigate to the “Advanced” tab in the pop-up window. Then, under the “Performance” section, click on Settings, and select the “Adjust for best performance” setting under the Visual Effects tab. Click OK to apply the changes.
12. Scan for Malware and Disable Third-Party Antivirus
Sometimes, running third-party antivirus software can cause the high GPU usage problem to occur. So, use this guide to uninstall apps in Windows 11 and remove the third-party antivirus entirely. If you don’t wish to do that, simply turn it off from the settings. As for running the virus scan, you can use the options present in the antivirus software. But for others, here are the steps on how to do it using the native Windows Security feature:
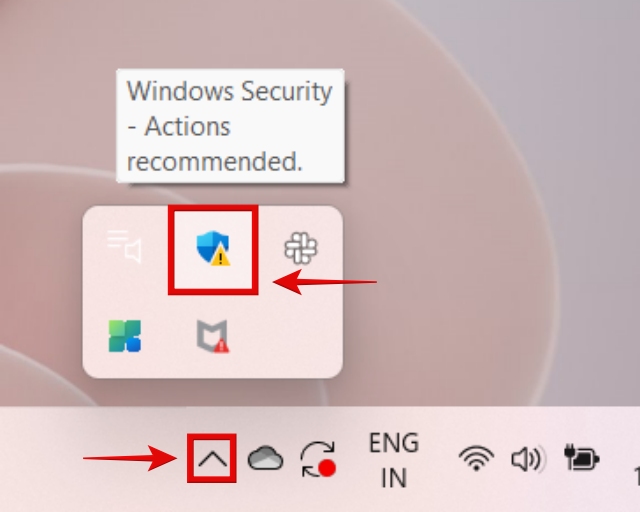
1. First, open the system tray (at the bottom right of your screen) by clicking on the arrow. Then, click on the “Windows Security icon,” which looks like a shield.
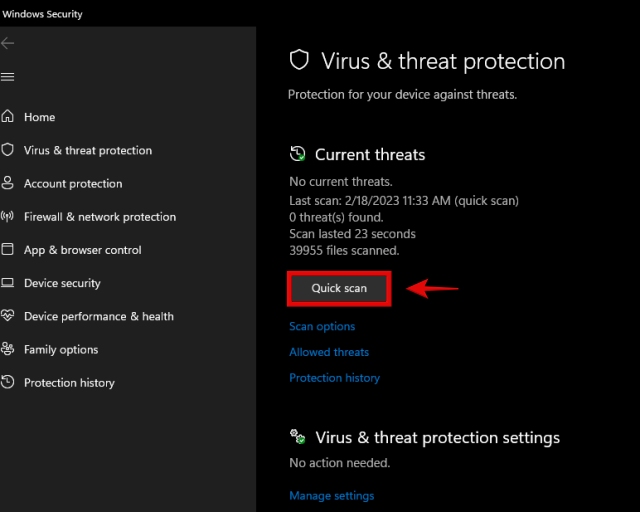
2. This will open the Windows Security app. Here, click on “Virus & threat protection” to access the system scanning option.


3. Next, click on “Quick Scan” to perform a scan on your system. We recommend using scan options to perform a full system scan as well if you are willing to do that. When it is complete, follow the on-screen instructions to remove any threats found on your system.
That’s it. We hope one of the numerous solutions we listed above helped fix the high GPU usage issue with the Desktop Window Manager (DWM.exe) system process. That said, if you have any doubts, do let us know in the comments below!
When running games or any other GPU-heavy programs, it is okay for GPU usage to be at 100%. Also, if you have intentionally set your power plan or GPU power management setting to the balanced settings, instead of the high-performance mode, then Windows could report your GPU usage to be really high based on your current settings.
The GPU usage can be at 100% even when not playing games because of many factors like background applications and services, DWM.exe issues, or even your current power plan.

