Despite being fully equipped for both recording and editing memos, the native Apple Voice Memos app is highly underrated. As someone who has used Voice Memos for years and still relies on it to add voice-overs to my Instagram Reels and YouTube Shorts, I find it pretty efficient in most aspects. And I’m sure you would have the same impression after getting a good hang of this stock voice recording app on your iPhone. So, whether you are a voice-over artist, a student, or an emerging vlogger looking to fine-tune your recordings, let’s look at how to edit and enhance Voice Memos on iPhone and iPad.
9 Tips to Use iPhone Voice Memos Like a Pro (2021)
From letting you reduce background noise to adjusting the playback speed and removing any unwanted parts from your voice recordings, the Voice Memos app packs all the essential tools. Besides, it also offers a way to duplicate and export your recordings, which can come in super handy when you want to share the memo with others. Let’s jump right in to find out what’s the Voice Memo app in iOS 15 has got in store for you!
Duplicate Voice Memo on iPhone and iPad
Before editing any recording, never fail to duplicate the voice memo to ensure you always have the original file.
1. Open the Voice Memos app on your iPhone or iPad and choose the file you want to edit.
2. Now, tap the icon with three blue dots (…) and select the “Duplicate” option in the pop-up menu.
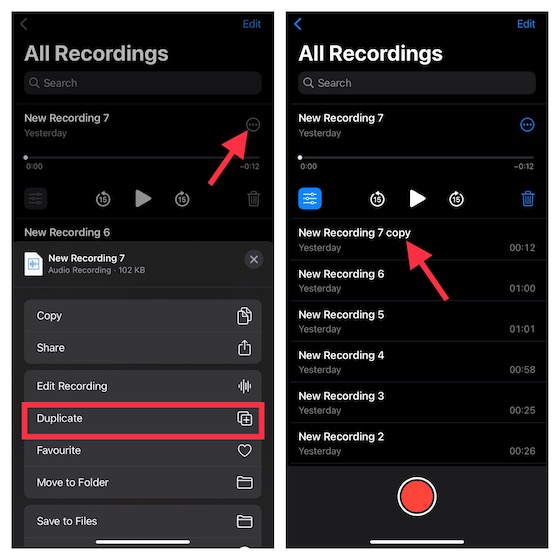
That’s it! The Voice Memos app will instantly create a duplicate copy of the recording. To help you find the duplicate voice recordings with ease, the app labels them as “Copy“.
Replace Part of a Voice Memo on iPhone and iPad
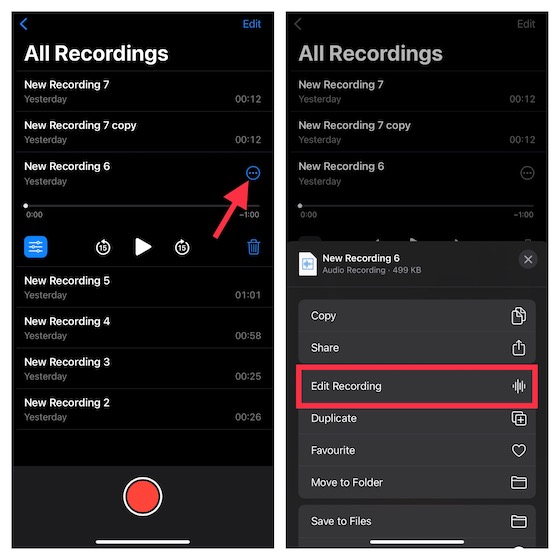
1. Launch the Voice Memos app on your iPhone or iPad and select the memo you want to edit.
2. Now, tap the icon with three blue dots (…) and tap “Edit Recording” in the pop-up menu. On iPad, tap “Edit“.
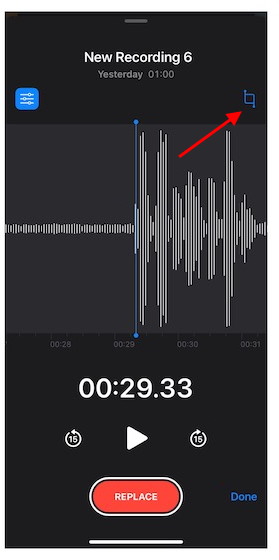
3. Next, swipe your finger left/ right over the waveform to perfectly adjust the blue playhead at the beginning of the part you wish to replace.
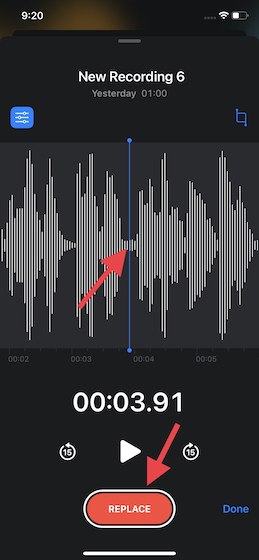
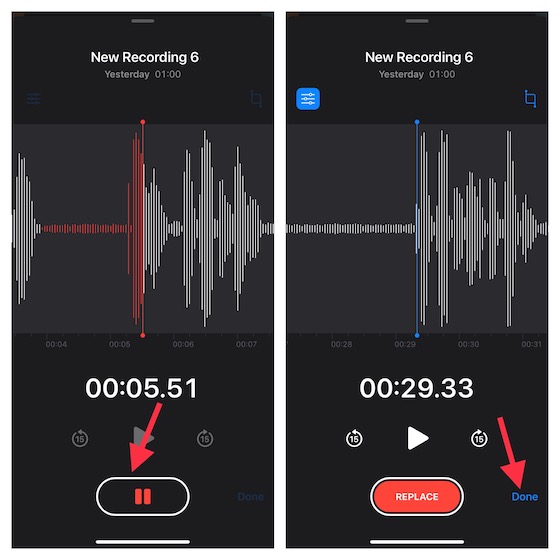
4. Next up, tap the “Replace” button at the bottom to re-record the memo over the existing memo. Once you are done, tap the “Pause” button and hit “Done” to save the changes.
Trim Voice Memo from the Beginning or End on iPhone
1. Navigate to the Voice Memos app on your device and choose the memo you want to trim. Now, tap the icon with three blue dots and choose “Edit Recording” in the pop-up menu.
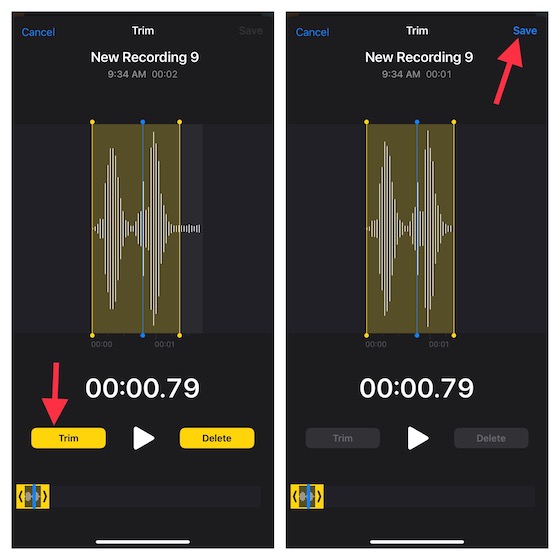
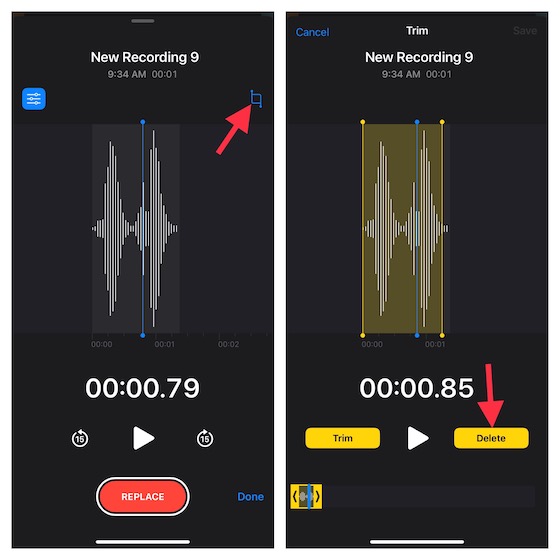
2. Tap the trim button at the top right of the audio waveform.
3. Now, yellow handles with arrows will show up on either end of the memo over the audio waveform. If you want to trim the memo from the beginning, drag the yellow arrow on the left to exactly where you want the memo to start. And to trim the recording from the end, drag the yellow arrow on the right to where the memo needs to end. After that, tap Trim -> Save.
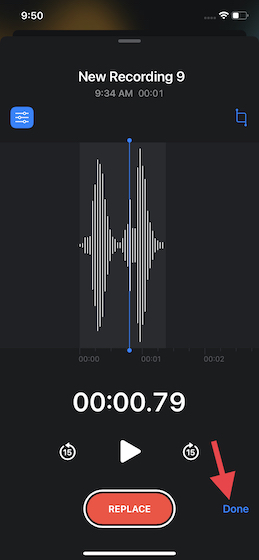
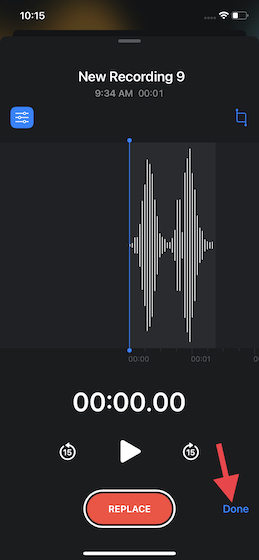
3. In the end, make sure to tap Done to confirm the changes.
Adjust the Playback Speed of Your Voice Memo on iPhone
Another notable editing feature that the Voice Memos app brings is the ability to adjust the playback speed. Use this useful tool when you want to get a bit funky with your voice-overs. For enhanced quality, the app also allows you to skip silence as well.
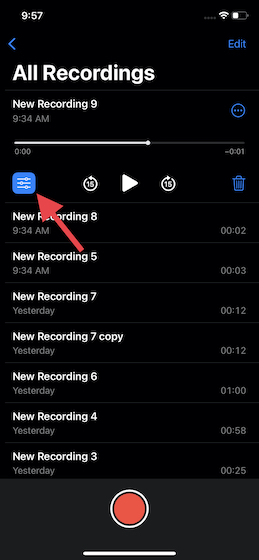
1. Open the Voice Memos app on your iPhone or iPad and select the recording for which you want to adjust the playback speed. Then, tap the menu button (three horizontal lines) that appears below the recording.

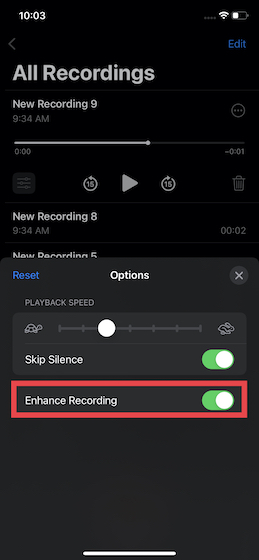
2. Under the “Playback Speed” setting, drag the slider left or right to fine-tune the speed of the voice memo on iPhone.
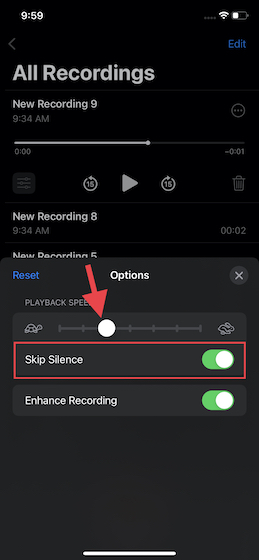
To be more precise, dragging the slider to the left (check out the slow-moving turtle) will let you slow down the playback speed while dragging the slider to the right (check out the fast-moving rabbit) will let you increase the speed of the recording. Once you are done, tap the “X” button at the top right of the pop-up window to save the changes.
Enhance Voice Memo by Reducing Background Noise on iPhone and iPad
Voice Memos app comes with a nifty noise reduction tool to let you enhance the sound quality of your voice recording by suppressing the background noise. Here’s how it works:
1. Head to the Voice Memos app on your iPhone or iPad -> choose a recording and tap the menu button (three horizontal lines).
2. Now, turn on the toggle next to “Enhance Recording“, and you are good to go.
Delete Part of a Memo on iPhone and iPad
Deleting certain parts of a memo is also easy in the native Voice Memos app on your iPhone. Just follow the steps below to learn how it works:
1. Head to the Voice Memos app -> select the memo in question -> three dots icon -> Edit Recording. On your iPadOS 15 device, select the recording and tap Edit.
2. After that, tap the trim button. Now, the yellow handles with arrows will appear on both ends of the memo. Simply drag the left and right yellow handles to select the portion you want to delete. Then, tap Delete.
3. Next, tap Save and hit the Done button to finish.
Recover Accidentally Deleted Voice Memos on iPhone and iPad
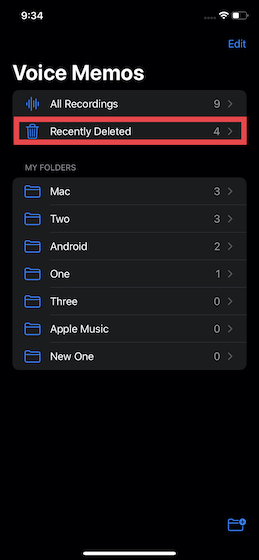
Whenever you delete any recording, the Voice Memos app stores them all in a separate folder called “Recently Deleted”. Hence, you can easily recover any accidentally deleted memos on your iPhone.
1. Open the Voice Memos app on your device. Then, head to the main screen and select the Recently Deleted folder.
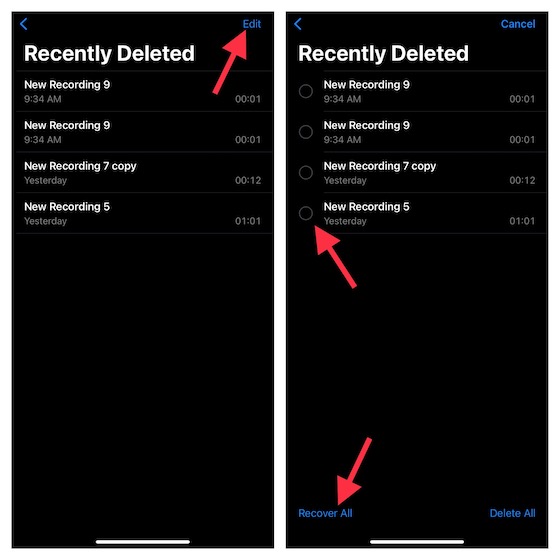
2. Now, select the Edit option at the top right corner of the screen. After that, select the specific recording and tap the Recover button. And if you want to recover all the deleted memos, tap “Recover All” at the bottom left corner.
Separate Audio from Voice Memo on iPhone and iPad
If you ever want to be a bit more creative with your voice recordings or wish to use the audio with the desired flexibility, you can do so with ease in the Voice Memos app on your iPhone.
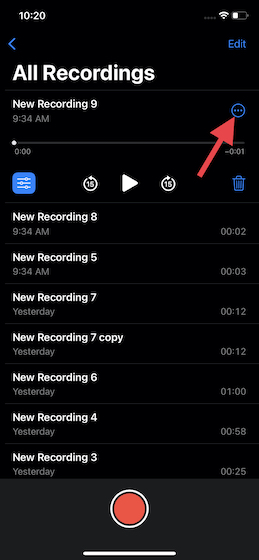
1. Navigate to the Voice Memos app, select a specific recording, and tap the More button.
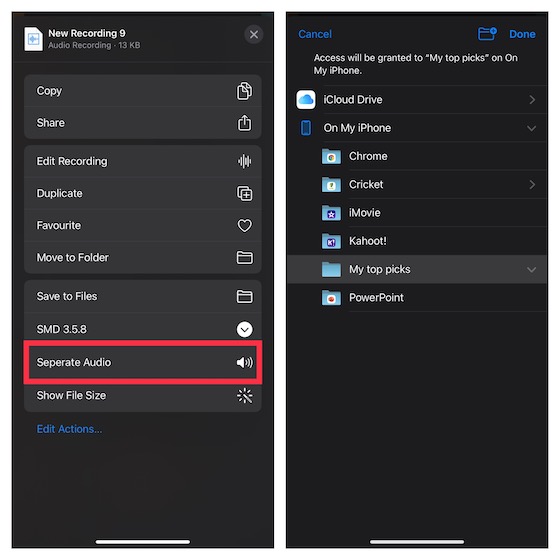
2. Now, scroll down in the pop-up menu and select “Separate Audio“. After that, choose the location where you want to save the audio in the Files app. And that’s it.
Share a Voice Memo on iPhone and iPad
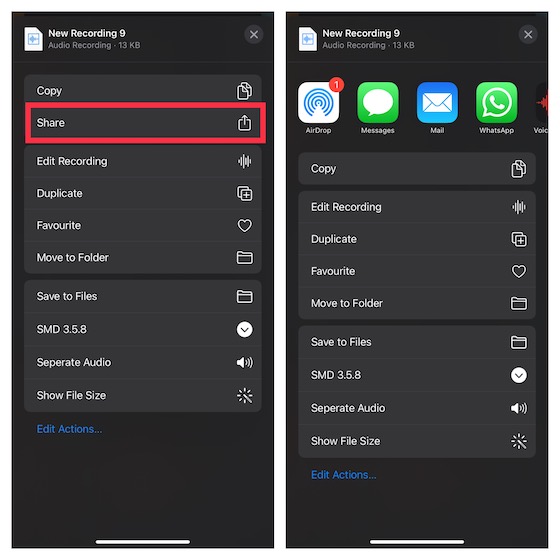
1. Launch the Voice Memos app on your device, choose the memo you want to share, and tap the three dot icon.
2. Now, tap the Share option in the pop-up menu and select the desired medium through which you want to share the recording.
Handy Tips to Use Voice Memos App in iOS 15 and iPadOS 15
So that wraps up our guide about editing and enhancing your voice memos on iPhone and iPad. As I mentioned above, the Voice Memos app has vastly improved due to the introduction of several useful editing tools in iOS 15. While I’m pleased with the improvements, there are a couple of new features that I wish to see in the app sooner than later. First, I wish we had better control over noise reduction through a slider (pretty much in the tune of the playback speed slider). And second, I want the Voice Memos app to be better integrated with third-party apps to seamlessly import/ export the audio to GarageBand or other audio editing apps. What are your thoughts on the Voice Memo app on iPhone? Did this guide teach you any new features for this stock app? Make sure to let us know in the comments below.