Being extremely fond of customization, I’m always on the lookout to find some cool ways to add personal touches to my Mac. Personalization sort of keeps mundane feeling at bay, doesn’t it? And for those who have a liking for personalization, macOS offers a nice way to customize file and folder icons on Mac. Aside from giving a unique look to the files, it also makes it a tad easier to recognize a specific item. If this sounds interesting to you, let me show you how you can create custom icons for your favorite folders on macOS.
Create Custom Icons for Files and Folders on Your Mac
Probably the best part about this hack is that you can make a custom icon for any file using your own photos and even the icons downloaded from the web. As it works even on older macOS versions like macOS Mojave, compatibility shouldn’t be a barrier either. What’s more, you also get the option to choose the icon from another file. With that said, let’s get started!
1. To get started, double-click on a photo or icon to open it in the Preview app.
![]()
Note: It’s worth noting that if any icon (downloaded from online) is in the .icns format, you will be able to directly drag it on the icon in a file’s Info panel.
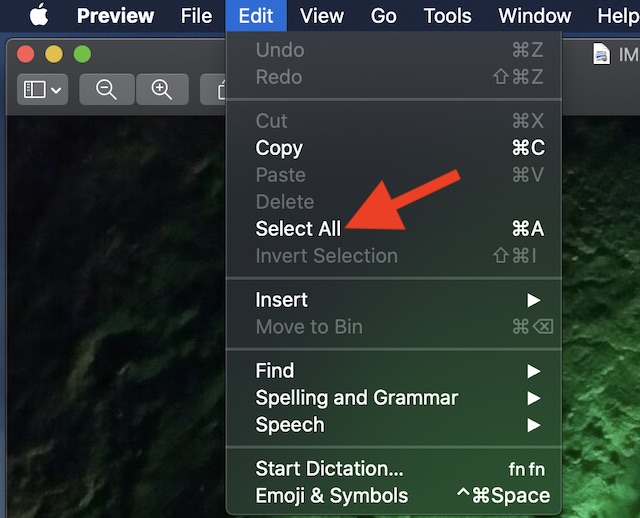
2. Now, click on the Edit menu and choose Select All. Alternately, you can also use the Command-A keyboard shortcut.
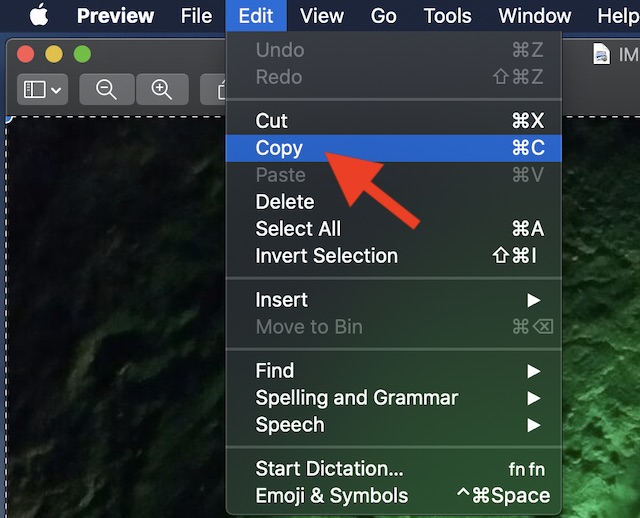
3. Next, select Edit > Copy in the Preview’s menu. Alternately, use the Command-C keyboard shortcut.
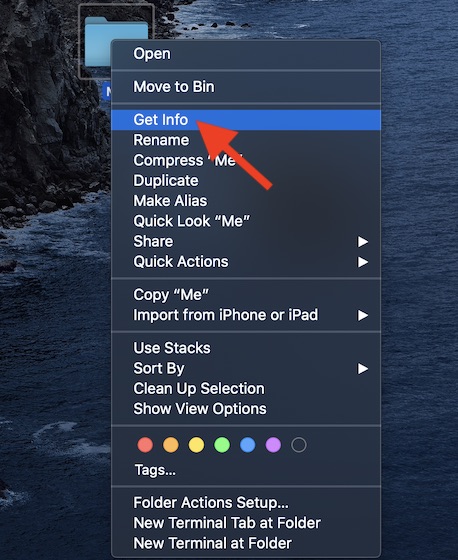
4. Next up, right-click on the file or folder which icon you wish to change and choose the Get Info option in the menu.
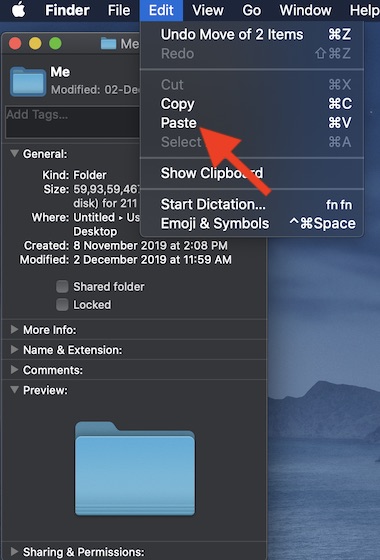
5. Up next, click on the icon located at the top left corner.
![]()
6. Now, click on the Edit menu and choose Paste or use the Command-V keyboard shortcut.
7. Finally, close the Info panel. Voila! The change would come into effect instantly. Take a look at the screenshot below.
![]()
Note:
- You can also use an icon from another file or folder. Simply choose the file which icon you want to use > File menu> Get Info.
- Click the icon at the top of the info window > Edit > Copy. After that, select the specific file and click on the File menu > Get Info. Finally, click on the icon > Edit > Paste.
How to Revert Files or Folders to Their Default Icon on Your Mac
If you ever want to restore the original icon of a folder, you can do so without any hassle.
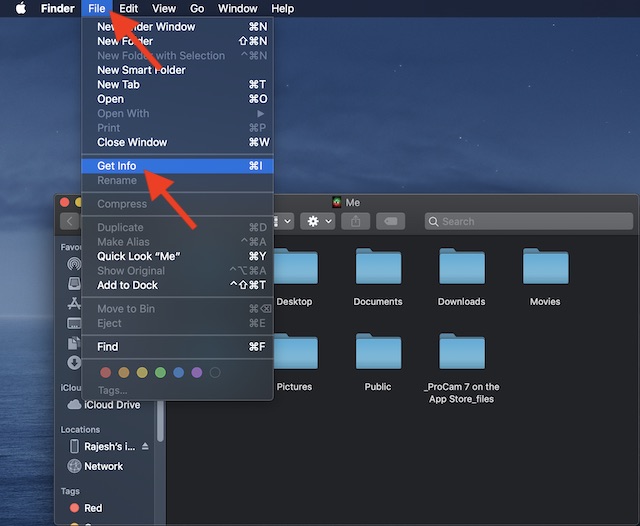
1. First off, select the file or folder. Then, click on the File menu and choose Get Info.
2. Now, choose the custom icon located at the top of the info window, click on the Edit menu, and choose Cut.
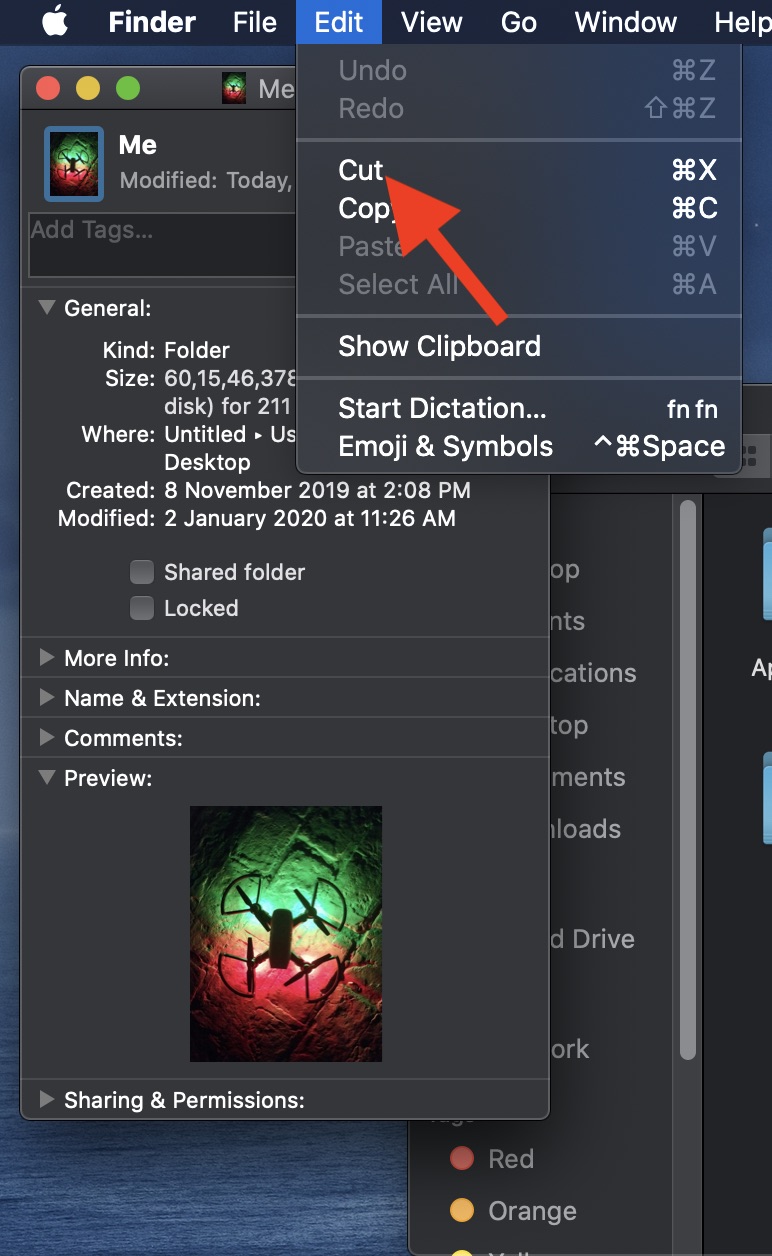
3. Finally, close the “Get info” window and you will be done.
Create Cool Custom Icons for Your Favorite Files and Folders on macOS
So, that’s the quick way to give a custom look to all of your favorite folders on macOS. As the process is pretty simple, you can use it to style all of your desktop folders. Unlike iOS, macOS offers more personalization options. For instance, you can hide Apple Music in the stock Music app, create an image resizing Automator quick action and also be able to add a dark/light mode switch. What’s your take on it? If you know any cool personalization tips, feel free to share them with us in the comments below.


Every time I create a custom file icon in Monterey, it takes about 10 times more space than when I do it in Mojave. For example, just now I created custom file icons in both Mojave and Monterey, using the technique you described above. In Mojave, this produced a 238 KB icon file, and in Monterey, it produced a 2.2 MB icon file. Why is there such a big difference in size?