Personalization is everything in today’s world, especially when it comes to technology. Don’t you just hate it when you have to use some computer that isn’t your own? Everything’s just a little too different, and you have to devote extra hours in adapting to that system environment since you cannot even modify it. Wouldn’t you love it if you had the ability to carry not just your personal data, but even your personal settings with you in your pocket? Well, luckily for you, you can. Today, we will be discussing with you how to create your own Windows To Go USB Drive, which is basically a bootable Windows residing inside your USB stick.
Prerequisites:
- A system running Windows 8/8.1/10.
- An ISO image file of the Windows version that you wish to install.
- A USB Drive of atleast 16 GB (preferably a Windows To Go certified USB).
Note – While the Windows To Go will be fully functional, do keep in mind that the read/write speeds will depend upon the USB stick that you use. While a USB 3.0 flash drive is fast, it still has its own limitations. If you just want to try it out, you can use a USB 3.0 flash drive, but for use as a daily driver, I’d strongly recommend getting a Windows To Go certified USB drive such as this or this.
Create Windows To Go USB Using Rufus
1. Download the latest version of Rufus from here, it’s free. There’s no need to install it, since it is a portable software. Once installed, connect the USB Drive to your PC.
Note: Make sure to backup all of the data from the flash drive, since the entire drive will be formatted later on.
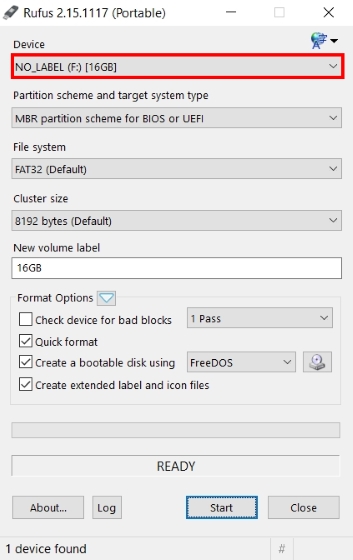
2. Launch the Rufus software on your PC. You’ll be presented with the main window. Make sure to select your USB Drive from the drop-down menu.
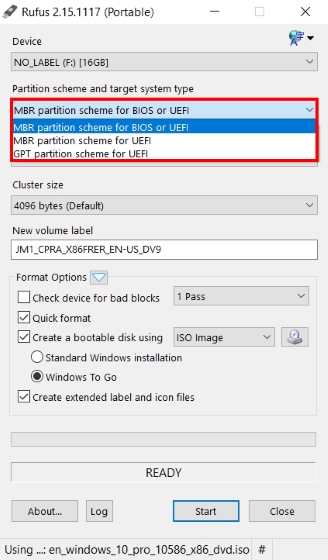
3. The next step is to select the partition scheme for your device. If you wish to boot the device in Legacy mode, select the “MBR partition scheme for BIOS or UEFI computer” option. Or, if you wish to boot it in the UEFI mode, select the “GPT partition scheme for UEFI computer”.
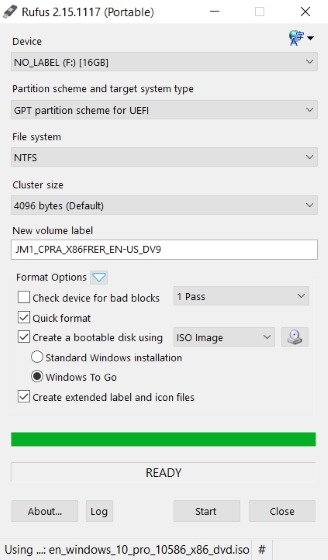
4. Select the “ISO Image” option from the drop-down menu next to the “Create a bootable disk using” option. Next, click on the “disk icon” and browse for the Windows ISO image file that you’ll be using to create the Windows To Go Bootable USB.
5. Next, make sure that “Windows To Go” option has been selected. Once you’re through with everything, tap on the “Start” button to begin the procedure.
6. Depending upon your system, the Windows image being used and the USB stick that’s being used, the entire process can take anywhere between 2-4 hours. Once done, the green meter in the bottom will be completed and you’ll get the ‘READY’ message below it. And that’s it, your Windows To Go USB is now ready. You can now simply restart your PC and boot up into the USB Stick to experience it.
Create Windows To Go USB Using GImageX
To create a Windows To Go USB with the help of GImageX, we first need to make the USB Disk bootable. To do that, we will be using Diskpart, a native Windows tool. To do so, follow the steps below:
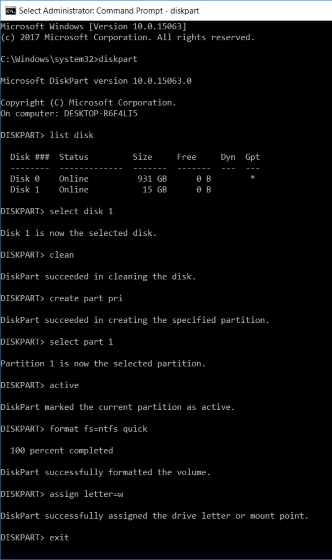
1. To start off, open up a Command Prompt / PowerShell window with Administrative Privileges. Then, make sure that your USB Stick is plugged in and the data is backed up. Proceed by executing the following commands inside the Command Prompt / PowerShell window.
- diskpart
- list disk
- select disk x //here x represents the number of your USB as shown in the list above
- clean
- create part pri
- select part 1
- active
- format FS=NTFS quick
- assign letter=W //you can change ‘W’ to any other drive letter that you want to use, but make sure that it is not already in use by another drive
- exit
2. Next up, right-click on your Windows ISO file, and select “Mount” to mount the image file in order to access its files.
3. Now, download GImageX from here, it’s free and open it. Under the “Apply” section of GImageX, click on the “Browse” button next to “Source” and navigate to the sources folder on your mounted ISO file, and select the “install.wim” file.
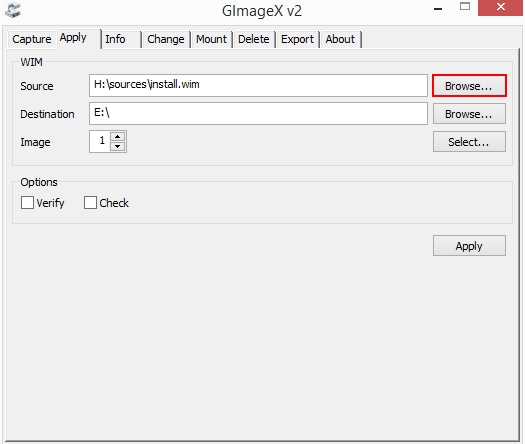
4. Next up, make sure to browse to the USB Drive that in the “Destination” section. Once done, proceed by clicking on the “Apply” option in the bottom-right.
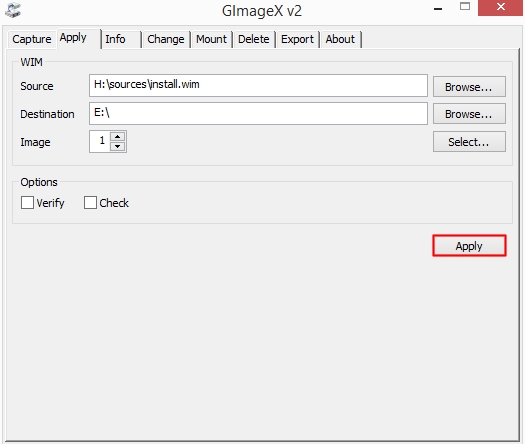
5. Do note that this method will take even longer than Rufus, nearly 5-6 hours to complete depending upon the disk and other hardware used. Once completed, the green bar will reach the 100% mark. Simply click on “Close”, restart your PC and boot into your Windows To Go USB.
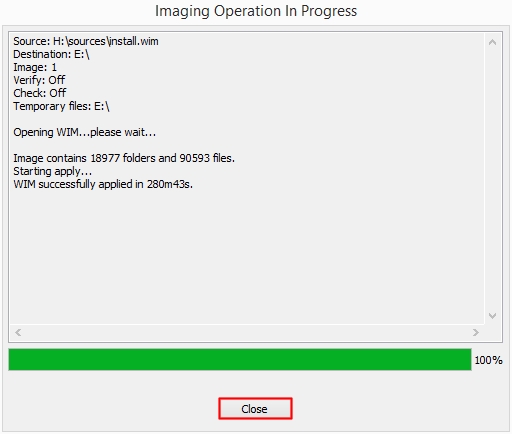
Note: I created a Windows To Go USB with a Windows 10 ISO image on a Windows 10 Creators Update running PC but the method should work for all Windows versions.
SEE ALSO: How to Hide Drives in Windows 10 (Guide)
Carry Windows Wherever You Go
The power to carry your data along with the settings inside the work environment of your choice is indeed great. We’ve shared both the automatic and the comparatively manual method of creating a Windows To Go USB for your use. So, do try it out and share with us your experiences and any queries in the comments section below.


