When you’re dealing with a large collection of files, there are times when you would want to simultaneously rename all of them to manage them in a better fashion. Renaming all the files manually can be a frustrating experience, but Windows 11 offers a few ways to bulk rename your files. In this article, we will go through the steps for how you can batch rename files in Windows 11.
Batch Rename Files in Windows 11 (2022)
Batch Rename Files with Windows 11 File Explorer
Did you know that you can use Windows 11’s default file explorer to batch rename files? Although it’s not as versatile as PowerToys or other third-party batch file renaming software, it gets the job done for most users. Here’s how it works:
1. Open File Explorer using the Windows 11 keyboard shortcut ‘Win+E’ and select the files you wish to rename. Right-click the selected files and click on the “Rename” icon from the context menu. You can alternatively use the keyboard shortcut ‘F2’ to rename the files.
2. Enter the new name for the files and hit the Enter key. While you will see the text box in one of the selected images, it’s worth noting that Windows will assign the same name to all the selected files with different numbers.
3. As you can see in the image below, Windows has batch renamed all the selected files using the same name. If you don’t mind having a number at the end of the file name, this is all you need to rename multiple files on Windows 11 easily.
Use PowerToys to Batch Rename Files in Windows 11
1. Download the latest version of the PowerToys installer from GitHub and run the setup file. Follow the on-screen instructions to complete the setup and open PowerToys.

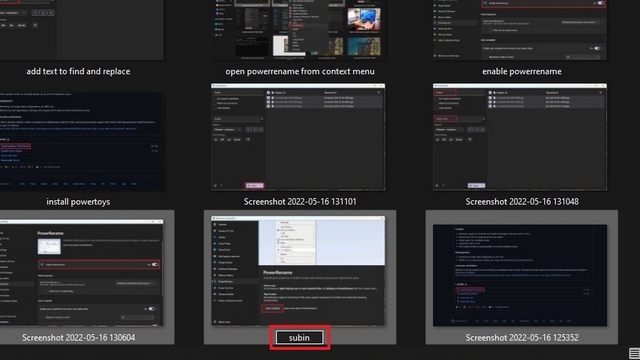
2. When PowerToys opens, switch to the “PowerRename” tab from the left sidebar and click on “Open Settings” to review your PowerRename settings.

3. By default, you will notice that the “Enable PowerRename” toggle is enabled. If that’s not the case, enable it to use PowerRename.

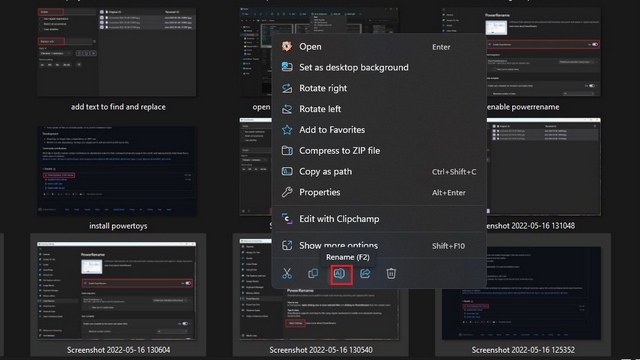
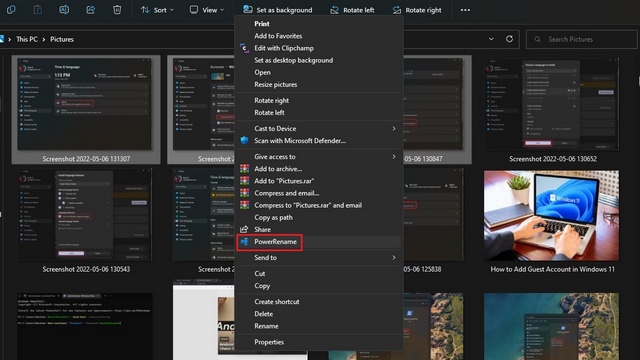
4. Select the files you want to rename and right-click on them. Click on the “Show more options” to expand the context menu and choose “PowerRename”.
5. When PowerRename’s interface appears, type the word you want to replace in the top box and the replacement word in the “Replace with” textbox.
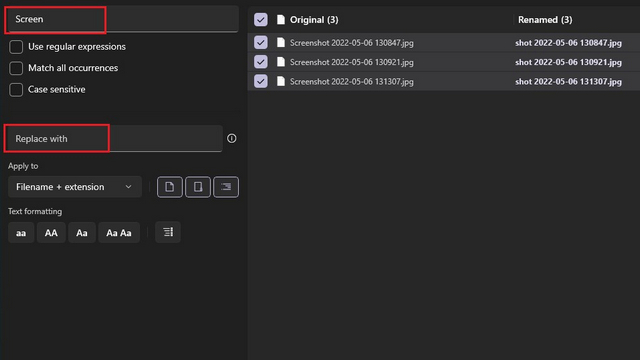
6. Click on the “Apply” button at the bottom-left corner of the app to batch rename files in Windows 11 using PowerRename.

Third-Party App to Batch Rename Windows 11 Files
You could also consider using a dedicated batch renaming software to bulk rename files. While there are a lot of options out there, one software we would recommend is FastStone’s Photo Resizer. Although the app looks a bit dated, it is fast and has a negligible learning curve.
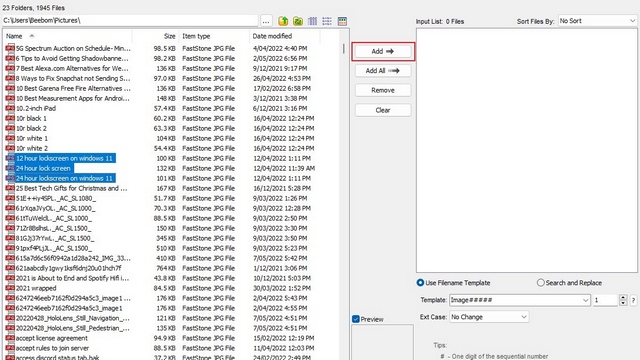
1. Install FastStone Photo Resizer (download) and navigate to the folder containing the files you want to rename. Select the files and click on the “Add” button to add them to the renaming queue.
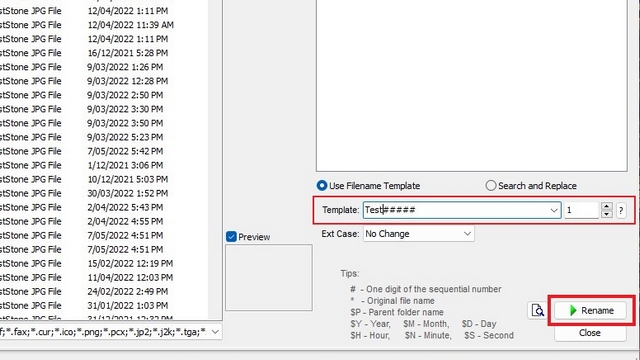
2. You can now set the common name using the filename template or search and replace specific words in the file name. You also have the option to use the parent folder’s name, year, date, and more using the symbols detailed in the app’s tips section. After setting the desired name and format, click on the “Rename” button to bulk rename files.
3. The application will show you a confirmation prompt. Click on “Yes” to confirm the changes.

4. FastStone will now rename the files you have selected, and you can view the results on the next page.

Bulk Rename Files Easily in Windows 11
So, those are three ways to batch rename files in Windows 11. Meanwhile, do not forget to take a look at our other guides to always run apps as an administrator in Windows 11 and how to add a guest account in Windows 11. Furthermore, you could also check out our article on the best Windows 11 hidden features to explore more such features.