Creating a guest account in Windows used to be a fairly straightforward process that anyone could do in a few clicks. That’s no longer the case, but you can still create a guest account in newer versions of Windows, such as Windows 11. In this article, we have explained how to create a Windows 11 guest account using Settings, Command Prompt, and PowerShell. So without further ado, let’s dive in.
Create Guest Account in Windows 11 (2022)
Add Guest Account using Windows 11 Settings App
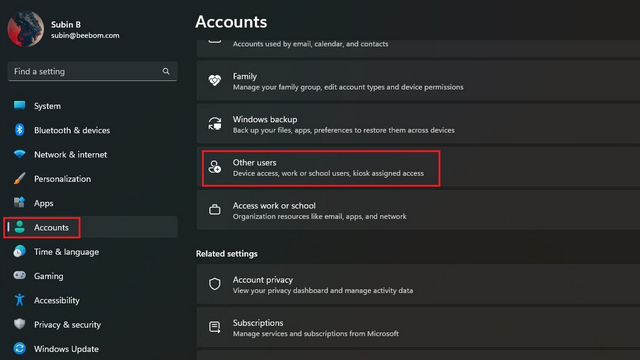
1. Open the Settings app using the Windows 11 keyboard shortcut ‘Win+I’ and switch to the “Accounts” section from the left sidebar. From here, click on “Other users” to set up a guest account. If you’re on an older build of Windows 11, you will find this option as “Family & other users” instead.
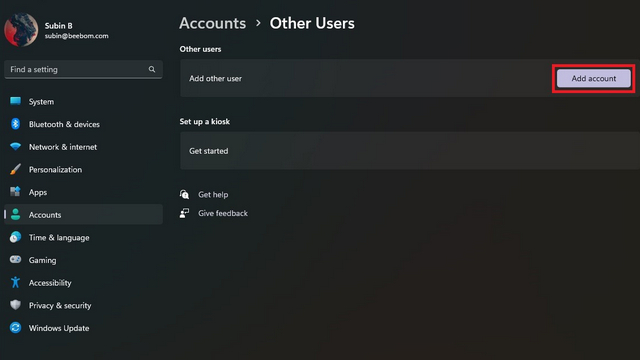
2. Up next, click on “Add account” to create a new user account.
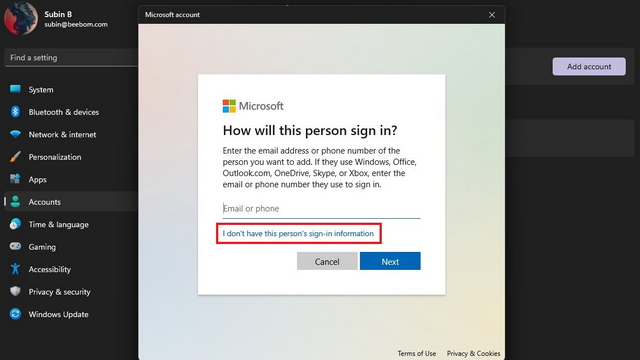
3. When Microsoft’s account creation screen appears, choose “I don’t have this person’s sign-in information”.
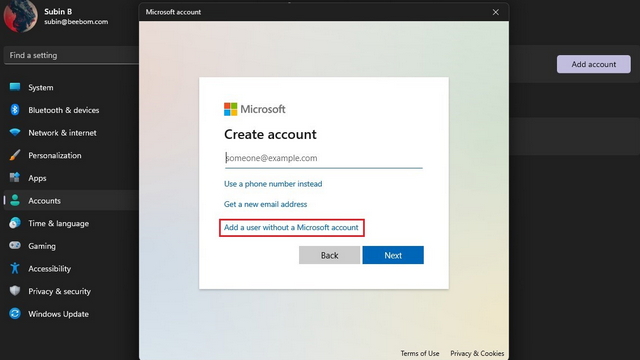
4. From the next page, click on “Add a user without a Microsoft account” to create the guest account without linking a Microsoft account.
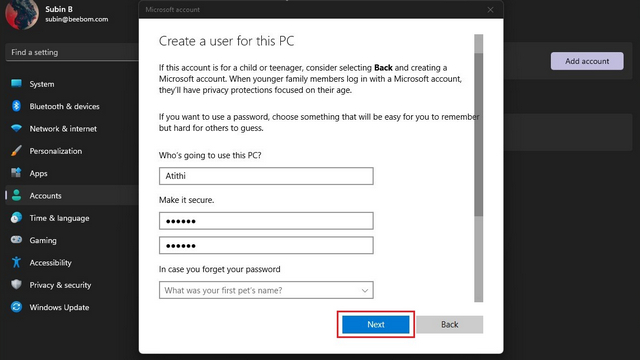
5. You should now set the username, password, and three security questions for the guest account. Do note that you can’t use “Guest” as the username since it is reserved in the OS. Click “Next”, and you now have a second account in Windows 11.
Add New Account to Guest User Group
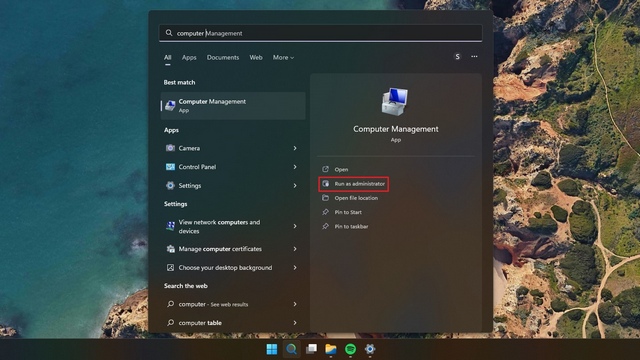
1. Now that you have created an account, you should add it to the guest user group so that the account doesn’t have complete access to your PC. To do this, open Windows Search and open “Computer Management” as an administrator.
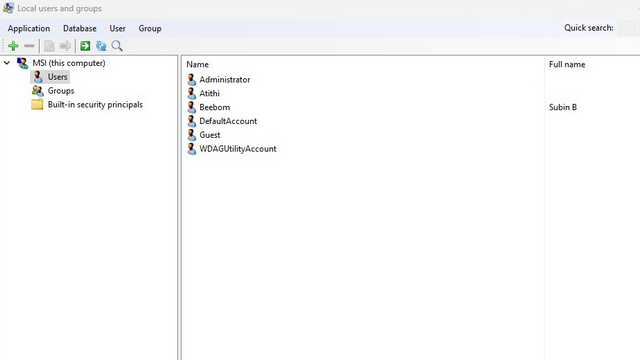
2. When Computer Management appears, navigate to System Tools -> Local Users and Groups -> Users to add the account to the user group. Notably, you won’t find the “Local Users and Groups” option if you’re on the Home edition of Windows 11. As a workaround, you can install and use the Local User and Group Management tool from GitHub. To get started, double-click on the user you just created.
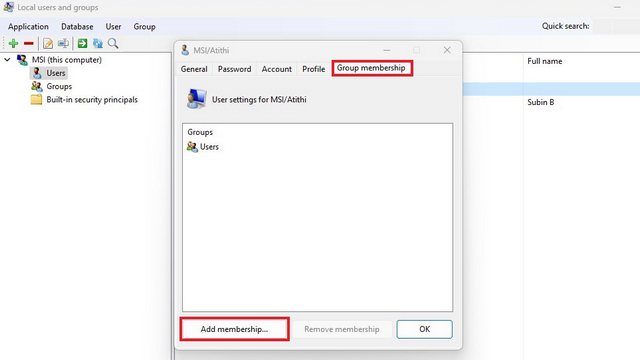
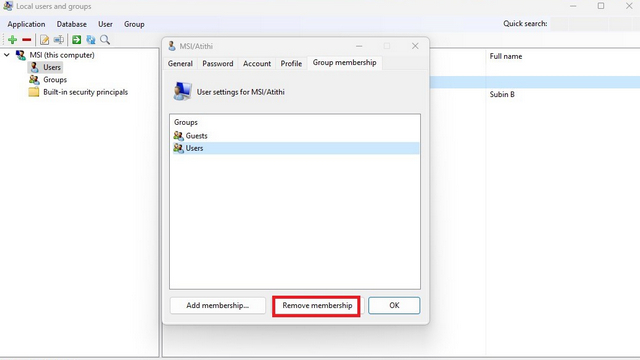
2. Switch to the “Group membership” tab and choose “Add membership” to pick the guest user group.
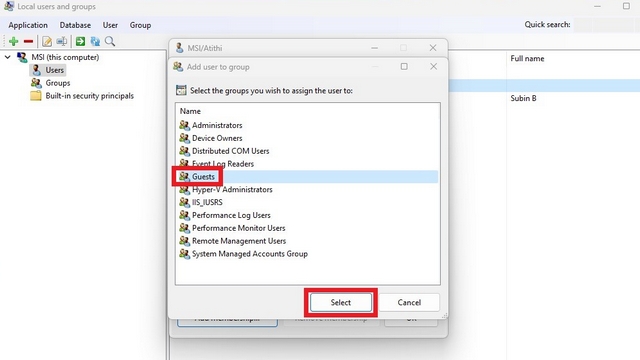
3. Choose “Guests” from the list of groups and click on “Select” to confirm the selection.
4. After adding the guest user group, click on “Users” and hit the “Remove membership” button. You have successfully created a guest account in Windows 11.
Use Command Prompt to Create Guest Account
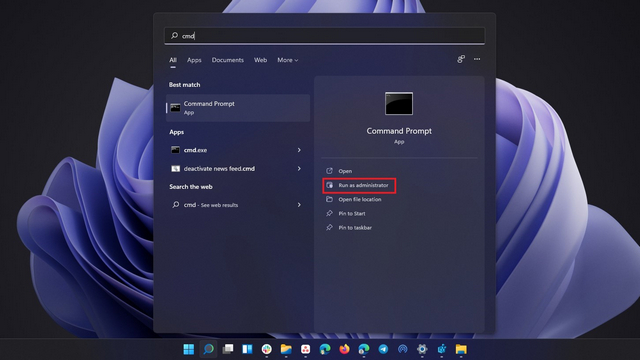
1. Search “Command Prompt” in Windows Search and run it as administrator.
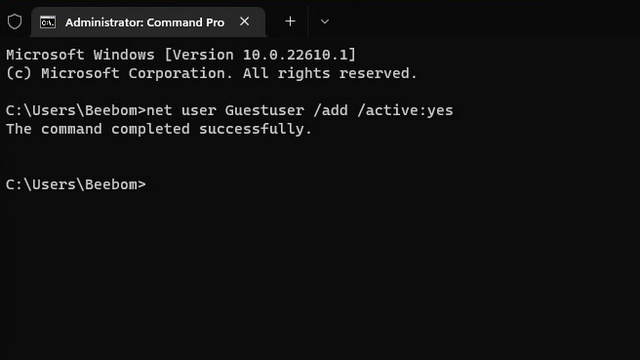
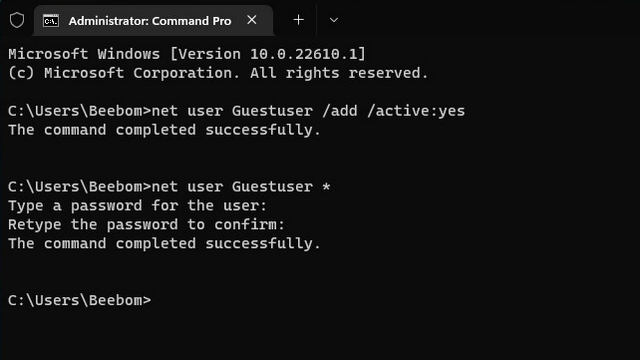
2. Type the following command to create a new guest user. Do note that you can replace “Guestuser” in the command with a name of your choice.
net user Guestuser /add /active:yes
3. Use the command below to set a password for the guest account. And that’s it, you have created a guest account in Windows 11 using Command Prompt.
net user Guestuser *
Create Windows 11 Guest Account Using PowerShell
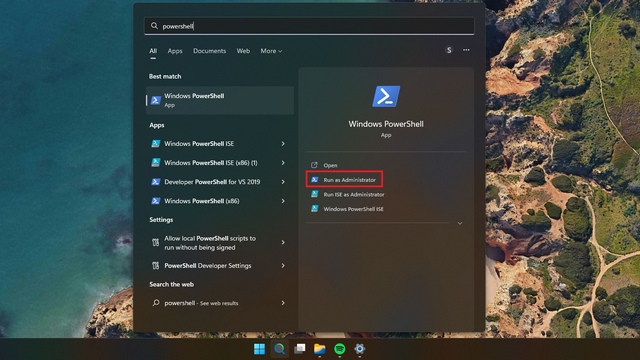
1. Another way to create Windows 11 guest account is using PowerShell. Search “Powershell” in Windows Search and run it as administrator to open an elevated PowerShell window.
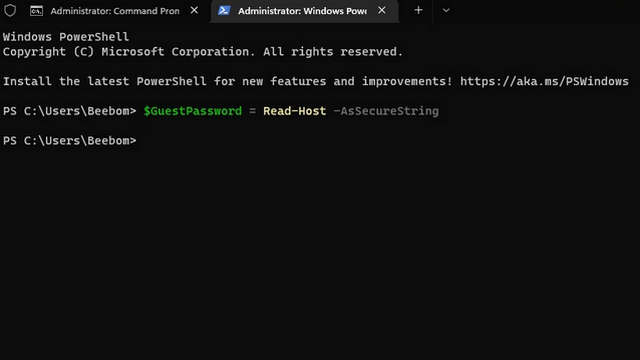
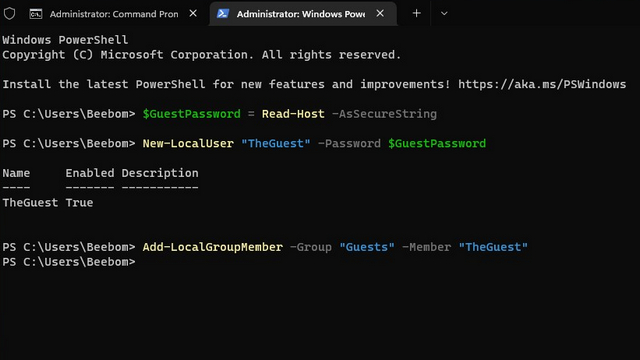
2. Use the command below to set up a password for your guest account.
$GuestPassword = Read-Host -AsSecureString
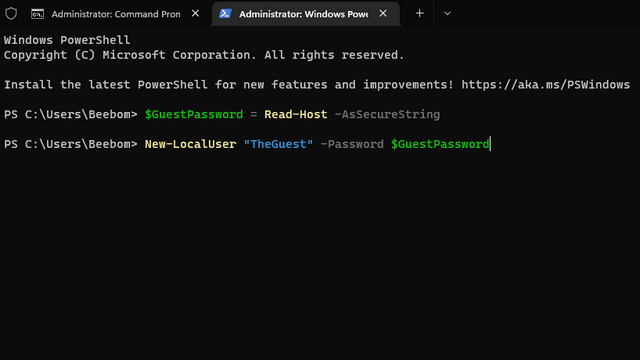
3. Up next, use the command below to set the name for the guest account.
New-LocalUser "TheGuest" -Password $GuestPassword
4. As a final step, use the command below to add the account to the guest user group. You can now share your PC with others using the guest account.
Add-LocalGroupMember -Group "Guests" -Member "TheGuest"
Use Guest Account While Sharing Your PC
So, those are three ways to create a guest account in Windows 11. The option to create a guest account will come in handy, especially if you often find yourself sharing your system with peers or acquaintances. Meanwhile, if you prefer an offline account that’s not associated with your Microsoft account instead, head to our linked guides to create a local account in Windows 11 and remove your Microsoft account from Windows 11.