
Windows and Mac OS X are inherently different operating systems, even if both of them serve the same purpose of personal computing. There is also no denying the fact that Microsoft’s offering is by far the more popular one, with a number of applications available only for Windows that you can find alternatives for on OS X, but they themselves are unavailable. The same holds true for a vast number of gaming titles, which are primarily considered a forte of Windows. This becomes a challenge when you own a system that’s basically meant to run Mac, and/or you work in an environment that requires Windows-based programs for operation.
When I migrated to Mac a couple of years ago, I never really looked back, but despite my bias toward OS X as a superior operating system, the need to run Windows applications was inevitable. I fully acknowledge that I am not the only one facing this dilemma either, and so this article here outlines the best ways to either run a full blown version of Windows on your Mac, or run Windows programs whilst staying inside OS X.
Note: The requirements for running Windows on a Mac varies with different systems and the versions of Windows OS that you’re attempting to employ. For the purpose of this article, we’ll be talking about 64-bit Windows 10 Professional running on a Macbook Pro 13″ with Retina display, having a Core i5 processor, 8GB RAM and 256GB SSD.
Here’s How to run Windows on Mac
Parallels Desktop
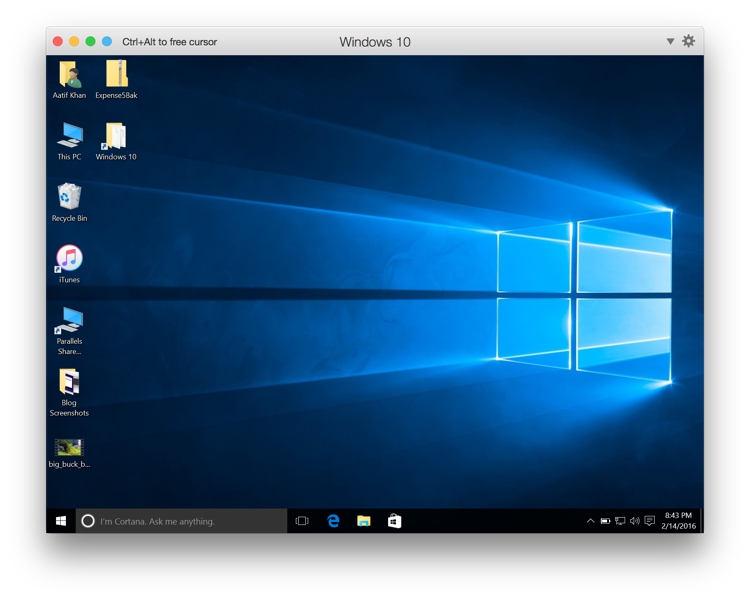
Parallels has made a name for itself for being (arguably) the best way for running Windows on a Mac. At the core of it, Parallels creates a virtual machine that can either run as a separate interface carrying your Windows installation, or can even seamlessly integrate with Mac courtesy of its “Coherence” mode, which is a great solution if you just need a few specific Windows apps running as part of your regular OS.
Setting Up Parallels Desktop
To set up Parallels Desktop, you need to first download the software and obtain an ISO of the Windows version that you want to run (along with product key, of course, just like you’d do with a normal Windows installation). Launch Parallels Desktop and since you don’t already have an existing virtual machine, the software will automatically go to the new VM setup screen. Here, you actually get a bunch of options. You can either set up a new Windows installation or migrate Windows from an existing PC, along side a number of free resources including automatic downloads for Chrome OS, Linux, Android or even OS X installation from a recovery partition, to name a few. If you have an existing virtual machine file available, you may add that to set it up with Parallels, too.


Hit the new Windows installation option, and Parallels will auto-scan your hard drive or attached USB drives for Windows ISO images. If you have multiple ISOs available, all of them will be listed. Alternatively, you can manually point to one as well if the software cannot auto-locate, or if you have the installation image in a network location.

Because Parallels is tuned to handle Windows installations on a Mac, the next screen offers you to conduct an “Express installation,” which basically means that you don’t have to go through any of Windows settings screens for this installation – everything will be done based on recommended settings. At this screen, you may also provide your Windows product key which will get added automatically during the installation process. You may, of course, forego this per your preference.
Note: For this article, we’re going ahead with Express Installation.

The next screen will ask you for your primary usage of this Windows installation, where you have options to pick from Software Development, Software Testing, Designing, Productivity and Gaming. Since every virtual machine has its own set of configurations in terms of allocated RAM, video memory, CPU and storage, Parallels will auto-suggest a VM configuration based on the usage pattern that you identify during this part. All of this changeable later on, of course, but the whole idea with Parallels is ease of getting up and running, and so, these auto-configurations will hold true most of the time if you select the appropriate use case.

The next screen asks for the name of the virtual machine and where it will be located. Over here, you have a bunch of other options as well, like whether to share this VM with other users of your Mac, include a desktop shortcut or whether to customize the VM settings before setting it up. You will also see how much space is available and how much of it will be taken up by the virtual machine.

Once you continue from this point, the installation for Windows will begin. You will need to still go through “some” steps in Windows installation, but most of it will be a smooth sailing process, and in under half-an-hour, you will have your Windows virtual machine up and running with ease.

Please note that this is in no way an exhaustive guide to using Parallels Desktop – this is just to give you an idea of how to set it up and get it running. The program is extensively exhaustive, and the official Parallels Website offers a wealth of knowledge and tutorials for in-depth usage. Every virtual machine within Parallels comes with its own configuration panel that will allow you to change and manipulate a bunch of options, from hardware to software and integration with OS X.

Pricing & Verdict
Parallels Desktop comes in various flavours and pricing options, with the best one being for home & student use. This version, you can grab at $79.99 one-time, or a yearly payment plan like a subscription. While it might seem a little pricey, realise that Parallels Desktop offers the best experience among all possibilities, and hence, comes highly recommended. It also offers a free 30-day trial if you want to first take it for a test ride. Oh, and Parallels keeps holding sales with really good bargains from time to time, so you should at least sign up for their newsletter to get it while its up for grabs at a reduced price.


While running a Virtual Machine is never the most optimal experience, Parallels has really bridged the gap in its years of development. The VM runs smoothly, works independently, and the coherence mode really makes it feel like you’re using Windows apps on your Mac instead of a VM. What’s even better, this is one of those few software that allows you to fully leverage the hardware capabilities of your Mac, including USB 3.0 ports, lightning connectors and even the retina display, thanks to its deep integration. Your files are conveniently shared, drag & drop is fully supported, and generally, you’ll be hard pressed to tell it apart that you’re running two separate OS on your machine. I highly recommend you give Parallels Desktop a try before resorting to an alternative.
VMware Fusion
VMware Fusion is another option that’s similar to Parallels Desktop on the front, but differs considerably in its setup, appearance and other facets. The basic premise, however, remains the same with both of them: both create a virtual machine that will run your Windows installation inside a Mac. With VMware Fusion, you get a long history of dealing with virtual machines at a professional level and providing virtual computing solutions, so Fusion is worth checking out.
Setting up VMware Fusion
From the get go, you will begin to see the differences between Fusion and Parallels. From launch, Parallels is all about ease and getting set up in the least number of steps possible. Fusion, on the other hand, is different. The first screen offers a bunch of installation sources, including from a disk image, migrating from an existing PC, from bootcamp – basically everything that Parallels offered. However, a quick comparison even of the screenshots that we provided will tell you that Parallels is more good looking and straightforward, with VMware being the confusing one.


For the purpose of this article, we’re naturally going with installation from a regular ISO.
In the second step, you’ll clearly see the stark difference from Parallels, where Fusion doesn’t actually locate any ISOs on your hard disk no matter where they are. Rather, you’re required to manually point to the ISO in question that you want to install from.

The next step allows you to configure your Windows installation account, giving you the option to pick the account name, an optional password, provide the Windows product key, and, something where Fusion has a clear edge over Parallels, selecting the version of Windows that you want to install. This is useful if your ISO contains installation files for more than one version, because you can select off the bat which Windows you want to get up and running. Oh, and there’s an easy install option here as well.

The next step deals with the integration that you want to have between Windows and OS X. Akin to Parallels, Fusion also allows you to run a sorts of Coherence mode (called Unity in this instance), where Windows won’t behave like a separate installation but have a closer connection with the default OS X.

The final step gives you an overview of your installation options, and supposedly allows configuring the virtual machine. I say supposedly because even if you opt for that, you can basically change the save location for the VM file and nothing more. Fusion takes care of everything else by itself. This can be interpreted as a double-edged sword; you are saved configuration hassle, but at the same time, you have lesser control over various aspects when creating the VM.

Beyond this point, you can pretty much sit back and relax as VMware Fusion takes care of your Windows installation. One major advantage that you get here over Parallels is that because you took care of all the settings beforehand, you don’t have to do pretty much anything during the installation – Fusion remembers all your settings and implements them as the time comes for them all. This is honestly the most seamless installation of Windows I’ve ever seen, period.


Customizing VMware Fusion Virtual Machine
Because Fusion doesn’t allow customization of the VM during installation, it’s important to take a look at the configuration pane you can access once your VM is up and running. The first thing that you’ll notice is how similar Fusion’s configuration pane looks to OS X’s default System Preferences, with every option laid out just like you have natively. This makes navigating around the options much easier, consequently making this a more pleasant experience (this is subjective, of course). With respect to the number of options that you get, they are also better and more diverse than Parallel’s offering, giving a more granular control. It’s also easier to access these settings compared to Parallels, but we’ll comment on that in the verdict.


Pricing & Verdict
When it comes to pricing, there is hardly any difference, with Fusion also coming in at $80 approximately, and coming with a free trial. While it doesn’t offer as much flexibility in pricing plans as Parallels does, some people might appreciate this simpler, more to-the-point approach over Parallels’ more complex offering.
VMware has a long history of making and managing virtualisation software, and Fusion 8 is honestly a testament to that. There are several things to like in Fusion: it’s ability to install Windows seamlessly, the fact that it places the most used VM controls at a click’s distance which are rather complicated in Parallels (like Settings, Snapshot, Audio, Camera etc), and that it just feels more robust when it comes to reliability. One of the biggest bonuses that Fusion brings over Parallels is how it can leverage an existing Bootcamp Windows installation, where you can simply call on that installation to run Windows programs within OS X without having to jump back and forth. With a 256GB SSD, this is a real blessing as it saves those precious gigabytes that you would otherwise have lost to a dual installation.
Another aspect that I want to touch on is power consumption. If you’re plugged in, this shouldn’t be any consideration, but if you use your Macbook on battery frequently, you might find Parallels a better option than Fusion. In my experience, running the same VM in Parallels is friendlier on not only the battery but also the core temperature, as the same on Fusion started pushing the core temperature well past 70°C, resulting in a higher battery drain. Oddly enough, I did not observe that while the Macbook was plugged in, so that might have to do with power source as well.
Overall, Fusion delivers a solid, punch-packing experience that you should definitely take for a spin. Since both Parallels and Fusion offer free trials, you should try them both before making the decision to stick with one. While I still favour Parallels, that’s a personal choice, and I encourage you to make yours.
Other Options
The options that we’ve discussed so far are beyond argument the best ones to get the best of both worlds, but they’re not all. There are two more that need to be discussed when we’re talking of best ways to run Windows on a Mac.
Boot Camp Assistant
If you’ve ever wanted to run Windows on your Mac, it’s almost impossible that you won’t have heard of Boot Camp. It’s a native OS X application that allows for a full Windows installation on your Intel-based Mac (Intel-based being the operative word here). If it’s native, why didn’t we recommend it in the first place? Because Boot Camp creates a dual booting system, and that doesn’t really cut it for everyone.
Setting up Boot Camp is fairly easy. Just launch it from the Launchpad or through OS X search, and follow the on-screen instructions. You need to have the Windows ISO image and product key handy, of course, but one major advantage is that Apple with automatically download and provide the necessary Windows drivers for your Macbook, making it a very convenient option if you don’t mind rebooting into the other OS every time you need something from the other world. And because it’s a separate installation for which a separate NTFS partition is created on your hard disk, forget sharing folders between the two OSes either; it simply won’t work. The space that gets formatted as NTFS is also not available to your Mac, so if you were to allocate, say, 50GB to the Boot Camp installation and only 25GB out of that in use, the remaining 25GB goes to waste unless you consume it, which is not the case with options like Parallels and Fusion.
CrossOver
CrossOver used to be very popular but has somewhat lost its appeal in recent times. The app was created with the idea of running Windows-based games on OS X, but has expanded considerably ever since. CrossOver works by creating “bottles” – containers within OS X environment that fool a program into believing that it’s in the x86 Windows architecture, thereby allowing the user to run that program through CrossOver on a Mac (or Linux – CrossOver supports both). The list of supported titles is pretty large, with more than 13,700 applications in the CrossOver database. They also have an intricate rating system where users provide commentary on not just whether a Windows application runs via CrossOver or not, but also, how well it runs and what works etc.


CrossOver comes in at a $60 price tag, and offers a fully-functional 14-day trial. The website has a great search feature that will allow you to check for support of your target application before you make the purchase, and the trial should help verify the findings for yourself as well.
SEE ALSO: How to Speed Up Your Mac
Final Words
While running Windows on Mac OS X isn’t an exact science, there are a number of good options available that you can employ, depending on your needs and budget. No matter which option you consider, there will be tradeoffs and cost factors that will come into play. With the exception of CrossOver, you will need to purchase the license for the Windows version that you’re running, so that is almost a constant. Boot Camp is free, but the hassle of switching back and forth might not make it worth your while. However, if you plan on running games on your Mac, Boot Camp is the best choice, as a virtual machine or container can never be as smooth as real, hardware level integration. CrossOver might be attractive because it doesn’t entail a Windows license cost and is about $20 cheaper than both Parallels and Fusion, but you must ensure that your target apps will work with this solution, lest those $60 would go to waste. Parallels and Fusion are both solid, but in the end, they are virtual machines nevertheless.
In the end, the choice is yours. Luckily, all solutions discussed here offer free trials, and fully functional ones, too, so I strongly urge you to go through them yourself and decide based on your circumstances. Oh, and let us know what you picked and why in the comments below.


![How to Select Multiple Files on Mac [4 Ways]](https://static.beebom.com/wp-content/uploads/2024/02/MacBook-Select-Multiple-Files.jpg?w=300&quality=75)


