Though a lot of people prefer using their keyboards to navigate through macOS thanks to all the useful Mac keyboard shortcuts, there’s no denying that a mouse cursor can’t be completely ignored. So, when your mouse cursor suddenly disappears from the screen, it can be extremely annoying to try and figure out what’s going on. Fortunately, there are some reliable methods to fix a Mac cursor that keeps disappearing.
18 Ways to Fix Mouse Pointer Keeps Disappearing Issue on Mac (2022)
First and foremost, let’s briefly delve into the reasons why the mouse cursor disappears on Mac. Once we’ve spotted the possible causes, it will be a tad easier to relocate the hidden mouse pointer on the macOS device.
Why does Mouse Pointer Keep Disappearing on My Mac?
There are so many things that could be behind the missing mouse pointer issue on your Mac. For starters, the problem could be due to outdated apps, the worn-out battery in case you are using a wireless mouse, and ill-functioning third-party screensavers.
Not to mention, the vanished mouse cursor could also be the result of the random software glitch that crops up out of nowhere or even the buggy firmware.
As for the solutions, at times, you can get rid of the issue by just taking care of the basics. However, if they don’t work out, you will need to go for a bit radical measures. In most cases, these hacks can help you get the better of the problem.
Shake Mouse Pointer to Locate
Probably the easiest way to relocate the missing mouse pointer on Mac is to shake the mouse. Yeah, you read that right! At times, all you need to do to bring back the disappeared cursor is to give the mouse a quick shake. Alternately, you can also move your finger quickly across the trackpad to force the mouse pointer to appear on the screen.
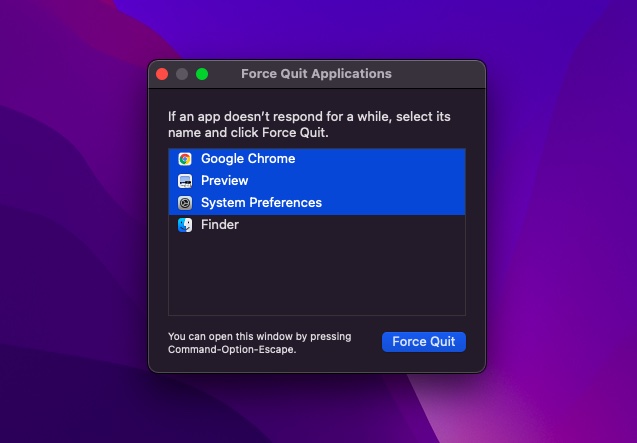
Force Quit Hack
Many a time, you can quickly bring the disappeared pointer back by using this nifty force quit hack. Do note that it works by just bringing up the force quit window. So, there is no need to quit any app.
- Simply press the Cmd (⌘) + Option (⌥) + esc on your keyboard to bring up the Force Quit window. Now, check if the cursor has appeared on the screen.
Switch to Another App or Finder to Relocate Your Mouse Pointer
If the mouse cursor seems to be hidden inside an app, try switching to another app or Finder (press Cmd (⌘) + tab) to relocate the hidden pointer. Once the cursor shows up, return to the previous app.
Try Out the Right Click Trick
When it comes to fixing the vanished mouse cursor on Mac, the right-click hack is also quite reliable. So, do give it a chance as well. You can either click with two fingers or use the Cmd + left click.
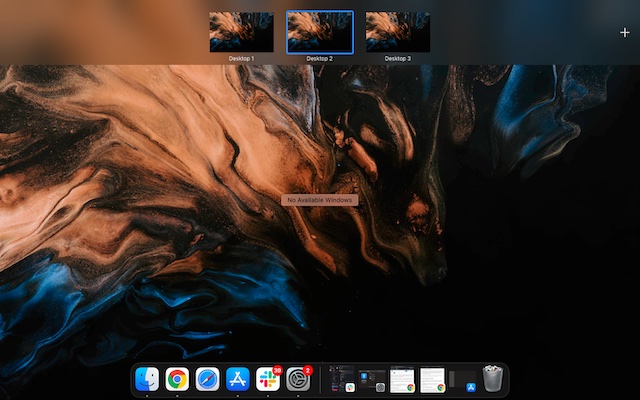
Use Mission Control to Force the Missing Cursor to Appear
It’s worth pointing out that the right-click method may not always bring up the vanished cursor when you are using the full-screen app. But don’t worry, this is where the ever-reliable Mission Control has a role to play.
There are multiple ways you can invoke Mission Control on your Mac:
- Press Ctrl + Arrow up (△) key
- Swipe up with three/four fingers on the Trackpad
- Click the Mission Control key (F3) that appears in the top row or Touch Bar
Try Dragging the Mouse Cursor to the Dock
The Dock has also been pretty effective in resolving the disappeared mouse pointer issue on Mac. To use this trick, just drag the invisible cursor to the Dock. The moment the mouse cursor has hovered over the Dock, it will show up.

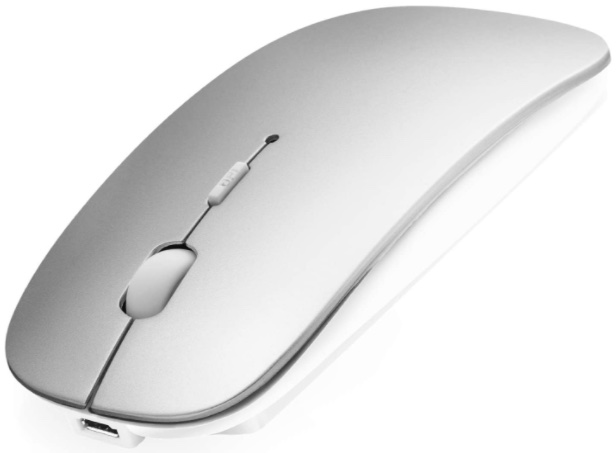
Ensure That Your Wireless Mouse is Fully Charged
If you are using a Bluetooth mouse, make sure it’s fully charged. The wireless mouse tends to misbehave when it runs low on power or the battery gets worn out. So, make the battery is not just fully juiced up also in good condition.
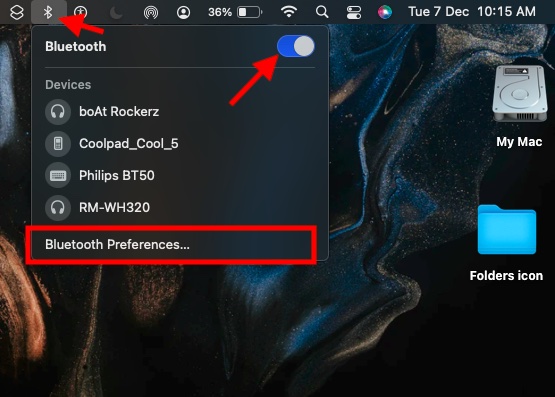
Disconnect/Reconnect Your Mouse
If the cursor doesn’t show up even if the battery of your wireless mouse is charged and in solid condition, disconnect your mouse from Mac and reconnect.
- Open System Preferences app -> Bluetooth. Now, hover the pointer over the connected mouse and click the “X” and click Remove in the popup. Now, reconnect the mouse to your Mac.

- If you are using a wired mouse, unplug it. Then, wait for a few seconds and then plug it back in.
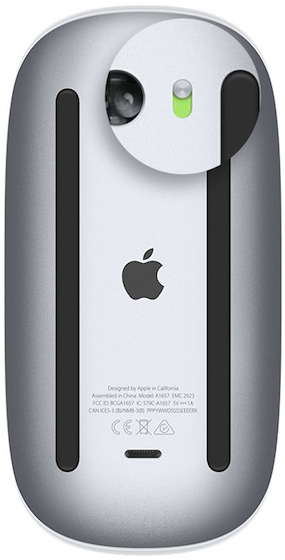
Reset Your Wireless Mouse
If you are still unable to relocate the hidden mouse pointer on your Mac, try resetting your wireless mouse. Most wireless mouse like the Apple Magic Mouse comes with a switch to let you reset with ease. If you don’t know how it’s done on your particular mouse, you can take the help of the user manual.
Ensure That Bluetooth is Enabled
When using a wireless mouse, make sure that Bluetooth is turned on your Mac.
- Head into the System Preferences -> Bluetooth -> Turn Bluetooth On.
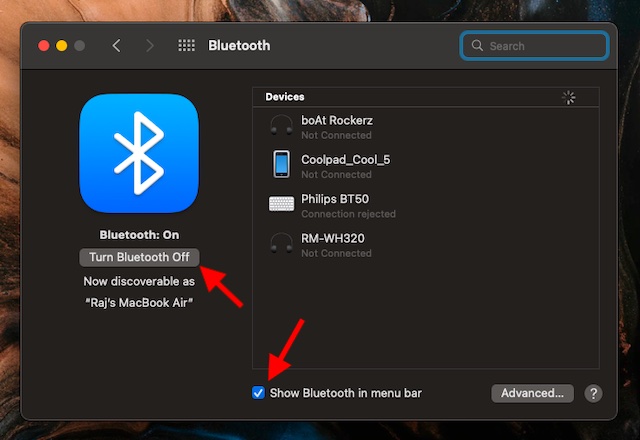
- To be able to take control of Bluetooth devices with ease, make sure that the box to the left of “Show Bluetooth in menu bar” is checked off.
- Just in case the Bluetooth icon is missing or if the menu bar status continues to indicate that the Bluetooth is disabled, reboot your Mac. After that, turn on Bluetooth again.
Hard Reset Your Mac
If the mouse cursor hasn’t yet returned on your Mac, force restart (aka hard reset) your device. When it comes to fixing common macOS issues, force restart has a pretty good track record. Therefore, make sure to try it out.
- Press and hold the power button until your Mac shuts down. Now, wait for a few seconds, and then hold down the power button until your device turns on.
- Once the device has rebooted, check out if the curse is back. If it has, you’ve troubleshooted mouse pointer issues on your Mac.
Mouse Cursor Disappears When Using a Specific App?
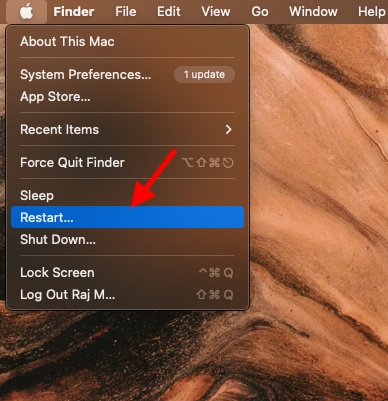
If the cursor keeps disappearing when you are using a specific app on your Mac, force quit the app and reopen it.
- Click the Apple menu at the top left corner of the screen and choose Force Quit. Now, select the app in question and hit Force Quit.
Now, open the app to check if the cursor has returned. If the problem persists, update the app as the outdated version might be at fault.
- Head over to App Store on your Mac and then click on Updates in the left sidebar. After that, find the app and hit Update.

Adjust Cursor
No solution as yet? Fret not. At times, adjusting the cursor slider can help you relocate the disappeared mouse cursor on your Mac.
- Navigate to the Apple menu at the upper left corner of the screen -> System Preferences -> Accessibility -> Display.
- Now, select the Cursor/Pointer tab and then drag the Pointer Size slider towards the left/right to adjust it.
- Make sure that the box to the left of “Shake mouse pointer to locate” is checked off.
- Alternately, you can also invoke Siri and ask it to “Increase mouse pointer” size on your Mac.
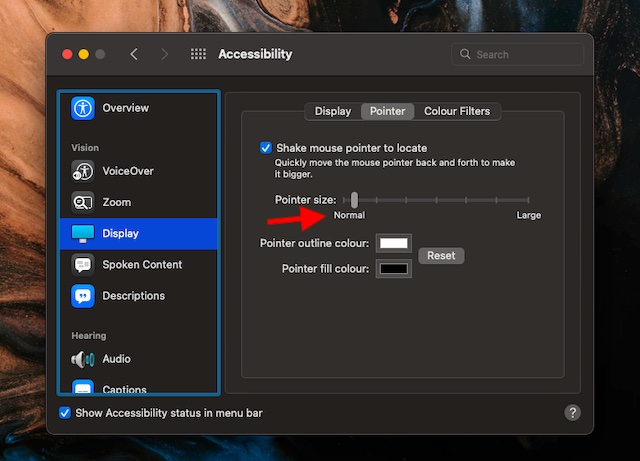
- After that, restart your Mac (Apple menu -> Restart) and then check if the mouse pointer is back.
Disable Keyboard Shortcuts to Zoom
If you are using keyboard shortcuts to zoom on your Mac, try turning them off as they might be causing the mouse pointer to disappear.
- Open System Preferences -> Accessibility -> Zoom. Now, ensure that the keyboard shortcuts to zoom are unchecked.

Turn Off Third-Party Screensavers
While there is no denying the fact that third-party screensaver apps are quite handy and worth giving a shot for enhanced customization, at times they could create issues and might even interfere with the mouse. So, if you are using any third-party screensavers, uninstall or completely disable them.
Reset NVRAM/PRAM/SMC (Macs with Intel Processor)
When faced with a persistent issue on my Mac, I make sure to reset NVRAM (Non-volatile Random-access Memory)/PRAM (Parameter Random-access Memory) and SMC (System Management Controller).
For those uninitiated, PRAM or NVRAM is a small amount of memory that is designed to store certain peripheral data including display resolution, sound volume, time zone, recent kernel, startup disk selection, and more. SMC is responsible for several vital processes including LED lights, cooling fans, and keyboard. Moreover, it also manages the power supply of your Mac. That’s why resetting NVRAM/SMC helps you fix your misbehaving Mac.
Reset PRAM/NVRAM on Your Intel Mac
- Turn off your Mac. After that, press and release the power button. Then, immediately hold down the option+command+P+R keys.
- Make sure to hold down these keys for about 20 seconds until your Mac boots twice.
Reset SMC on Your Intel Mac
MacBooks with the T2 Chip: Turn off your Mac. Then, press and hold the Control+Option (Alt)+Shift. Be sure to hold down these keys for 7 seconds and then press and hold the power button as well. After holding these keys for 7 seconds, release them all. Now, wait for a few seconds and then press the power button to turn on your MacBook.
Desktop Macs with T2 Chip: Turn off your Mac and then unplug the power cable. After waiting for 15 seconds, plug the power cable back in.
MacBooks with a Non-Removable Battery (without T2 Chip): Shut down your Mac and then hold down the Shift+Control+Option (Alt) keys. While still holding these three keys, press and hold the power button as well. Make sure to hold down these four keys for 10 seconds and then release them. After that, press and hold the power button to turn on your Mac.
MacBooks with a Removable Battery (without T2 Chip: Turn off your Mac and then remove the battery. After that, hold down the power button for 5 seconds and then reinstall the battery. Then, press the power button again to turn on your Mac.
Desktop Macs (without T2 Chip): Shut down your Mac and then unplug the power cable. Now, wait for 15 seconds and then plug the power cable back in. After waiting for 5 seconds, press the power button to reboot your Mac.
Update the Third-Party Mouse/Trackpad
To improve performance and also fix miscellaneous issues, manufacturers release firmware updates from time to time. So, make sure to check the firewire updates if you are using a third-party mouse/trackpad. You can contact your manufacturer to enquire about the update.
Update Software
If the cursor is still not working on your Mac, I suspect there could be a rare bug behind this issue. In such a scenario, the software update is always the right way to go. As most macOS updates come with a ton of bug fixes and performance improvements, you should be able to fix the issue.
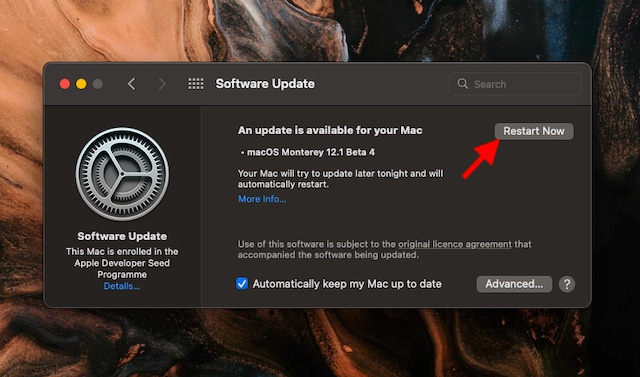
- Navigate to the Apple menu at the upper-right corner of the screen -> System Preferences -> Software Update.
- Next, wait for a few seconds until your Mac has checked for the update. If there is any update available, download and install it without any delay.
Troubleshoot the Missing Mouse Pointer Issue on macOS
Well those are the ways you can fix a missing mouse cursor on your Mac. I have included multiple solutions for the problem, and hopefully one of the 18 mentioned here will solve your problem. So, were you able to fix your mouse cursor? Which method worked for you? Let us know in the comments.