Apple has finally starting seeding the macOS 10.12.4 Developer Beta to people who have enrolled their machines into the Apple Beta Program. The update brings a number of changes, and stability improvements, but one of the most important features that macOS Sierra 10.12.4 brings to Macs, is the Night Shift feature. Previously available only in iOS devices, and on Macs using third party clients such as f.lux, Night Shift in macOS Sierra 10.12.4 finally brings the much needed feature to Apple’s desktop operating system. We’ve tried out the Developer Beta for macOS Sierra 10.12.4 on a MacBook Air, and here’s how you can use the Night Shift feature on your Mac.
Note: You should never install beta software on your daily driver MacBook. Also, you should take a Time Machine backup of your system before updating it to a beta software, and should take Time Machine backups regularly, while you’re running the beta software, just in case of an unforeseen error. Beta software are inherently prone to being buggy, and may crash, resulting in a loss of data. Please update your Mac to a beta version of macOS, if and only if, you understand the risks involved.
Update Your Mac to macOS Sierra 10.12.4
Since the latest version of macOS Sierra is only available as a developer beta, as of now, you will need to have a developer account registered with Apple (the ones that cost $99/year). If you have a developer account, you can follow the steps below to get macOS Sierra 10.12.4 Developer Beta up and running on your Mac:
1. Go to the Apple Beta website, and sign in with your developer account. Under the downloads section, you will be able to see “macOS 10.12.4 beta“. Click on the “Download” button next to it.

2. This will download a small .DMG file on your Mac. Simply open this file, and run the installer.
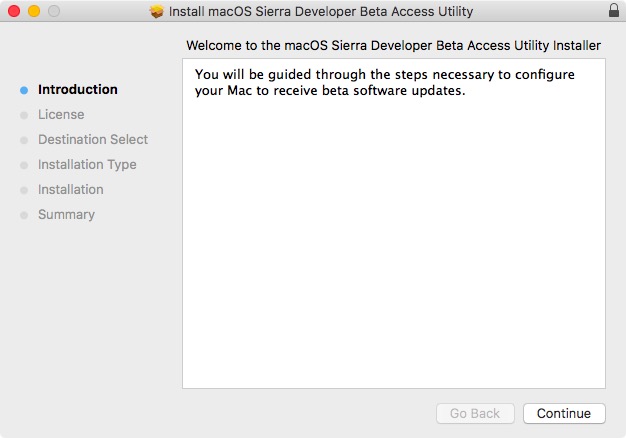
3. Once you’ve completed the installation, the App Store will automatically launch, and you will be able to see the latest developer beta (macOS Sierra 10.12.4) available under Updates.
4. Simply Download the update, and it will be installed on your Mac. Your Mac will restart automatically, and will have been updated to macOS Sierra 10.12.4.
Enable and Use Night Shift in macOS Sierra 10.12.4
Now that you’ve updated your Mac to the latest iteration of macOS Sierra (10.12.4), you can enable Night Shift by following the steps below:
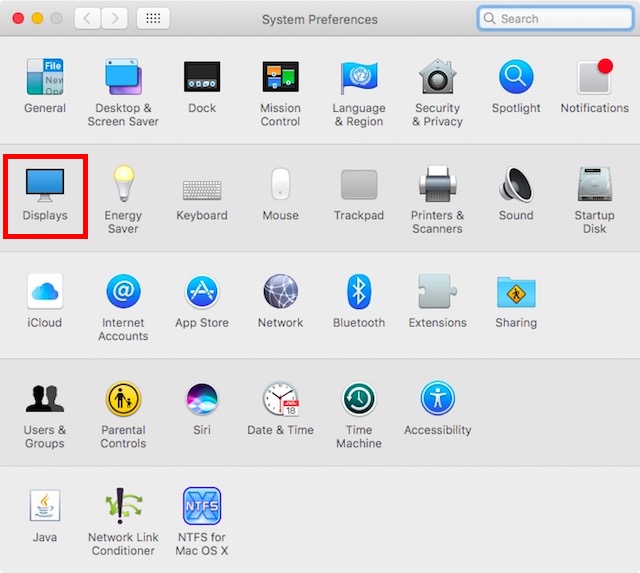
1. Go to System Preferences -> Displays.
2. Here, switch to the tab called “Night Shift“.
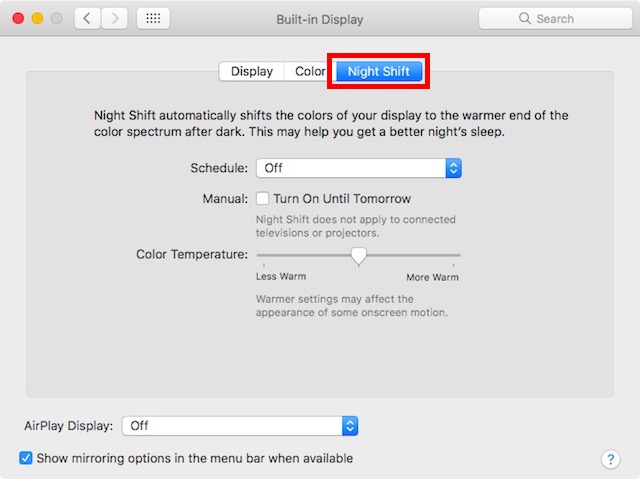
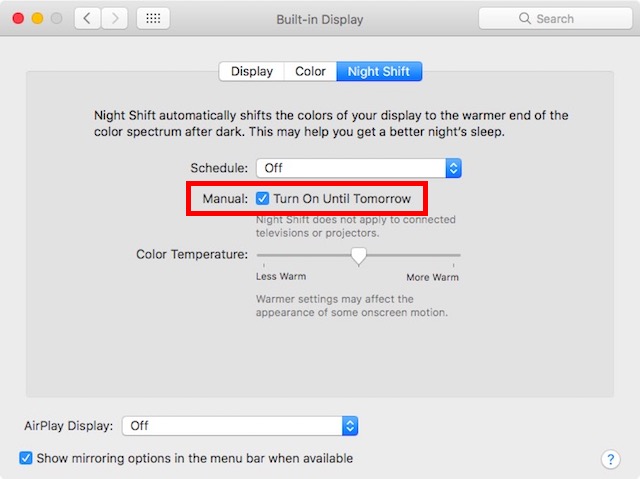
3. Here, you can enable Night Shift for your Mac. There are a number of different options that you can use. If you only want to enable Night Shift for one day, simply check the checkbox that reads “Turn On Until Tomorrow“. This will turn on Night Shift, and it will automatically switch off the next day.
4. If you want Night Shift to automatically toggle on, and off, according to sunset, and sunrise, you can click on the dropdown menu next to “Schedule“, and select “Sunset to Sunrise“.
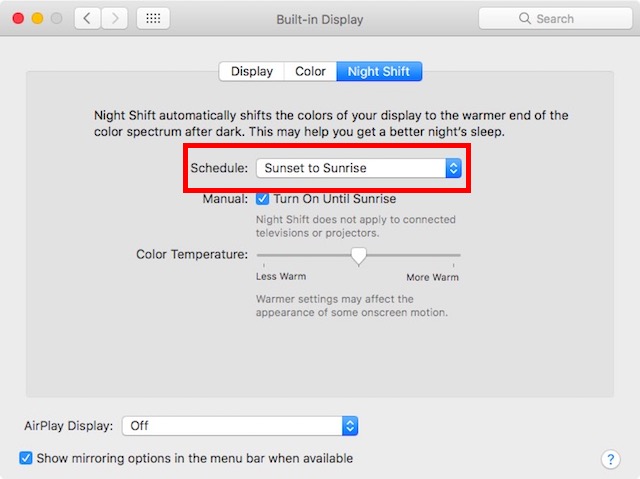
5. You can also select “Custom”, in the same dropdown menu, to get the option to choose the time range in which you want Night Shift to be enabled. Night Shift will automatically disable as soon as it crosses out of the time range you specified.

6. Now that you have enabled Night Shift on your Mac, you can use the “Color Temperature” slider, to adjust the warmth of your screen when Night Shift is enabled.
Note: Night Shift does not apply to external monitors, or projectors. So, if you use multiple displays with your Mac, they will not be affected by Night Shift. Only the primary display of your Mac will be affected when Night Shift is turned on.
Get Night Shift for Mac running older version of macOS
If you have an older Mac, that doesn’t support the latest version of macOS, or if you don’t have a developer account, to be able to download the developer beta, you can still use third party apps to get a Night Shift feature on your Mac. I would recommend that you use f.lux to get Night Shift on your Mac running an older version of macOS. To get started with f.lux, just follow the steps below:
1. Download f.lux. It will be downloaded as a .ZIP file, which you can extract to get at the f.lux app.
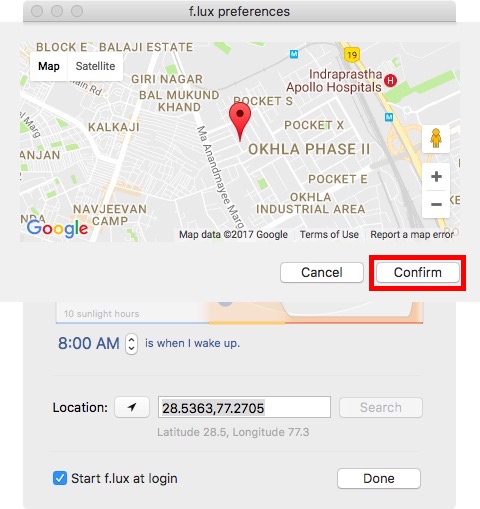
2. Once you launch f.lux, it will ask you for your location. F.lux uses the GPS to find out your current location, and if it is accurate enough, you can simply click on “Confirm“.
3. After this, you will be taken to the “Preferences“, where you can choose the color temperature for your display, at various times during the day.
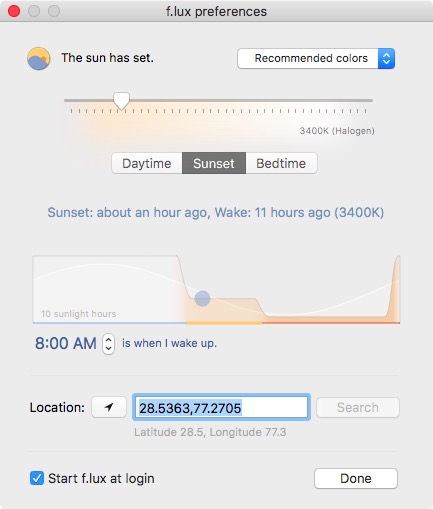
4. f.lux automatically saves your profile, and dynamically adjusts the temperature of your Mac’s display based on sunset, and sunrise times for your location.
f.lux is by far the best way to get a Night Shift like feature on a Mac running an older version of macOS. The app is completely free, but if you like the developer’s work, I would recommend that you make a donation on their website, to help with the continued development of the app. f.lux is also available for Windows, Android, and iOS devices.
SEE ALSO: How to Check Battery Time Remaining in macOS Sierra 10.12.2
Use Night Shift in macOS Sierra
Now that Apple has finally incorporated the Night Shift feature in macOS Sierra 10.12.4, you only need to wait for the stable release to come out, so you can experience it on your Mac. If you just can’t wait, you can download the Developer Beta for macOS Sierra 10.12.4, using the steps mentioned in this article, or you can wait for the Public Beta to be out (which should sometime in the next few weeks, but don’t quote me on that). If you don’t want to update your Mac to macOS Sierra 10.12.4, you can use a third party app like f.lux to get the same functionality.
So, what other features do you want Apple to bring to macOS Sierra? How about a fully fledged dark mode? I know I’ll love that. Let us know your thoughts about Night Shift, dark mode, and any other features you like in the comments section below.


