
When playing Steam Deck games such as Elden Ring or Hi-Fi Rush, you might often have the urge to take a screenshot on your handheld console. I mean, who doesn’t want to document and savor their success in the game and boast about it to their friends? Thankfully, Steam Deck makes it painfully easy to take a screenshot, so you can save your favorite in-game moments or high-adrenaline action by clicking a button combo. And in this guide, we will show you how to take a screenshot on Steam Deck and share it with your friends with ease. That said, power up your Steam Deck and continue reading.
In this article, we will explain how you can take screenshots both in the Game as well as the desktop mode on your Steam Deck. Then, we will show you the steps to upload and share these screenshots with friends and other Steam Deck users.
How to Take Screenshots on Steam Deck
Take a Screenshot In-Game
If you want to capture your favorite moments in a game, Steam Deck makes it extremely easy to do so. To take screenshots while playing a game, follow the steps below:
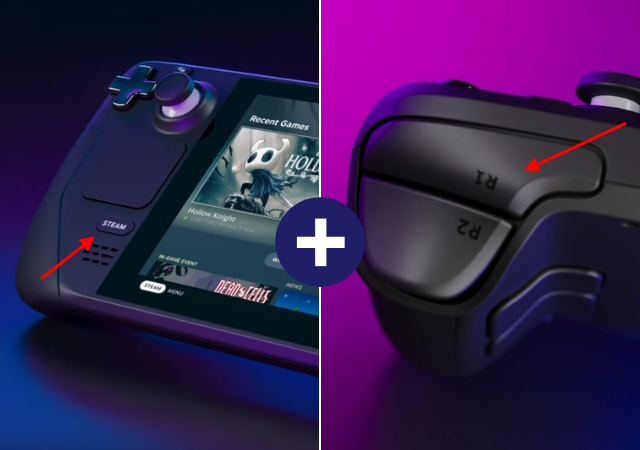
1. First, press the Steam button on the left side of the screen. Then, locate and press the R1 button on the Steam Deck. Pressing both of these buttons simultaneously will instantly take a picture of the game and save it to the screenshot library as a private image.

2. The Steam Deck shows a “Screenshot Taken” pop-up notification at the bottom-right corner of the screen, confirming you have captured a screenshot.


The same method applies if you want to take a screenshot anywhere in SteamOS. Press the Steam button along with R1, and the system will capture a screenshot right away. Later in this article, we teach you how to upload and share screenshots with friends.
Take a Screenshot in Desktop Mode
While taking screenshots in SteamOS or in-game is simple, the same does not hold true for the desktop mode. You need to use a third-party app called “Spectacle,” which comes pre-installed on Steam Deck. Follow the steps below to learn how to use it.
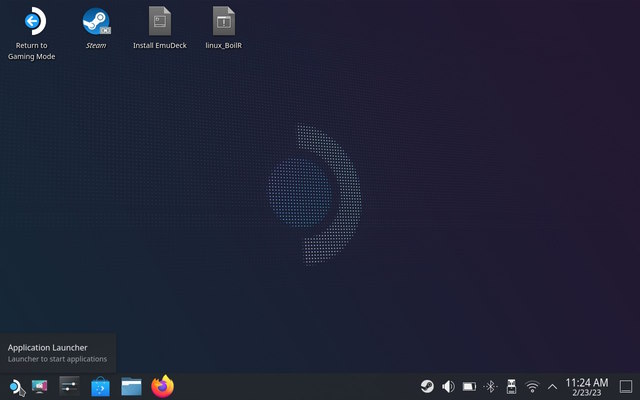
- First, boot into desktop mode on Steam Deck using the guide linked here. Then, click the “Application Launcher” (Steam Deck) button on the taskbar to bring up the menu.

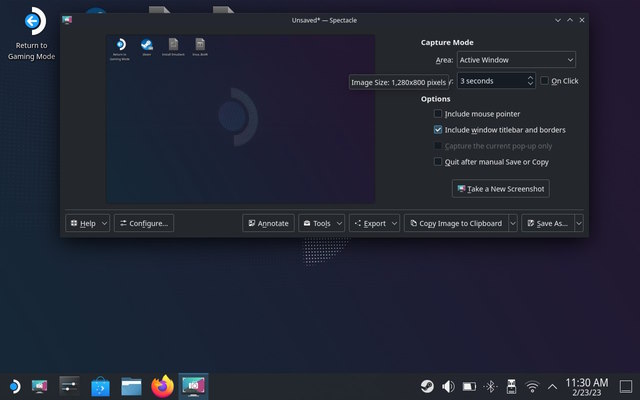
- Here, hover your mouse cursor on the “Utilities” category using the right trackpad. In the right pane, you will find “Spectacle,” which is an open-source screenshot app that comes preinstalled on Steam Deck and enables users to take screenshots in desktop mode. Click to open the app. Follow this guide if you don’t know how to left- or right-click on Steam Deck.

- Like any other screenshot app, Spectacle allows you to grab the entire screen, an active window, a particular region, and more. You can also assign button shortcuts from the “Configure” option here, making it easier for you to take screenshots on Steam Deck.
Capture Hi-Res Screenshots on Steam Deck
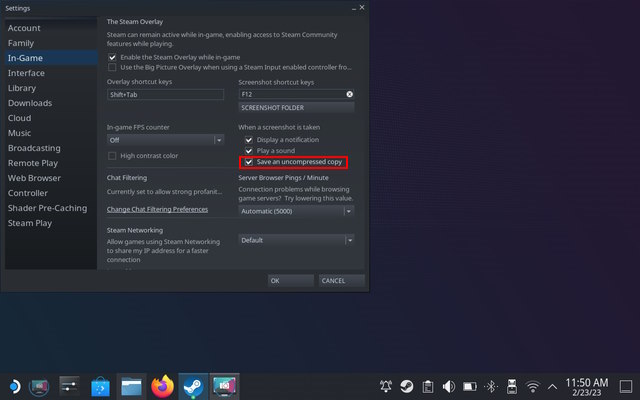
By default, Steam does not capture high-resolution screenshots, and they are slightly compressed. This is probably done to save space on the handheld, as it comes with limited storage. To ensure that your Steam Deck takes lossless screenshots, follow the steps below:
- Head to the desktop mode and open the Steam app using the icon on the desktop.
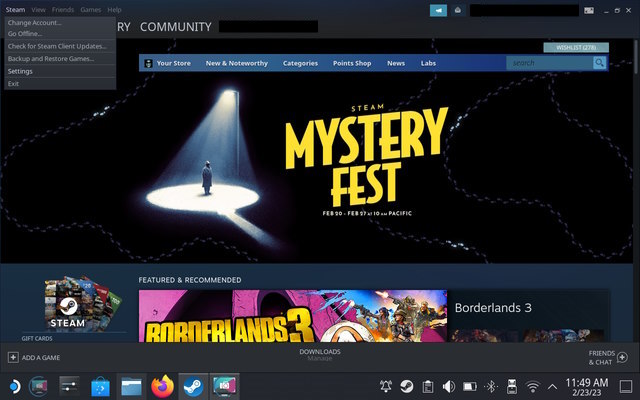
- Once open, click on the “Steam” option in the top-left corner and select “Settings” from the drop-down menu. This will bring up the settings window.
- Move to the “In-Game” settings from the left sidebar. Here, enable the “Save an uncompressed copy” checkmark for screenshots taken.
- Steam will now take high-resolution screenshots on your console. Spectacle, on the other hand, lets you adjust the screenshot quality under the “Configure” option. Adjust the slider to the desired compression percentage.
Where are Screenshots Located on Steam Deck
A user might want to find the screenshot they took in SteamOS or in-game without sharing it publicly. There are two ways to locate all the screenshots you capture on the Steam Deck, and we will explore both of them here:
The easiest method to find and share the screenshots from your Steam Deck is, of course, SteamOS. You simply need to head to the media section and follow our instructions:
- First, press the “Steam” button to access the menu. Here, navigate to the “Media” library.
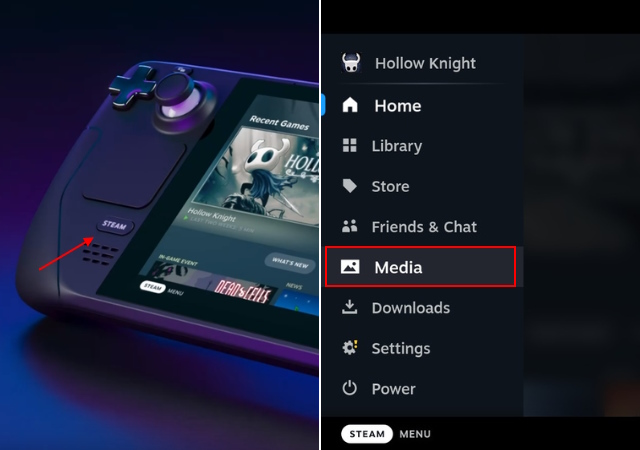
- You will find all the screenshots taken on the handheld here. You can choose to view public, private, or all screenshots here.

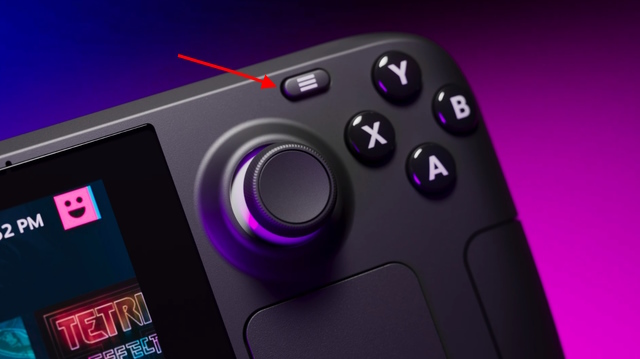
- Screenshots captured on the Steam Deck are private by default, but you can adjust the privacy settings and share the image on Steam. Simply select an image using the A button and press the “option” button on the Steam Deck.

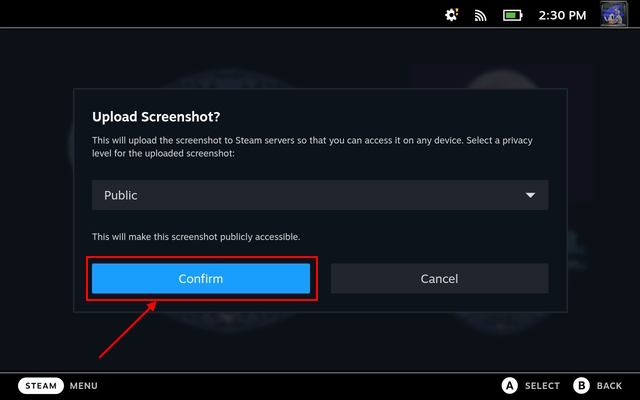
- From the “Upload Screenshot” pop-up menu that appears, select the appropriate privacy settings and click on “Confirm” to upload the image to Steam and access the image from your desktop (as explained below).
Alternatively, you can head to the desktop mode on Steam Deck to find all the screenshots. We will not only show you how to access them via the Steam app but also the file explore. Follow the steps below:
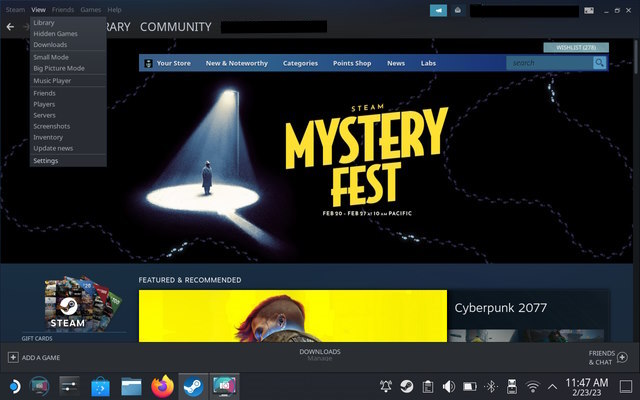
- Open Steam and click the “View” option on the top menu bar. Here, select the “Screenshots” option.
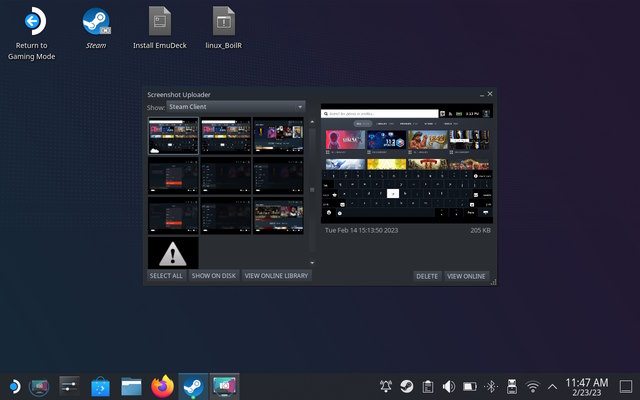
- The screenshots window lets you see all the existing screenshots captured on your Steam Deck. It also categorizes them accordingly. If you wish to know where screenshots are located on your system, select the game from the drop-down menu and click the “Show on Disk” option at the bottom.
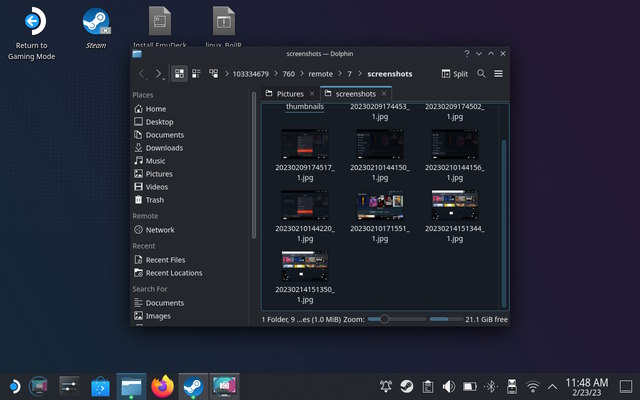
- Doing so opens the Dolphin File Explorer and shows the actual location where Steam saves the screenshots locally. From here, you can easily share the screenshots. We have also mentioned the path for the screenshots folder on Steam Deck here:
Home > .local > share > Steam > userdata > [Your Steam ID] >760 > remote > [GAME ID] > screenshots
In the case of Spectacle, the software saves screenshots in the Pictures folder by default. Hence, head over to “Pictures” in the Dolphin File Explorer to find desktop mode screenshots.
How to Share Steam Deck Screenshots to PC
As of now, Steam Deck does not offer any in-built option for users to transfer files from the console to their PC. While local game transfer was introduced recently and is currently in beta, sharing screenshots requires some additional work on the user’s end. There are two easy ways to share screenshots via your Steam Deck:
Method #1: Share Using Email
Almost every screenshot included in this article was shared via email. While the process might sound cumbersome, it is practical as Steam Deck is a Linux PC. To share the screenshots, follow these steps:
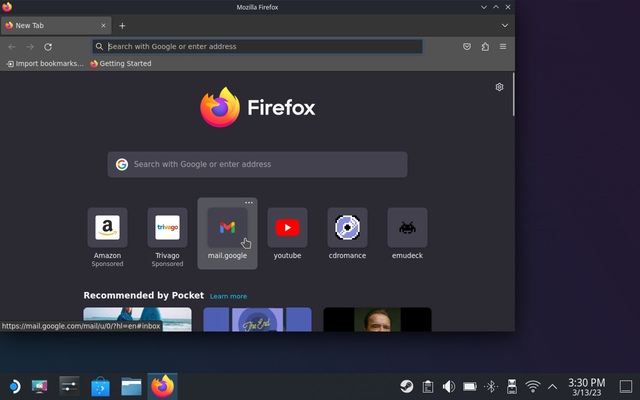
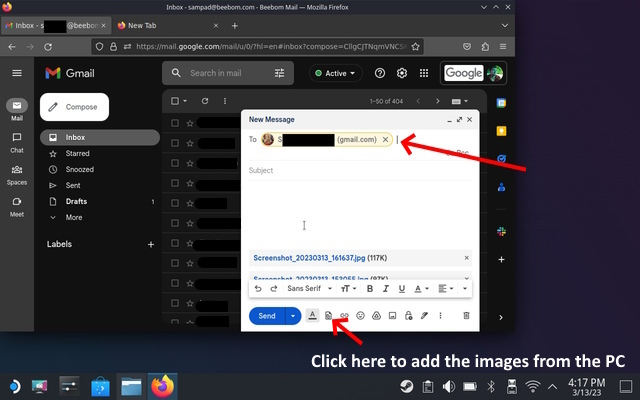
- Open up your desired browser on Steam Deck and log into an email service using your email ID and password. We use Gmail in this tutorial.
- Then, compose an email and attach all the necessary screenshots from the Dolphin File Explorer on your Steam Deck. Once you are done, hit the “Send” button. Now, go to your PC and download the received images.
Method #2: Share Using Warpinator
The second method to send images from Steam Deck to OC is the most practical one. Warpinator is a local file transfer software that allows users to transfer files on the local network. For this method, follow the following steps:
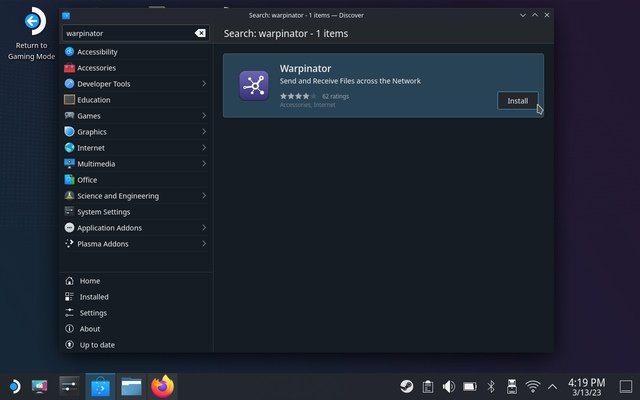
- First, download Warpinator on your Steam Deck. To do that, open Discover (app store) via the taskbar and search for Warpinator. From the search results, press the “Install” button.
- Now, head to your desktop PC and download Warpinator. If you are a Windows user, click on this link to download the software. Once installed, open the software.
Note:
Ensure that your Steam Deck and desktop PC are connected to the same network to successfully transfer these screenshots. Since Warpinator is a local file transfer software, this method won’t work if both systems are not on the same network.
- If both devices are on the same network, the app will show both of them and allow you to establish a connection. Connect your PC to the Steam Deck.


- Once connected, click the “Send files” option to browse screenshots on your Steam Deck and send them to the target PC. Over on the desktop PC, accept the incoming files.


- You have now successfully transferred screenshots from Steam Deck to your system. To view the screenshots, go to Documents and open the Warpinator folder.
That’s pretty much all you need to know about how to take a screenshot on Steam Deck. Capturing a screenshot on Steam Deck is simple and straightforward. The desktop mode does require you to jump through some hoops, though. We have also included where screenshots get saved on Steam Deck, along with two different methods to share them with yourself, your friends, and other Steam users. So, what all games are you playing right now and plan to screenshot cool in-game moments for? Let us know in the comments below.


