
With iOS 18, Apple has finally added the most requested feature – call recording on iPhones. While it may seem like a trivial feature to Android users, iPhone users have remained bereft of it for so long. Thankfully, gone are those days. Now, you can natively record calls on your iPhone without needing a third-party app. However, if your device is not on the list of iPhones compatible with iOS 18, there are other methods you can try. So, here’s how you can record calls on iPhone.
Note: In many regions, it’s illegal to record phone calls without the consent of the other party. So, make sure to do it responsibly.
Method 1: Use iOS 18 Call Recording Feature
With iOS 18, you can record calls directly from the Phone app. The best part is that you also get the transcribe feature for recorded calls which saves the transcript in the Notes app. It is noteworthy that transcribe call recording functionality on iPhone is only available in English (U.S., UK, Australia, Canada, India, New Zealand, Singapore), Spanish (U.S., Mexico), Japanese (Japan), Mandarin Chinese (China mainland, Taiwan), Cantonese (China mainland, Hong Kong), and Portuguese (Brazil).
- Make a call using your iPhone and when the call connects, tap on the Record button on the top left corner of the call screen.
- You will see a prompt reading “This call will be recorded” on the screen. This message will be played before the call recording begins to inform the other party that you’re recording the call. If you cross it, the call won’t record.
- Now, you can tap on the Stop button whenever you want to stop the recording.


- The transcript of the call recording will be saved in the Notes app. You can access it by visiting Notes-> Call Recordings.


In case call recording isn’t working on your iPhone, here are 4 ways to fix it.
If you don’t have an iOS 18 compatible iPhone, you can try the below methods to record calls on your iPhone.
Method 2: Use Voice Memos app
I know it may sound ridiculous to many, but if you wish to record a call on your iPhone with a third-party app, you can use the built-in Voice Memos app to record audio. The app is super-easy to use and lets you record anything. What’s more, it also offers a better way to edit the recordings, manage them all efficiently, and even share the recordings with anyone in no time.
Note: You’ll need a secondary iPhone or an iPad for this method.
- Open the Voice Memos app on your secondary device (an iPhone or iPad) and bring it closer to your iPhone. Hit the Record button before you make a call.
- While you’re making the call from your iPhone, put it on Speaker mode with the maximum volume. This will allow the Voice Memos app to hear and record the entire conversation. Otherwise, it will only record what you’re saying.
- Once you’re done with the call, tap on the Red button on the other device to stop the recording.
- You can now tap on the three dots on the right side of the recording and hit the Share button to move this recording to your iPhone.


Method 3: Call Recorder Apps for iPhone
While there is no dearth of call-recording apps for iOS, not all of them do what they advertise. Plus, a lot of the apps only work after you subscribe to them, which means you can’t even test things out before paying. Having tried several iPhone call recorders, I have chosen the three best ones based on the user interface, reliability, and how they handle call recordings.
First is Rev Call Recorder, which is a free call recorder app for iPhone. Second is TapeACall, which boasts a pretty intuitive user interface and a plethora of features to record and manage phone calls on an iPhone. Third is Recordeon, which offers a super-simplified call recording experience. Check out more about them in our companion post linked above.
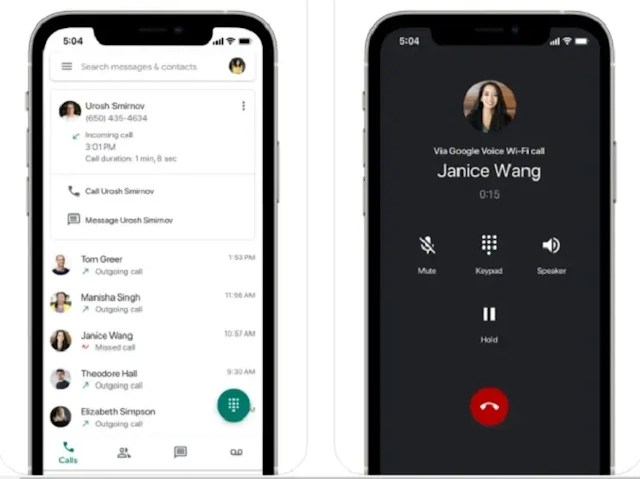
Method 4: Use Google Voice to Record Incoming Calls
If you are still hunting for a way to record a phone conversation for free on your iPhone, try out Google Voice (available for free). While it’s not a full-fledged call recorder, it can live up to the task with some limitations.
Before we move any further, here’s something you need to know about Google Voice:
- First and foremost, Google Voice is currently available for personal Google Accounts in the US and Google Workplace accounts in select markets.
- Second, you can record only incoming calls, and not outgoing calls.

Here are the steps to record calls on iPhone using Google Voice:
- Open the Google Voice app on your iPhone -> Settings -> Calls and turn on Incoming call options. When you’re using Google Voice for the first time, you’ll be asked to choose a free phone number and specify the device you’ll be using to make the calls.
- Once the call has started, tap “4” to start recording the call. All the participants will hear an announcement that the recording has started. When you want to stop the recording, tap “4” again or hang up. It’s worth noting that the app allows you to hit the “4 key” as many times as you want to stop/start recording.
- Once the call has ended, Google Voice will show you a pop-up with the recording. You can also find it under the Calls tab in the app.
Method 5: Try Out Call Recording Headphones
If you don’t want to try out third-party call recorders on your iPhone, the call-recording headphones could be worth checking. They are easy to use and reliable in letting you record calls on iOS. However, there’s a downside. Most call-recording headphones feature a 3.5mm headphone plug. That means you can use them only on your iPhone 6s or older device. On iPhone 7 and later models, you will need a headphone dongle. If you don’t mind this shortcoming, you must check out the Olympus TP-8 Telephone Pick-up Microphone ($22.33).
That’s how you can record phone calls on an iPhone. The iOS 18 Call Recording feature is a much-useful addition for iPhone users. Also, if you’ve got an older, incompatible model, there are several other ways to get the job done. So, no matter which model you own, you can always record those important phone calls on your iPhone for future reference.
On iPhones running iOS 18, go to Settings -> Apps -> Phone -> Call Recording and turn on the Call Recording toggle.
If you’re using iOS 18, you can view the transcript of the recorded call in the Notes app on your iPhone. Please note that this feature is only available in select countries and regions.


