If there is one thing for sure it’s that people absolutely love Minecraft. Whether you’re learning about the best Minecraft Trident enchantments or learning how to plant and grow Minecraft crops, gamers love this sandbox. However, did you know that you can enter the world of Minecraft using virtual reality? That’s right! Oculus Quest 2 users will be happy to know they can put on their headsets and play Minecraft in VR. So if you have set up your Quest 2, and are interested in playing Minecraft VR, keep on reading as I tell you how to do exactly that.
How to Play Minecraft VR on Oculus Quest 2 (2022)
This guide will go into detail about teaching you how to play Minecraft VR on the Quest 2. However, since this guide also covers both editions of Minecraft, use the table below to jump to the one you want to play.
Can I Play Both Editions of Minecraft on Quest 2?
While you can play both editions of Minecraft on VR in Quest 2, there are some differences between them including the processes. Like playing Steam Games on the Quest 2, your PC will run Minecraft and it will be streamed on your Quest 2. You can play the following versions of Minecraft in VR on Quest 2:
1. Minecraft Bedrock Edition
Also known as Minecraft for Windows 10, the Minecraft Bedrock version has almost a plug-and-play process that users will love. The bedrock version is already VR compatible and we can quickly get it up and running. You will need to purchase it either from the Microsoft/Minecraft Store or it will be in your Xbox Game Pass library. However, the Bedrock Edition also comes with its own set of drawbacks. A big one is that you cannot mod it like you can mod the Java edition which might be a problem for some gamers. However, if you want the easier way to play Minecraft VR on the Quest 2 then go ahead and get Minecraft for Windows ($26.99) and keep reading.
2. Minecraft Java Edition
The original version of Minecraft, the Java edition is much more customizable than its counterpart. It also includes more physical VR actions so Oculus Quest 2 users might enjoy this version more. However, the Java edition does not natively support running in VR and will require a slightly longer process. Like Bedrock, the Java edition can either be purchased through the Microsoft Store or will already be included in your Xbox Game Pass library. So go ahead and purchase Minecraft Java Edition ($26.95) and carry on reading.
How to Play Minecraft Bedrock Edition on the Quest 2?
Ready to play the Minecraft Bedrock on your Quest 2? While the process is easy enough you will need a couple of things set up before we begin. Therefore cross off the below list before proceeding.
Things You Will Need to Play Minecraft Bedrock on Quest 2
1. Oculus Link Set Up and Paired
If you’ve followed our earlier guide on how to play Steam games on the Quest 2, you already know about Oculus Link. Meta’s official software for playing PC games on the Quest 2, Link is very handy. We will be using Oculus Link for essentially streaming Minecraft onto our PC. Therefore before you proceed, make sure to follow the above guide and pair your Quest 2 with it.
2. Installed Copy of Minecraft Bedrock
Now it is natural that you will require the actual game installed on your computer before beginning. Therefore go ahead and install Minecraft Bedrock/Minecraft for Windows on your PC and run it normally at least once. You can search for Minecraft for Windows either on the Microsoft Store or your Xbox Game Pass library.
How to Enable Unknown Sources on Oculus Link
While Minecraft Bedrock has official VR support, we will be going through this extra step to ensure that the game launches without problems. However, don’t worry since this does not put your Quest 2 at any risk. Assuming you’ve already set Oculus Link up, follow the steps below to allow Minecraft to pass through.
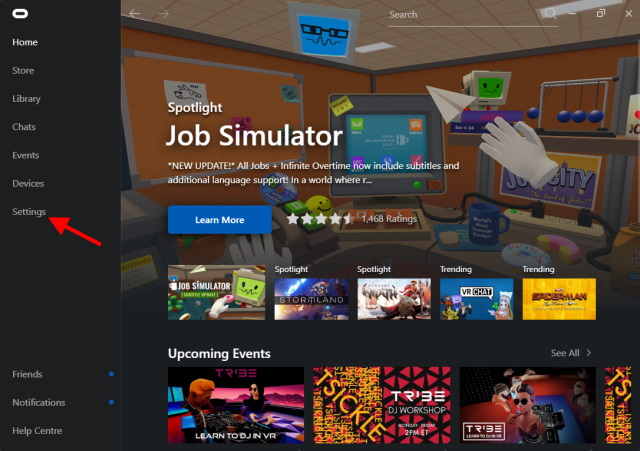
1. Open the Oculus Link app on your PC.
2. From the left sidebar, find and click on the Settings button.
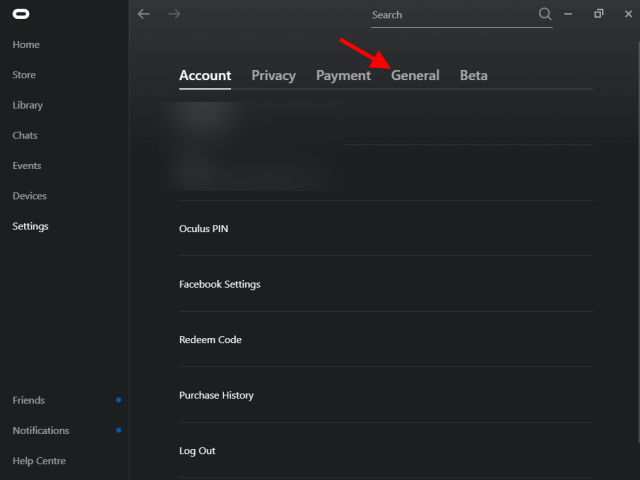
3. Click on the General tab to open up its settings.
4. Toggle on the Unknown Sources button and you’re done.
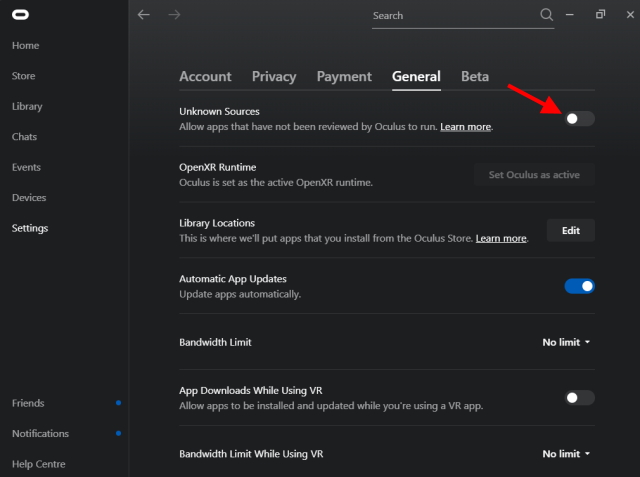
And that’s it! As mentioned above, don’t worry about viruses or any other problems since Minecraft VR is perfectly safe to use on your Oculus Quest 2.
Creating the Minecraft VR Shortcut
The easiest way to run Minecraft VR on the Quest 2 is by creating a quick shortcut that will launch the game in VR automatically. However, do be sure you have installed Minecraft for Windows before you do this. The process itself is very easily so make sure to follow along once done with the requirements.
1. Right-click on your desktop and under the New menu, click on Create a new shortcut. A new window will open up.
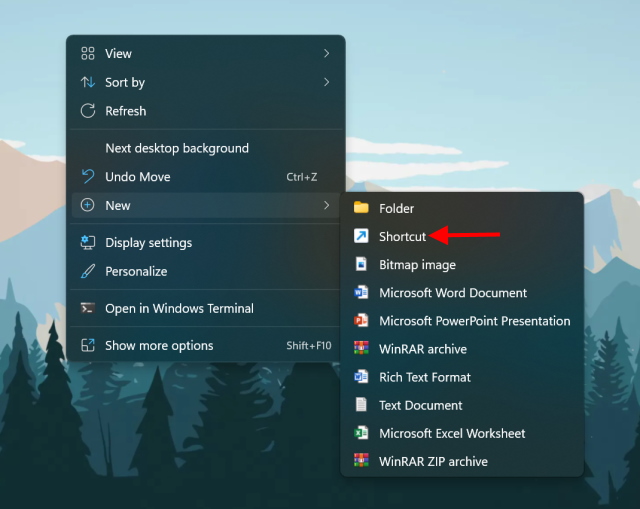
2. The shortcut will ask for the location of the item. Copy-paste the following there and click on next.
minecraft://Mode/?OpenXR=true 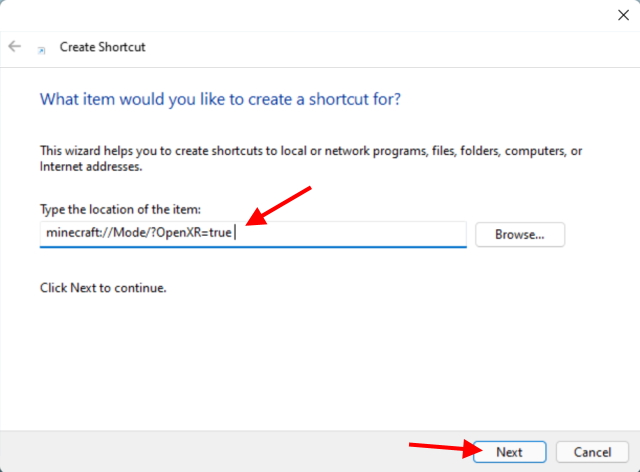
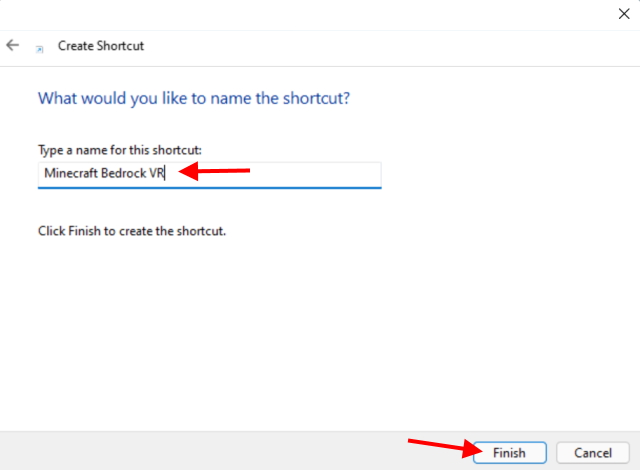
3. Name your shortcut according to your preference. I’ll be naming it Minecraft Bedrock VR for simplicity. Once done, click on Finish.
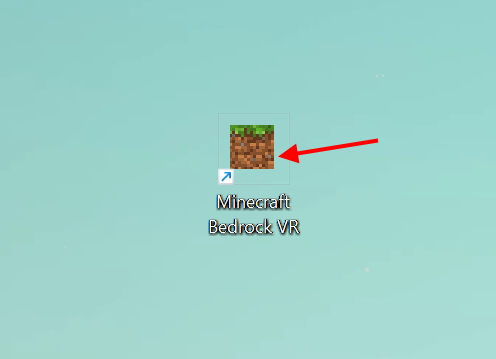
And that’s it! Your new Minecraft VR shortcut has now been created. However, do not launch it just yet. Keep reading as we will do exactly that below.
Launching Minecraft Bedrock on the Quest 2
All done with the above things? Well then, let’s get to launching Minecraft VR on your Quest 2. Keep your headset handy and follow the steps below.
1. Make sure your Quest 2 Guardian boundary is all set up and ready to go. I suggest a standing boundary for maximum movement. However, if you’re doing this connected with a short wire, sitting is fine too.
2. Open Oculus Link on your PC and make sure your headset is connected to the software. Enable Oculus Link on your Quest 2 if it asks for permission.

3. Dive into Oculus Link from your headset to open its interface.

4. Launch the shortcut we created either from Oculus Link Desktop control or from your PC itself.
5. Put on your headset and wait patiently for a minute or two and then look around.
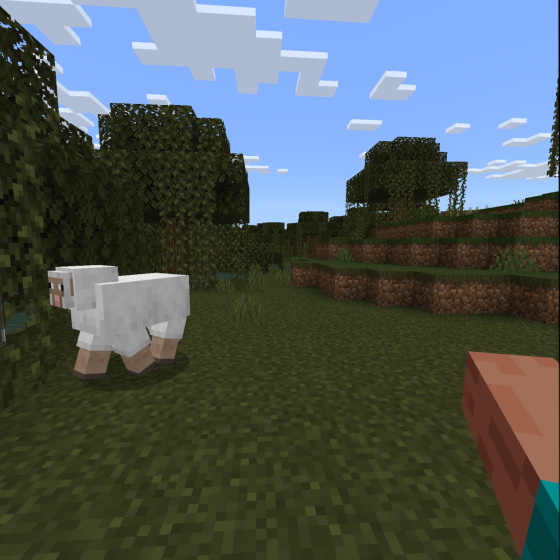
Congratulations, you’re now playing Minecraft VR on the Quest 2! You can use your controllers to move around and even control your hands to dig and do all kinds of things. When you want to exit the game, simply press the Oculus button and Quit app to back to the Link screen. You can repeat the above steps to launch Minecraft VR again and have fun playing! How to Play Minecraft Java Edition on the Quest 2.
How to Play Minecraft Java Edition on the Quest 2
As I mentioned before, Minecraft Java is the original and more moddable version of Minecraft. However, since the Java edition does not automatically support VR, we will need to go through a few extra steps to get it to work. Let’s begin with our requirements.
Things You Will Need to Play Minecraft Java on Quest 2
1. Oculus Link Set Up and Paired
As before, one of the prerequisites of this method is the official Oculus Link software. It will be required to play Minecraft Java and stream it to your Quest 2. Go ahead and consult the Steam guide in the previous section to install it.
2. Java Installed
You will also need the Java client installed on your computer before you can go ahead and install anything else. To break it down, Java is a programming language that will help us run Minecraft Java in VR. However, don’t worry as there is no programming involved here. Go ahead and get Java (Free) and install it.
3. Minecraft Java Installed
You should also install the official Minecraft Java edition before you install anything else from the list. It goes without saying that this installation is the most important as we will need the game itself. You can go ahead and get the game from the Microsoft/Minecraft Store ($26.95) or look for it in your Xbox Game Pass library. So go ahead and install it before proceeding.
4. Vivecraft
Vivecraft is a mod that allows Minecraft Java to run in VR easily. This is also an important part of the process so make sure to download and install it before we begin. You can go ahead and get Vivecraft’s latest mod from the Vivecraft Downloads (Free) page.
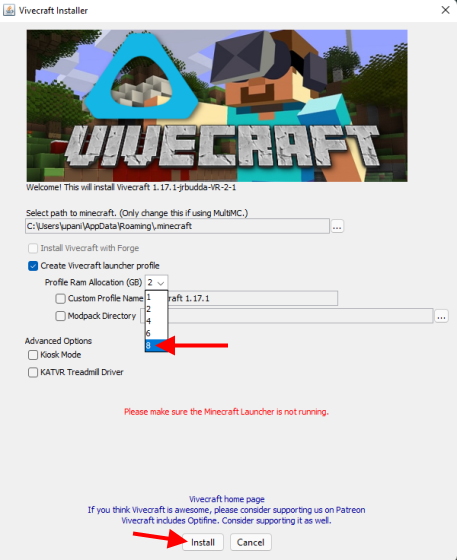
I’ll be using the Vivecraft 1.17.X version for this. Be sure to pick the VR Installer from the Github repository you’re led to. Once downloaded, choose the maximum RAM allocation to avoid lag and then click on Install. Remember to install Java from the above point first or else the installation will fail.
5. Steam and SteamVR
The method to launch Minecraft VR on your Quest 2 will also require Steam and its official SteamVR application. This will help fix any compatibility issues that you might encounter. Go ahead and get Steam (Free) and SteamVR (Free) on your PC and install it.
6. Enable Unknown Sources on Oculus Link
As a precautionary measure, you will also need to enable unknown sources in the Oculus Link software so Minecraft Java runs without problems. You can learn how to do that by scrolling up and looking for the same of the same name. Once done, keep reading.
Launching Minecraft Java on the Quest 2
Installed all the stuff up above? Well then, let’s get to launching Minecraft VR on your Quest 2. Keep your headset handy and follow the steps below.
1. Make sure your Quest 2 Guardian boundary is all set up and ready to go. I suggest a standing boundary for maximum movement. However, if you’re doing this connected with a short wire, sitting is fine too.
2. Open Oculus Link on your PC and make sure your headset is connected to the software. Enable Oculus Link if it asks for permission.
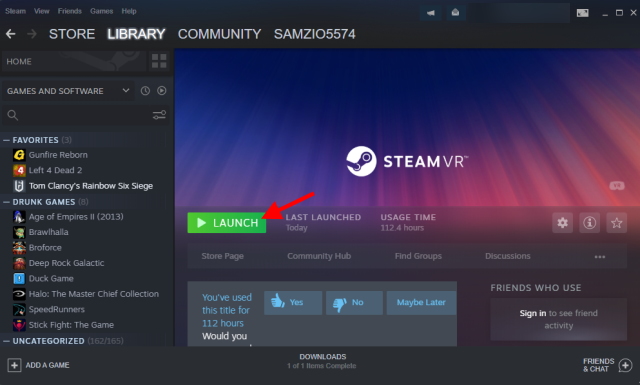
3. On your PC, launch SteamVR from either the library or by clicking the VR icon on the Steam client.
4. Once in Steam Home, Put on your headset and open up the Airlink Interface by clicking the Oculus button on the right controller.
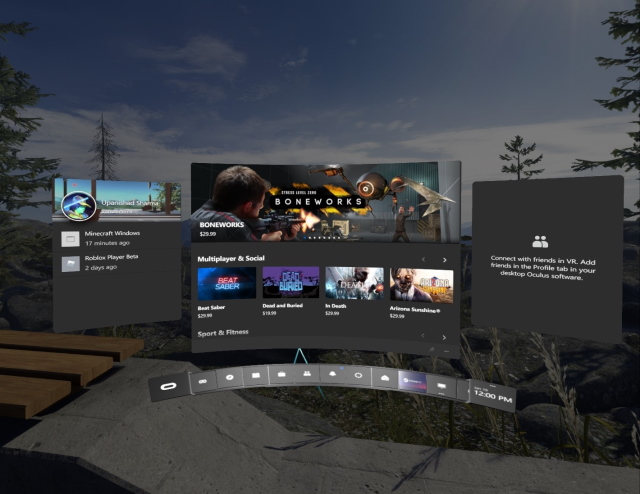
5. Tap the monitor icon to open up the virtual desktop. If you have multiple monitors, make sure to choose the one Minecraft will run on else you will not see the game at all.
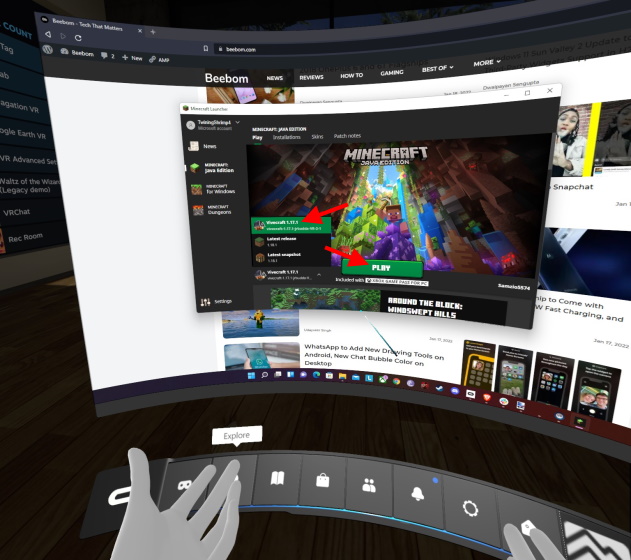
6. Once on the virtual desktop, launch Minecraft Java by searching for ‘Minecraft Launcher‘ or ‘Minecraft Java‘.
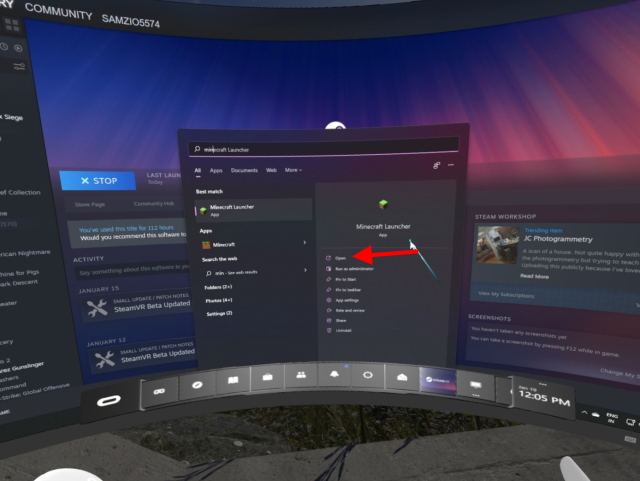
7. When it asks you to select the version, choose the Vivecraft one we installed. Tap ‘Play’ to launch it.
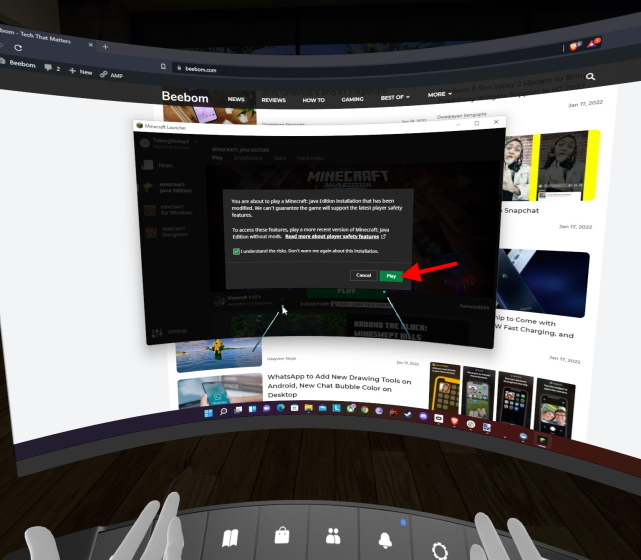
9. Press ‘Play‘ again on the warning that appears.
5. Put on your headset and wait patiently for a minute or two and then look around.
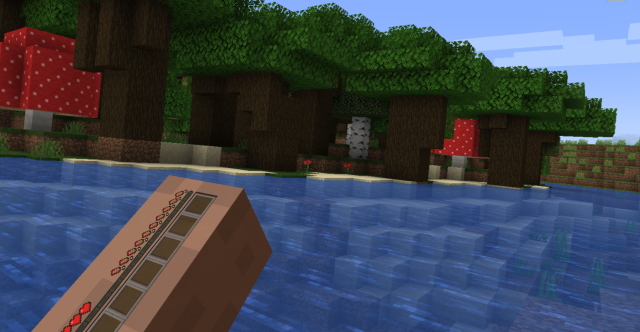
Congratulations, you’re now playing Minecraft VR on the Quest 2! You can use your controllers to move around and even control your hands to dig and do all kinds of things. When you want to exit the game, simply press the Oculus button and Quit app to back to the Link screen. You can repeat the above steps to launch Minecraft VR again and have fun playing!
Get Lost in Minecraft VR with Your Oculus Quest 2
I hope you have lots of fun playing Minecraft VR on your Quest 2. Once you’re done, check out the upcoming Minecraft 1.19 The Wild Update. Can’t wait that long? You can also try out Minecraft 1.19 features right now! So, are you gonna play Minecraft VR on Oculus Quest 2? Share your thoughts in the comments.


