- Players can make a Minecraft skin using some free online editors like Skindex or Nova Skin.
- Remember that Minecraft skins are PNG files, usually of the resolution 64x64, and so they can be further edited using the offline editor apps.
- Once created, these custom skins can work on all Minecraft editions, whether it's Java, Bedrock, or Pocket Editions.
Minecraft is one of the most customizable sandbox games ever made, and you can make your own mods, worlds, structures, bases, and whatnot. So, creativity has no limits here, but if you’re looking for true personalization, you should consider changing your character skin. Everything from its size to the texture is customizable in Minecraft skins. So, in this tutorial, we will explain how to make a Minecraft skin, alongside stating some of the best skin editors to help you ease out the process.
What are Skins in Minecraft?
In Minecraft, the skins refer to the texture of the main character, and they can be customized in unlimited ways. But don’t confuse it with Minecraft texture or resource packs that you can use to change the texture of blocks and other mobs. In technical terms, the skins are nothing more than an image morphed upon the character’s blocky shape.
The best part about making a Minecraft skin is that these images can be used in both the Java and Bedrock versions of the game. Moreover, due to the connected Bedrock environment, you can use skins on Minecraft Pocket Edition (MCPE) for Android, Windows 10, iOS, and Fire OS. You can even customize skins while using Minecraft on Chromebook.
How to Make a Minecraft Skin Online
The easiest and most reliable way to learn how to make a Minecraft skin is to use an online editor. There are many Minecraft skin editors available online and offline to help you with this task. The most popular Minecraft skin editor is from Skindex. So let’s learn how it works.
- Open the Minecraft skin editor on Skindex (visit here). I will use a blank base to teach you how to make your own Minecraft skin from scratch.
- You can use the linked URL or choose the “Editor” option from the top navigation bar on Skindex.

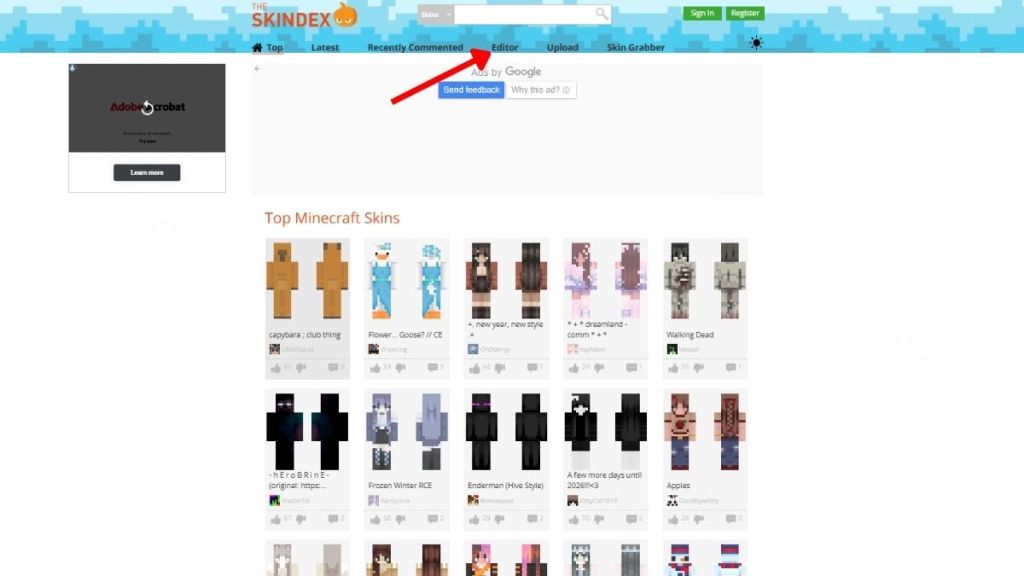
- Alternatively, you can choose one of the existing skins on Skindex and edit that to your liking. In the latter case, you won’t have to start with an empty canvas while making your Minecraft skin.
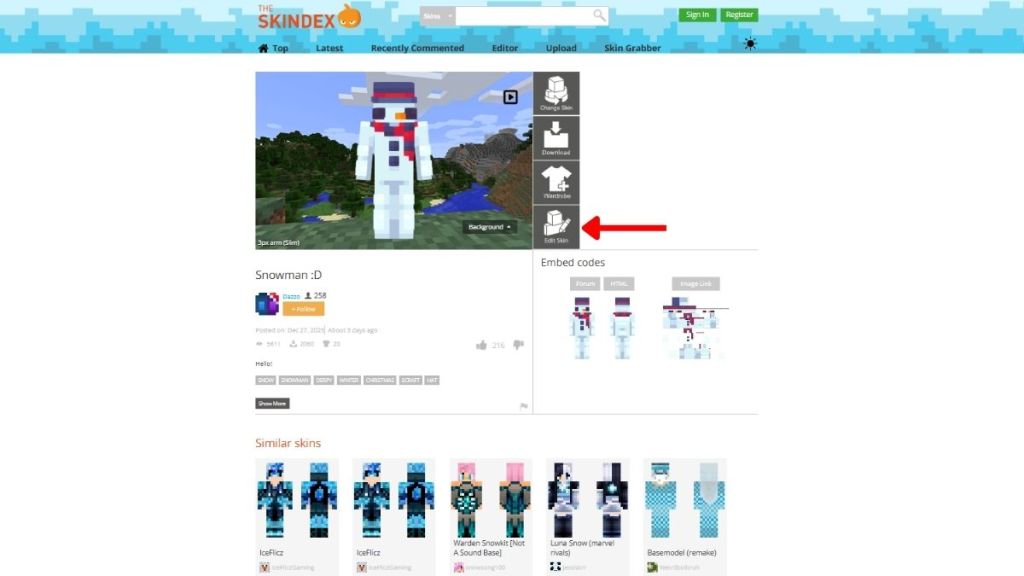
- The “Edit Skin” option is available at the bottom of the right menu bar on the skin’s page. You can access a skin’s page by clicking on a skin’s banner on the home or a category page.
- Next, depending on the option you chose, you will see an empty or filled “character base” in the editor.
- The interface of the editor will look like a basic version of MS Paint.
- The left sidebar includes tools like the pencil, eraser, color picker, paint bucket, zooming, etc.
- On the right side, you will find a color wheel. You can also turn off body parts or the body outline from the right sidebar.
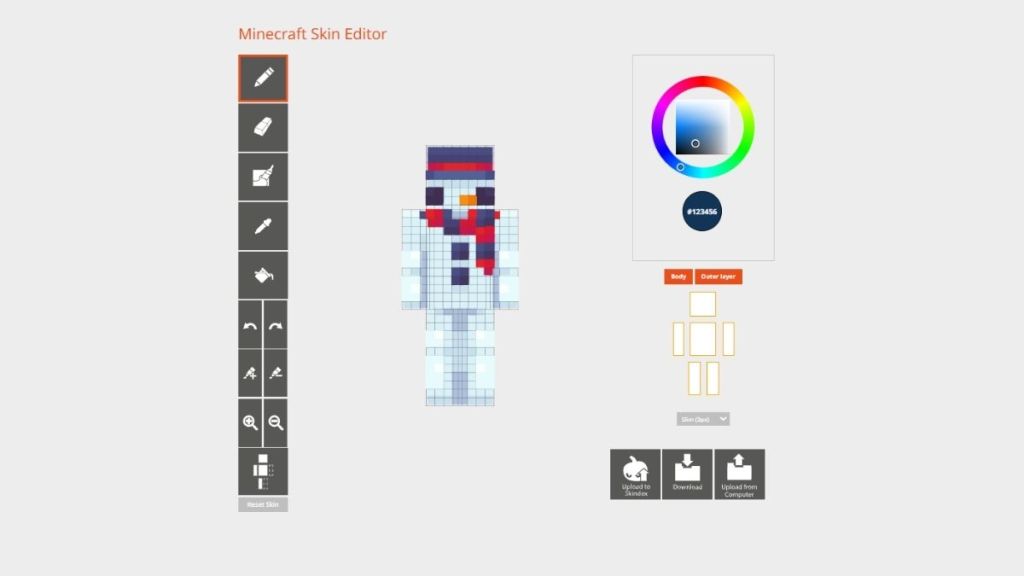
- Now, all you need to do is use your mouse, pick a color, and start painting to make your favorite skin.
- You can click and drag your cursor on an empty area to rotate the figure by 360 degrees.
- Make sure to paint all sides of the skin, including the top and bottom. If you are going for transparent areas, you can leave a few blocks empty.

How to Download Your Custom Minecraft Skin
This is one of the fastest ways to understand how to make a Minecraft skin. Now, you can click the “Download” button on the bottom right to get the skin as a PNG file. Alternatively, you can even upload it to Skindex for people to enjoy using the button to the left of the “Download” button.
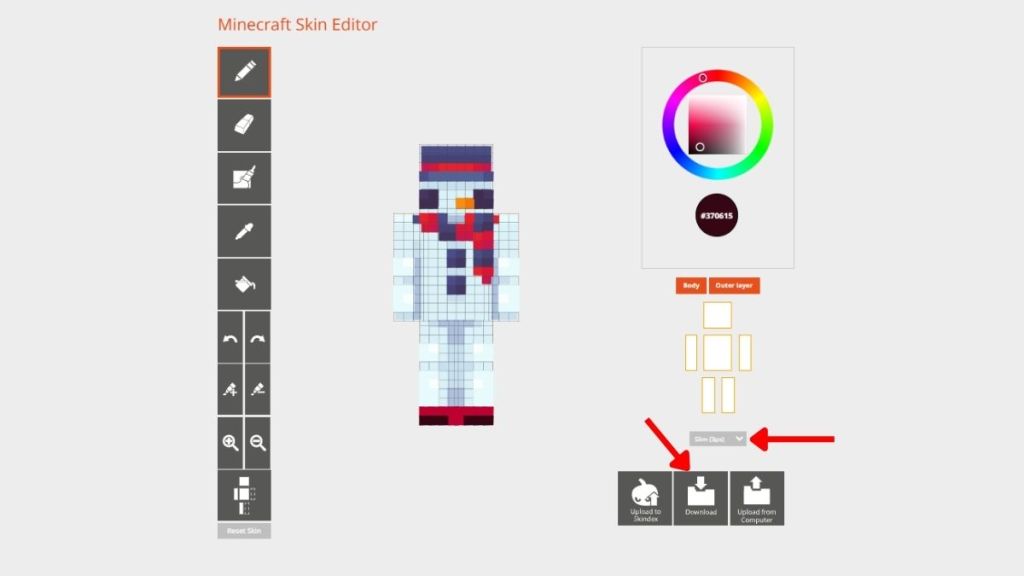
You can even select the skin “Model” as Classic or Slim using the drop-down menu under the body parts section on the right sidebar. The only difference that the Slim model will bring is in the width of the arms. The Classic model has wider arms.
5 Best Minecraft Skin Editors
If you want a few more options while learning how to make a Minecraft skin, we have some of the best skin editors. A few of them, like Skindex, will function on the web using a similar interface. We have included some high-quality tools for other platforms as well.
1. The Skindex
We are starting from the tool you just witnessed. Skindex is one of the most popular community websites for downloading Minecraft skins. You can expect almost every popular Minecraft skin to be available here, including those inspired by official marketplace skins.
What makes this platform even better is that it has a built-in skin editor. You choose the skin you like and make it entirely yours with a few clicks.

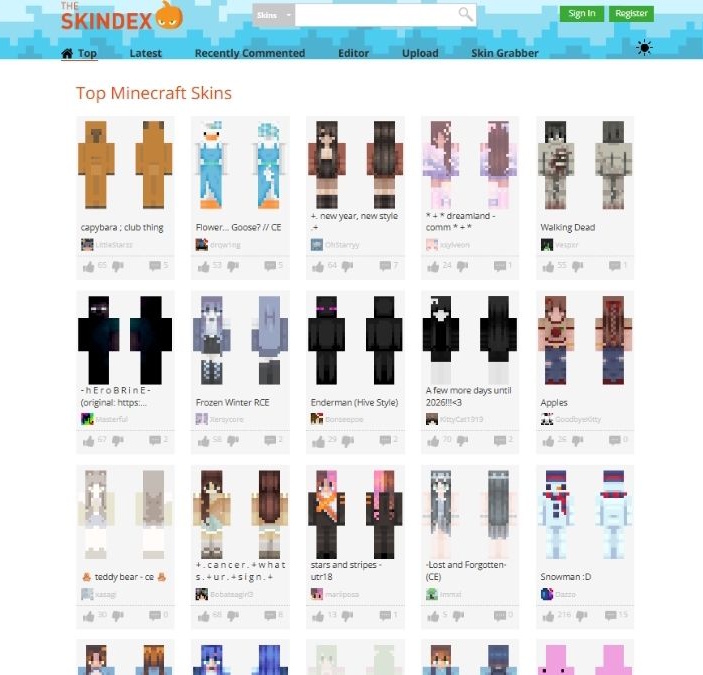
The site even gives you the option to directly upload your skins to the Minecraft Java server. That means you can enjoy the direct installation of your newly created skins if you are using the official Minecraft Java edition. The popularity and easy-to-use editor ensured it the number one spot on our list of best Minecraft skin editors.
2. Nova Skin
Even though it’s comparatively less popular than Skindex, NovaSkin is way more powerful. The best feature of this skin editor is the highly customizable posing system. You can see the skin on your character in real-time. It also lets you change the pose or make the character move, all within the editor.

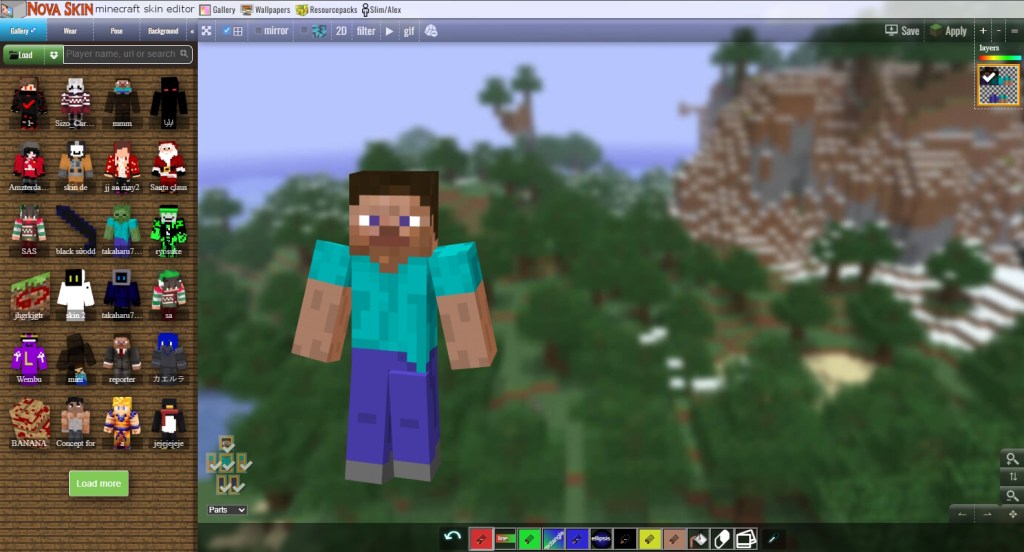
Adding on to that, it also has more features, including shapes. You can save a ton of time and make your skin editing easier with Nova skin. The interface might look a little overwhelming at first, but it’s easy to get used to. It also has a few pre-built skins that you can place over your creation to make the experience even quicker and smoother.
3. MinecraftSkins.net
Don’t confuse it with Minecraftskins.com, which will lead you to Skindex. MinecraftSkins.net offers a simple editing experience with multiple popular base skins. From default characters like Steve and Alex to many pop culture characters, it has a lot to offer.
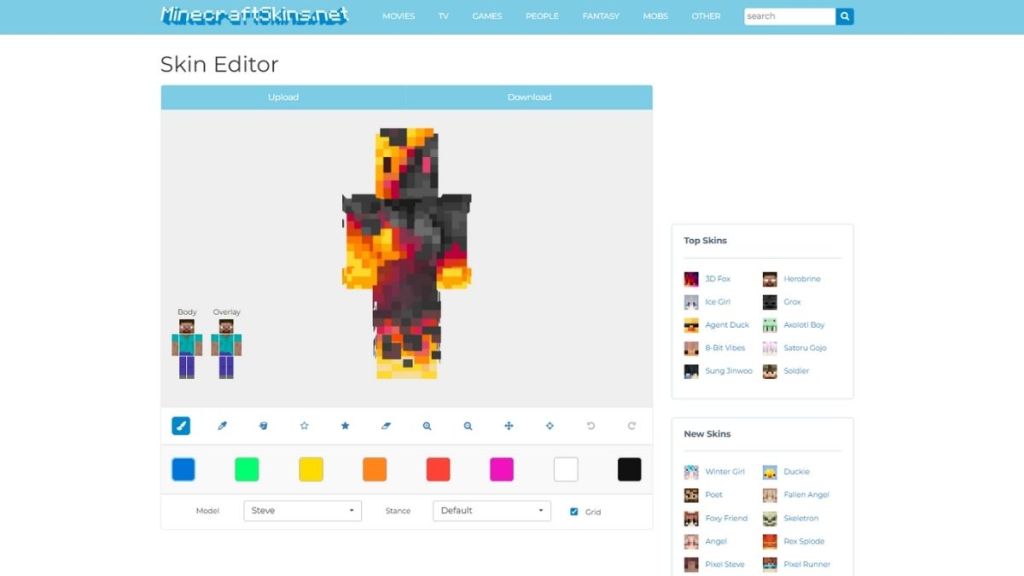
The site even has dedicated categories focusing on pop-culture niches. There aren’t a lot of skins on this website, but all the ones they have are popular. Coming to the skin editor itself, the UI is easy to understand and use. And it gives you the same tools as Skindex.
4. QB9’s 3D Skin Editor for Minecraft
Expanding the users who want to make a Minecraft skin, we have a mobile option too. This app can be downloaded on Android. With tools like a brush, paint bucket, eraser, color picker, and more, it’s a well-versed Minecraft Skin editor. It also has similar iOS alternatives.

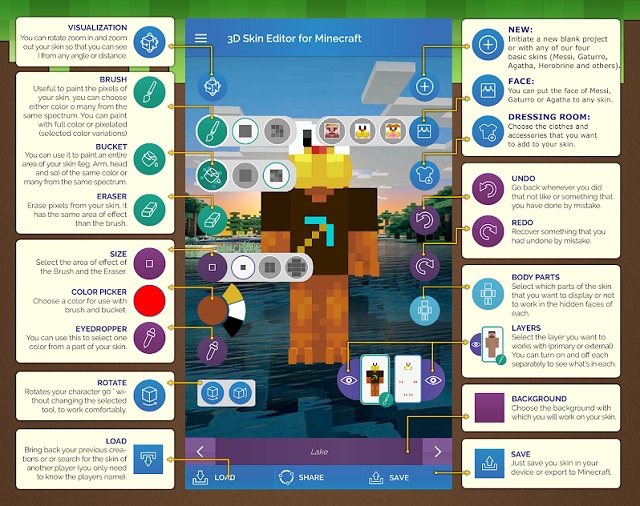
The skins created here can be used on Minecraft PE. But you can even share them on your PCs and use them on the PC version of Minecraft. It’s a great tool to have if you want to edit Minecraft skins on the go. Due to the low-quality textures, this tool will work well on almost every smartphone.
5. Blockbench
In the end, we have this powerful tool that developers use to model Minecraft. With enough practice and patience, you can create highly customized and high-quality Minecraft skins. Blockbench can be used to break out of the regular character limits of Minecraft.

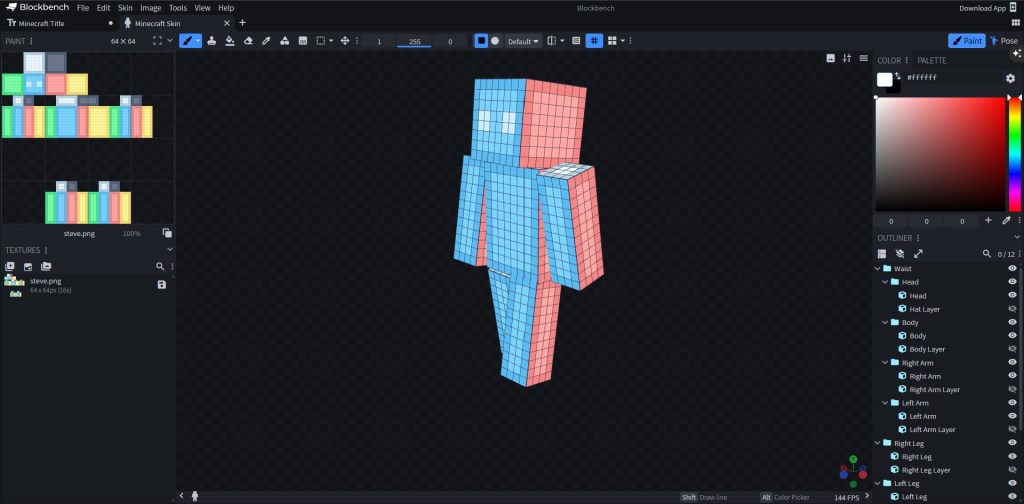
Yes, it’s one tool that will require certain learning and skills, but the results are highly promising. If you don’t wanna dive deep into a tool like this, you can always install Forge to use mods in Minecraft. There are plenty of skin-based mods that will not only give you a new look but also grant you powers to help with your exploration.
How to Edit Minecraft Skins in Offline Photo Editors
As mentioned earlier, Minecraft skins are saved as PNG images. That means, if you want, you can edit them as images too. However, there are a few things you need to keep in mind while doing that.
- You should stick with the general dimensions of the base skin to ensure that your custom skin is compatible with the game.
- The standard Minecraft skin is usually 64×64 and is compatible with every version and edition of the game.
- 128×128 is the maximum texture size that you can go for in Minecraft.
- You can edit these skin files using any modern photo editing software like Photoshop, Paint.net, GIMP, Paint, etc.
Editing Minecraft Skins using Paint.net
Before starting on how to make and edit a Minecraft skin, you can get the base skin steve.png from Mojang using the link here and alex.png from the link here. Don’t worry about the image quality as Minecraft optimizes it to work and fit best with its world.
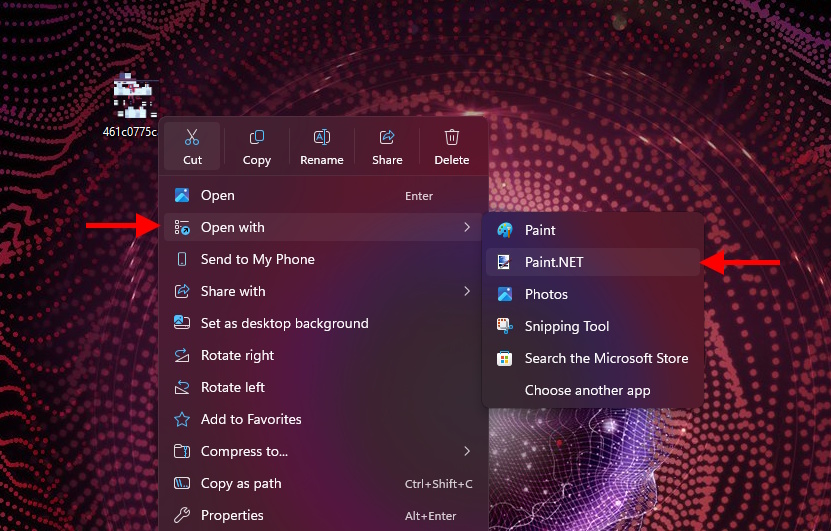
- Now, right-click on the downloaded skin and choose “Paint.net” from the”Open with” option.
- You can also use any other photo-editing tool, as we will only do some basic edits.

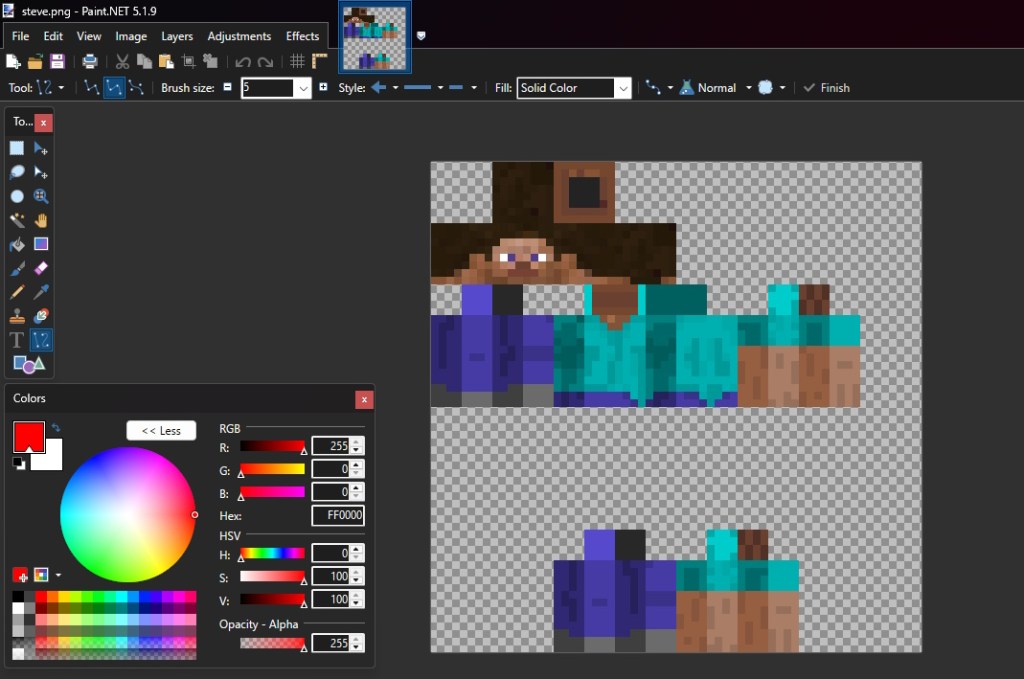
- Paint.net has its tools library on the left sidebar. Most creators stick with brushes and other related items to make skins.
- Do make sure to zoom in on the base skin first and only edit the already colored blocks. Messing up with the transparent blocks might make your in-game character look weird.

- Now, you can also add images or symbols to your skins. Dragging and dropping images works on almost all modern image editors, so do that if you wish to add more textures to your Minecraft skin.
- You have to resize the imported images so that they don’t mess up the dimensions of the main file. Alternatively, you can use some of the best Minecraft mods to get high-quality skins in the game.
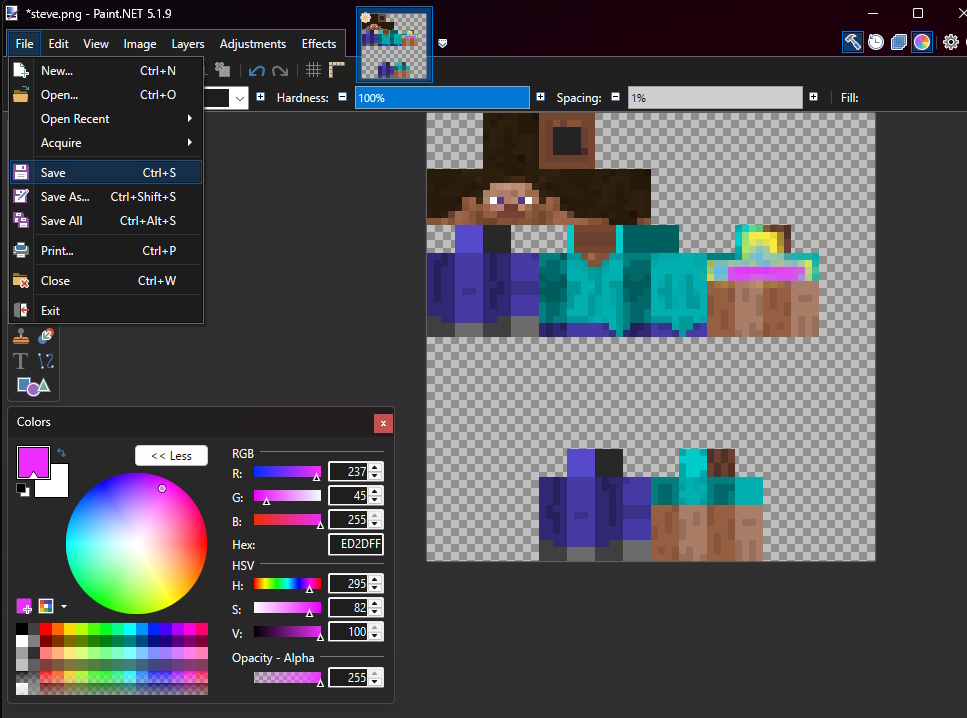
- Finally, once you are satisfied with the results, save the file. Do make sure that the dimensions and the resolutions are the same as the original file for maximum compatibility.

With that, you now have multiple options for how to make a Minecraft skin. So, have you made your unique skin in Minecraft? Tell us in the comments below.
Yes, you can always use the same Minecraft skin on both the Java and Bedrock editions.
Skindex is the easiest option for all beginners to edit and make a Minecraft skin.