- Google Chrome's built-in Dark Mode setting doesn't apply to all web pages, which calls for external tools.
- Type "chrome://flags" in the address bar, press Enter, and enable the Auto Dark Mode for Web Contents flag.
- Additionally, you can navigate to the Chrome web store and get the Dark Reader extension.
While Google Chrome already lets you enable dark mode in the settings, it doesn’t apply to all web pages. Dark mode doesn’t apply to a lot of websites still, hence the need for an automatic dark mode. The good news is, that there are many ways to enable dark mode on Chrome, from using Flags to Chrome Extensions. Here’s how to enable auto-dark mode in Google Chrome effortlessly!
How to Enable Auto Dark Mode in Google Chrome
To make Google Chrome apply dark mode automatically across all content on the web, you can follow either of these two methods.
Method 1: Turn On Auto Dark Mode on Chrome Using Flags
The process of forcing dark mode on all web content on Chrome is similar across all platforms. All you need to do is:
- Launch Chrome and go to the following address
chrome://flags/#enable-force-darkby typing it into the address bar and hitting the Enter key.

- Now, locate the Auto Dark Mode for Web Contents flag and click on the Default dropdown menu.
- From the subsequent menu, select Enabled.

- Now, click on Relaunch at the bottom to restart Google Chrome.

Google Chrome should instantly relaunch and all the websites will now appear in dark mode. You can retrace your steps and select Default or Disabled in the Chrome Flag’s drop-down settings to turn it off again.
Method 2: Enable Auto Dark Mode on Chrome Using Extensions
Chrome Extensions can only be used on the desktop app of the browser. While there are quite a few out there, it’s hard to find one that’s better than Dark Reader. Follow these steps to install and use the extension:
- Launch Chrome and head over to the Chrome Web Store (visit).
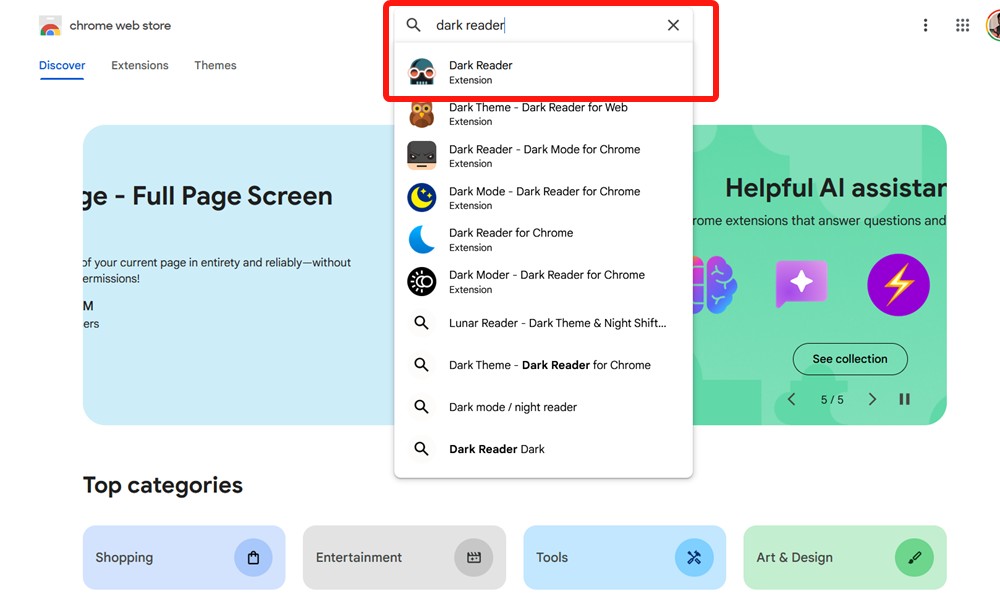
- Search for Dark Reader in the search bar and click on the first suggestion.
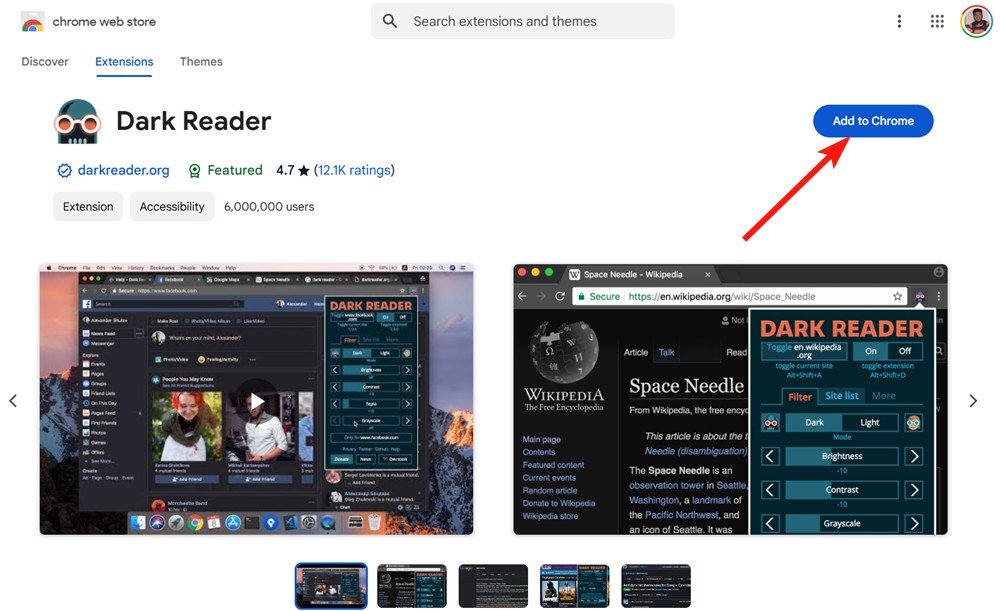
- Inside the extension’s landing page, click on Add to Chrome.
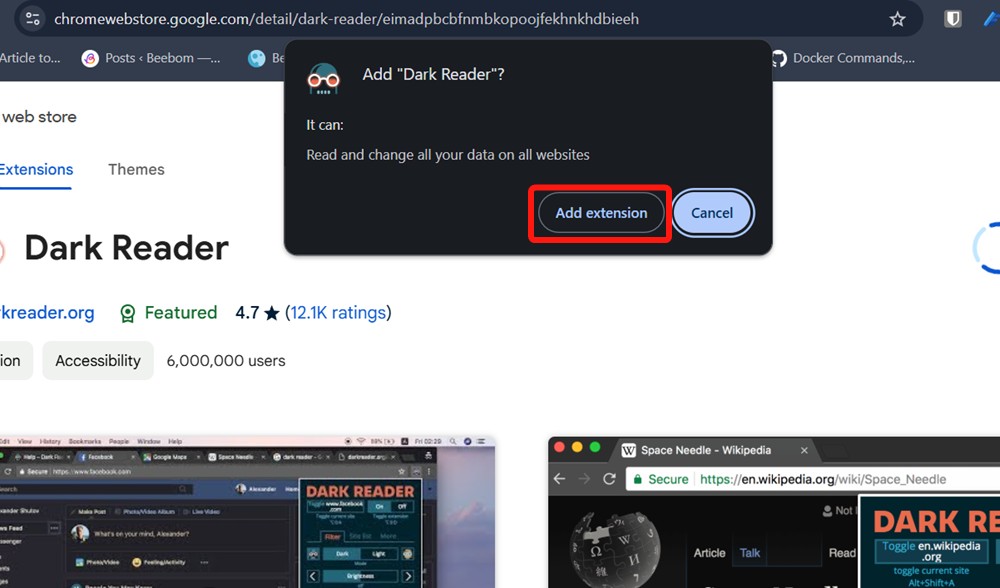
- In the pop-up that appears, click on Add extension.
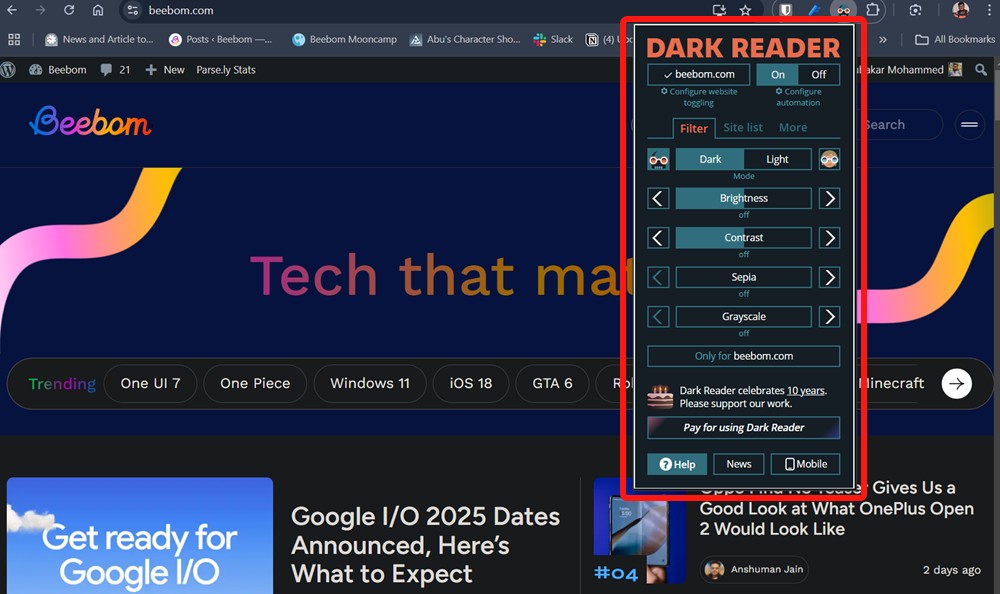
- Once installed, the webpage should automatically switch to dark mode.
- To change the way a webpage looks, click on the Extensions icon and select Dark Reader.
- You can change the brightness, contrast, sepia, and grayscale for a website and have them configured differently for different websites.
And, that’s how you turn on auto dark mode in Google Chrome. You no longer have to wait for those web pages to get a native dark mode. Dark Reader doesn’t just invert colors but considers the elements of the website and intelligently imposes black where needed.
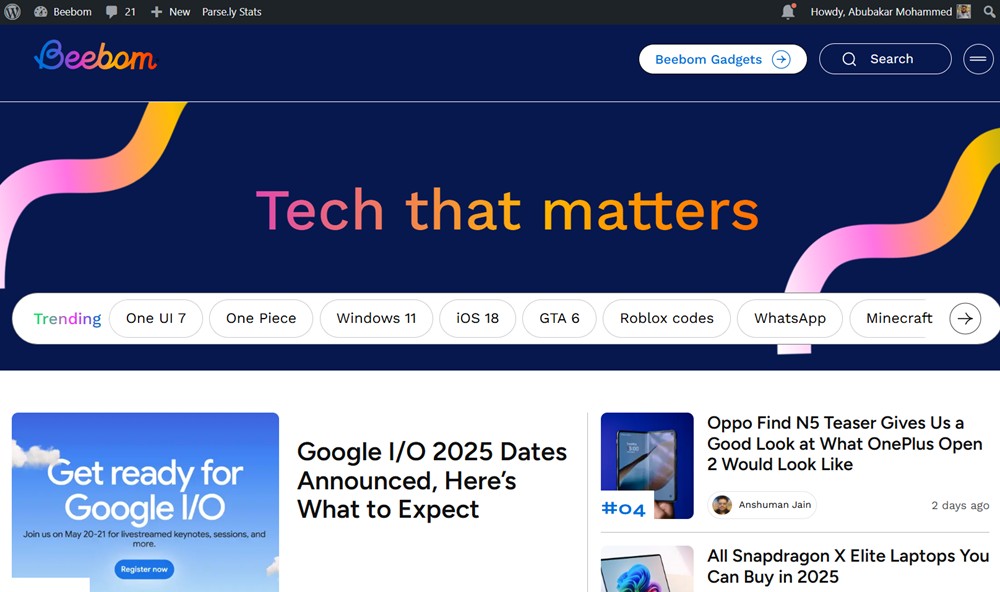
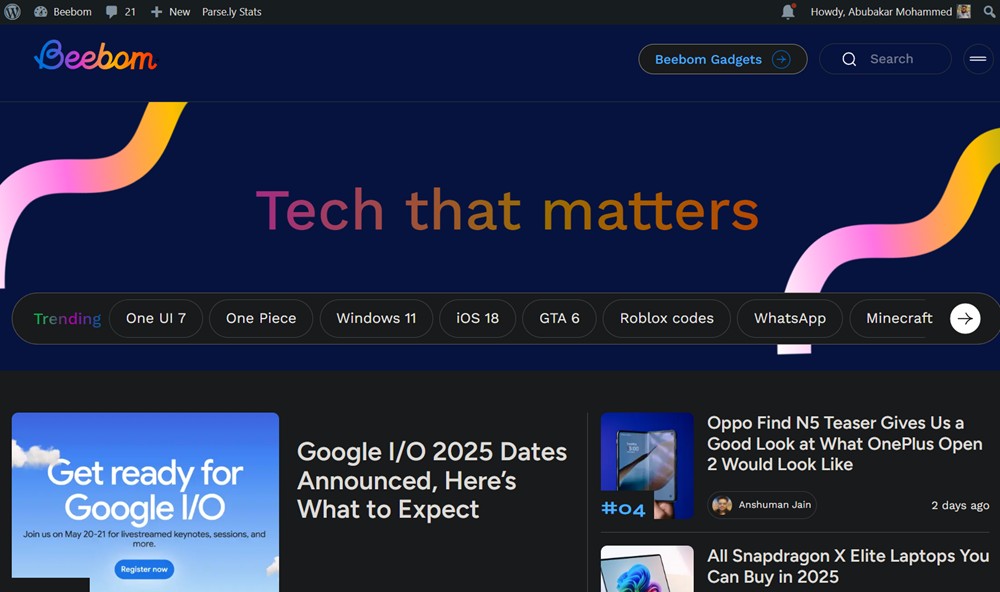
And that’s how you can enable auto dark mode in Google Chrome. Dark Reader is easily one of the best Chrome Extensions to use. The Force Dark mode is a great Chrome flag, but we’d recommend using an extension for ease of use.
If you have any further queries, do drop them in the comments down below, and we’ll try to help you out.


