
Proximity sensor issues are not new on Android smartphones. There are instances of screen lighting up during calls and mind you, this continues to happen on flagship Android devices. In case, you have a damaged screen at your hand then the experience gets even worse. Users report that after slight damage, the screen does not turn on during calls because it affects the proximity sensor. The display perennially blacks out and you have to wait for the call to end from the other side. In summation, it’s a frustrating experience. So if you want to disable the proximity sensor during calls on Android smartphones then follow our guide below.
How to Fix Screen Doesn’t Turn On or Off During Calls (2022)
In this tutorial, we have mentioned five different ways to fix the proximity sensor problem plaguing various Android handsets. Note that, the methods mentioned below are not exhaustive and not just limited to that particular section. So I would suggest you start with the basic fixes and then move to the next method step-by-step for finding more resolutions.
1. Basic Fixes
For most of the users who have a broken proximity sensor, the Accessibility Settings on Android devices can fix the issue. It’s applicable to Android 6.0+ devices. Here is how to go about it.
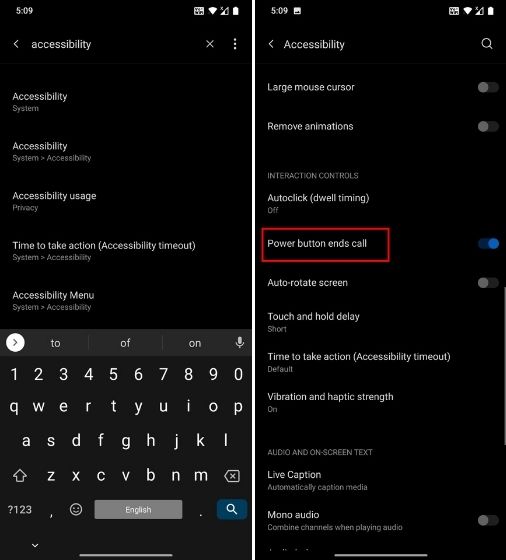
1. Open Settings on your Android device and search for “Accessibility”. Now, open the Accessibility page. Alternatively, you can navigate to Settings -> System to find the said menu. Now, scroll down and look for “Power button ends call“. Enable this toggle. It will allow you to end the call with the hardware power button even when the screen is turned off.

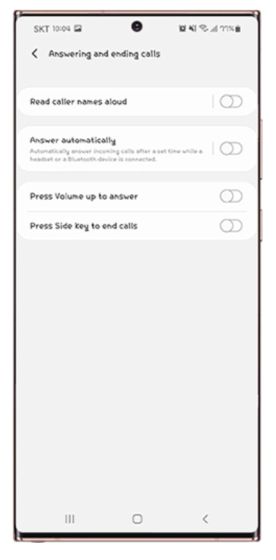
2. Some Samsung devices also allow you to receive the call with the Volume Up button. If the screen is not turning on even before you have received a call then the Volume Up button will let you accept the call. So make sure to enable this toggle. Users who have devices from other OEMs, look for this toggle under the Accessibility page. For your information, stock Android devices don’t have this option.

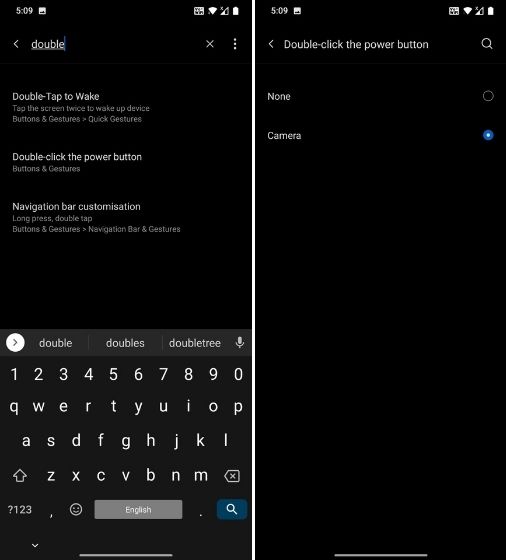
3. While the above steps will let you receive/end calls when the screen is turned off, if you want to turn on the screen during an active call then follow this step. Most Android smartphones come with “Double-click with power button” functionality. It allows you to open the camera by double-clicking the hardware power button. If you have this option then turn it on. During calls, the camera will override the proximity sensor and will force the screen to turn on. Finally, you can open other apps or enable the Loudspeaker mode.
2. TapTap App
The TapTap app is built by Kieron Quinn for bringing additional utility to Android smartphones, but it can also be a great tool for devices suffering from proximity sensor issues. The TapTap app allows you to double-tap or triple-tap on the back of your phone to perform many system actions. We are going to use this functionality to turn on the screen during calls.
1. First of all, click on this link and download the TapTap app. It works on Android 7.0+ devices. After that, install the app on your Android device.
2. During the setup, it will ask you to double-tap on the back to check the sensitivity. If the app is unable to register your tap then adjust the sensitivity and device size. Also, if you have a fingerprint sensor on the back then double-tap on the sensor.


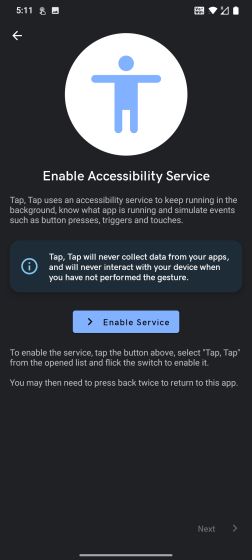
3. Next, follow the on-screen instructions and grant the accessibility permission. After that, make sure to disable battery optimization.
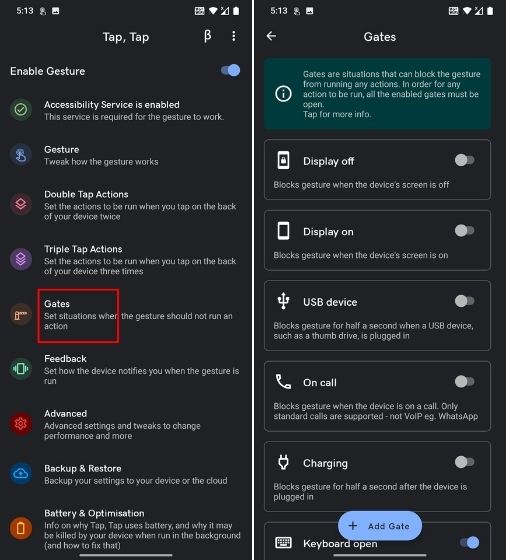
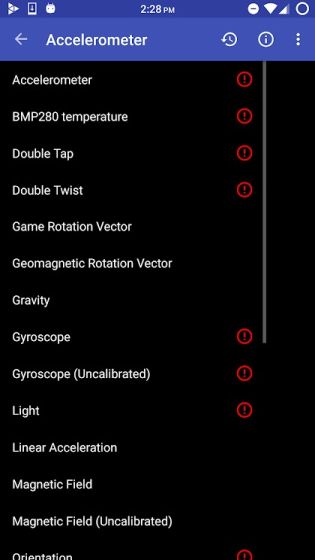
4. Once you have completed the step, go to “Gates” and disable all the toggles especially “Display Off” and “On call” options.
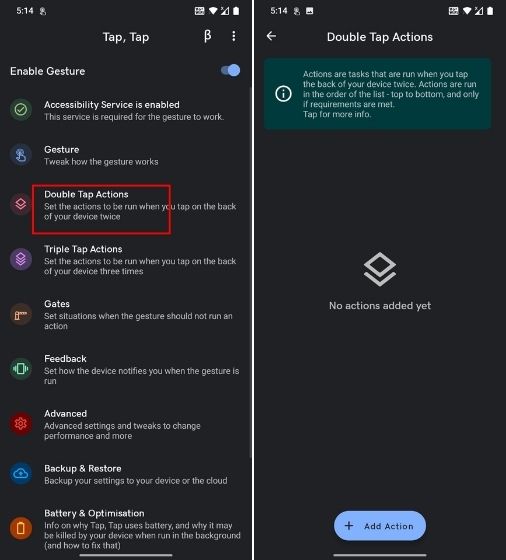
5. Next, open “Double Tap Actions” and then tap on “Add action”. If actions are already added then press and hold and remove them.
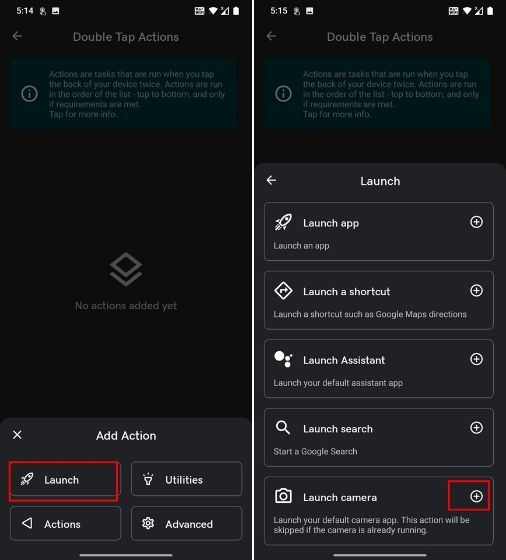
6. Now, choose “Launch” and then add “Launch camera“. This will allow you to launch the camera by double-tapping on the back when you are on a call. The reason I am asking you to open the camera specifically during the call is because it can override the proximity sensor which is blocking the screen from turning on.
7. Now, go ahead, place a call, and double-tap on the back. You will find that the screen is turned on and the camera has been opened. From here, you can end the call or turn on the loudspeaker mode from the notification shade. You can also open any app from the launcher.

8. If the above step is not working for you then I would recommend you to add a new action. Remove the existing action and add a new one. Choose “Actions” and then add “Wake device“. This will likely not work on devices running Android 10 or above, but if you have a smartphone running Android 9 or below then this might work.

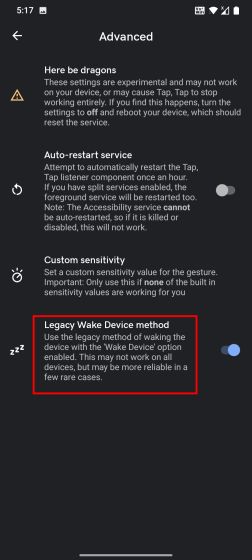
9. Now, go ahead and test whether this is working. If not then open “Advanced” and enable “Legacy Wake Device method”.
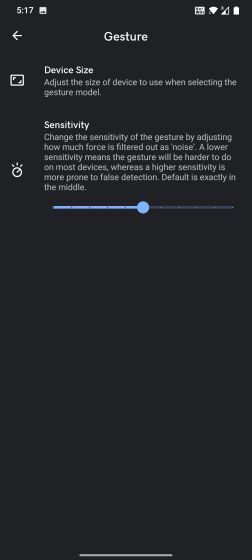
10. In my usage the TapTap app worked fine, but it was too sensitive to taps and was opening the camera even after a slight trigger. So to adjust the sensitivity, open “Gesture” and reduce the “Sensitivity”.
3. Install a Modified Dialer App
Some developers have come up with a new idea to completely block the proximity sensor during calls. Generally, Dialers are programmed in such a way that when you receive a call, the proximity sensor powers off the screen and turns it on when there is no object nearby. So developers have come up with an idea to remove the source code related to the proximity sensor altogether in the AOSP Dialer app. This way, the proximity sensor will not be called into action during calls. That’s amazing, right? So here is how you can proceed.
1. For Android 8.0 users, you can download the modified AOSP Dialer app from XDA Forums. Now, install the app and grant all the permissions. Make sure to set the modified Dialer as your default caller app.

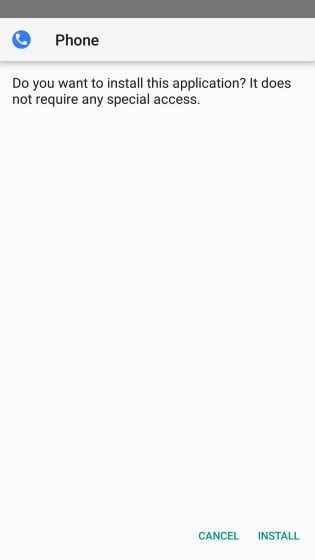
2. For Android 9.0 users, you can download the modified AOSP dialer from here. Install the app and follow the on-screen instructions to make it your default Dialer. Now onwards, the proximity sensor won’t turn off the screen during calls.
4. Use Switch Access Under Accessibility Settings
Switch Access is an Accessibility tool that lets you navigate through the Android UI with the help of hardware buttons. This method is applicable to all Android smartphones.
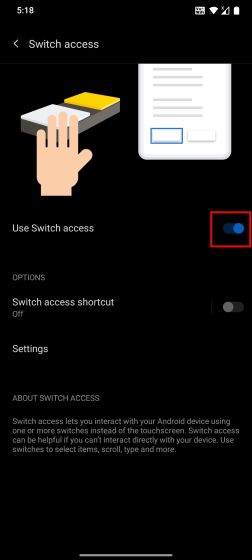
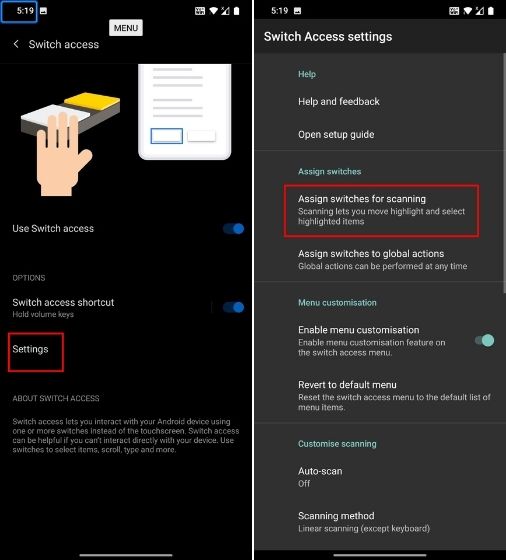
1. First off, open Accessibility under the Settings page and enable “Switch Access”. You will be asked to select a USB or Bluetooth device. Don’t touch anything, just tap on the “Exit” button.
2. Next, enable “Switch access shortcut”. If you get a prompt then select “Hold volume keys” and save it.

3. Next, open “Settings” under the Switch Access page and move to “Assign switches for scanning“.
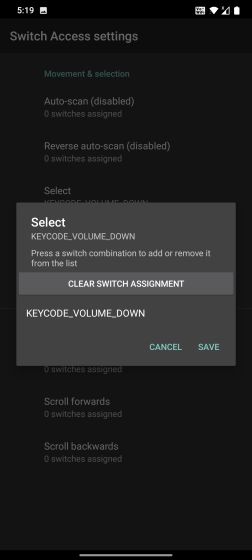
4. Here, tap on “Select” and then press the hardware volume down button. It will register your button press. Now, save it. This will allow you to select a UI button (equivalent to the Enter key) by pressing the volume down button.
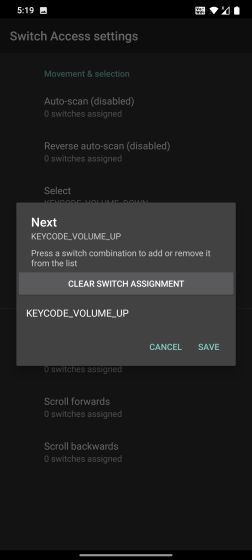
5. Similarly, tap on “Next” and press the hardware volume up button. Now, save it. Basically, by pressing the volume up button, you will be able to move to different UI buttons.
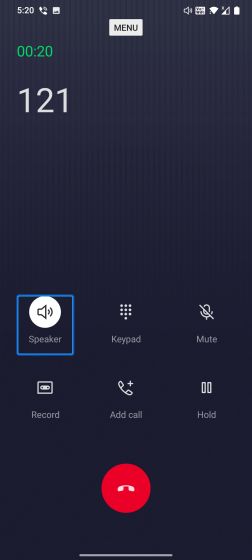
6. Now, when you are on a call and the screen is turned off due to the broken proximity sensor, you can press the volume up button to move to the “Speaker” button. As you can see in the image below, the speaker button is located at number 2 — the first being the Menu and the second being the Speaker button. This placement of buttons will differ for your Dialer so check at which number the Speaker is located beforehand.
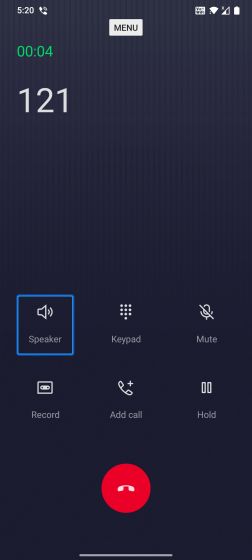
7. So, after pressing the volume up button two times, I have reached the Speaker mode. Now, simply press the volume down button which we have assigned for selecting a menu. And it will turn on the speaker mode which will eventually override the proximity sensor and turn on the screen. So whenever you are on a call, you will have to press these button combinations to enable the Speaker mode. This way, you can turn on the screen during calls with the help of Switch Access.
5. Disable Proximity Sensor (Requires Xposed)
There is a way to altogether disable the proximity sensor on Android smartphones, but it requires you to have the Xposed framework installed. This process is not for everyone, but if you are well-versed with Android development and rooting then you can follow these steps. Also, bear in mind, this Xposed module only works on devices running Android 7.0 or below. in addition, do note that Android 10 and above comes with an option to disable all the sensors, but it also disables the microphone which is something you would not want during a call.
1. You can install the Xposed framework by following the instructions from XDA Forums. After that, install the Sensor Disabler app (Free) from the Play Store. Now, you can disable the proximity sensor on your Android device.
Disable Proximity Sensor During Calls on Your Android Smartphone
So these are some of the ways you can fix the proximity sensor issue on Android smartphones. In the past, I have faced this annoying issue. I think Android should have a native toggle to disable the proximity sensor as smartphones start to act up after a few years of usage. Anyway, that is all from us. In case, you are facing another plaguing issue such as Play Services causing battery drain then follow our linked guide. And if you have any questions, do comment down below and let us know.

