When it comes to online multiplayer gaming platforms, there’s hardly any competition for Roblox. It is a creative powerhouse that welcomes all types of creations and players. And now, even you can join the long list of Roblox creators by making your own Roblox experience in no time. Whether you want to create an open-world exploration game or a fast-paced shooting game, we have you covered. But there is no time to waste. So, let’s quickly explore how to make a Roblox game in the easiest way possible.
We are going over the basics, mechanics, and steps for creating a game in Roblox Studio in separate sections. Use the table below to navigate to the aspects you want to learn about.
Items Required to Make a Roblox Game
You require the following items to make your Roblox game:
- Roblox Studio
- Ideas for your game
Roblox Studio, as the name suggests, is a dedicated free game-building software by Roblox that players can use to quickly build games in no time. At first glance, it looks similar to other 3D modeling tools like Blender, but Roblox Studio is much simpler to use. Furthermore, it even comes packed with templates that can save you dozens of hours.
Though, not to forget, if you want to build a more personalized game, you will need to use additional tools like Photoshop or Procreate for custom 3D objects.
Ideas for an Easy Roblox Game
Here are a few suggestions for easy-to-build Roblox games:
- Car Racing: A simple competition between players to race across a set path with custom obstacles.
- Parkour: Jump over floating, moving, and stationary obstacles while putting your movement skills to the test. The faster the better.
- Shootout: An open custom arena for players to fight with each other using a fixed set of weapons.
- Exploration: Jump into a large open world and explore its various creations to find and collect items.
- Line Runner: Similar to Flappy Bird, you have to jump over or duck beneath the obstacles that are coming towards you.
For the purpose of this tutorial, we are going with a simple parkour game. You can try out any other idea or come up with creative options on your own as well.
Download and Install Roblox Studio
As you know at this point, Roblox Studio is the main tool you need to create custom Roblox experiences. Unfortunately, it is only available for Windows and Mac users at the moment, so you can’t build games on your smartphones, Chromebooks, and consoles. With that said, let’s set up Roblox Studio and get to work:
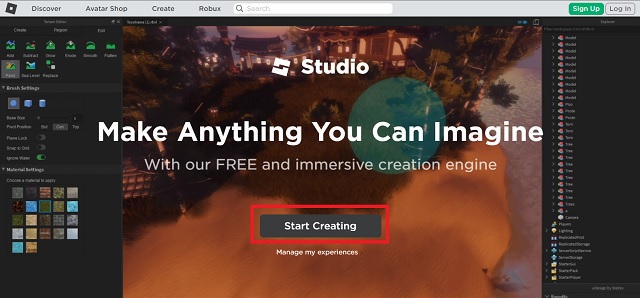
1. First, go to the Roblox Studio website (here) and click on the “Start Creating” button. Your browser will automatically start downloading the setup file for Roblox Studio.
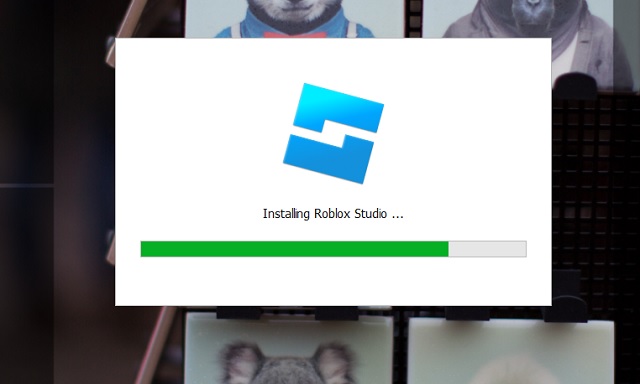
2. Once the download finishes, double-click the setup file (.exe/.dmg) to open it and start installation. Roblox Studio will then be installed on your PC.
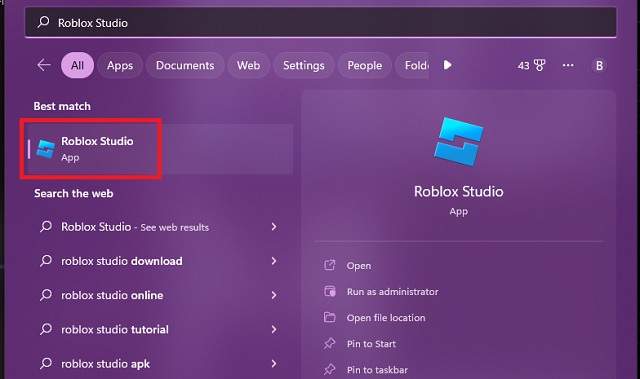
3. Finally, use the desktop shortcut or find the “Roblox Studio” in the Start Menu and launch it from there.
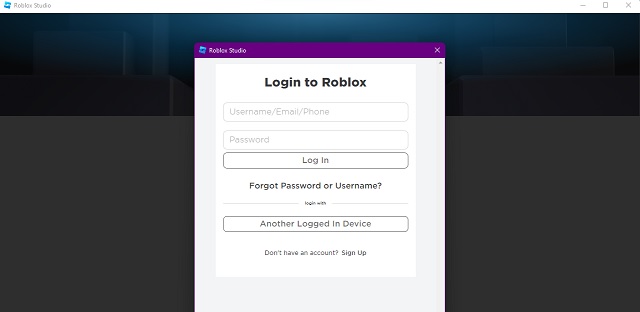
4. You have to log in with your Roblox account the first time you use it. This has to be the same account where you want to publish your Roblox game. More on that later.
Basics of Roblox Studio
Before we dive in and start building a brand new game, you must learn a few basics of Roblox Studio. You can choose to directly dive into the step-by-step tutorial too but skipping the basics will prevent you from heavy customization.
Camera Movement
As soon as Roblox Studio’s main dashboard loads, you get a 3D area that acts as the canvas for creating your game’s map. Let’s learn how to move around it:
1. First, use the W, A, S, D, Q, and E keys to move the camera forward, back, left, right, down, and up respectively. You can press and hold the “shift” key to decrease the movement speed.
2. If you want to bring a particular object into focus, you can press the “F” key. This allows for detailing and customization.
3. Lastly, your mouse acts as the main tool for perspective control. You can press and hold the right mouse button to look around the canvas. Meanwhile, the middle mouse button allows you to pan and zoom the camera.
Structure Parts

As you might expect, every object or structure in a Roblox game is made up of various small geometrical parts. You get cuboidal blocks, spheres, cylinders, wedges, and corner wedges. To insert any of these geometrical shapes, go to the Model tab and then click on the “Parts” option.
Assets
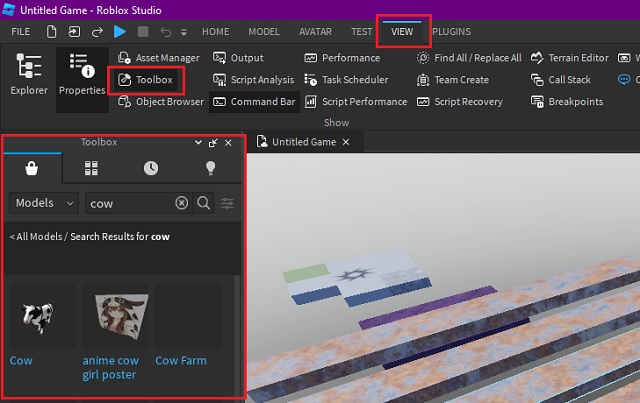
Much like shapes and parts, you can also insert ready-to-use 3D objects onto your Roblox game’s map too. You can find thousands of objects in the Marketplace tab. From structures to useable vehicles, everything is present here. To open it, go to the view panel and turn on the “toolbox“. Then you can add any object to the map.
Materials of Objects
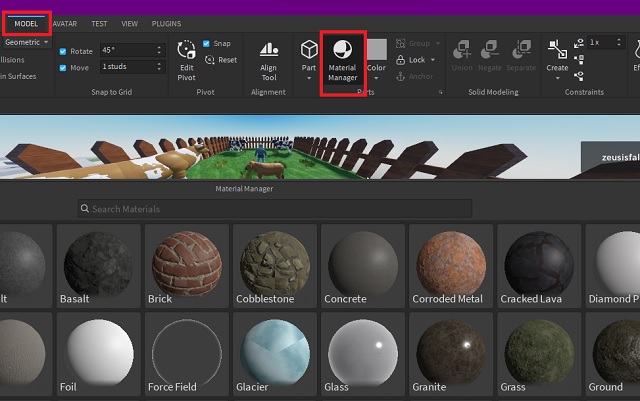
Much like other game creation software, Roblox Studio also treats the material of every object separately. It refers to the traits and visual aspects of the 3D object that reflect real-world properties. You can explore them in the Materials Manager option in the Model section window.
For example, an object with neon material will be blurry and glow. Meanwhile, something with Brick material will have a rough texture and even sink in liquid within the game. With well-planned chosen materials, you can create an endless interactive experience in your Roblox games.
Luau Script
With all the easy stuff out of the way, a major learning curve for Roblox Studio comes in the form of Luau code. If you want to add special movements or unique features to the Roblox games, you have to add scripts using the Luau scripting language. It is similar to C++ but has a few fundamental differences. While most experiences can do without the custom scripts, you can use the official documentation (here) to find out more details.
Easy Steps to Make Your Roblox Game
With the basics out of the way, follow the steps below to make a simple game in Roblox:
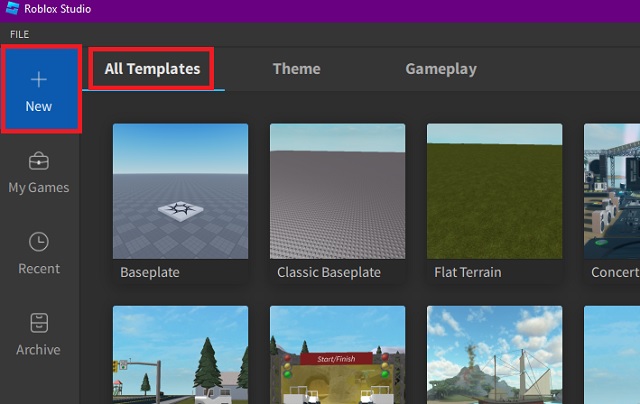
1. First, launch Roblox Studio and go to the “All Templates” section in the “New” tab.
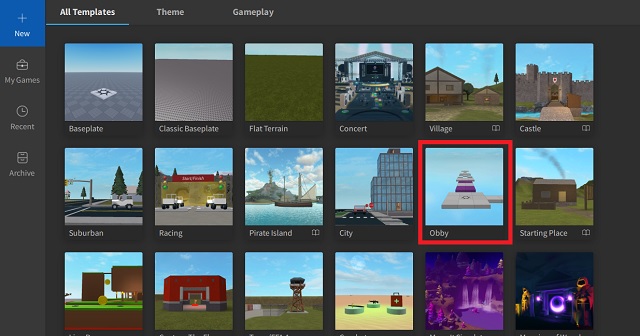
2. Then, click on the “Obby” option and launch its template. It is perfect for creating a parkour game.
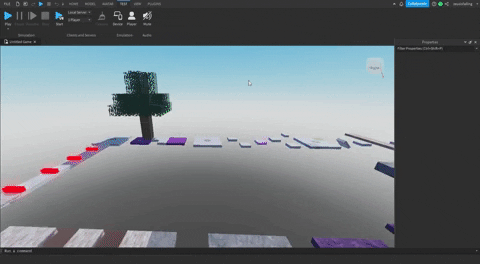
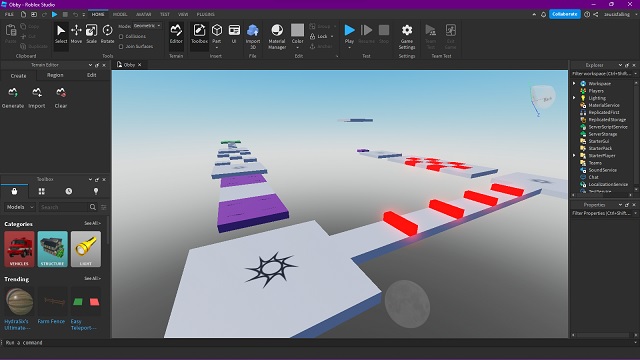
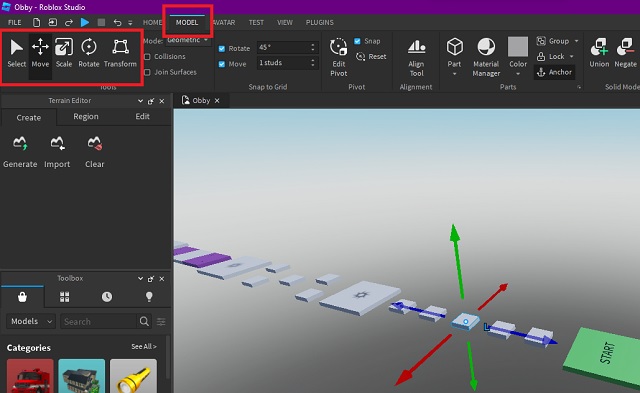
3. When the template loads, you will find a ready-to-use map that you can customize as per your desire. Use right-click and WASD keys to move around the map. The platforms with a sun-like icon mark the checkpoints and the green one marks your original spawn point.
Customize Your Roblox Game
Now that you have a base map to edit, let’s customize it to create a new Roblox game:
1. First, click on any tile to select it, and then go to the “Model” option on the top tool section. There, first use the options to scale, move, and rotate various tiles to your liking. Much like a photo editor, you can use commands like “Ctrl + D” to duplicate objects and “Ctrl + Z” to undo any move.
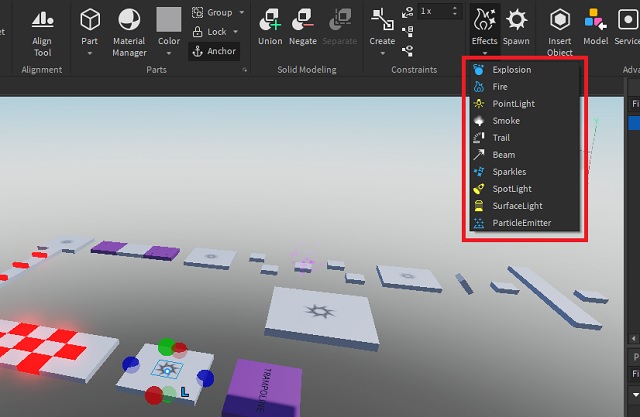
2. Next, you can also add custom effects to each tile to make the game more interesting. To do so, use the “Effects” option from the Model menu after selecting a tile. While these effects are only visual and won’t affect the player, they act as a major gameplay upgrade.
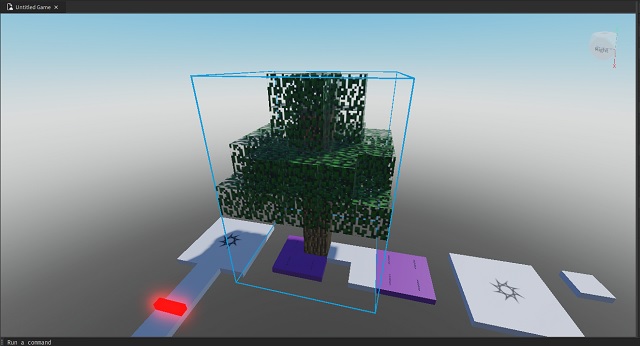
3. Next, as you might notice, the default template has red tiles which damage the players, and purple tiles which impact their movement. To customize such tiles and add similar properties to other tiles, you first need to select a tile by clicking on it. Then, click on the script icon (white page) in the top right corner of the model section.
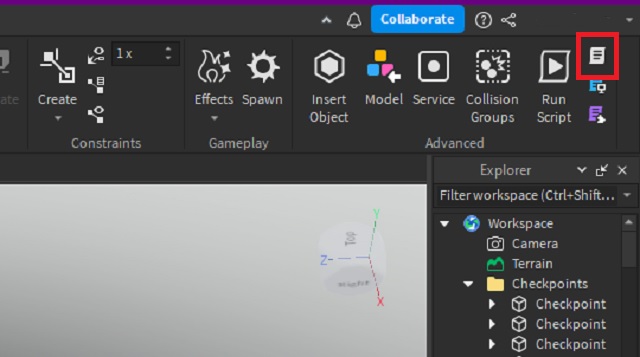
4. Roblox uses Luau scripting language for adding properties to its in-game objects. You can use the official documentation (here) to learn more. However, for the purpose of this guide, we suggest you stick to copying existing scripts within the “Explorer” right-side menu and pasting them onto your tiles (as shown in the last step).
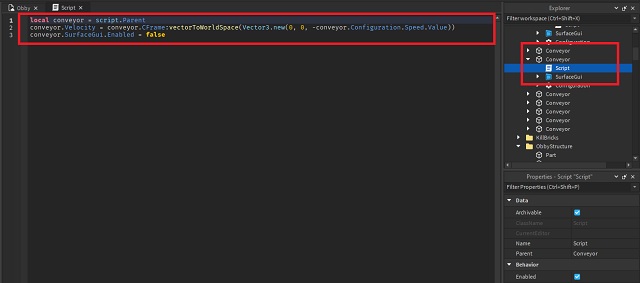
5. Alternatively, you use the amazing script repository by Buzzy (here) to find some amazing scripts for your game.
Bonus Features
Once you are satisfied with your main game area or parkour path, it’s time to prepare for the surroundings and aesthetics. Here’s how.
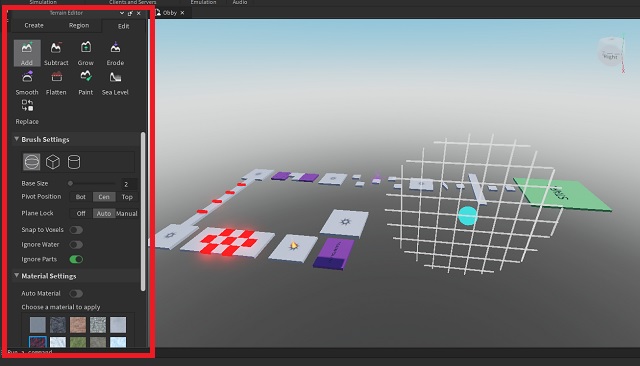
1. First, go to the “Terrain Editor” located on the left panel then use the options in its “Edit” section to create an area around your tiles. You can scroll down to edit the texture and brush size width, which you have to paint the new 3D terrain into your map.
2. Next, if generic lumps of land aren’t cutting for you, Roblox studio also allows you to add 3D objects to your map. To import them, click on the bag icon on the left side panel. If you can’t find it, click on the “toolbox” button to toggle it.
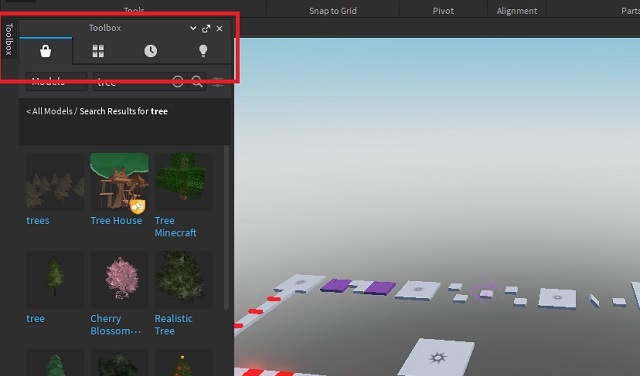
4. Then, search for an item you want to use and then drag and drop it into the scene. You can also use them as obstacles for your parkour course.
Additional Tips
While the custom tiles, 3D objects, and beautiful terrain are more than enough to create a fun Roblox game experience, here are a few more ideas that you can implement:
- Marketplace Scripts: Just like the 3D objects, you can find a bunch of fun scripts to add animation, environment, and a lot more to your game.
- Recording: You can use the “View” panel in the top toolbar to record clips and screenshots of your map for collecting feedback.
- Texturing: If you want to change the appearance of the tiles or any in-game object, you can use the “Model” panel and edit its color and material. For example, instead of using red color, you can use textures like “force field” on dangerous parkour tiles.
Test Your Roblox Custom Game
Once you believe your custom Roblox game is ready, it’s time to test it alongside your skills. Let’s see how.
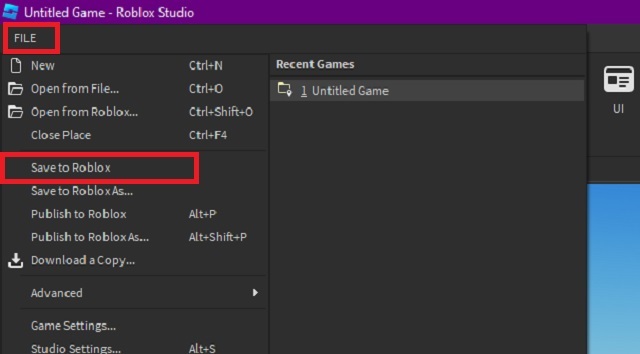
1. First and most importantly, you have to save your custom Roblox game. For that, go to the “File” menu in the top left corner and choose the “Save to Roblox” option.
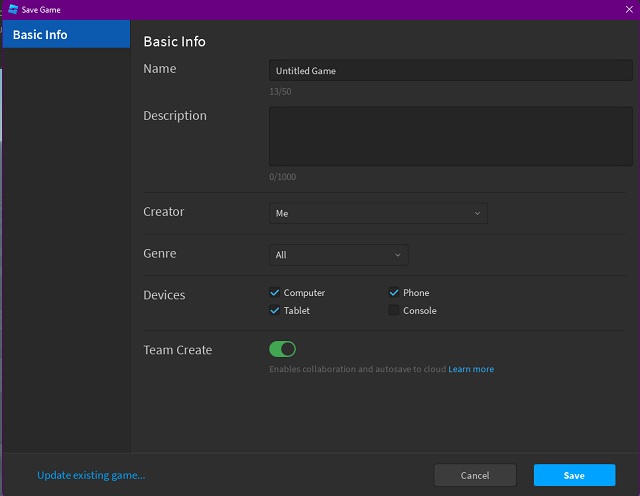
2. Next, in the new pop-up window, first enter a name and description of your Roblox game. Then, choose its genre and devices before finally clicking the “Save” button.
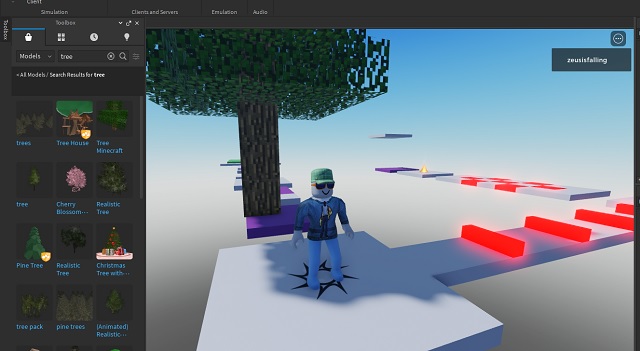
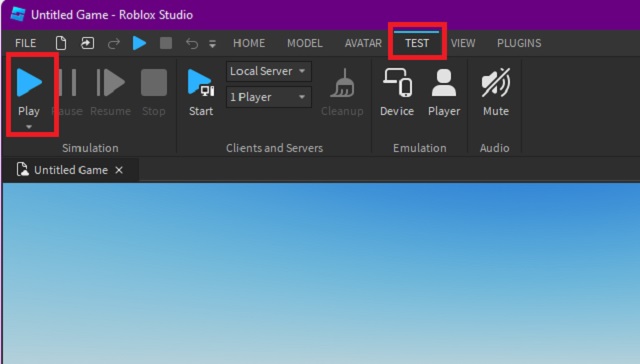
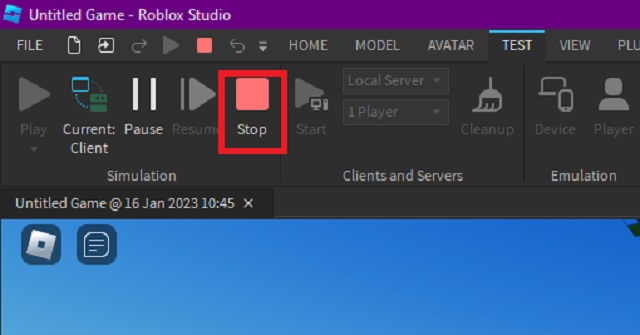
3. Once your game is saved, go to the test section in the top menu panel. Then use the “Play” button to launch the game.
4. Your editing window will then spawn a controllable character. Use standard gameplay control to run and test it.
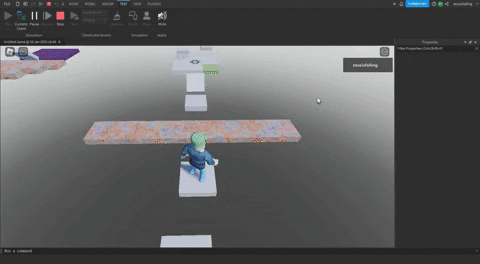
5. Once you are satisfied, use the “Stop” button to end the test.
The best part about using Roblox templates is that you don’t have to worry about character spawning. While you can add a custom checkpoint from the model menu, the initiation and respawning mechanism is automatic.
Publish Your Game to Roblox
When you are ready and satisfied with your Roblox game it’s time to let the world explore and enjoy it. But for that, you have to publish it to the Roblox marketplace. Here’s how.
1. First, go to the “File” menu in the top left corner and select the “Publish to Roblox” option.

2. The studio will then use the same information you filled in while saving the game to publish it on Roblox. Then, within minutes, you can find it within Roblox Marketplace.
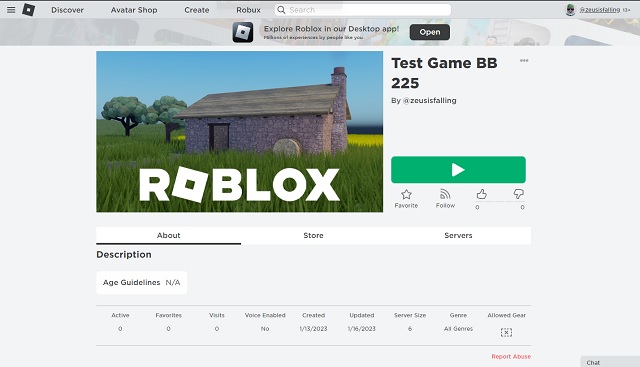
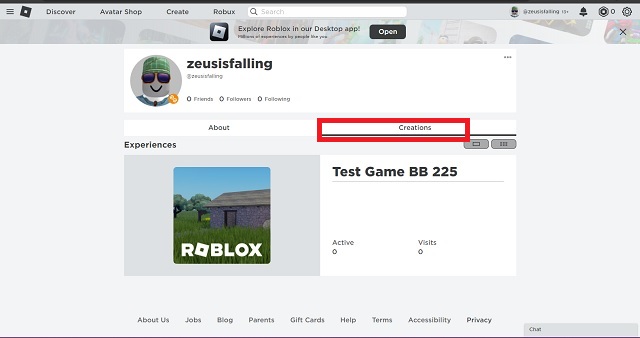
3. If for some reason, you are unable to find the game in the Roblox marketplace, you can also access it from your profile. For that, just go to the “Creations” section of your profile and find the game there.
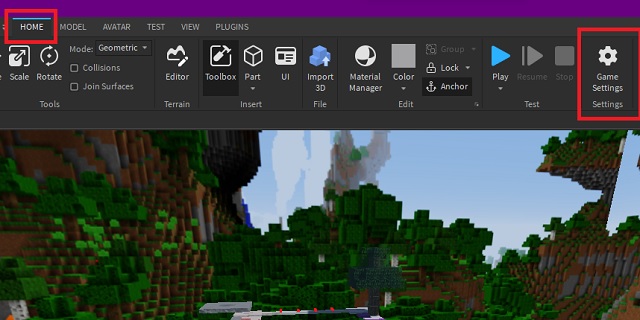
4. Once your game is published, the Roblox Studio will allow you to access the “Game Settings” option. You can find it in the home tab. This option allows you to change the privacy, details, and even monetization of your game alongside other important settings.
Just like that, you are now ready to create and publish your own Roblox game. Whether you want to make a racing game or a complex RPG, nothing is out of the picture. You can explore some of the best Roblox multiplayer games to find some inspiration. Just make sure that none of the experiences you create are prone to the common Roblox errors. Having said that, what type of Roblox game are you looking to build and share with others? Tell us in the comments section below! Who knows, you might end up fighting a collaborator.


