- High CPU usage on Windows 11 is generally caused by background apps and services hogging all the resources.
- Windows Update is notorious for causing high CPU spikes, so users can pause or stop Windows Update.
- Users should also disable unnecessary Startup apps to reduce the load on the CPU, right after logging in.
Just like Windows 10, Microsoft’s Windows 11 is not without its growing pains. And ever since its release, a common problem that has plagued users is 100% CPU usage. There could be a number of reasons behind high CPU usage on Windows 11, but the most common issue is background services and apps hogging all the resources. If your PC or laptop is regularly consuming high CPU resources, even at idle, follow our tutorial to fix the high CPU usage issue in Windows 11 right away.
1. Restart Your Windows 11 PC
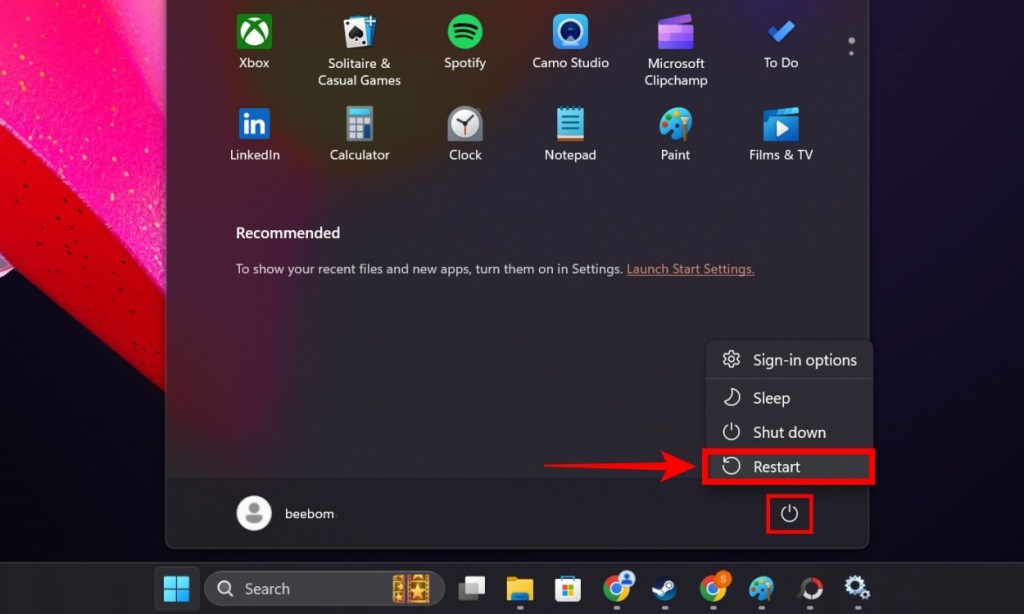
To fix the 100% CPU usage problem on Windows 11, sometimes a simple restart is all you need. It will terminate all the running processes in the background and give your computer more of a fresh slate. If a while has passed since you last restarted your computer, save all your work and reboot Windows 11.
After the restart, launch the programs you’ve previously had open and check if your CPU usage is now back to normal and fixed.
2. Check Which Program Causes High CPU Usage
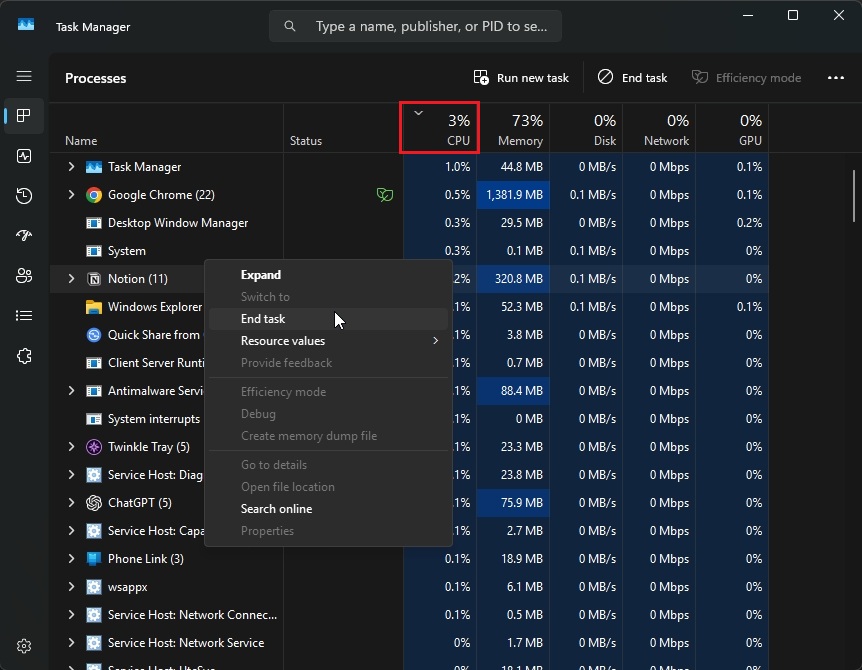
After rebooting the PC, if you are still facing high CPU usage, use the Windows keyboard shortcut “Ctrl + Shift + Esc” to open the Task Manager.
After the Task Manager is open, click on the “CPU” column to reorder the list based on usage and check which program is consuming the CPU’s resources. Right-click on the program and end it then and there. This will free up the CPU from resource-hogging apps.
3. Disable Startup Apps
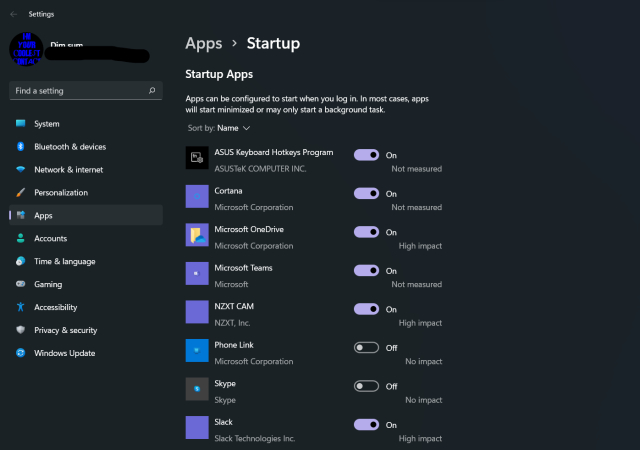
As we mentioned, there are various apps and services that start running in the background, as soon as we start up the computer. Well, there’s a way to stop Windows apps and services from running at startup. Here are the steps to follow:
- Click on the search bar in the Taskbar.
- Type Startup and open “Startup Apps.”
- Here, disable the toggle next to the program.
- Do this for all apps that you don’t use often.
4. Disable SysMain (Superfetch)
SysMain, also known as Superfetch, is a Windows service that was introduced with Windows Vista and is officially defined as a service that “maintains and improves system performance over time.” It is kind of a vague explanation that doesn’t tell us anything. But the idea is that when you want to run an application, it will launch it much faster because it’s already preloaded in memory. However, it can lead to high CPU usage on Windows 11, so here is how you can disable it.
- Click the search icon on the Taskbar and type “Services”. Now, open it.
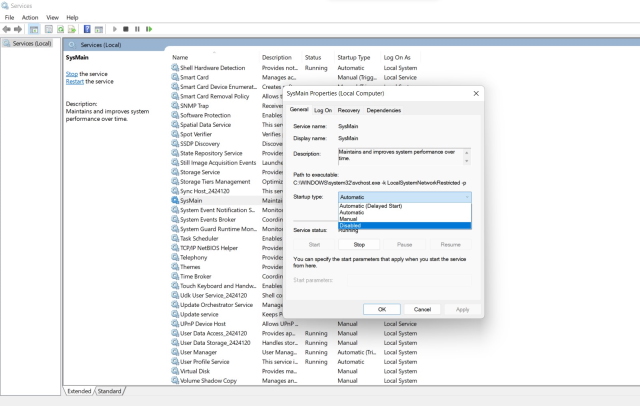
- In the Services window, scroll down to “SysMain” and double-click on it.
- Set the Startup Type to “Disabled“. If Service Status is running, select “Stop“.
- Once you are done, select Apply and then click OK.
- Now, restart your PC to fix the high CPU usage issue.
5. Pause Windows 11 Update
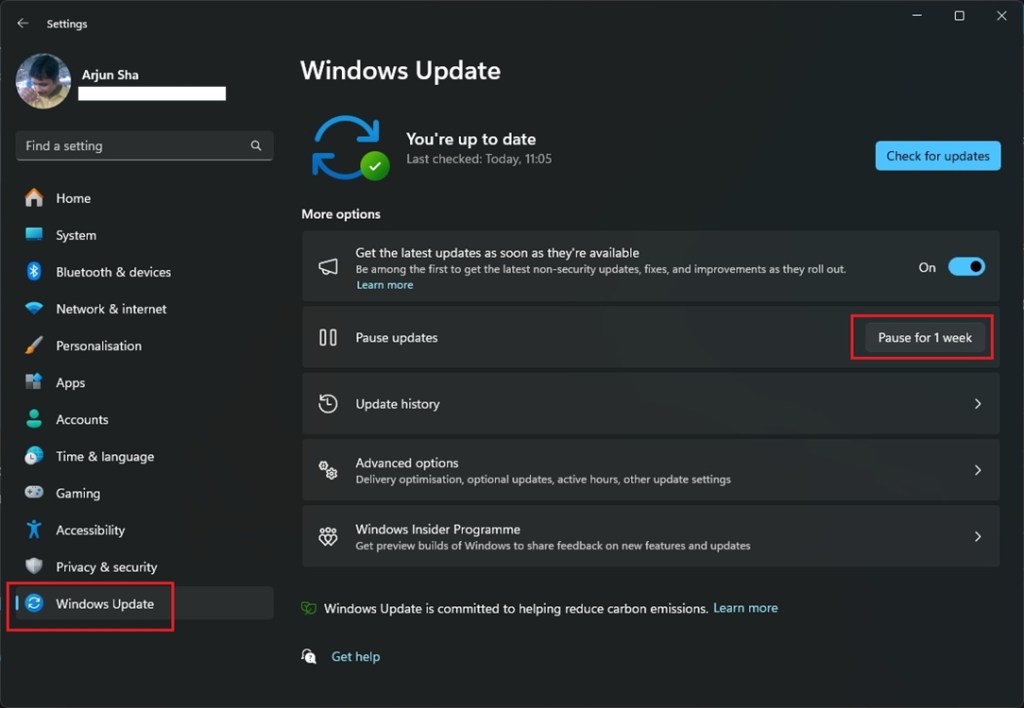
Windows updates, for the most part, are crucial for both getting new features and security updates. However, Windows updates start consuming CPU resources in the background, if the update is pending or the PC is preparing to install the update. You can choose to pause Windows Update for a week. Here is how you can do it.
- Launch Search from the Taskbar and open the “Settings” app.
- Under Settings, move to Windows Update and click on “Pause for 1 week”.
- Keep in mind that after a week, you will have to perform this step again.
6. Disable Windows Update
If you want to permanently stop automatic updates on Windows 11, you can follow our detailed tutorial. In this tutorial, we have briefly mentioned the steps to disable Windows Update. After following the instructions, it should reduce the CPU usage on your Windows 11 PC.
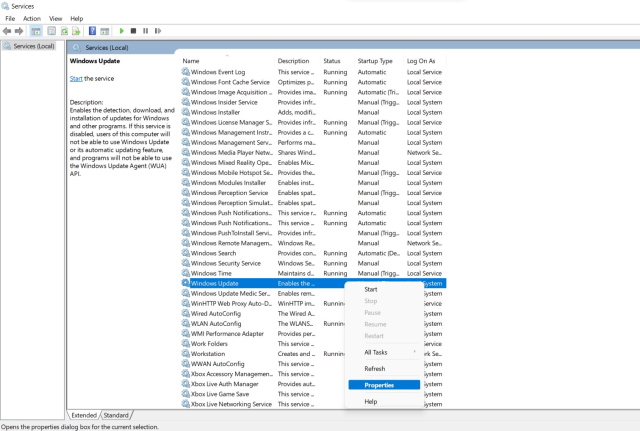
- Search for “Services” in the Start Menu and then press Enter.
- Under Services, scroll down and locate Windows Update.
- Then, right-click on Windows Update and select Properties.
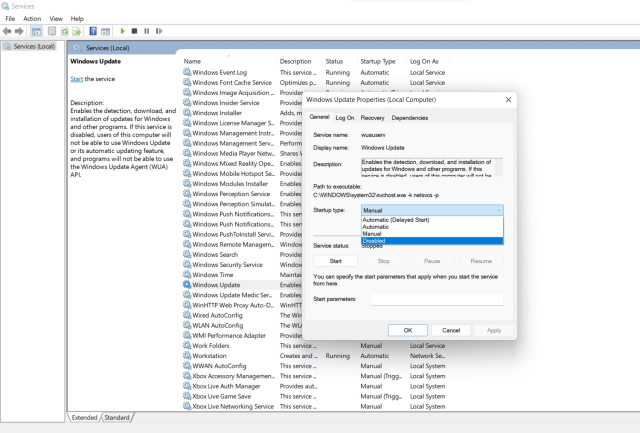
- Change the Startup type to “Disabled”. Now, click on “OK” and restart your PC.
7. High CPU Usage Can Be Caused by Malware
With the rise of malware attacks on businesses, governments, and individuals, our idea of what it means to be infected by malware has changed. They are now seen as lethal programs that infect your system and steal your data by constantly running in the background. Some malware also use your computer resources to mine cryptocurrencies, causing high CPU usage.
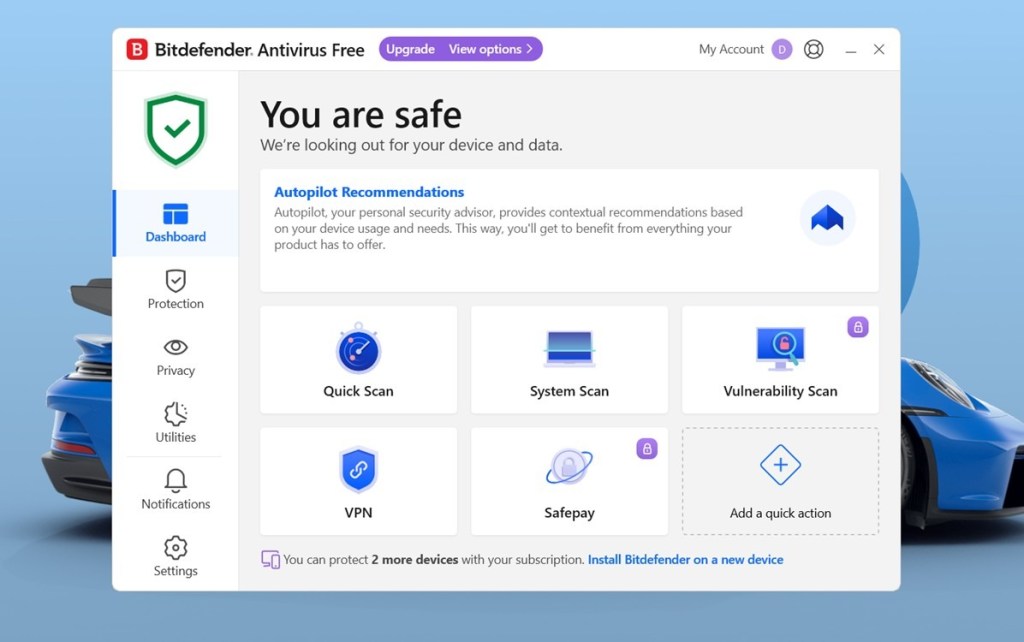
The easiest way to get rid of these is to have an Antivirus, which will be able to identify these pesky intruders. Our recommendation for the best malware removal tool for Windows 11 is Bitdefender and Malwarebytes. Run a deep scan of your system and remove malware from your PC to free up the CPU.
8. Reinstall Windows 11
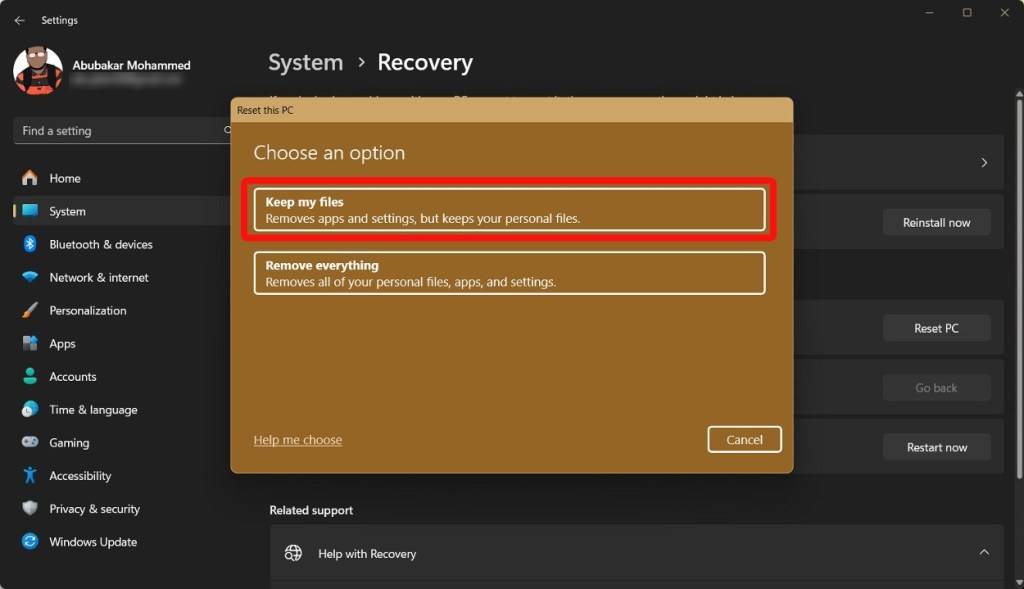
If your Windows 11 PC is still consuming high CPU resources, you can choose to reinstall Windows 11 without losing data. You can follow our tutorial to reinstall a fresh copy of Windows 11 without affecting your personal data.
After a fresh install, your computer should work normally, keeping CPU usage in check. So, this is how you can fix 100% CPU usage issue on Windows 11.
While software fixes help to a certain extent, if your PC is running on old hardware, it may be time to upgrade your PC. Faster SSD, paired with a new processor should handle Windows 11 effortlessly. Anyway, that is all from us. If you have any questions, let us know in the comments below.


