
- Hanging indent can enhance the readability, add a poetic touch to your, or add bullet points, or lists.
- To do hanging indent on PC, go to the Format tab > Align & indent > Indentation options.
- The other way is to use the Shift + Enter keyboard shortcut to enter a new line, and press the Tab key to indent as needed.
Google Docs has many tricks to enhance the readability of your documents, and one of them is hanging indent. Be it to enhance the readability, add a nice poetic touch to your, or add bullet points, or lists. Indentations allow you to bring more out of your writing, and if you’re wondering where you can find them in Google Docs, here’s how to do hanging indent on Google Docs.
How to Do Hanging Indent on Google Docs Website
A hanging indent can be made in multiple ways inside Google Docs when you use the service on the web.
Method 1: Do Hanging Indent Using Format Menu
The easiest way to do hanging indent on Google Docs is using the Format menu. Here’s how you do it.
- Go to Google Docs (website) and open a new document if you haven’t already.
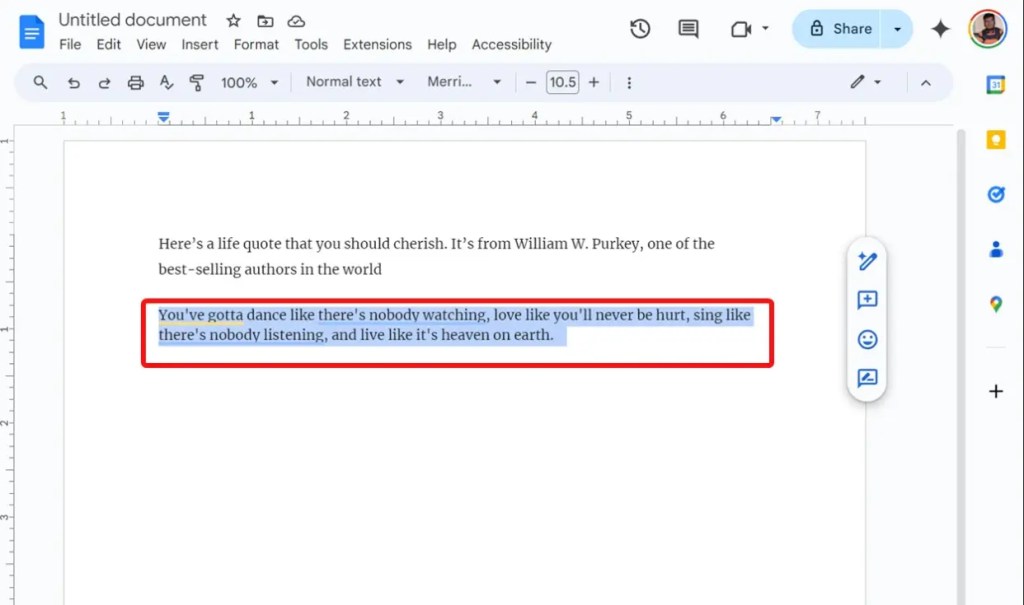
- Select the text you want to change the indentation of.
- From the toolbar at the top, click on the Format tab.
- Hover over Align & indent and click on Indentation options.

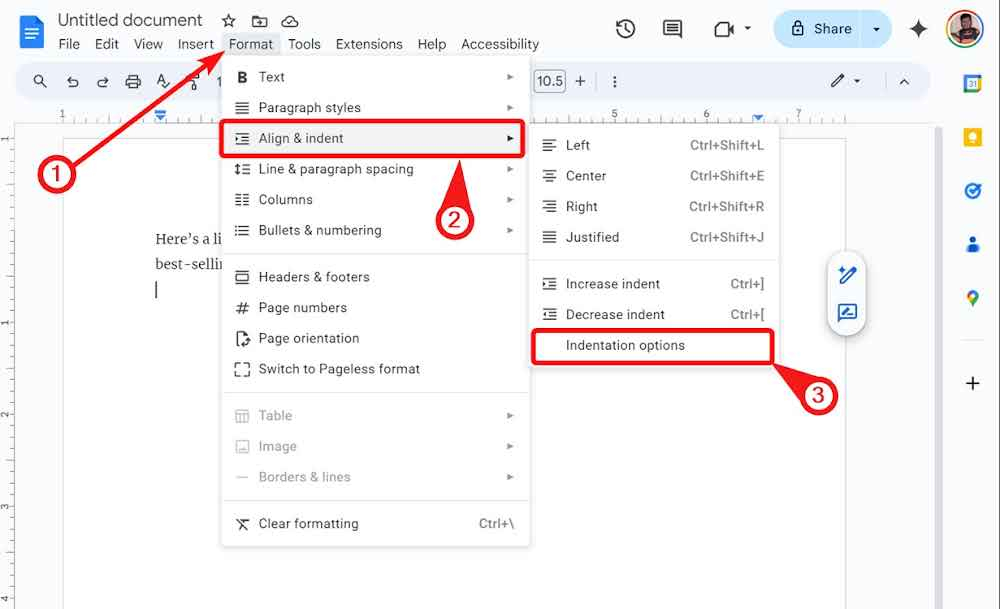
- In the Special indent dropdown, select Hanging.

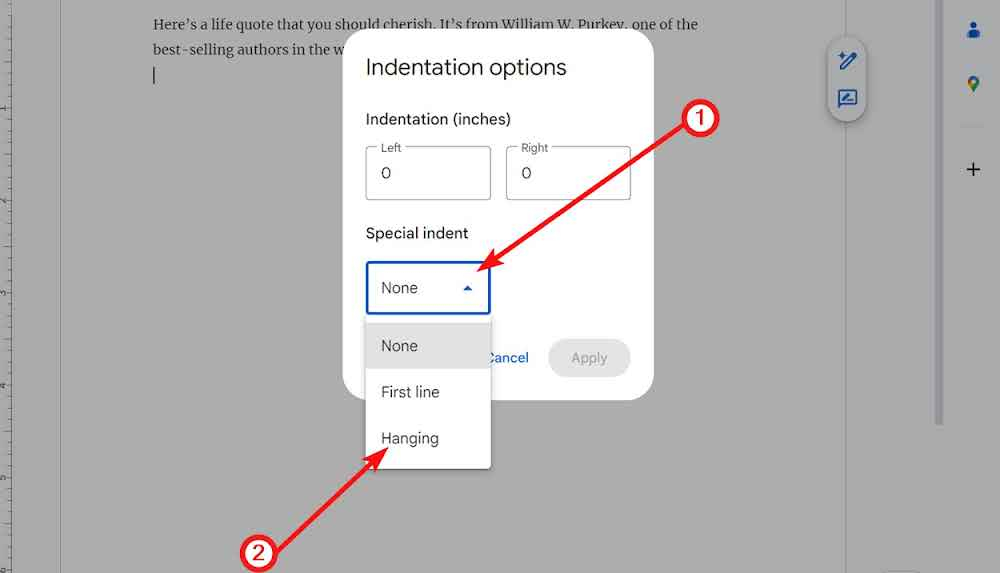
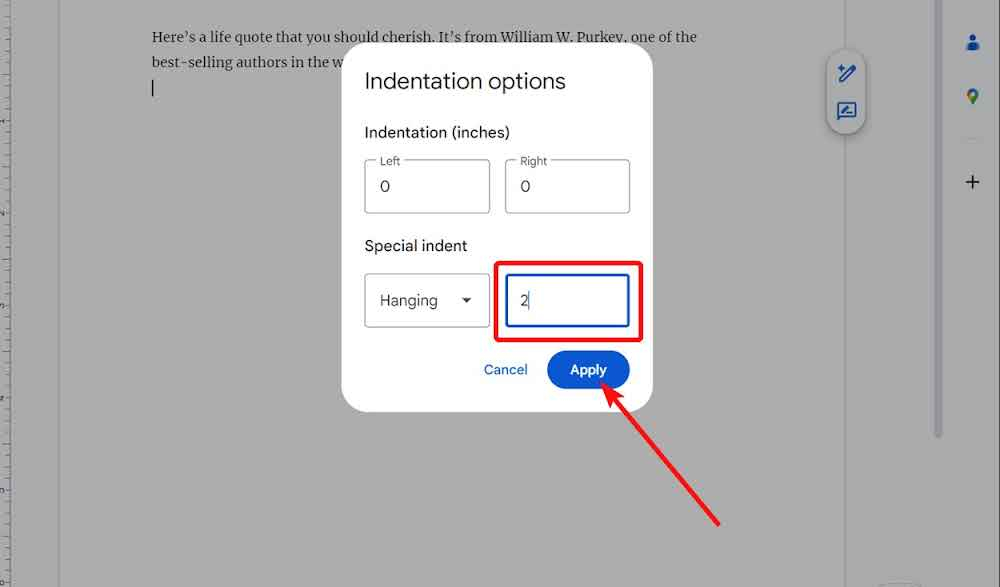
- Enter a number in the empty field corresponding to the space you want to give the indent.
- Now, click on Apply.

Method 2: Making a Hanging Indent with Google Docs Ruler
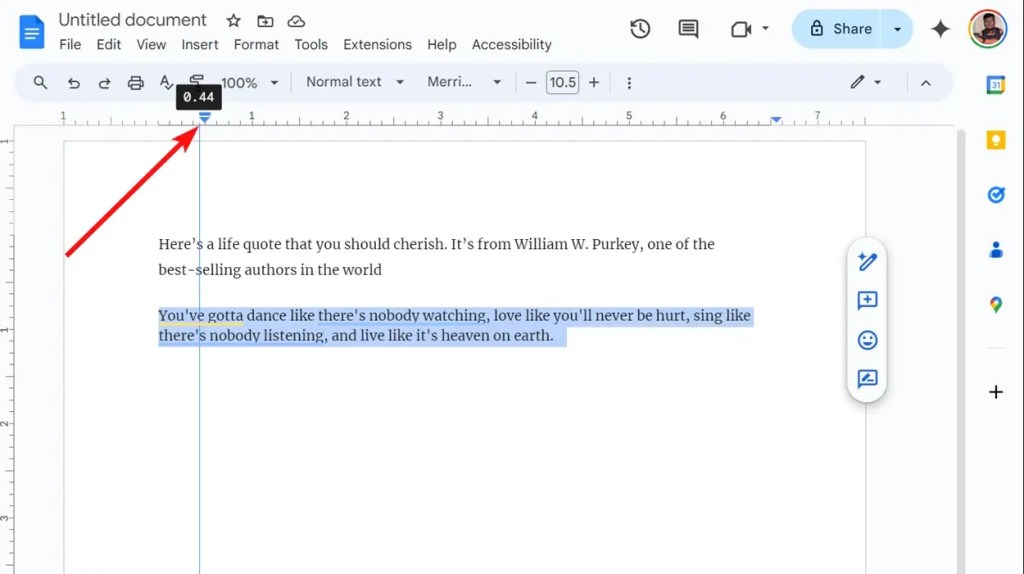
You can also do hanging indent by using the same Ruler tool that’s used to change margins on Google Docs. You cannot do this on a phone but only on PC.
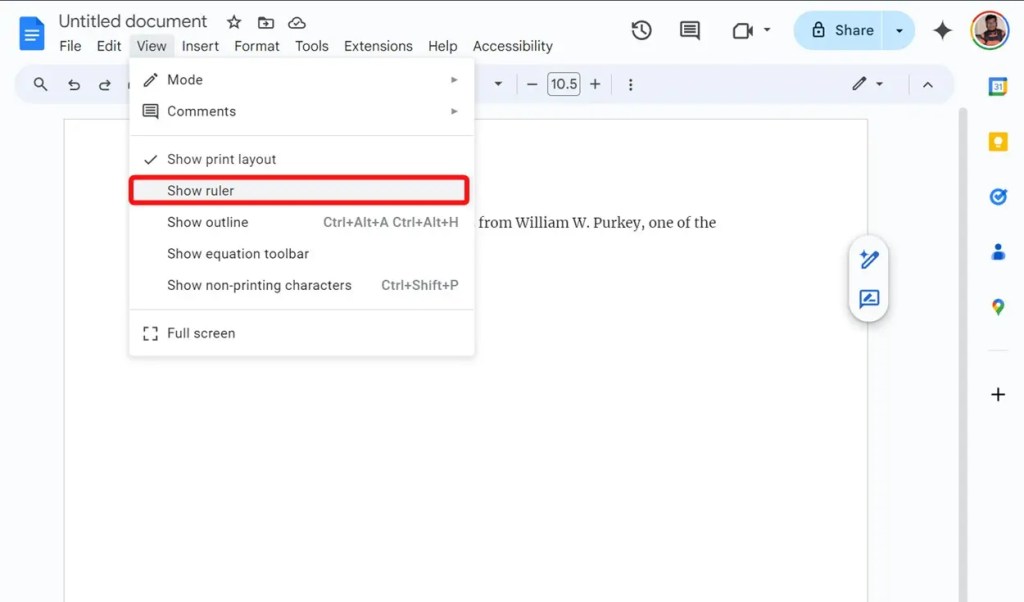
- Open a document inside Google Docs and click on View in the menu bar.
- Click on Show ruler. You should now see ruler numbers on the top and left side.

- Select the text you want to change the indent of by clicking and dragging your cursor.

- Now click on the blue pointer on the ruler and drag to adjust the indent.

Method 3: Do Hanging Indent Using a Keyboard Shortcut
Indentation in Google Docs can also be added via keyboard shortcuts. Here’s how to do it:
- Use the Shift + Enter keyboard shortcut to enter a new line
- Press the Tab key to change the indent and start typing. You can adjust the indent by pressing the Tab key multiple times before starting the sentence.
- Selecting the existing text and pressing the Tab key will change the indent as well.
- You can use the blue pointer above the ruler to adjust the indentation further.
How to Do Hanging Indent on Google Docs App (Android or iPhone)
While the means to do indentation on Google Docs’ phone app isn’t in abundance, fortunately, there’s still one way to do it.
- Launch the Google Docs app and open a document.
- Tap on the Pencil icon at the bottom-right to start editing.
- Tap on the A icon from the top bar to bring up all the text editing options.

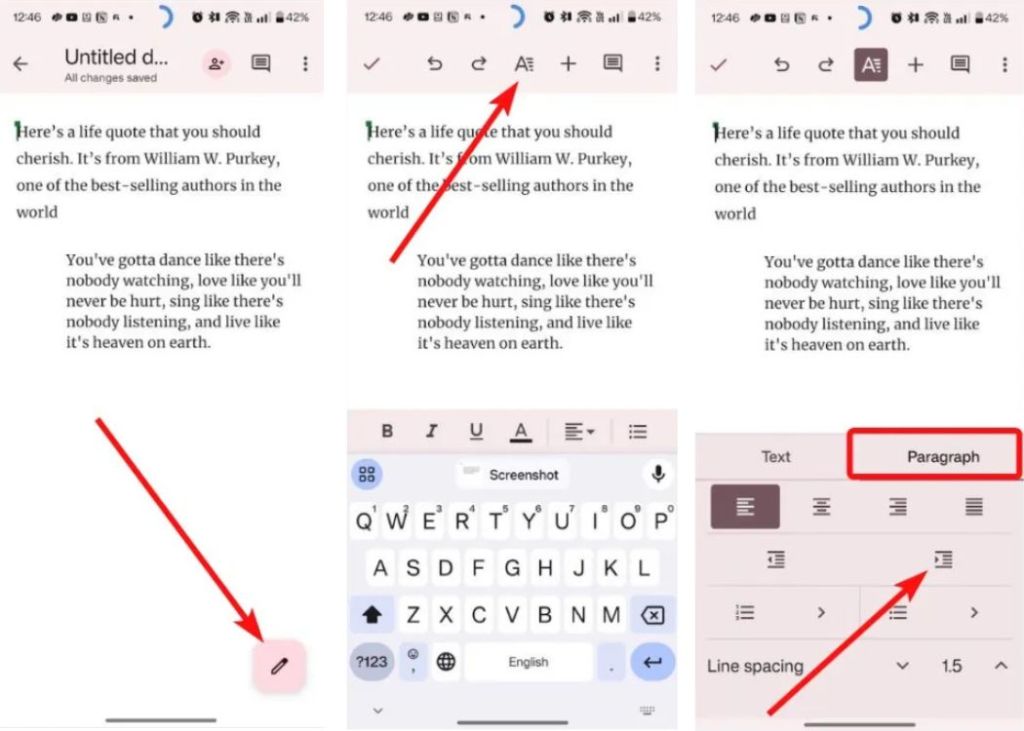
- Go to the Paragraph tap and tap on the indentation options below to move the paragraph to the right or left.
And that’s how you can do a hanging indent in Google Docs. Using the Ruler is by far the easiest way, but the rest are also quite handy. What are some of the most underrated Google Docs features you know that not many know of? Let us know in the comments below.


