- Microsoft now lets you disable or uninstall Windows Recall in just two steps.
- You can also choose to turn off Recall AI from Windows 11 Settings, Registry, or Group Policy Editor.
- In case, you don't want to disable Recall, you can add specific apps and websites to the filter list.
After many months of delay, Microsoft has finally rolled out Recall AI to Copilot+ PCs in the Insider channel. This time, Microsoft has revamped the security model entirely and encrypted the local database in a Secure Enclave. That said, some users don’t want to share their screen with an AI tool, although the processing is done locally. So if you want to disable or uninstall Windows Recall, follow our detailed guide below. I have tested the instructions on Surface Laptop 7.
Uninstall Windows Recall
In September, Microsoft promised that users will be able to uninstall Windows Recall and the new update does let you remove it entirely. Here are the steps you can follow.
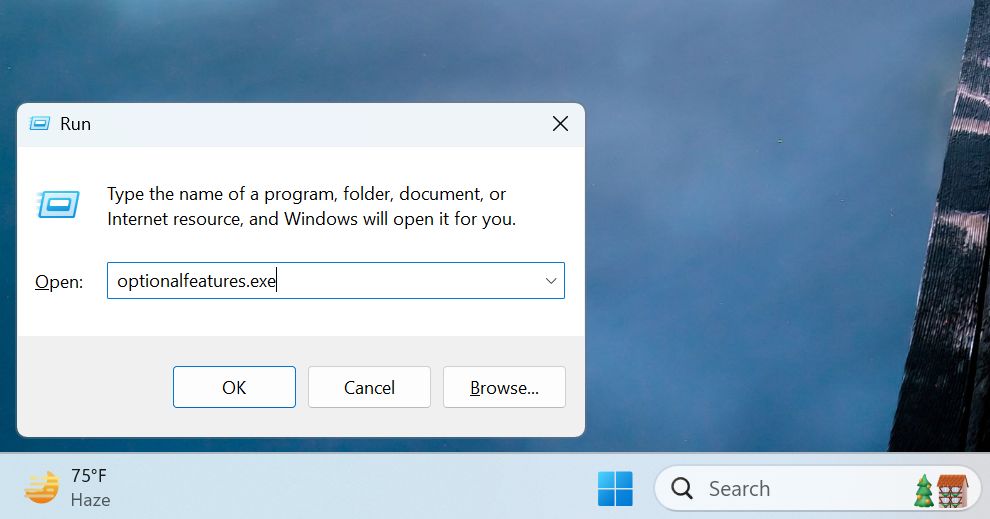
- Press “Windows + R” to open the Run dialog box. Here, type
optionalfeatures.exeand hit Enter.

- Next, in the Windows Features dialog, scroll down and uncheck “Recall.” Now, click “OK.”
- After that, restart your PC and Windows Recall should be uninstalled from your PC.

Disable Windows Recall via Settings
- To turn off Recall on Windows 11, open Windows Settings by pressing “Windows + I“.
- Next, move to “Privacy & security” and click on “Recall & snapshots“.

- Here, simply turn off “Save snapshots”. This will stop Recall from capturing screenshots of your activities.
- You can also delete all Recall snapshots by clicking on the “Delete all” button.

- And if you want to filter out some websites and apps, you can add them to the filter list. This will prevent Recall from saving snapshots on specified apps and websites.

Turn Off Windows Recall via Registry
- You can also fully turn off Windows Recall through the Registry. Open the Start menu and search for “Registry“. Now, open it.

- Next, paste the below address into the Registry’s address bar and hit Enter.
Computer\HKEY_LOCAL_MACHINE\SOFTWARE\Microsoft\PolicyManager\default\WindowsAI\DisableAIDataAnalysis
- Now, double-click on “value” and set the value data as
1. - You are done. Now, restart your Copilot+ PC and Windows Recall should be disabled.

Disable Windows Recall via Group Policy
Finally, you can disable Windows Recall by configuring the Group Policy Editor. While Group Policy is enabled on the Pro edition, for Home edition users, you can follow our tutorial on how to enable Group Policy Editor on Windows 11 Home. After that, follow the below steps.
- Open the Start menu and search for “group policy”. Now, open “Edit group policy“.

- Next, navigate to this path: User Configuration > Administrative Templates > Windows Components > Windows AI.

- Here, double-click on “Turn off Saving Snapshots for Windows”.

- Now, click on “Enabled” and then “Apply” and “OK”. Go ahead and restart your PC and Windows Recall will be disabled right away.

So this is how you can turn off or uninstall Recall AI entirely from your Copilot+ PC. As I have said before, while the Recall feature might be useful to some users, I am not comfortable sharing my screen with an AI tool, no matter if the analysis is done locally or via the cloud. So if you are also on the same boat, you can uninstall Recall AI right away.


