If you often create grocery shopping lists on your iPhone, iOS 17 is going to make your life a lot easier. Among other best features, the latest iOS 17 brings a big improvement to the Reminders app, allowing you to create a grocery list on your iPhone for stress-free shopping. You can keep your items sorted in categories and set priority levels, so you don’t miss out on anything when you visit a store. So, no more multiple visits to a bakery as your bread, pastries, cookies, and other similar items are grouped together. How convenient, right? Moreover, when you have an organized shopping list, you won’t have to spend too much on things you don’t even need. So, go ahead and follow this step-by-step guide on how to create grocery shopping lists in the Reminders app on an iPhone running on iOS 17.
How to Make a Grocery List on iPhone in iOS 17
It’s pretty simple to create a grocery list in the Reminders app. You just have to add a list and populate it with your items. The app will automatically sort your items into categories, and you can even collaborate with your partner or flat buddy to list out what you need from a store. Here are the complete steps to do it:
Step 1: Turn on iCloud for Reminders
As weird as it sounds, Apple says that you need to enable Reminders from iCloud to create a grocery list on iOS 17. Here are the steps for it:
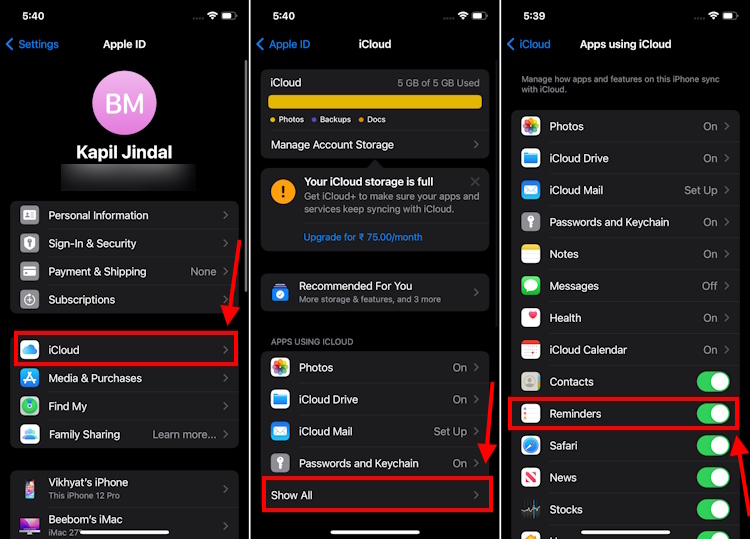
- Head to the Settings app on your iPhone and tap on [Your Name].
- Next up, choose iCloud and tap on “Show All” under the Apps using iCloud section.
- Make sure to turn the toggle on for Reminders.
Step 2: Create a Grocery List
- On your iPhone running iOS 17, open the Reminders app.
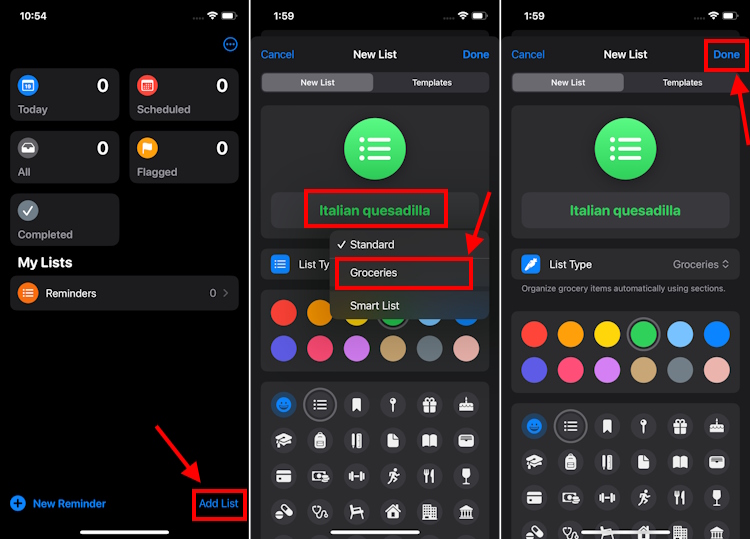
- To create a grocery list on your iPhone, tap on Add List from the bottom-right corner.
- You’ll now see a New List screen. You can set a name and icon for your list.
- Next, tap on List type and choose Groceries. Make sure you do not skip this step, otherwise, the iOS 17 grocery list feature won’t work for you.
- Next up, tap on Done. A grocery list will be created in the Reminders app.
Step 3: Add items to the list
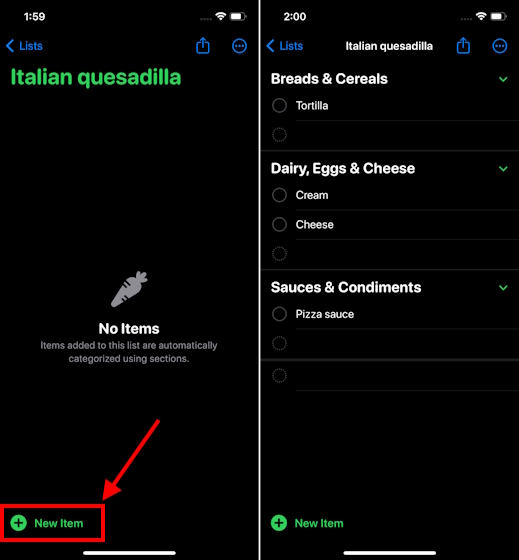
- Once the list has been created, you can add items to the list.
- Tap on New Item from the bottom-left corner and start adding the items. As you populate the list, the Reminders app will start sorting them into categories like Breads & Cereals, Dairy, Eggs & Cheese, and more.
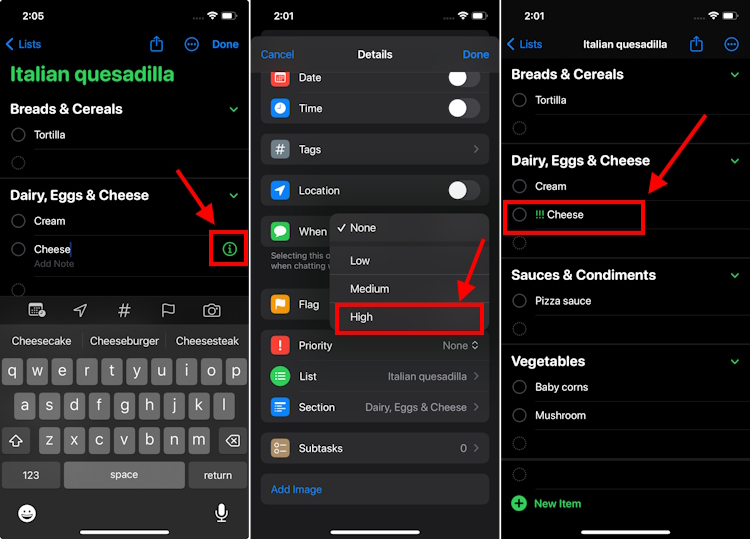
- You can also set a priority for your list item. For this, tap on the item and hit the “i” button. Then, tap on Priority and choose an option from the drop-down menu. When set to high priority, you’ll see three exclamation symbols on the left of the item. For example, if you’re really all out of cheese, mark it as a high priority.
Step 4: Change or create your own category
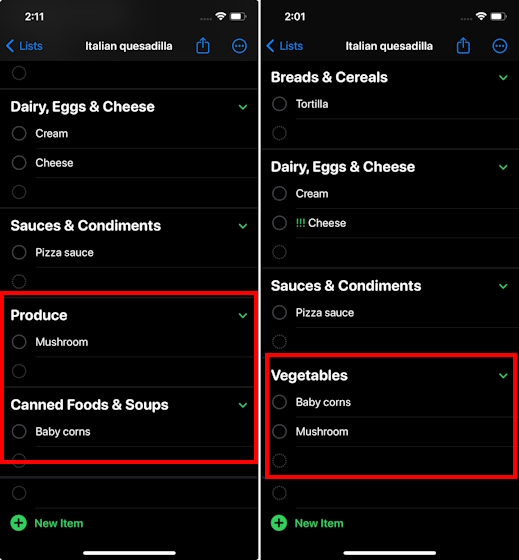
- Usually, the Reminders app does a pretty good job of placing the items under the categories. However, if you don’t like where Reminders places an item, you can change the category or even create a customized one.
- To change the item category, tap on the misplaced item and hit the “i” button. Then, tap on Section. You can choose from the available options in the Other Sections list. If you don’t find the right category, tap on New Section with Selection and create a custom one.

- For instance, we’ve moved Baby corn from “Canned Foods & Soups” to a custom section named “Vegetables” and then dragged Mushrooms to this section to keep all veggies in one place.
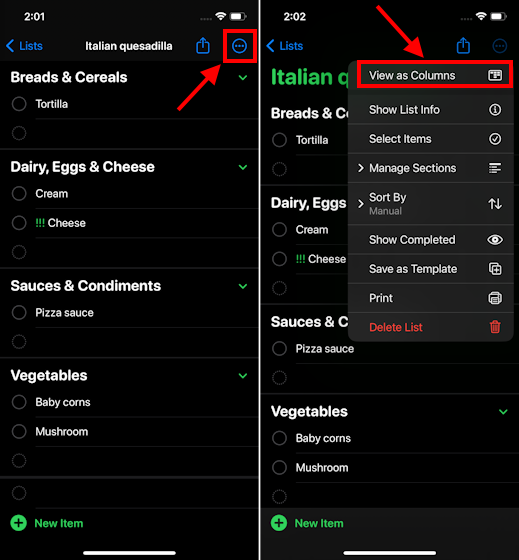
Step 5: Choose a layout
- By default, your items will appear in a list. If you wish, you can view it as columns with all the sections appearing across the screen. It’s helpful when you have a long list. Instead of scrolling down to the bottom, you can swipe to view the complete list.
- For this, tap on the three-dots at the top left corner and choose View as Columns.
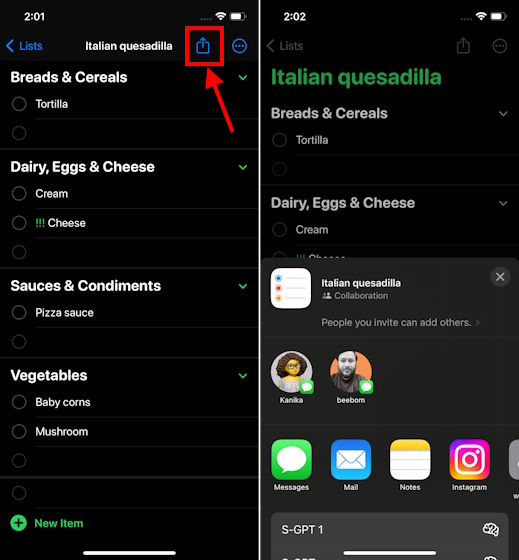
Step 6: Share your grocery shopping list
- If you wish to share your grocery list with someone, say your roommate or spouse, you can quickly do that with a tap.
- Just tap on the Share icon from the top of the screen and choose a contact.
We appreciate iOS 17 for bringing several handy and useful features that can make your life easier. Of course, the Groceries Lists in the Apple Reminders app offers a great way to organize your grocery shopping without going for any third-party app. So, go ahead and plan your daily needs shopping in a much better way.