- You can block emails on Gmail if you feel they have been unnecessarily flooding your inbox.
- On the web browser, navigate to the email on Gmail > 3-dots icon adjacent to the sender's name > Block.
- The process of blocking emails is the same on the Android and iPhone apps for Gmail.
If you are here, you are probably very tired of having those uncountable newsletters and suspicious emails flood your Gmail inbox. In that case, you can simply block these emails and make your Gmail as clean as a hound’s tooth. Additionally, you can also unsubscribe to these emails to stop receiving them or even report fraudulent ones for Google to look into. This article will show you how to go about carrying out these actions as well. With that being said, here’s a complete guide on how to block emails on Gmail.
How to Block Emails on Gmail
Blocking emails on Gmail is as easy as it gets. Here’s how to do it in a web browser on a PC or on Android and iPhone apps.
Method 1: Using the Gmail App (Android and iPhone)
Blocking an email address on Android and iPhone is a piece of cake. The steps are pretty much the same on both Android and iOS. So we’ll be using an Android device for this tutorial.
- Open the Gmail app on your phone and tap on a mail you want to block.
- When the mail opens, tap on the 3-dots icon at the top right.
- Now, select Block from the list of options.

You will now see a gray panel, stating that the sender has been blocked.
Method 2: Block Emails Using Gmail Website
If you prefer using Gmail on a PC, you can use the following steps to block emails from its website.
- Go to Gmail (website) and open an email from the sender who you want to block.
- Click the 3-dots icon beside the reply option.

- From the list of options, select Block.
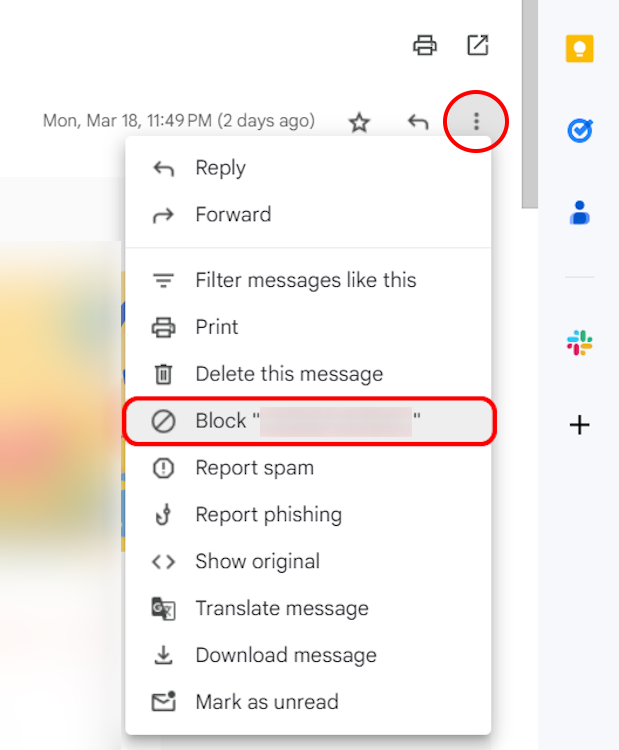
- Click on Block again in the confirmation popup.

Once blocked and marked as spam, you can safely empty your spam folder to free up space in Gmail.
How to Unsubscribe to Emails on Gmail
If you think Blocking the sender is a bit too harsh, you can also choose to unsubscribe to their emails.
Method 1: Using the Gmail App (Android and iPhone)
Here’s how to unsubscribe from emails using the Gmail app to keep your inbox clean.
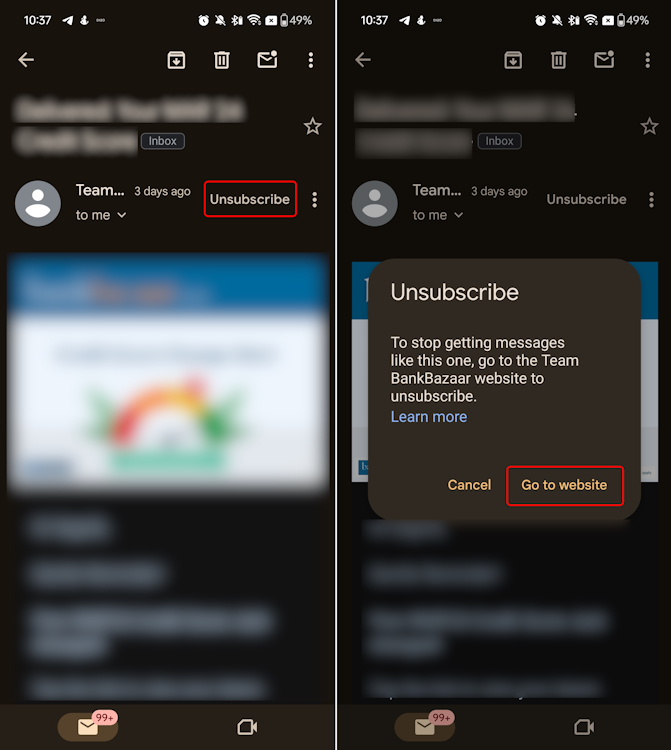
- Open the Gmail app on Android or iPhone and select an email you want to unsubscribe from.
- When it opens, tap on Unsubscribe button right beside the name of the sender.
- When a pop-up box appears, tap on Unsubscribe to confirm.
- If you see the Go to website option instead, tap on it and follow the on-screen instructions to unsubscribe from that particular website.
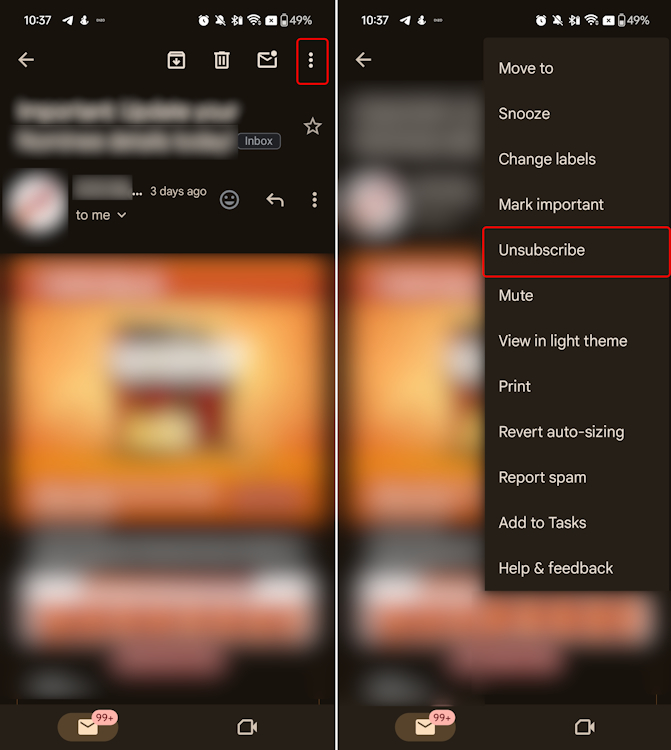
If you don’t see a dedicated Unsubscribe button, tap the 3-dots icon at the top right and tap on Unsubscribe.
Method 2: Unsubscribe to Emails on Gmail Website
You can also use the Gmail website to unsubscribe to emails you don’t want to see in your inbox.
- Open an email from the sender that you want to unsubscribe to.
- Click the Unsubscribe option beside the sender’s name.

- Click Unsubscribe in the confirmation popup. This should instantly unsubscribe you or take you to the sender’s website to unsubscribe.

How to Unblock Emails in Gmail
Blocked email addresses can be unblocked pretty easily on Gmail for web, Android, and iPhone.
Method 1: Using the Gmail App on Android and iPhone
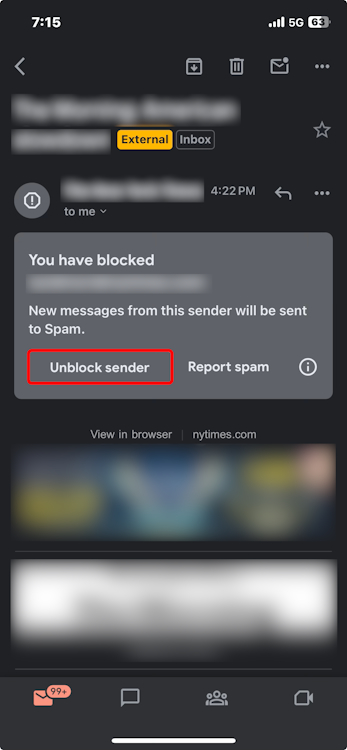
While you cannot unblock email addresses en masse, you can retrace your steps and find the emails from the email addresses you have blocked, manually. Then, as you find and get into these emails, tap on the Unblock sender button to unblock emails from this address.
Method 2: Unblock Emails on Gmail Website
Here’s how you can unblock emails when using Gmail on a PC.
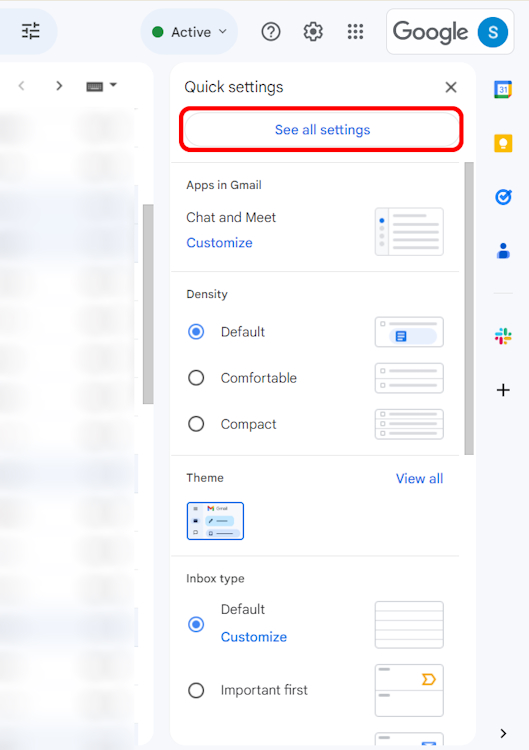
- Head over to Gmail (website) and click on the cogwheel icon near your profile.
- Click See all settings to access more settings.
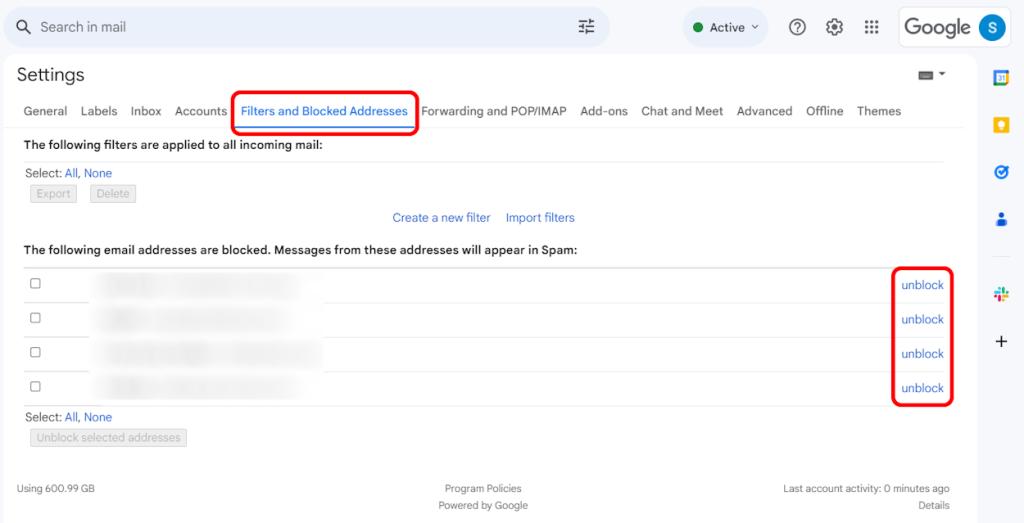
- Go to the Filters and Blocked Addresses tab. You’ll find all the emails you’ve blocked thus far.
- Click the unblock option to unblock an email address.
- Select All beside the select text if you want to unblock all the emails.
- Check the ones you want to unblock and click on Unblock selected addresses.
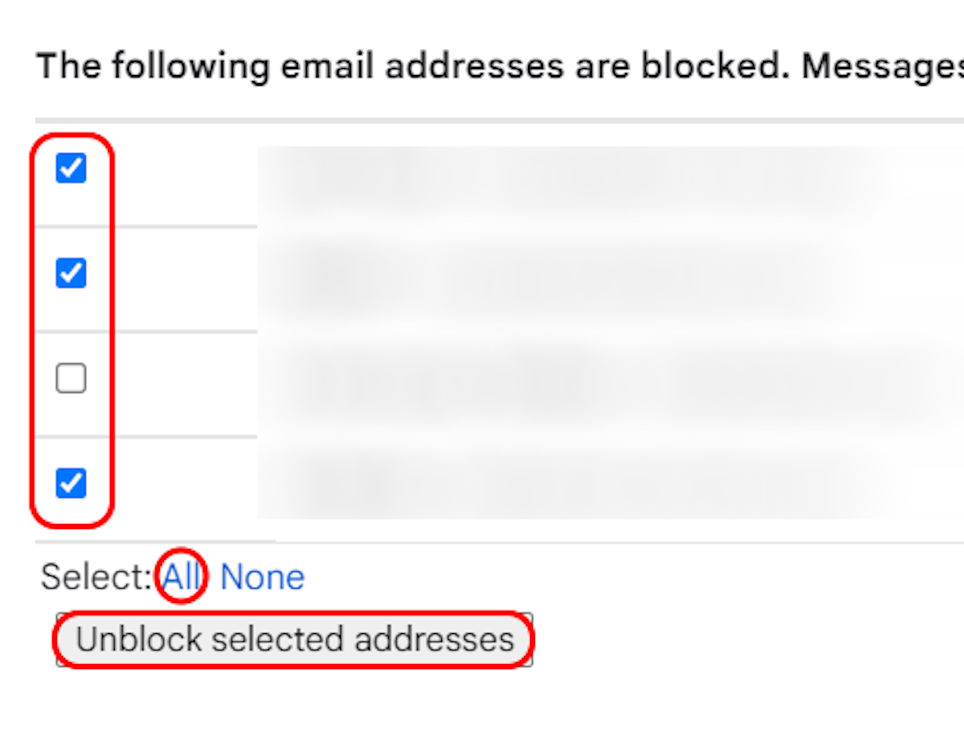
- Click on Unblock one last time to confirm your action.

How to Report Emails in Gmail
There’s no stopping spam emails, but you can report them so that they automatically move to the spam folder. Gmail is pretty good at detecting spam emails, but a few might slip and show up in your inbox. Here’s how to report emails in Gmail.
Method 1: Using Gmail App (Android and iPhone)
To report an email as spam on the Gmail app, you can follow the steps below.
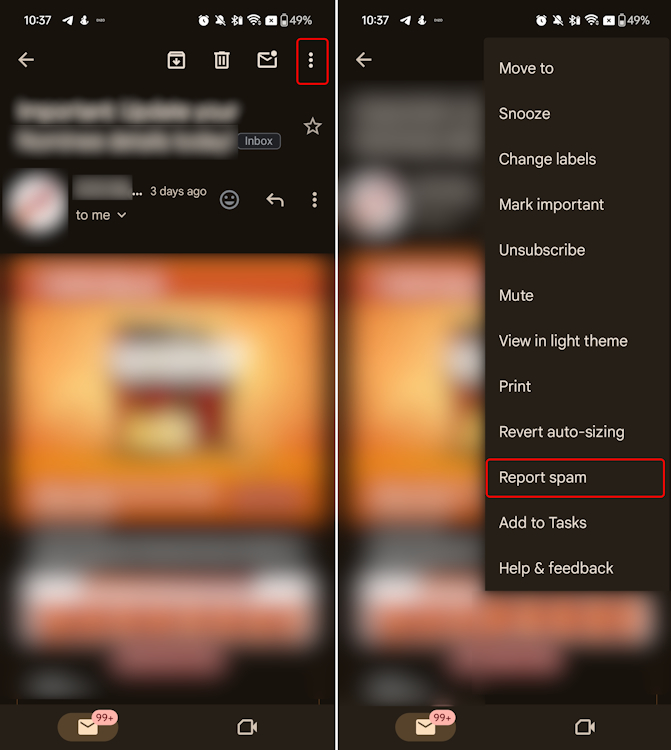
- Open the Gmail app on your phone and tap on an email you want to report.
- When the email opens, tap on the 3-dots icon at the top right.
- From the list of options, select Report spam.
Method 2: Report Emails on Gmail Website
You can report emails on the Gmail website in a similar fashion as on its app. Here’s how to do it.
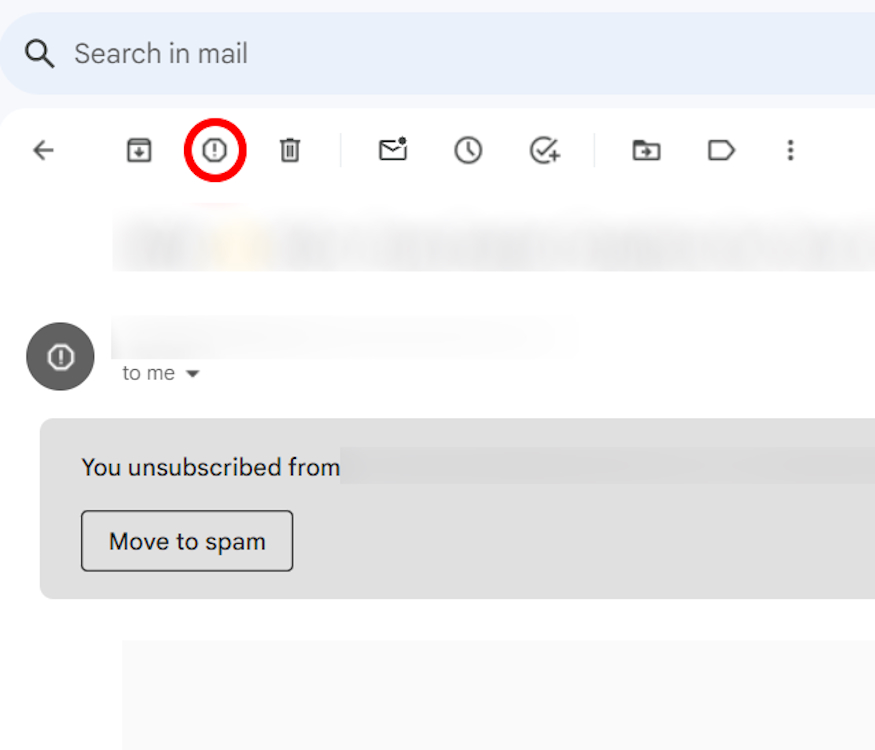
- Open Gmail (website) on a web browser and click on an email you want to report.
- When the selected email opens, click on the Report button (marked by an octagonal icon with an exclamation sign). This will report the email and move it to your Spam folder.
- Besides, you can also report phishing emails by clicking on the 3-dots icon at the top right and selecting Report phishing.
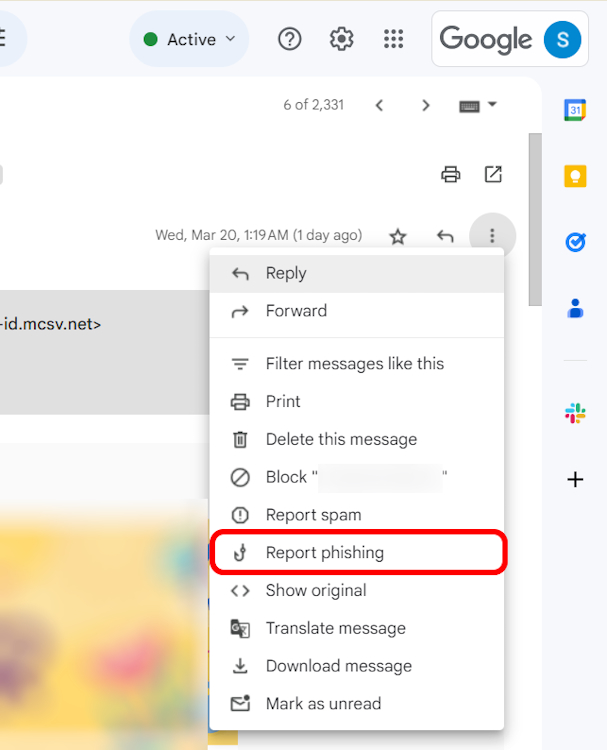
Once you report an email as a phishing attack, it is reported as that and moved to your Spam folder as well.
With that, we have finally reached the end of this guide. I hope this detailed how-to solved all your problems. Now, if you are looking to delete your Gmail account altogether and make a fresh new start, you can check the in-depth interlinked guide for the same. Now, if you have any other related queries or run into any problems, drop a comment down below, and we’ll get back to you.


