
Android Debug Bridge (ADB) is a handy command-line tool that lets developers and enthusiasts tweak various aspects of their Android device from a computer. While you can install ADB on Windows, macOS, Linux, and Chrome OS, there exists a new website dubbed WebADB that lets you use ADB right from the comfort of your web browser. Today, we will be taking a look at how you can use WebADB from your browser.
Run ADB from Your Browser
History of WebADB
WebADB is a website created by XDA member steeltoe. According to steeltoe’s post on XDA forums, the website is based on an open-source project ‘ya-webadb’ by web developer Simon Chan. In other words, WebADB website is essentially a prettier version of the original ‘ya-webadb’ project.
Simon Chan’s WebADB project makes use of WebUSB API that lets browsers communicate with devices over USB. As Chromium-based web browsers support WebUSB by default, it is recommended to use one such as Google Chrome, the new Chromium-based Edge, or Opera.
Since Simon Chan has also launched an online implementation of the project on GitHub, I’ll be using that for demonstration in this article. You can also use WebADB’s website, but I’d recommend using Chan’s version as new features will first appear there.
Features of WebADB
- APK Installation
- Interactive Shell
- Screen Recording
- Scrcpy Screen Mirroring
- Device Information
- File Manager
- Enabling ADB over Wi-Fi
Get Your Android Device Ready for ADB
1. The first step to use ADB is to prepare your device for utilizing it. Hence, you should first activate developer options on your phone. To do so, head to your phone’s ‘About phone’ section in Settings and tap on ‘Build number’ seven times.


2. You will now see a new ‘Developer options’ section in your phone’s settings. While the option usually resides in Settings -> Developer options, it is likely to vary based on your device OEM. On OnePlus phones, you will find the new Developer options in Settings -> System -> Developer options. From Developer options, you will have to enable USB debugging. Your phone is now ready to interact with WebADB from your web browser.

Get Your PC Ready for ADB
If you’re planning to use WebADB from a Windows PC, you should enable a feature flag. The flag in question is ‘Enable new USB backend’. From the looks of it, this flag is likely to make its way to our list of best Chrome flags.
1. Open Google Chrome (or any other Chromium browser of your choice) and visit chrome://flags. This might vary based on the browser you’re using. For instance, the URL to access the flags page on Microsoft Edge is ‘edge://flags’.
2. From this page, search for ‘Enable new USB backend’ and choose ‘Enabled’ from the dropdown list. Alternatively, you can paste the below URL in your browser’s address bar to directly access it.
chrome://flags/#new-usb-backend


3. After enabling the flag, do not forget to restart the browser. Once you’ve done that, you’re all set to use WebADB from your web browser. As mentioned earlier, make sure you’re using a Chromium-based web browser.
Connect Your Phone to WebADB
Now that your phone and PC are ready to use ADB, let’s get to the execution part. This section will walk you through the setup process on the browser end and how you can use the tool from the browser.
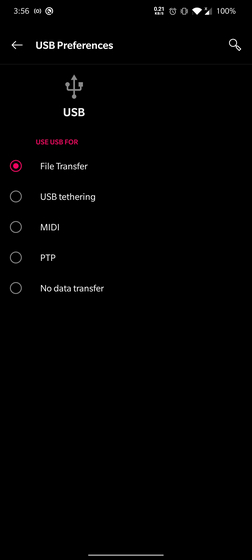
1. Plug your smartphone into your computer using a USB cable. When the prompt appears, set the USB preference to ‘File Transfer’ mode.

2. Open WebADB’s website and click on the ‘Add device’ button. If you’ve connected multiple Android devices to your computer, choose the right one from the list of available devices.

3. After choosing the right device, click on ‘Connect’ to start using WebADB from your browser. On this page, your device may show up with the entire name or just the model number.

4. Soon after you click the Connect button, a prompt will appear in your Android phone urging you to allow USB debugging access. If you’re planning to use WebADB quite often, do not forget to check the ‘Always allow from this computer’ checkbox. You can start using WebADB after granting access.

Run ADB from Your Browser
As you can see below, I can now access my phone’s file manager, install apps, run ADB shell commands, capture screenshots, and more without having a full-fledged installation of ADB on my computer. You can switch between various features from the left side menu on the website.

Another aspect worth pointing out is that you can enable ADB over Wi-Fi from this tool. However, the tool doesn’t work with wireless ADB just yet. As a result, your device will disconnect from the tool after you enable ADB over Wi-Fi.

Access ADB from Chrome, Edge, and Opera
You can do a lot of cool things on your Android device using ADB. Having access to tools like WebADB will help you make quick actions on the go. In my opinion, this will be convenient at times when you don’t have access to your primary productivity machine. So, will you consider using WebADB over a traditional ADB installation? Do not forget to share your thoughts with us in the comments.

