- You can install Minecraft mods in different ways, using popular methods like the NeoForge and the CurseForge apps.
- To install mods using CurseForge, create a new custom profile, add mods to it, and click on the Play button.
- Using the NeoForge installation, you can download mods and drag and drop their files into the mods folder.
Installing Minecraft mods is one of the best ways to transform your gameplay experience. Whether you like creating structures in the vanilla game or molding the game according to your needs using Mods, Minecraft allows both of them. Moreover, there are endless possibilities when it comes to using mods in the game. If you are looking for ways to do this on your own, you’re in the right place. This guide will teach you all the steps to install Minecraft mods using various methods. So, with that, let’s begin.
What are Minecraft Mods?
Minecraft mods are just files, or in a simpler way, modifications created by the community that can change and expand your gameplay experience. These mods change or tweak the Minecraft game code to achieve this. And, to do this smoothly, there are mod-loaders that you can download, like Forge or Fabric.
Mods can give a customized Minecraft world, include features that never existed, improve the graphics and performance, change the mechanics, and even add new mobs, tools, biomes, or dimensions. There are various types of mods available all over the internet; however, you must download them from trusted sites so that it doesn’t break your system. So, keep reading below to know the easy and safe ways to install Minecraft mods.
How to Install Mods in Minecraft
It can be overwhelming at first to know how to install the right and safe mod from a huge ocean full of Minecraft mod websites. But the process is actually straightforward, once you understand the tools involved. Given below are a couple of safe methods and sites that you can trust for installing the Minecraft mods and start customizing the world as you like:
Method 1: Install Mods Using CurseForge
Curseforge is a mod loader for Minecraft and works in a similar way to Fabric, Forge, or NeoForge loaders. After you install the CurseForge app, you should create a Minecraft modding folder. While this is explained in our guide, we’ll also cover it here. If you’re ready to add some mods and Minecraft Modpacks right away, feel free to skip the first two steps.
- To get started, click on Minecraft from the home screen of the CurseForge app.
- Then, choose either the “Standard” or “Advanced” folder. The recommended one is Standard; select it. After that, click on the “Continue” button.

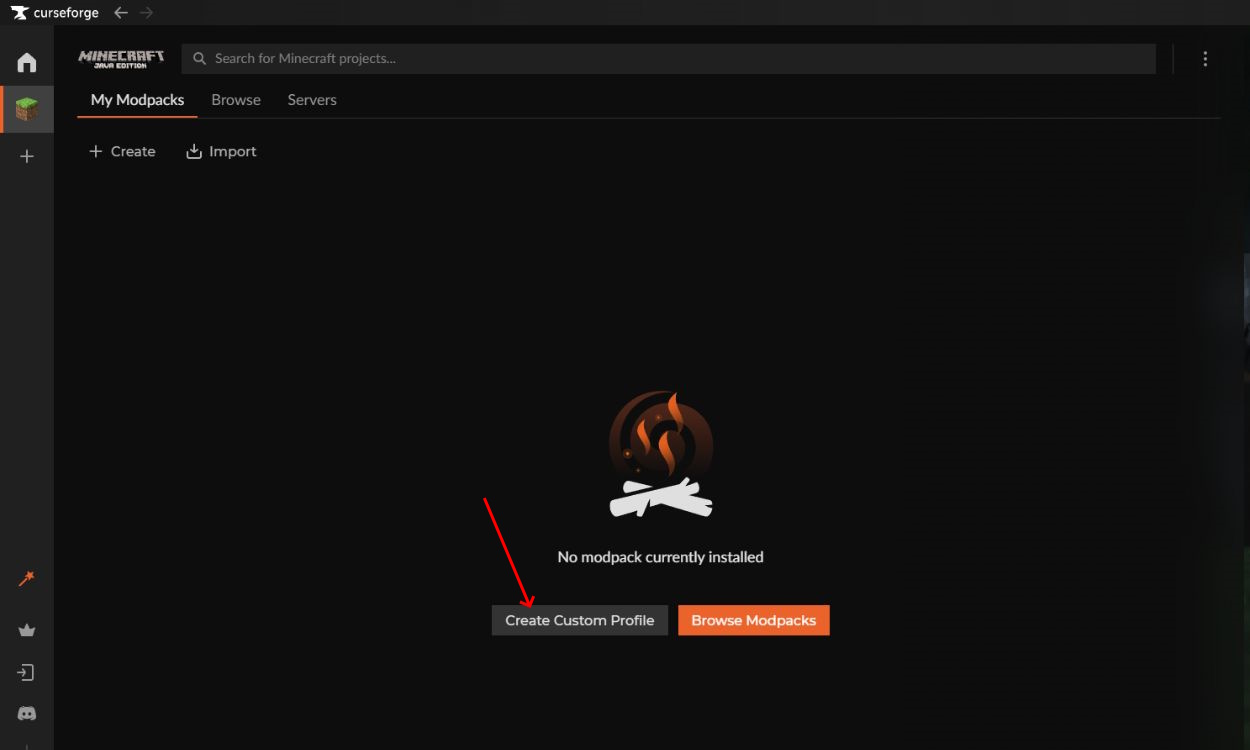
- You can now start adding. You may do so by browsing for mods and modpacks or by creating a custom profile. All the steps essentially lead to you making a new profile.
- Click on the “Create Custom Profile” button at the top right corner. This is the folder where you will store your mods.
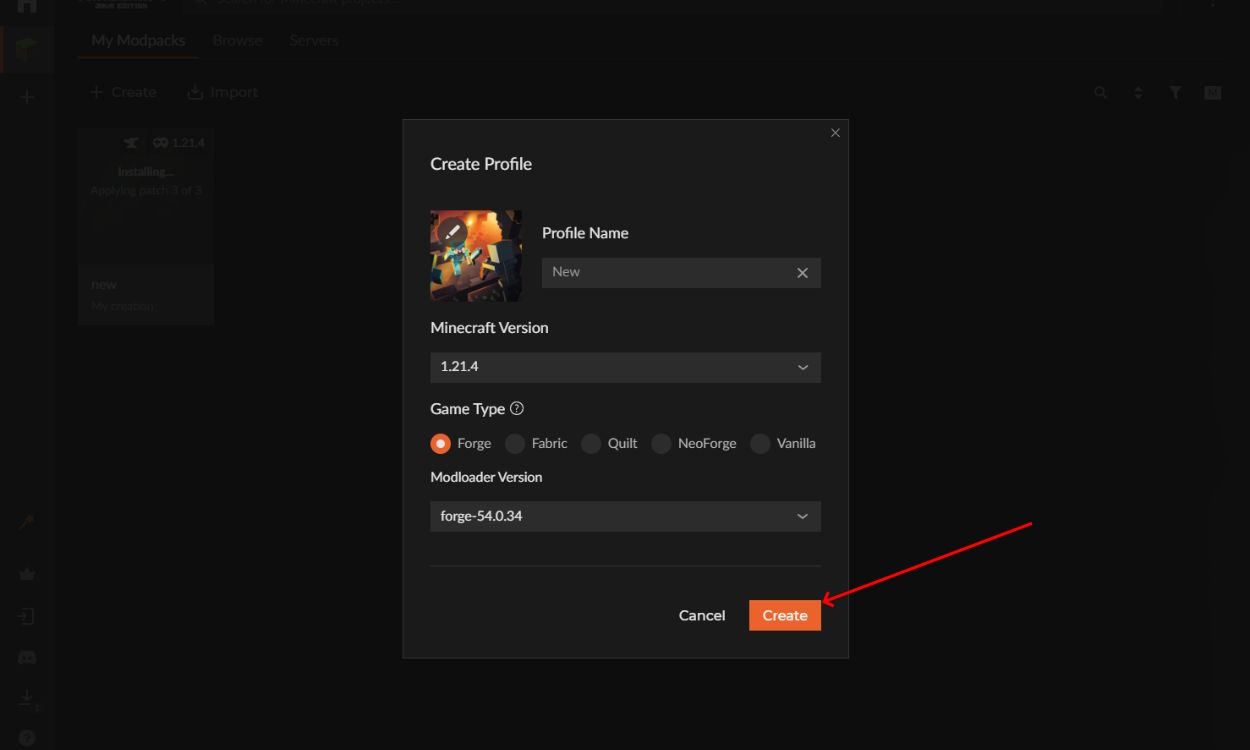
- In the pop-up box, select the Minecraft version, game type, and mod loader version. Later, ensure that you download all your mods using the same settings as chosen here.
- You may also choose to install a modpack from the Browse tab, which will create a brand-new profile as well. However, you cannot really customize it further.

- Next, you should name your new profile and select the Minecraft version for which you want to install the mods.
- Depending on the mod you want to install, make sure your game type is Forge, Fabric, or NeoForge. It’s best to use the latest version of the mod loaders, as they are usually backward compatible.
- Once everything is in order, click on the “Create” button.
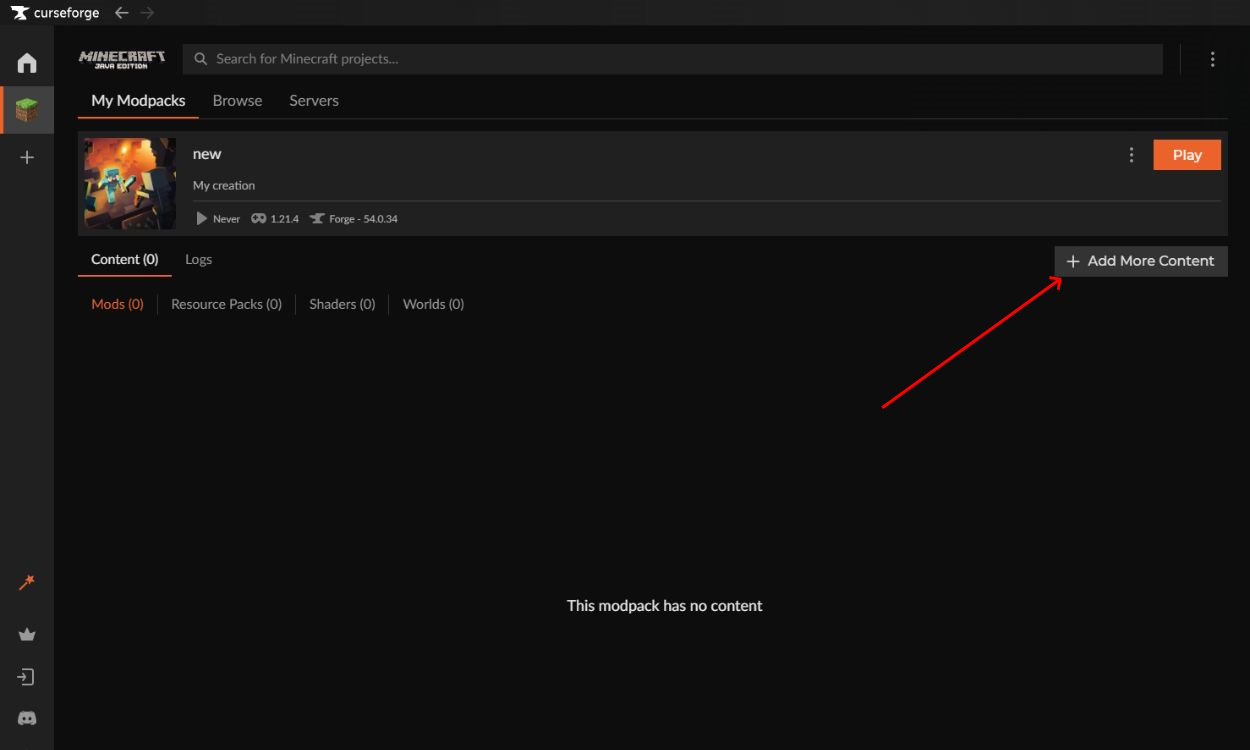
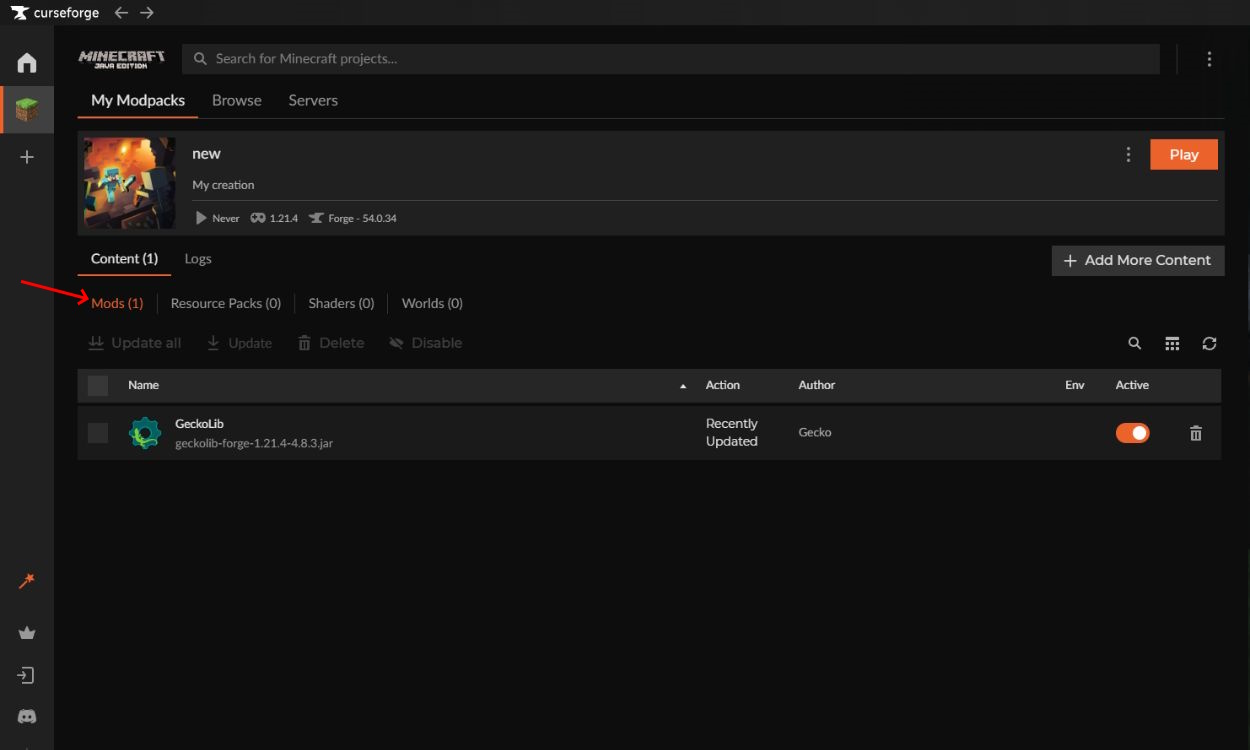
- Once your profile is ready, it will appear in the “My Modpacks” section. Click on its icon to edit it.
- Then, click on the “Add More Content” button to install a new mod in Minecraft with CurseForge.
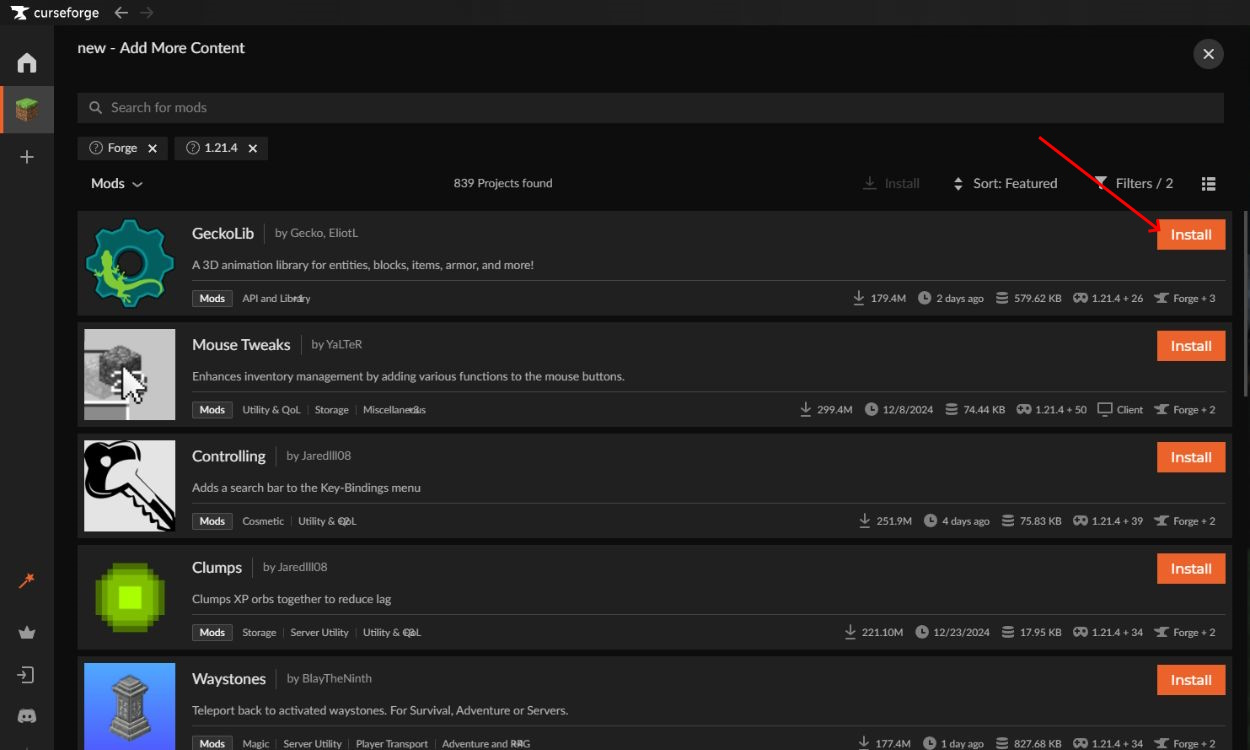
- Depending on your game’s version, CurseForge will show you a few mod options to install. You can also use the search option to look for a particular mod. Once you find the mod you want to install, click the “Install” button.
- Once the mod has been installed, it will show up in the “Mods” section of your CurseForge profile. You can add more mods in the same manner and even disable them in your profile.
CurseForge allows you to create multiple profiles in the app. You can use each profile to install a specific set of mods, texture packs, and maps. They will work independently of each other, and you can use them to run different versions of the game, too. The only catch here is that you have to launch modded Minecraft from the CurseForge app for each profile to come into action.
Also, note that deleting your profile in CurseForge will delete your saved worlds, mods, and other customizations. So, keep a backup of your “saves” folder from the Minecraft directory.
Method 1.1: Run Minecraft Mods Using CurseForge
Once you install Minecraft mods, follow these steps to run them in your system:
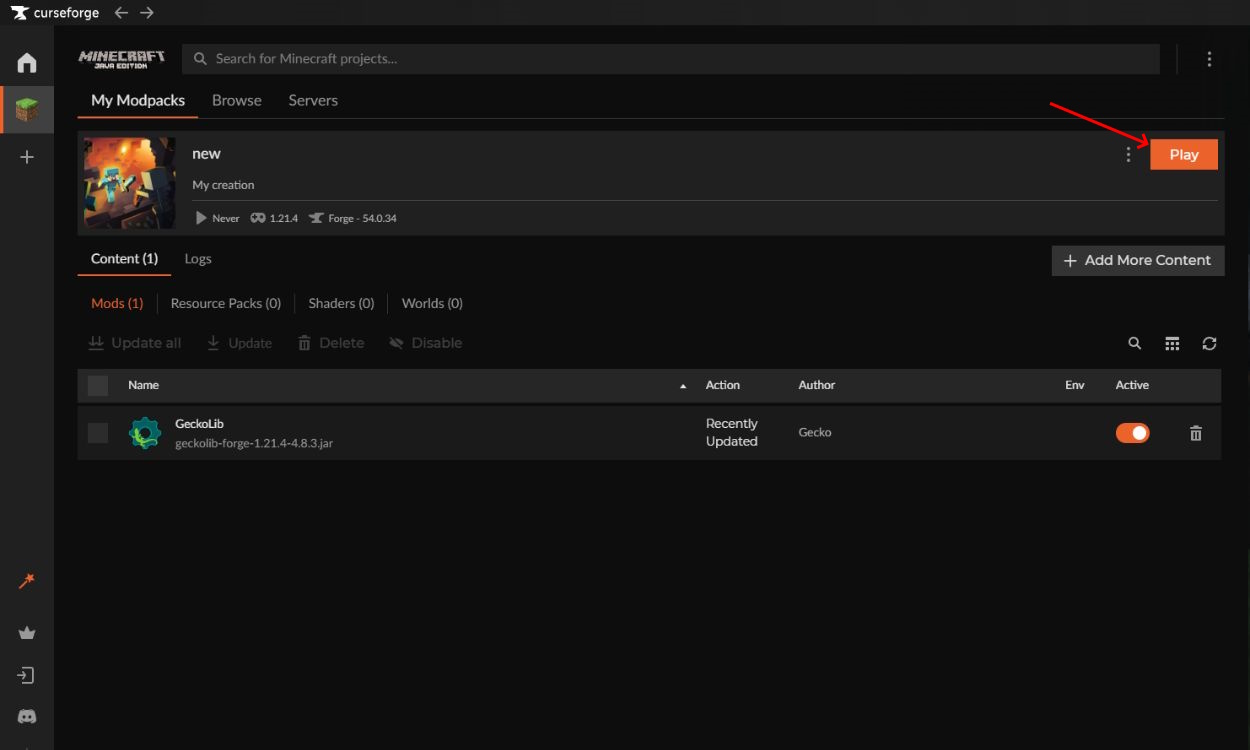
- First, go to your CurseForge profile, where you have installed some mods, and click on the “Play” button.
- Then, CurseForge will automatically launch your Minecraft launcher and cause it to download mods.
- You can see a new profile in your launcher’s Java section when the process is complete. Make sure that the modded profile is selected, and click on the “Play” button.
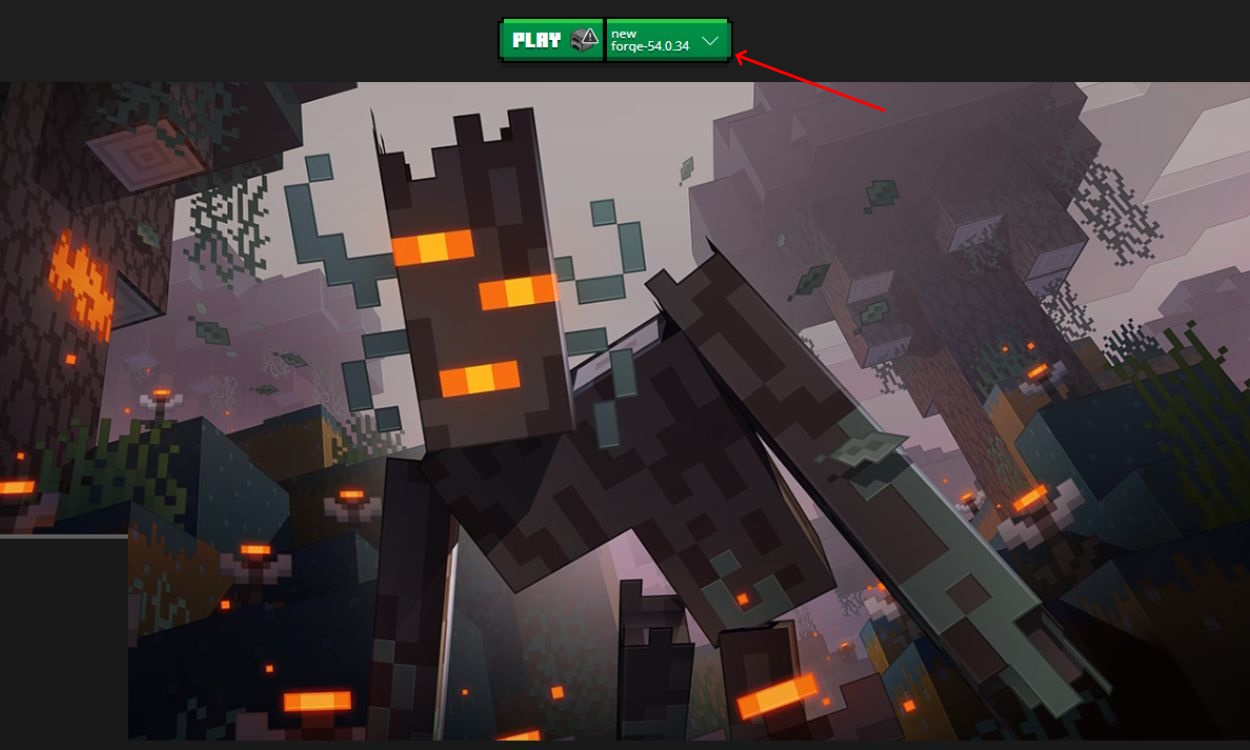
- Finally, the launcher will warn you about the potential experimental nature of your modded profile. Check the “I understand the risks” checkbox and click on the “Play” button to launch the game.

Method 2: Install Mods Using NeoForge
Note:
Before you install any mods, just make sure to back up any worlds you want to affect. If anything should go wrong in the process, the working backups of your worlds will remain safe on your hard disk.
Now, let’s take a look at how you can install mods using the NeoForge Java software. This is a manual method of installing mods, meaning you must keep track of their compatibility and version. It’s also very simple, just like using the CurseForge app. So, let’s see how to install mods with NeoForge in Minecraft.
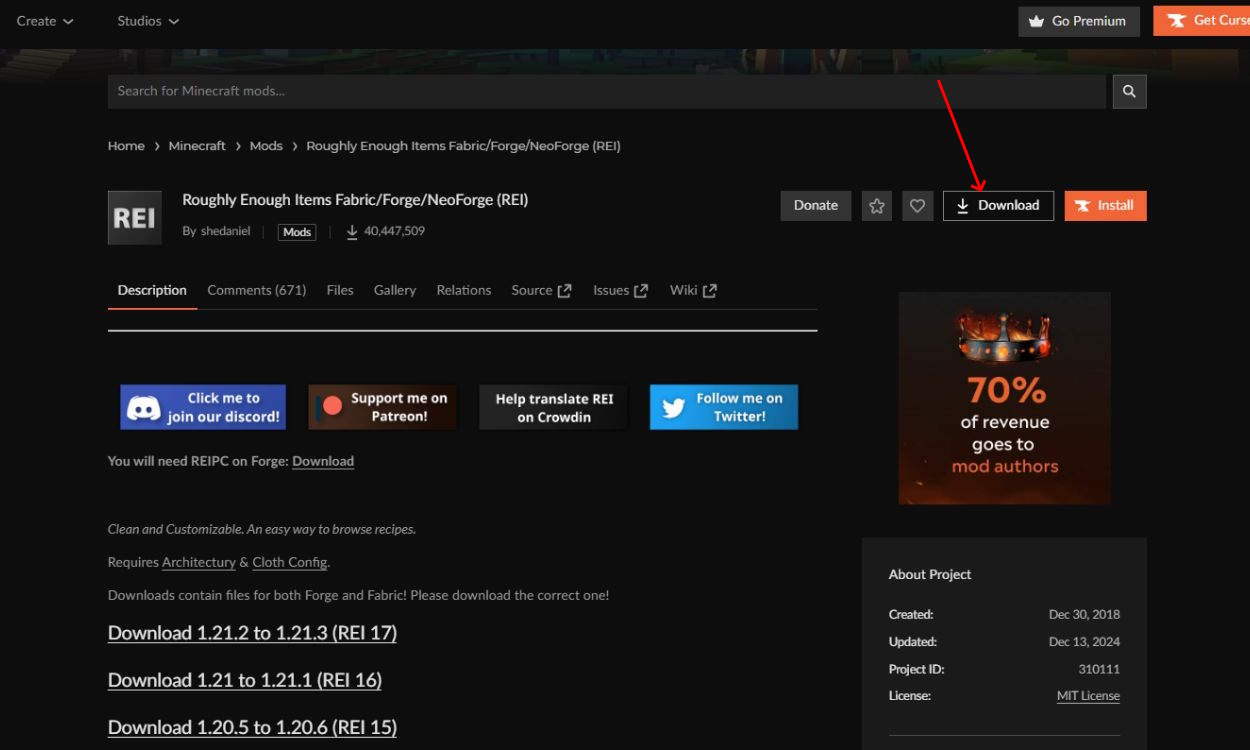
- First, visit the website that provides access to a library of different mods, such as the CurseForge website.
- Then, choose a mod you want to play with. Ensure it is made for the same Minecraft version as your NeoForge installation.
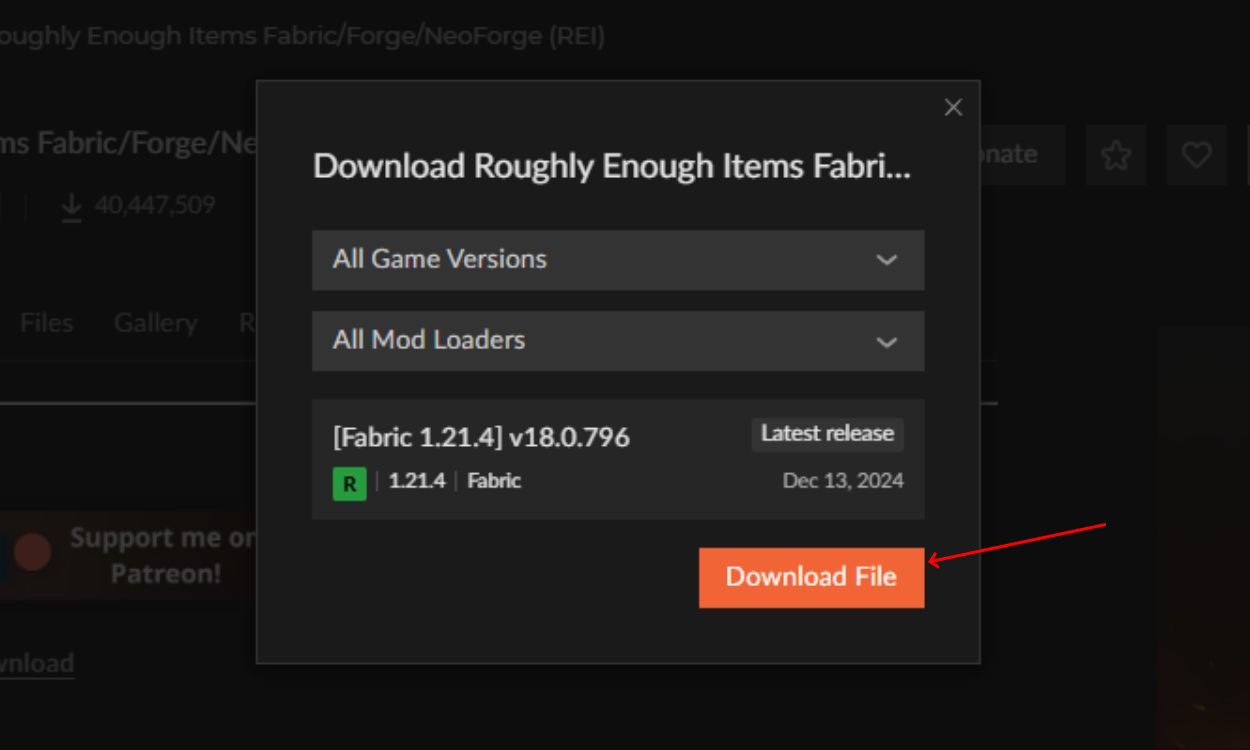
- Select the mod you want and click the “Download” button in the right corner.
- You’ll be able to choose the available game version that is compatible with NeoForge. Also, don’t forget to select NeoForge in the bottom drop-down menu. Then, click on the “Download File” button.
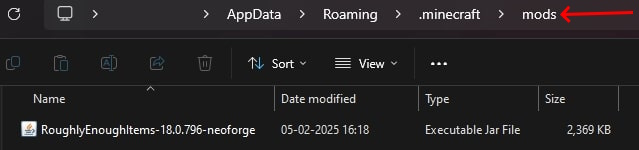
- Once the file is downloaded, you should open the .minecraft folder. Insert the following text in the Run app to find it easily: %appdata%\.minecraft
- Now, open the “mods” folder inside the Minecraft folder. If it doesn’t exist, you can just create it. All you need to do then is to drag and drop the downloaded mod file from the Downloads folder into this mods folder.
- After that, simply load the Minecraft launcher, select the NeoForge installation and click on the “Play” button.
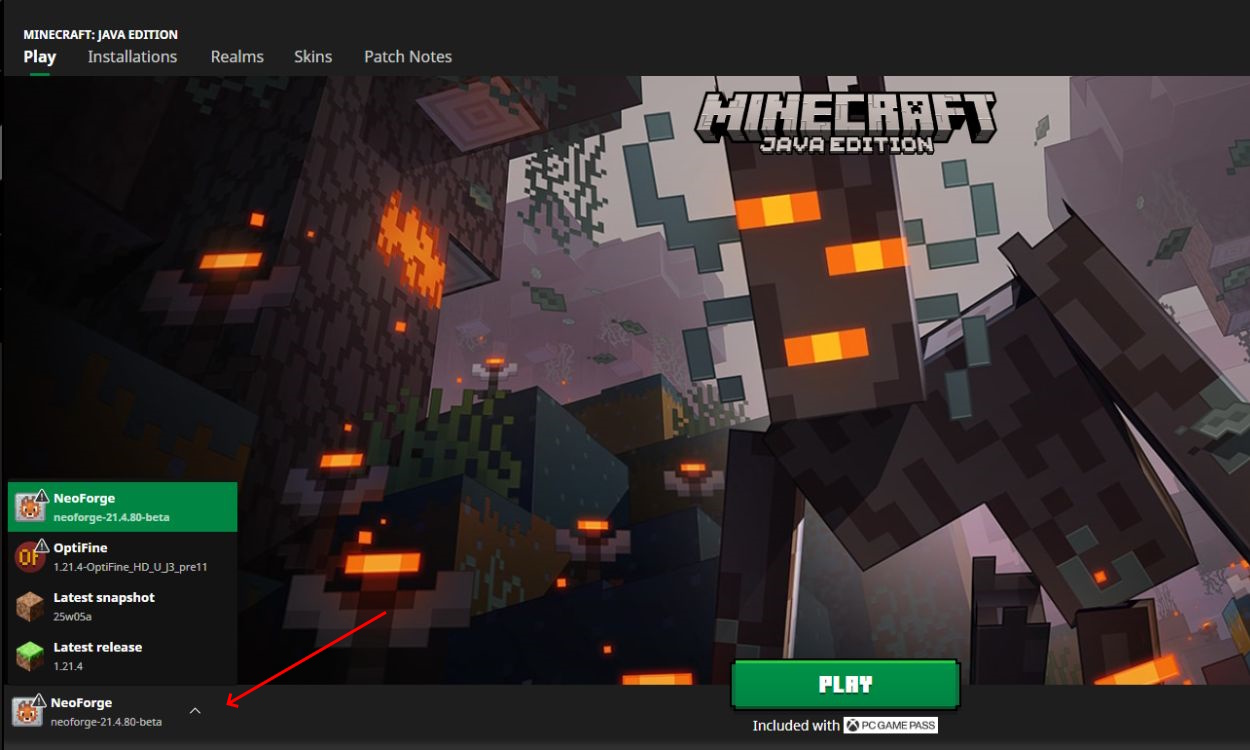
- Once you load the world, the mod should be ready for use. You can have multiple mod files in the mods folder, but just make sure they are available for the NeoForge version.
Best Alternative Tools to Install Minecraft Mods
Installing mods is not just limited to using the Curseforge software or NeoForge. If you want more flexibility, here are some alternative tools that help to install Minecraft mods:
- Modrinth: Modrinth is a clean and lightweight site, where you can find tons of mods, modpacks, and shaders that handle dependencies automatically. Installing mods works in a similar way as described in the second method. Once you find the mod, download it depending on the game version and platform. Add it to the mods library and launch the game to enjoy the mod.
- Prism Launcher: Prism Launcher is a software similar to CurseForge, and is known for it user friendly features. Simply make an instance of the Minecraft version you have, choose the mod, and the mod-loader. Hit install, and all the required files will be downloaded into the game. You can later launch Minecraft to play the modded world.
- Install Using Forge: Forge has been the most widely used mod-loader for decades, and is especially known to handle the heavy-duty mods. From either CurseForge or Modrinth, you can search for the mod you want, then install it by selecting the Forge option. But ensure that you have this mod-loader already installed to run the mod.
- Install Using Fabric: Lastly, Fabric is a mod-loader known to handle game optimizations and adding quality of life features. If you find a similar mod on CurseForge or Modrinth, hit the install button by selecting the Fabric option. However, you must have this loader installed in your system to run those mods.
And now you know how to install Minecraft mods using NeoForge and CurseForge. The only thing left to do is to go out and find the best Minecraft mods. Will you use the CurseForge app or manually download and run mods with NeoForge? Let us know in the comments below!
The “mods” folder appears in the .minecraft main folder. You can access it inside the AppData’s Roaming folder. If you don’t see it, you can simply create a new folder and call it “mods.”
CurseForge is a giant library of mods, so you can expect these mods to be both safe and harmful. That’s why you should stick to the more popular mods or mods that have lots of downloads. Though the CurseForge team works really hard to keep the platform safe for everyone.