For the past many years, Microsoft has been putting effort into improving Windows 11’s security. With the latest Windows 11 version 24H2 update, Microsoft finally started enabling BitLocker aka Device Encryption, by default. BitLocker encrypts the entire drive so that even if the PC is lost or stolen, the data can’t be extracted without the BitLocker recovery key.
Microsoft even relaxed some of the hardware requirements, such as HSTI, Modern Standby, and DMA, to bring Device Encryption to more PCs. That said, BitLocker is only enabled by default on a clean installation of Windows 11 24H2, and if you are signed in with a Microsoft account. In addition, if you have bought a new PC with version 24H2 installed, BitLocker encryption is enabled by default by the manufacturer.
While Device Encryption is indeed a valuable security feature to protect user data, the lack of clear communication from Microsoft around BitLocker’s automatic activation is creating a huge problem. It turns out BitLocker is locking out many Windows 11 users, and they are unable to access their PCs.
Many users on Reddit and the Microsoft Community report that they are unaware of BitLocker encryption and are finding themselves locked out of their PCs. If you are also facing the same issue, here is how you can retrieve the BitLocker recovery key and recover your Windows 11 PC.
Find Your BitLocker Recovery Key
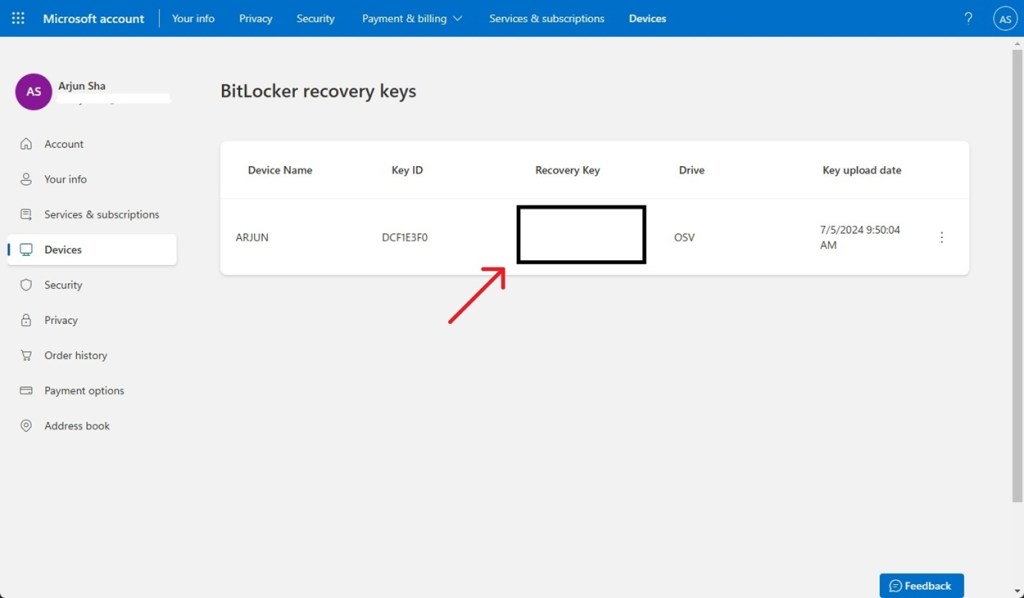
Microsoft automatically saves the BitLocker recovery key to your Microsoft account. You need to find that Microsoft account and follow the guide below to recover the key.
- First off, head to account.microsoft.com/devices/recoverykey and sign in with the same Microsoft account that was used on your PC.
- If you are unaware of the Microsoft account, you may have signed in with your work or school account. Use that account to sign in.
- In case you used a Gmail or another non-Microsoft account, use that email address to sign in. Microsoft automatically creates an account with the same email address.
- Finally, you can copy the 48-digit BitLocker recovery key from here and sign in without any issues.

If you can’t find the recovery key, unfortunately, there is no easy way to recover your files. You can try our tutorial on how to bypass the BitLocker recovery screen. If that doesn’t work, you need to clean install Windows 11, but note that it will wipe out all your data.
Turn Off BitLocker Device Encryption on Windows 11
If you want to disable BitLocker encryption, you can follow the steps below for both Windows 11 Home and Pro editions.
- On Windows 11 Home, press “Windows + I” to open Windows Settings.
- Now, head to Privacy & Security > Device Encryption. Here, turn off the toggle.


- On Windows 11 Pro, launch the Start menu and search “Manage BitLocker”. Now, open it.
- Here, turn off BitLocker, and you are done.


Prevent Automatic BitLocker Encryption During Windows 11 Installation
If you want to prevent automatic BitLocker/Device encryption during Windows 11 installation, you can do so through the Registry Editor. Here are the steps to follow.
- On the Windows 11 installation screen, press “Shift + F10” to open Command Prompt.
- Type
regeditand hit Enter to open the Registry Editor. - Next, move to the path mentioned below.
Computer\HKEY_LOCAL_MACHINE\SYSTEM\CurrentControlSet\Control\BitLocker
- Now, right-click on the space in the right pane and create a DWORD (32-bit) Value.
- Name it
PreventDeviceEncryptionand open it. - Set the value data
1and save it.


Now, close the Registry Editor and Command Prompt windows, and complete the onboarding process. Your Windows 11 PC will not be encrypted by default. So these are some of the ways you can prevent BitLocker encryption from locking you out of your PC. It’s always recommended to save the BitLocker recovery key on a piece of paper to avoid such issues in the future.