- The Virtual Memory feature on Windows 11 stores frequently accessed data on your PC's storage drive to quickly recall it, resulting in better performance.
- You can manage virtual memory by going to System info > Advanced Settings > Performance tab.
- Alternatively, you can use the WMIC utility to do the same via the Command Prompt.
The Virtual Memory feature on Windows 11, just like on today’s smartphones with expandable virtual RAM, stores frequently accessed data on your PC’s storage drive to quickly recall it, giving your PC a decent boost in performance if it’s struggling to keep up. While Windows has the ability to automatically increase and reduce the paging size, manually changing it in case of significant performance drops is better. Windows easily allows you to manage virtual memory, and here’s how to do it.
Manage Virtual Memory on Windows 11
There are a couple of ways you can manage virtual memory on Windows 11. The easiest way to do it is via the Settings app, but you can also get it done with specific commands on the Command Prompt.
Method 1: Increase Virtual Memory Using Windows 11 Settings
- Launch Windows Settings and go to System > About.
- Here, click on Advanced system settings and go to the Advanced tab.
- Click on Settings under “Performance”.
- Go to the Advanced tab yet again.
- Inside the “Virtual memory” section, click on Change.


- Uncheck the Automatically manage paging file size for all drives box.
- Choose a drive you want to borrow memory from and click Custom size.
- Enter desired values inside Initial size and Maximum size. We recommend an initial size of the size of your RAM and a Maximum size of double the size of your RAM.
- Once done, click OK.
- Finally, restart your Windows PC. The paging and virtual memory settings should be changed and live.


Method 2: Manage Virtual Memory Using Terminal
The Windows Management Instrumentation Command can be used to change the paging to manual and the allocated memory from the storage drive.
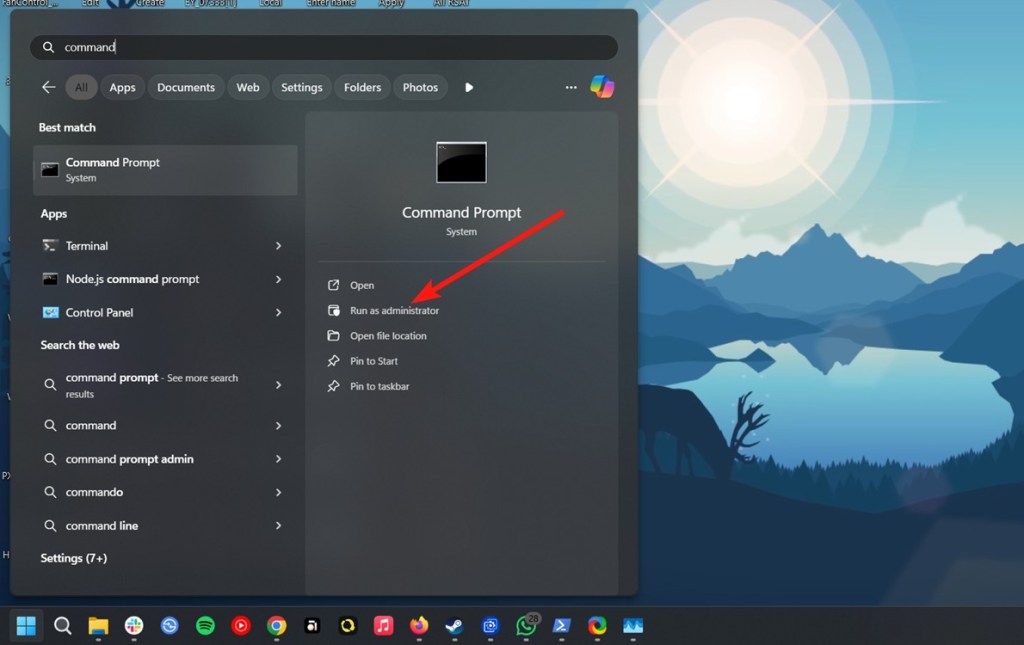
- Launch the Command Prompt using the Run as Administrator option.
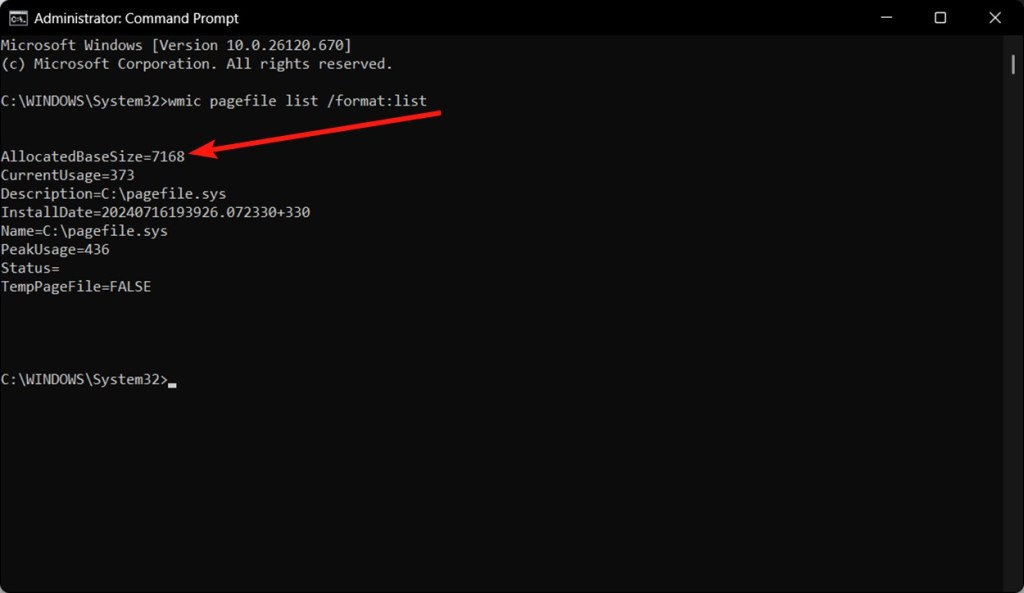
- Execute the following command to show the current paging and virtual memory details.
wmic pagefile list /format:list- The AllocatedBaseSize value is your current virtual memory in Megabytes.
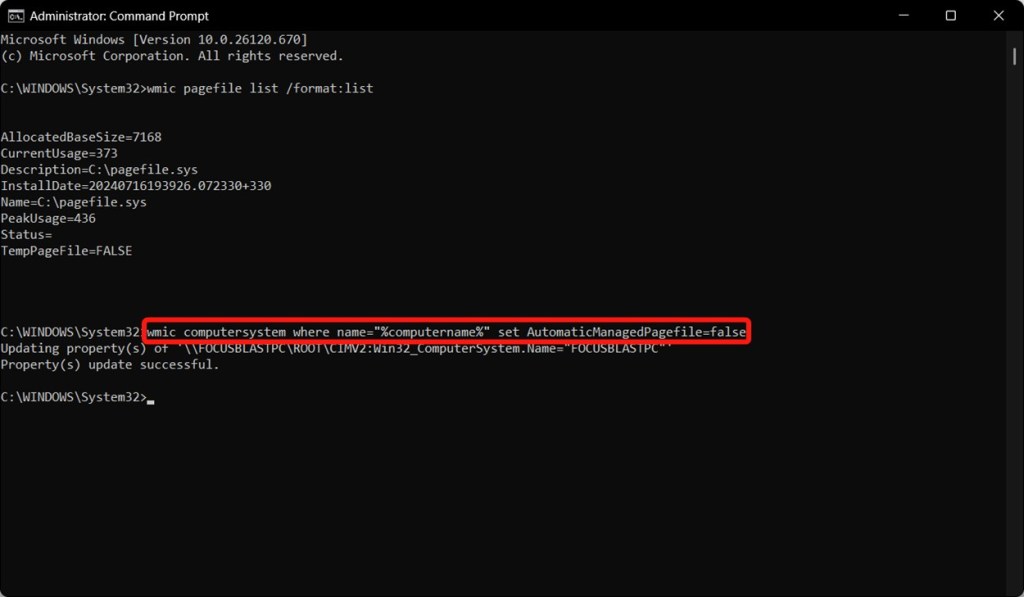
- To switch from automatic to manual paging and allocation, execute the following command.
wmic computersystem where name="%computername%" set AutomaticManagedPagefile=false- Once done enter the following command to set the Initial and Maximum memory, as we did in the UI in the above method. Don’t forget to replace the InitialSize and MaximumSize parameters in Megabytes.
wmic pagefileset where name="C:\\pagefile.sys" set InitialSize=YOUR-INIT-SIZE,MaximumSize=YOUR-MAX-SIZE- For example
wmic pagefileset where name="C:\\pagefile.sys" set InitialSize=16000,MaximumSize=48000 - Restart your computer.
Were you able to increase Virtual Memory on Windows by following this guide? Let us know if you have any doubts.